“I swear, these cookies looked like little pancakes!” I muttered, staring down at my baking sheet one evening after a long day. You know that sinking feeling when you’ve followed a recipe to the letter, only to get cookie dough that spreads out so much it loses all shape? That was me, frustrated, with a batch of flat cookies that were more like crispy discs than the soft, chewy bites I was craving.
Honestly, I’d been baking these “perfect cookies” for years, but every now and then, something would go sideways—especially when I tried to get fancy with add-ins or tweaked the butter. My kitchen smelled amazing, but the cookies? They just refused to hold their shape. One night, after juggling a hectic schedule and craving a sweet reset, I finally found a fix that changed my cookie game forever. There was no crazy technique, no weird ingredient—just one simple adjustment that made the difference between flat disappointment and soft, chewy perfection every single time.
It’s funny how such a small change can feel like a quiet little victory. Now, whenever I bake these cookies, I get that warm, comforting feeling that only comes from a batch that’s just right—crispy on the edges and tender in the middle. And I know this recipe will stick with me, not because it’s flashy, but because it reliably brings that smile after the first bite.
Why You’ll Love This Recipe
This perfect cookies recipe has been tested and tweaked through many late-night baking sessions (and a few kitchen mess-ups). It’s not just a recipe; it’s a solution to the classic cookie dilemma: flat cookies. Here’s why this recipe stands out:
- Quick & Easy: Comes together in under 20 minutes, ideal for busy evenings or last-minute cravings.
- Simple Ingredients: You probably already have everything in your pantry—no fancy shopping required.
- Perfect for Any Occasion: Whether it’s an after-school treat or a cozy weekend bake, these cookies hit the spot.
- Crowd-Pleaser: Friends and family always ask for the recipe—kids especially love them!
- Unbelievably Delicious: The texture balances just right: chewy centers with slightly crisp edges.
What makes this recipe different? It’s all about controlling that butter temperature and chilling the dough just enough. Instead of blindly blaming ingredients, this recipe offers a practical fix that works even if you’re not a seasoned baker. I’ve also made sure the seasoning is spot-on—just the right amount of salt to make the sweetness pop.
This isn’t just good cookies; it’s the kind of cookie that makes you close your eyes and nod after the first bite. Think of it as comfort food, but smarter—easier, faster, and with all the soul-soothing satisfaction you want from a homemade sweet treat. If you’ve ever wondered why your cookies come out flat, you’re about to find out the one fix that works every time.
What Ingredients You Will Need
This recipe keeps things straightforward, using simple, pantry-friendly ingredients that come together to create bold flavor and that perfect cookie texture. Here’s what you’ll need:
- All-purpose flour – 2 ¼ cups (280g), the base for structure.
- Baking soda – 1 teaspoon, the key leavening agent that helps cookies rise (don’t skip or replace with baking powder).
- Salt – ½ teaspoon, balances sweetness and enhances flavor.
- Unsalted butter – 1 cup (227g), softened but not melted (exact temperature matters here).
- Granulated sugar – ¾ cup (150g), for sweetness and crisp edges.
- Brown sugar – ¾ cup packed (165g), adds moisture and chewiness.
- Large eggs – 2, room temperature to help with smooth mixing.
- Vanilla extract – 2 teaspoons, for that classic warm flavor.
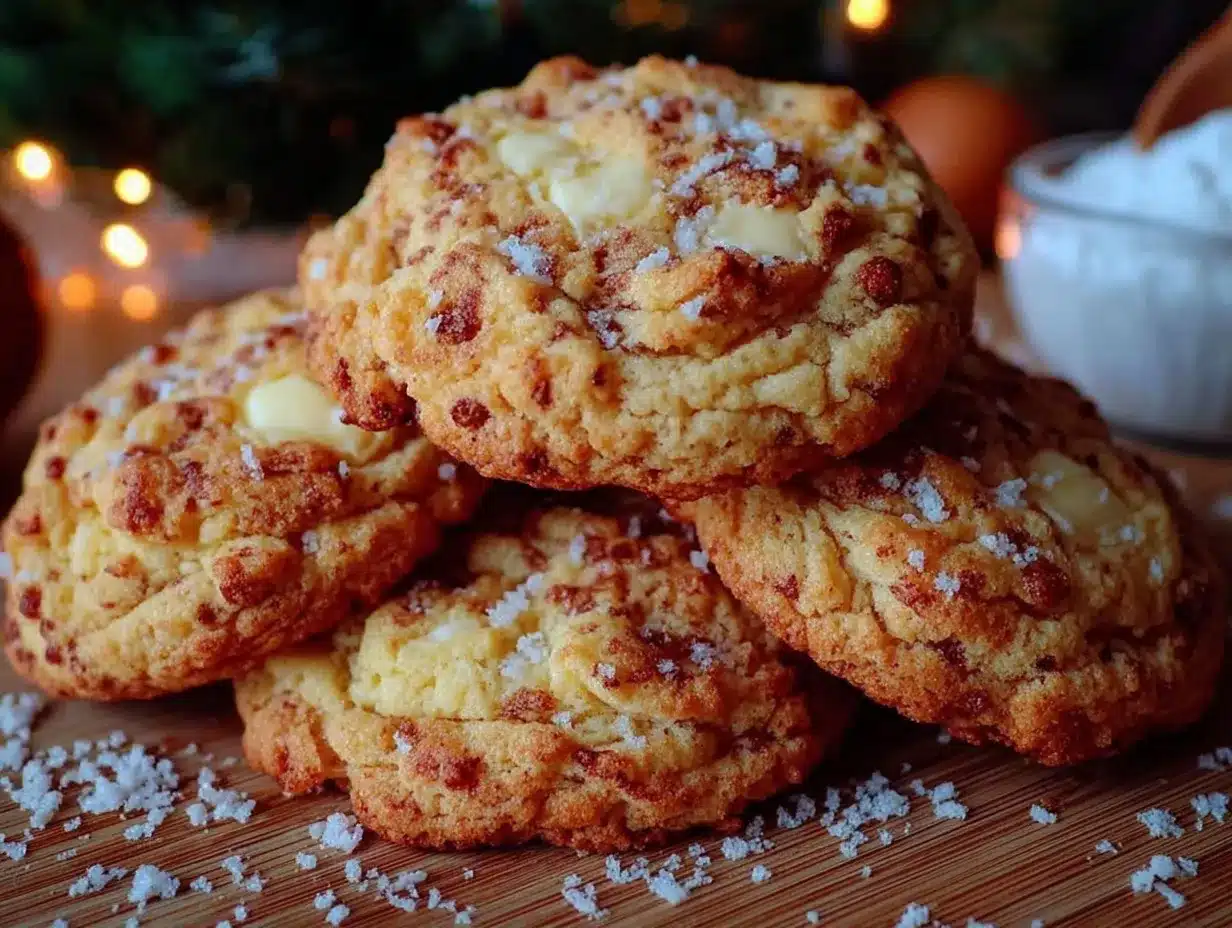
- Chocolate chips – 1 ½ cups (270g), semi-sweet or mix of dark and milk for melty pockets.
Optional tweaks:
- Walnuts or pecans – ½ cup chopped, for added crunch.
- Oats – ½ cup rolled oats, for a heartier cookie texture.
- For gluten-free: swap all-purpose flour with a 1:1 gluten-free blend like Bob’s Red Mill.
- Dairy-free option: Use vegan butter and dairy-free chocolate chips.
Pro tip: I prefer using Cabot butter for its creamy texture, which really helps the cookies stay soft inside. Also, fresh vanilla extract makes a noticeable difference here—don’t use imitation if you want that deep, authentic flavor.
Equipment Needed
- Mixing bowls – one large for the dough and a smaller one for wet ingredients.
- Hand mixer or stand mixer – helps cream butter and sugars thoroughly, but a sturdy wooden spoon works if you don’t have one.
- Measuring cups and spoons – accuracy is key, especially for flour and baking soda.
- Baking sheets – preferably heavy-duty, rimmed ones.
- Parchment paper or silicone baking mats – prevents sticking and promotes even baking.
- Cooling racks – for letting cookies cool evenly and avoid sogginess.
- Optional but handy: a cookie scoop for uniform sized cookies.
If you don’t have a stand mixer, no worries. I’ve made these cookies countless times with just a hand mixer or by hand. The key is to cream the butter and sugars until light and fluffy, which you can do with a wooden spoon and a bit of elbow grease. Silicone mats are a bit of an investment but well worth it for even browning and cleanup.
Preparation Method
- Prep your ingredients and equipment. Remove the butter and eggs from the fridge about 30 minutes before baking so they reach room temperature. Preheat your oven to 350°F (175°C). Line two baking sheets with parchment paper or silicone mats.
- Cream the butter and sugars. In a large bowl, beat 1 cup (227g) softened unsalted butter, ¾ cup (150g) granulated sugar, and ¾ cup (165g) packed brown sugar with a hand or stand mixer on medium speed until the mixture is light and fluffy—about 3-4 minutes. You’ll notice the color lighten and the texture become creamy. This step is crucial; it traps air that helps your cookies rise instead of spreading flat.
- Add eggs and vanilla. Beat in 2 large room temperature eggs, one at a time, fully incorporating each before adding the next. Then mix in 2 teaspoons vanilla extract. The dough should look smooth and glossy.
- Combine dry ingredients. In a separate bowl, whisk together 2 ¼ cups (280g) all-purpose flour, 1 teaspoon baking soda, and ½ teaspoon salt. Whisking helps evenly distribute the baking soda and salt so your cookies bake evenly.
- Mix dry and wet ingredients. Gradually add the dry ingredients to the wet mixture on low speed, mixing just until flour disappears. Overmixing develops gluten and can make cookies tough, so stop as soon as the dough looks uniform and thick.
- Fold in chocolate chips. Using a spatula, gently fold in 1 ½ cups (270g) chocolate chips and any optional nuts or oats if using.
- Chill the dough. This is the one fix that stopped my cookies from going flat every time. Cover the dough tightly with plastic wrap and chill in the fridge for at least 1 hour, preferably 2. Chilling firms the fat in the dough so cookies spread less in the oven and develop better texture.
- Scoop and bake. Use a cookie scoop or tablespoon to portion out dough balls about 2 tablespoons each. Place them 2 inches apart on the prepared baking sheets. Bake for 10-12 minutes until edges are golden but centers look slightly underbaked. They will continue to cook on the hot sheet once removed.
- Cool properly. Let cookies rest on the baking sheet for 5 minutes before transferring to a wire rack. This prevents breaking and helps set the shape.
Common hiccup: If your butter is too warm or melted when mixing, cookies will spread flat like pancakes. Also, skipping the chill means more spreading. Trust me on this one—chilling the dough makes all the difference.
Cooking Tips & Techniques
One trick I learned (sometimes the hard way) is that the temperature of your ingredients makes or breaks cookie texture. Butter that’s too soft or melted causes cookies to lose their shape. I always let butter soften but not melt—think of it as soft enough to press but still holding form.
When creaming butter and sugars, patience pays off. It takes a few minutes to get that fluffy texture, but rushing leads to dense cookies. If you don’t have a mixer, just keep stirring vigorously—it’s worth the effort.
Chilling the dough isn’t just about preventing flat cookies. It also develops flavor as ingredients meld overnight. If you’re short on time, chilling for at least an hour helps, but longer is better.
Another tip: spacing cookies at least 2 inches apart is key because they spread as they bake. Overcrowding leads to merging cookies, which nobody wants!
Lastly, don’t overbake. I pull mine out when edges are golden but centers look a little soft. They finish cooking on the tray, resulting in chewy, tender middles and crisp edges.
Variations & Adaptations
Here are some ways to switch things up:
- Chewy Oatmeal Chocolate Chip: Add ½ cup rolled oats and reduce flour to 1 ¾ cups for a heartier cookie.
- Nutty Delight: Fold in ½ cup chopped walnuts or pecans for extra crunch and flavor.
- Peanut Butter Twist: Swap half the butter for natural peanut butter—watch the dough chill times to adjust.
- Gluten-Free: Use a 1:1 gluten-free baking flour blend instead of all-purpose flour.
- Dairy-Free: Replace butter with vegan butter and use dairy-free chocolate chips.
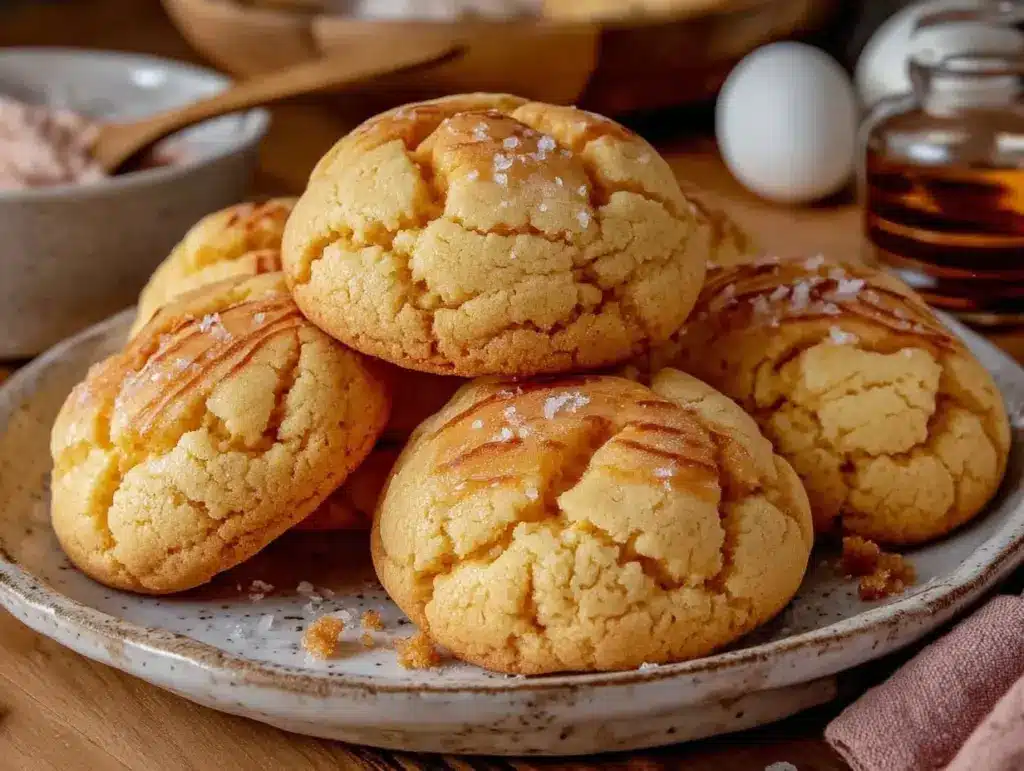
Personally, I tried adding a sprinkle of flaky sea salt right before baking once, and it gave the cookies a fantastic sweet-salty contrast. It’s one of my favorite tweaks for impressing guests with minimal effort.
Serving & Storage Suggestions
These cookies are best served slightly warm or at room temperature. I like to let them cool on a wire rack and then enjoy a couple with a cold glass of milk or a cup of coffee. They also pair nicely with a scoop of vanilla ice cream for a quick dessert.
Store cookies in an airtight container at room temperature for up to 5 days. If you want to keep them longer, freeze the dough balls on a baking sheet, then transfer to a freezer bag. Bake straight from frozen, adding a couple of minutes to the baking time.
Reheating cookies in the microwave for 10-15 seconds brings back that fresh-baked softness. Flavors deepen after a day or two, so sometimes I actually prefer saving a batch for later.
Nutritional Information & Benefits
Each cookie contains approximately 150-170 calories depending on size and add-ins. They provide a good balance of carbs and fats for a satisfying snack. The brown sugar adds moisture and a subtle molasses flavor, while the chocolate provides antioxidants.
This recipe can be adapted for dietary needs, including gluten-free or dairy-free options. While cookies are an indulgence, using quality ingredients and portion control makes them a treat you can feel good about now and then.
Conclusion
If you’ve ever wrestled with flat, disappointing cookies, this recipe offers a straightforward fix that really works. It’s about understanding your ingredients and taking that extra step to chill the dough—a small move with a big payoff. I love these cookies because they’re reliable, delicious, and just easy enough to make anytime without fuss.
Feel free to tweak the mix-ins or try one of the variations to make them your own. Baking is part science, part art, and these cookies are a reminder that sometimes, a little patience and attention is all it takes to get it just right.
Give this recipe a go and let me know how your cookies turn out. I’d love to hear your favorite add-ins or baking tips!
FAQs About Perfect Cookies and Preventing Flatness
Why do my cookies spread out and become flat?
Flat cookies usually happen when the butter is too warm or melted, or when the dough isn’t chilled. Soft butter melts quickly in the oven, causing the dough to spread too much.
How long should I chill cookie dough?
At least 1 hour is recommended, but 2-24 hours is ideal. Chilling firms the fat and slows spreading, plus it enhances flavor.
Can I use melted butter for this recipe?
No, melted butter will cause cookies to spread too much. Use softened butter that still holds its shape but is easy to press.
What’s the difference between baking soda and baking powder in cookies?
Baking soda helps cookies spread and promotes browning, but also requires an acid to activate. Baking powder contains acid and base and can cause different textures. This recipe specifically uses baking soda for the best rise and chew.
Can I freeze cookie dough balls to bake later?
Yes! Freeze the dough balls on a tray, then transfer to a freezer bag. Bake directly from frozen, adding a couple of extra minutes to baking time.
For a comforting dinner after your cookie baking, you might enjoy the creamy one-pot Tuscan chicken pasta or the moist homemade meatloaf recipe—both easy dishes that bring warm vibes after a day in the kitchen.
Pin This Recipe!

Perfect Cookies Recipe Easy Fix to Stop Flat Cookies Every Time

This recipe offers a simple fix to prevent flat cookies by controlling butter temperature and chilling the dough, resulting in soft, chewy cookies with crispy edges every time.
- Prep Time: 15 minutes
- Cook Time: 12 minutes
- Total Time: 1 hour 27 minutes
- Yield: 24 servings 1x
- Category: Dessert
- Cuisine: American
Ingredients
- 2 ¼ cups (280g) all-purpose flour
- 1 teaspoon baking soda
- ½ teaspoon salt
- 1 cup (227g) unsalted butter, softened but not melted
- ¾ cup (150g) granulated sugar
- ¾ cup packed (165g) brown sugar
- 2 large eggs, room temperature
- 2 teaspoons vanilla extract
- 1 ½ cups (270g) chocolate chips, semi-sweet or mix of dark and milk
Instructions
- Remove the butter and eggs from the fridge about 30 minutes before baking so they reach room temperature. Preheat your oven to 350°F (175°C). Line two baking sheets with parchment paper or silicone mats.
- In a large bowl, beat 1 cup (227g) softened unsalted butter, ¾ cup (150g) granulated sugar, and ¾ cup (165g) packed brown sugar with a hand or stand mixer on medium speed until the mixture is light and fluffy—about 3-4 minutes.
- Beat in 2 large room temperature eggs, one at a time, fully incorporating each before adding the next. Then mix in 2 teaspoons vanilla extract until the dough looks smooth and glossy.
- In a separate bowl, whisk together 2 ¼ cups (280g) all-purpose flour, 1 teaspoon baking soda, and ½ teaspoon salt.
- Gradually add the dry ingredients to the wet mixture on low speed, mixing just until flour disappears. Stop as soon as the dough looks uniform and thick.
- Using a spatula, gently fold in 1 ½ cups (270g) chocolate chips and any optional nuts or oats if using.
- Cover the dough tightly with plastic wrap and chill in the fridge for at least 1 hour, preferably 2.
- Use a cookie scoop or tablespoon to portion out dough balls about 2 tablespoons each. Place them 2 inches apart on the prepared baking sheets.
- Bake for 10-12 minutes until edges are golden but centers look slightly underbaked. They will continue to cook on the hot sheet once removed.
- Let cookies rest on the baking sheet for 5 minutes before transferring to a wire rack to cool completely.
Notes
Use softened but not melted butter to prevent cookies from spreading too much. Chilling the dough for at least 1 hour is crucial to achieve the perfect texture. Do not overbake; remove cookies when edges are golden but centers are still slightly soft. Spacing cookies 2 inches apart prevents merging. Optional add-ins include nuts and oats. For gluten-free, substitute flour with a 1:1 gluten-free blend. For dairy-free, use vegan butter and dairy-free chocolate chips.
Nutrition
- Serving Size: 1 cookie
- Calories: 160
- Sugar: 15
- Sodium: 120
- Fat: 8
- Saturated Fat: 5
- Carbohydrates: 22
- Fiber: 1
- Protein: 2
Keywords: cookies, chocolate chip cookies, chewy cookies, soft cookies, baking tips, cookie recipe, easy cookies, homemade cookies


