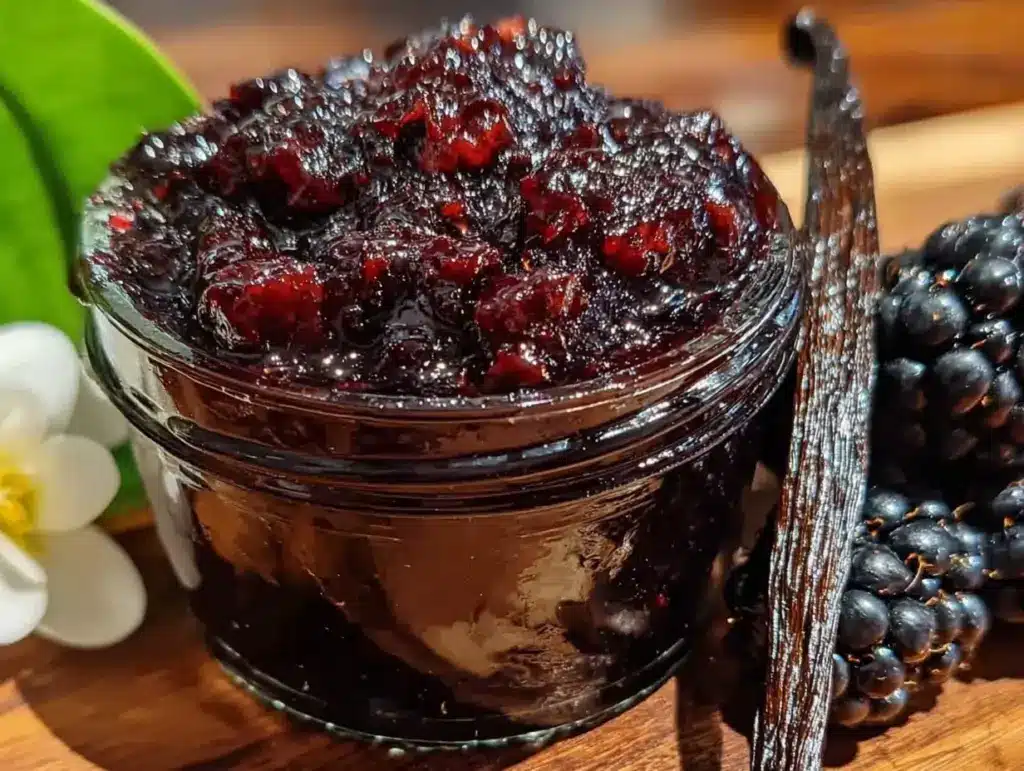
“You have to try this jam, it’s like summer in a jar,” my neighbor said, holding out a tiny glass jar with a mysterious deep purple spread. Honestly, I was skeptical at first. Mulberries were always the fuzzy fruit I saw on the side of country roads, not something I’d ever seriously cooked with. But that late afternoon, with the sun dipping low and the smell of vanilla drifting in the air, I gave in to curiosity and a quiet craving for something homemade and sweet.
I remember carefully spooning that first dollop onto my morning toast the next day—silky, fragrant, and with a subtle warmth from the vanilla bean that made it feel special. There was no rush, no overwhelming sweetness, just a gentle balance that whispered of lazy summer days and quiet mornings. It wasn’t the kind of jam that shouts for attention, but one that sneaks quietly into your heart, making you want to make it again.
What stuck with me was how doable this recipe felt. Small batch, no fancy equipment, just simple ingredients you can find at your local market or maybe even your own backyard. Plus, it was a perfect little project when my kitchen was bursting with other meal preps—kind of like how I sometimes whip up a quick batch of creamy Chick-fil-A sauce without breaking a sweat. This mulberry jam quickly became my go-to for adding a sweet note to breakfasts or even a surprising hint of flavor to savory dishes.
So here’s the thing: this isn’t just any berry jam. The addition of that tiny vanilla bean pod, split and simmered slowly with the fruit, creates a mellow depth that turns the jam from ordinary to something I never want to be without. It’s the kind of recipe that feels like a secret worth sharing—and I’m glad you found it.
Why You’ll Love This Recipe
After making this homemade mulberry jam with vanilla bean several times, I can honestly say it’s a keeper for so many reasons. It’s not only delicious but also super manageable, even if you’re new to jam-making or just want a small batch to avoid waste.
- Quick & Easy: Ready in about 45 minutes, this recipe fits perfectly into busy mornings or slow weekend afternoons.
- Simple Ingredients: Uses fresh mulberries, real vanilla bean, sugar, and lemon juice—nothing complicated or hard to find.
- Perfect for Small Batches: Ideal if you don’t want to end up with dozens of jars crowding your pantry.
- Crowd-Pleaser: Whether spread on toast, swirled into yogurt, or paired with cheese, it always sparks compliments.
- Unbelievably Delicious: The natural tartness of mulberries balanced with the smooth vanilla bean makes it uniquely comforting yet refreshing.
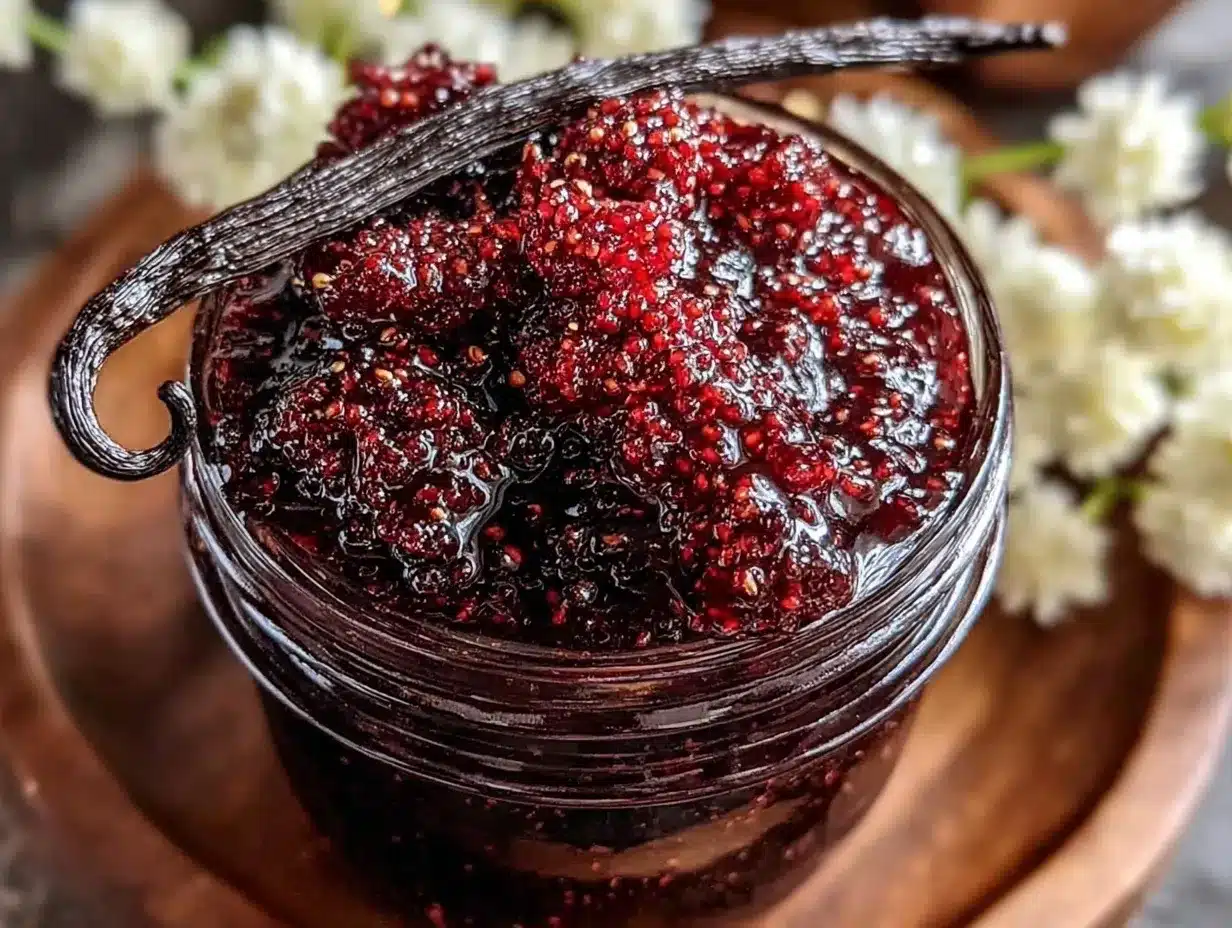
What really sets this jam apart is the subtle magic of that vanilla bean. Unlike extracts, the real bean infuses the jam with tiny seeds and an aromatic depth that feels like a little indulgence in every bite. Plus, making this recipe in a small batch means you get fresh jam without the pressure of preserving large quantities—a perfect fit for anyone juggling a hectic schedule or limited kitchen space.
It’s also a recipe that invites you to get creative. I’ve found myself drizzling it over breakfast pancakes or even stirring a spoonful into my loaded baked potato soup for a touch of sweetness and color. Honestly, it’s one of those rare homemade treats that feels both nostalgic and a little fancy at the same time.
What Ingredients You Will Need
This homemade mulberry jam with vanilla bean uses simple, wholesome ingredients to deliver bold flavor and satisfying texture without fuss. You don’t need exotic items or specialty stores—just fresh mulberries and a few kitchen staples.
- Fresh Mulberries (about 2 cups / 300 grams): Look for ripe, plump berries with deep purple-black color. If fresh ones aren’t available, frozen mulberries work fine—just thaw and drain excess liquid.
- Granulated Sugar (3/4 cup / 150 grams): Regular white sugar works best for preserving the jam’s bright color and flavor.
- Fresh Lemon Juice (1 tablespoon / 15 ml): Adds brightness and helps the jam set by activating the natural pectin in the berries.
- Vanilla Bean (1 whole pod): Split lengthwise to release seeds and infuse the jam with a mellow, fragrant warmth. If you don’t have a vanilla bean, high-quality vanilla extract (1 teaspoon) is a decent substitute.
- Water (2 tablespoons / 30 ml): Just a splash to help the berries soften and release their juices.
Some quick tips on ingredients:
- Mulberries: I always recommend picking berries that are firm but not too hard. Overripe ones can make the jam too runny.
- Sugar: You can reduce sugar slightly for a tarter jam, but keep in mind it also helps with preservation.
- Lemon Juice: Freshly squeezed is best, but bottled works in a pinch.
- Vanilla Bean: I swear by beans from Madagascar for their rich fragrance, but any good-quality bean will do.
Equipment Needed
- Medium-sized Heavy-Bottomed Saucepan: A thick-bottomed pan prevents burning and promotes even cooking. I usually use my trusty 3-quart saucepan.
- Wooden Spoon or Heatproof Silicone Spatula: For stirring the jam gently without scratching your cookware.
- Fine Mesh Strainer (optional): If you prefer smoother jam, you can strain out seeds after cooking, but I love keeping the texture.
- Small Glass Jars with Lids: For storing the jam. I prefer half-pint (8 oz / 240 ml) jars so I don’t open more than needed.
- Knife: For splitting the vanilla bean pod.
- Canning Funnel (optional): Helpful for transferring jam into jars without spilling, but you can manage with a spoon too.
For budget-friendly options, any basic saucepan will do—no need for fancy copper or enamel. Just keep an eye on the heat to avoid scorching. Also, if you don’t have a dedicated jam jar, clean and sterilize any small glass jar you have around (like a reused salsa jar) and it’ll work perfectly.
Preparation Method
- Prepare the Vanilla Bean: Using a sharp knife, split the vanilla bean pod lengthwise and scrape out the tiny seeds with the back of the knife. Set seeds and pod aside.
- Wash and Drain Mulberries: Rinse mulberries gently under cold water, then drain well. Remove any stems or leaves.
- Combine Ingredients: In your saucepan, add the mulberries, sugar, lemon juice, vanilla seeds, vanilla pod, and water. Give everything a gentle stir to combine.
- Cook the Jam: Place the pan over medium heat. Stir occasionally as the sugar dissolves and the berries start breaking down. This should take about 10 minutes.
- Simmer and Thicken: Lower the heat to medium-low and simmer the mixture, stirring frequently, until it thickens to your liking—usually around 25-30 minutes. You’ll know it’s ready when it coats the back of a spoon and the bubbling slows down.
- Remove Vanilla Pod: Once the jam has thickened, fish out the vanilla pod and discard it.
- Test the Jam: To check if the jam is set, place a small spoonful on a chilled plate and tilt it. If it wrinkles slightly when pushed with your finger, it’s ready. If not, cook a few more minutes and test again.
- Jar the Jam: Carefully spoon the hot jam into clean jars, leaving about 1/4 inch (6 mm) headspace. Allow to cool at room temperature before sealing.
- Store: Refrigerate your small batch jam and enjoy within 2-3 weeks for best freshness.
Pro tip: Stir gently to avoid smashing the berries too much if you want chunkier jam. Also, if you notice foam forming on top during cooking, skim it off with a spoon for a clearer finish.
Cooking Tips & Techniques
Jam-making sounds tricky but honestly, the biggest secret is patience and gentle stirring. Here are a few things I’ve learned through trial and error:
- Don’t rush the cooking process. Mulberries have delicate flavors that can get lost if cooked too fast. A slow simmer lets those flavors concentrate beautifully.
- Use a heavy-bottomed pan. Cheap pans tend to burn jams on the bottom, ruining the taste. I’ve had my fair share of scorched batches before upgrading!
- Test the set early and often. Jam thickness can vary depending on berry ripeness and sugar content, so keep tasting and testing with the chilled plate method.
- Keep the vanilla pod in during cooking. It infuses the jam slowly, so don’t skip this step. Just remember to remove the pod before jarring.
- Multitask smartly. While the jam simmers, clean up your workspace or prep breakfast—this helps keep cooking stress-free.
- Beware of jelly fever! Sometimes jam sets a bit more after cooling. Don’t overcook trying to force thickening, or you’ll end up with candy-like jam.
For a smoother texture, some cooks like to gently mash the berries with a potato masher early in the cooking process. I prefer leaving them mostly whole for a rustic feel. And if you want to experiment, try adding a cinnamon stick during simmering for a warm spice note.
Variations & Adaptations
This recipe is flexible, and I’ve enjoyed tweaking it over time. Here are some ways to make it your own:
- Dietary: For a lower-sugar option, you can reduce sugar to 1/2 cup (100 grams), but expect a softer set. Using natural pectin powder helps compensate.
- Seasonal: Swap mulberries with fresh blackberries or raspberries when out of season. The vanilla bean addition works beautifully with all these berries.
- Flavor: Add a splash of balsamic vinegar (about 1 teaspoon) during cooking for a subtle tang and richness.
- Cooking Method: Try making this jam in a slow cooker on low for 2-3 hours, stirring occasionally. It’s a hands-off way that intensifies flavors slowly.
- Personal Variation: I once stirred in a handful of chopped fresh mint leaves at the end of cooking for a refreshing twist—definitely worth a try if you like herbaceous notes.
Got nut allergies or want a vegan spread? This jam is naturally vegan and free from common allergens, making it a safe choice for most diets.
Serving & Storage Suggestions
This homemade mulberry jam with vanilla bean is best served at room temperature or slightly chilled. Spread it generously on warm buttered toast or swirl into plain yogurt for a quick breakfast boost. It also pairs surprisingly well with soft cheeses like brie or ricotta, making it a charming addition to a cheese board.
For storage, keep your jam refrigerated once opened. It should stay fresh for up to three weeks. If you want to keep it longer, freezing in small airtight containers works well—just thaw in the fridge overnight before using.
Reheating the jam gently in a small pot or microwave helps revive its luscious texture if it thickens too much in the fridge. Over time, the flavors mellow and deepen, so don’t be afraid to make it ahead of a special meal or gift.
If you love experimenting with flavors, I found this jam’s vanilla richness pairs wonderfully with dishes like fresh Lebanese fattoush salad, where a spoonful can add a subtle fruity contrast to the tangy dressing.
Nutritional Information & Benefits
This small batch homemade mulberry jam is not just delicious but carries some nutritional perks. Mulberries are packed with vitamin C, iron, and antioxidants, which support immune health and help fight inflammation. Using real vanilla bean adds flavor without extra calories or additives.
Per tablespoon (about 20 grams), the jam contains roughly:
| Calories | 50 |
|---|---|
| Carbohydrates | 13g (mostly natural sugars) |
| Fiber | 1g |
| Protein | 0.3g |
| Fat | 0g |
This recipe is naturally gluten-free and vegan, making it suitable for most dietary needs. Just be aware of the sugar content if you’re monitoring intake.
Conclusion
Homemade mulberry jam with vanilla bean is one of those recipes that quietly wins over your taste buds and your heart. It’s simple, flavorful, and perfectly sized for those who want fresh jam without the fuss of large batches. Whether you’re spreading it on toast, stirring it into oatmeal, or gifting a jar to a friend, this jam brings a little homemade magic to everyday moments.
The vanilla bean twist makes all the difference, lending a subtle warmth that turns ordinary mulberries into a jam that feels special. I’ve come back to this recipe time and again, tweaking it slightly but never straying far from the original because it just works.
If you try it, I’d love to hear how you made it your own or what you paired it with—comments and stories always brighten my day! Here’s to sweet mornings and simple pleasures.
FAQs about Homemade Mulberry Jam with Vanilla Bean
Can I use frozen mulberries for this recipe?
Yes! Just thaw and drain them well before cooking. Frozen berries may release more liquid, so you might need to cook the jam a bit longer to reach the right thickness.
How do I know when the jam is set?
Use the chilled plate test—place a spoonful of jam on a cold plate, tilt it, and if it wrinkles slightly when pushed, it’s ready. If not, simmer a few more minutes and test again.
Can I replace the vanilla bean with vanilla extract?
You can use about 1 teaspoon of vanilla extract, but add it at the end of cooking to keep its flavor fresh. The bean gives a more natural, subtle aroma that’s hard to replicate.
How long does homemade jam last in the fridge?
Stored in a clean, airtight jar, it generally lasts 2-3 weeks. Always check for signs of spoilage before use.
Is this recipe suitable for beginners?
Absolutely! It’s a small batch with straightforward steps—perfect if you’re making jam for the first time or want a manageable project.
Pin This Recipe!
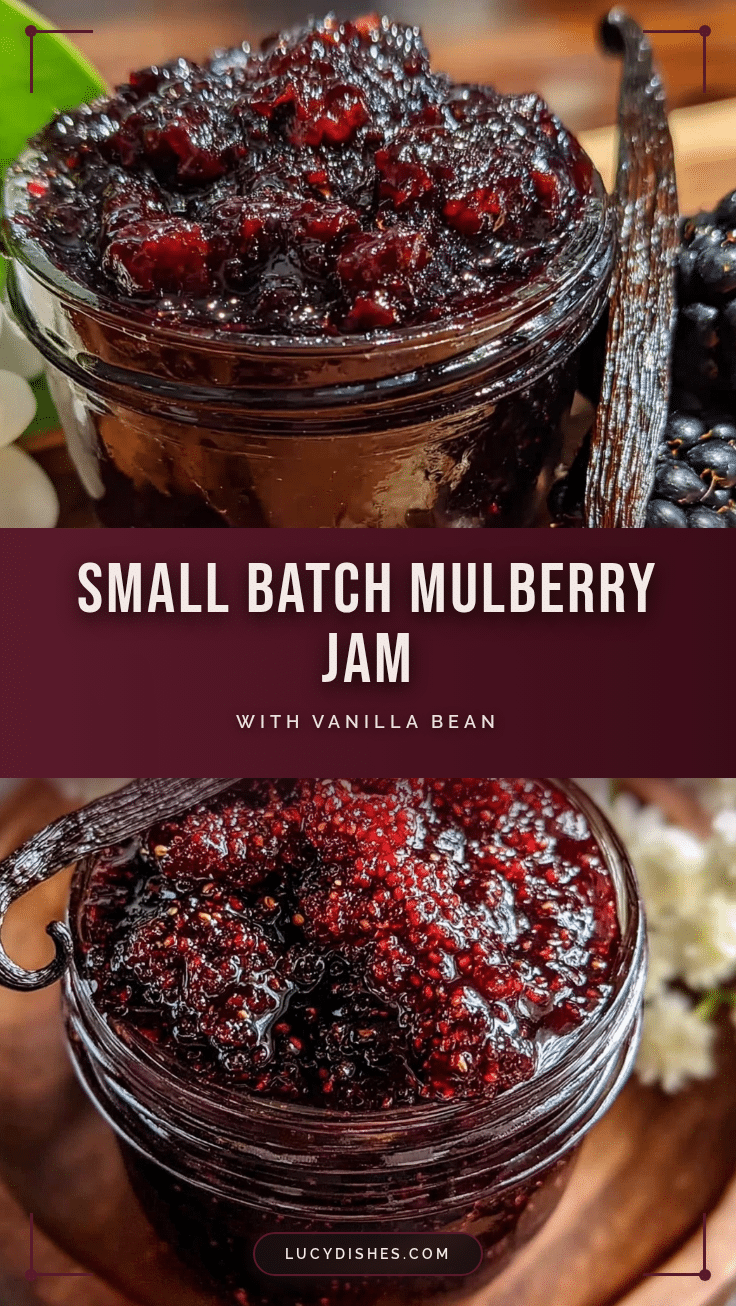
Homemade Mulberry Jam with Vanilla Bean Easy Small Batch Recipe
A simple and delicious small batch mulberry jam infused with real vanilla bean, perfect for beginners and quick to make. This jam balances natural tartness with a mellow vanilla warmth, ideal for spreading on toast or pairing with cheese.
- Prep Time: 10 minutes
- Cook Time: 35 minutes
- Total Time: 45 minutes
- Yield: About 1 cup (8 oz) jam, approximately 4 servings 1x
- Category: Condiment
- Cuisine: American
Ingredients
- 2 cups fresh mulberries (about 300 grams)
- 3/4 cup granulated sugar (150 grams)
- 1 tablespoon fresh lemon juice (15 ml)
- 1 whole vanilla bean pod, split lengthwise
- 2 tablespoons water (30 ml)
Instructions
- Using a sharp knife, split the vanilla bean pod lengthwise and scrape out the tiny seeds with the back of the knife. Set seeds and pod aside.
- Rinse mulberries gently under cold water, then drain well. Remove any stems or leaves.
- In a medium-sized heavy-bottomed saucepan, add the mulberries, sugar, lemon juice, vanilla seeds, vanilla pod, and water. Stir gently to combine.
- Place the pan over medium heat. Stir occasionally as the sugar dissolves and the berries start breaking down, about 10 minutes.
- Lower the heat to medium-low and simmer the mixture, stirring frequently, until it thickens to your liking, about 25-30 minutes. The jam is ready when it coats the back of a spoon and bubbling slows down.
- Remove the vanilla pod and discard it.
- Test the jam by placing a small spoonful on a chilled plate and tilting it. If it wrinkles slightly when pushed with your finger, it’s set. If not, cook a few more minutes and test again.
- Carefully spoon the hot jam into clean small glass jars, leaving about 1/4 inch (6 mm) headspace. Allow to cool at room temperature before sealing.
- Refrigerate the jam and enjoy within 2-3 weeks for best freshness.
Notes
Stir gently to avoid smashing berries for chunkier texture. Skim off foam during cooking for clearer jam. Use the chilled plate test to check jam set. Vanilla bean pods add more depth than extract; if using extract, add at the end of cooking. Jam can be frozen for longer storage. Try adding cinnamon stick or fresh mint for variations.
Nutrition
- Serving Size: 1 tablespoon (about
- Calories: 50
- Sugar: 12
- Carbohydrates: 13
- Fiber: 1
- Protein: 0.3
Keywords: mulberry jam, homemade jam, vanilla bean jam, small batch jam, easy jam recipe, fruit preserves, vegan jam, gluten-free jam


