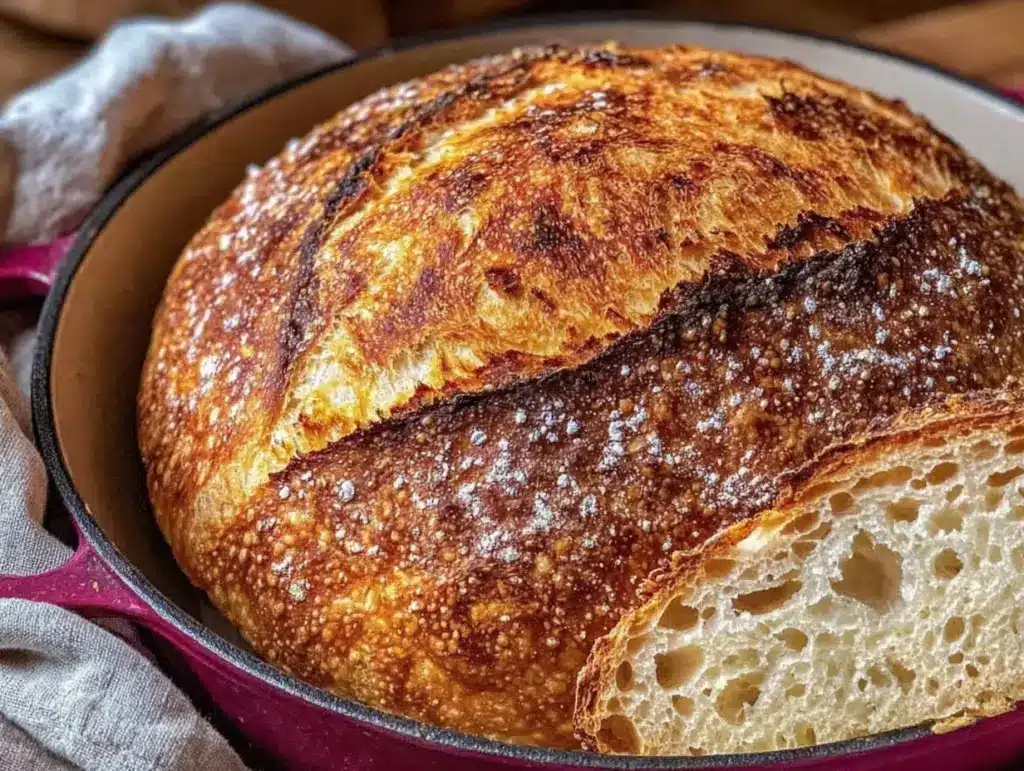
“You want bread? But no kneading?” That’s what my friend muttered in disbelief the first time I mentioned this recipe. Honestly, I was skeptical myself at first. Baking bread always felt like an elaborate chore reserved for weekends when I had endless time, but one hectic evening — juggling dinner prep and emails — I stumbled on this game-changer. A few simple ingredients, tossed together with barely a stir, resting overnight, and then baked in a Dutch oven to produce this crackling, golden crust with a cloud-like crumb inside. It was almost too good to be true. The smell filled the kitchen in the most comforting way, and I remember thinking, “Why hasn’t anyone told me this before?”
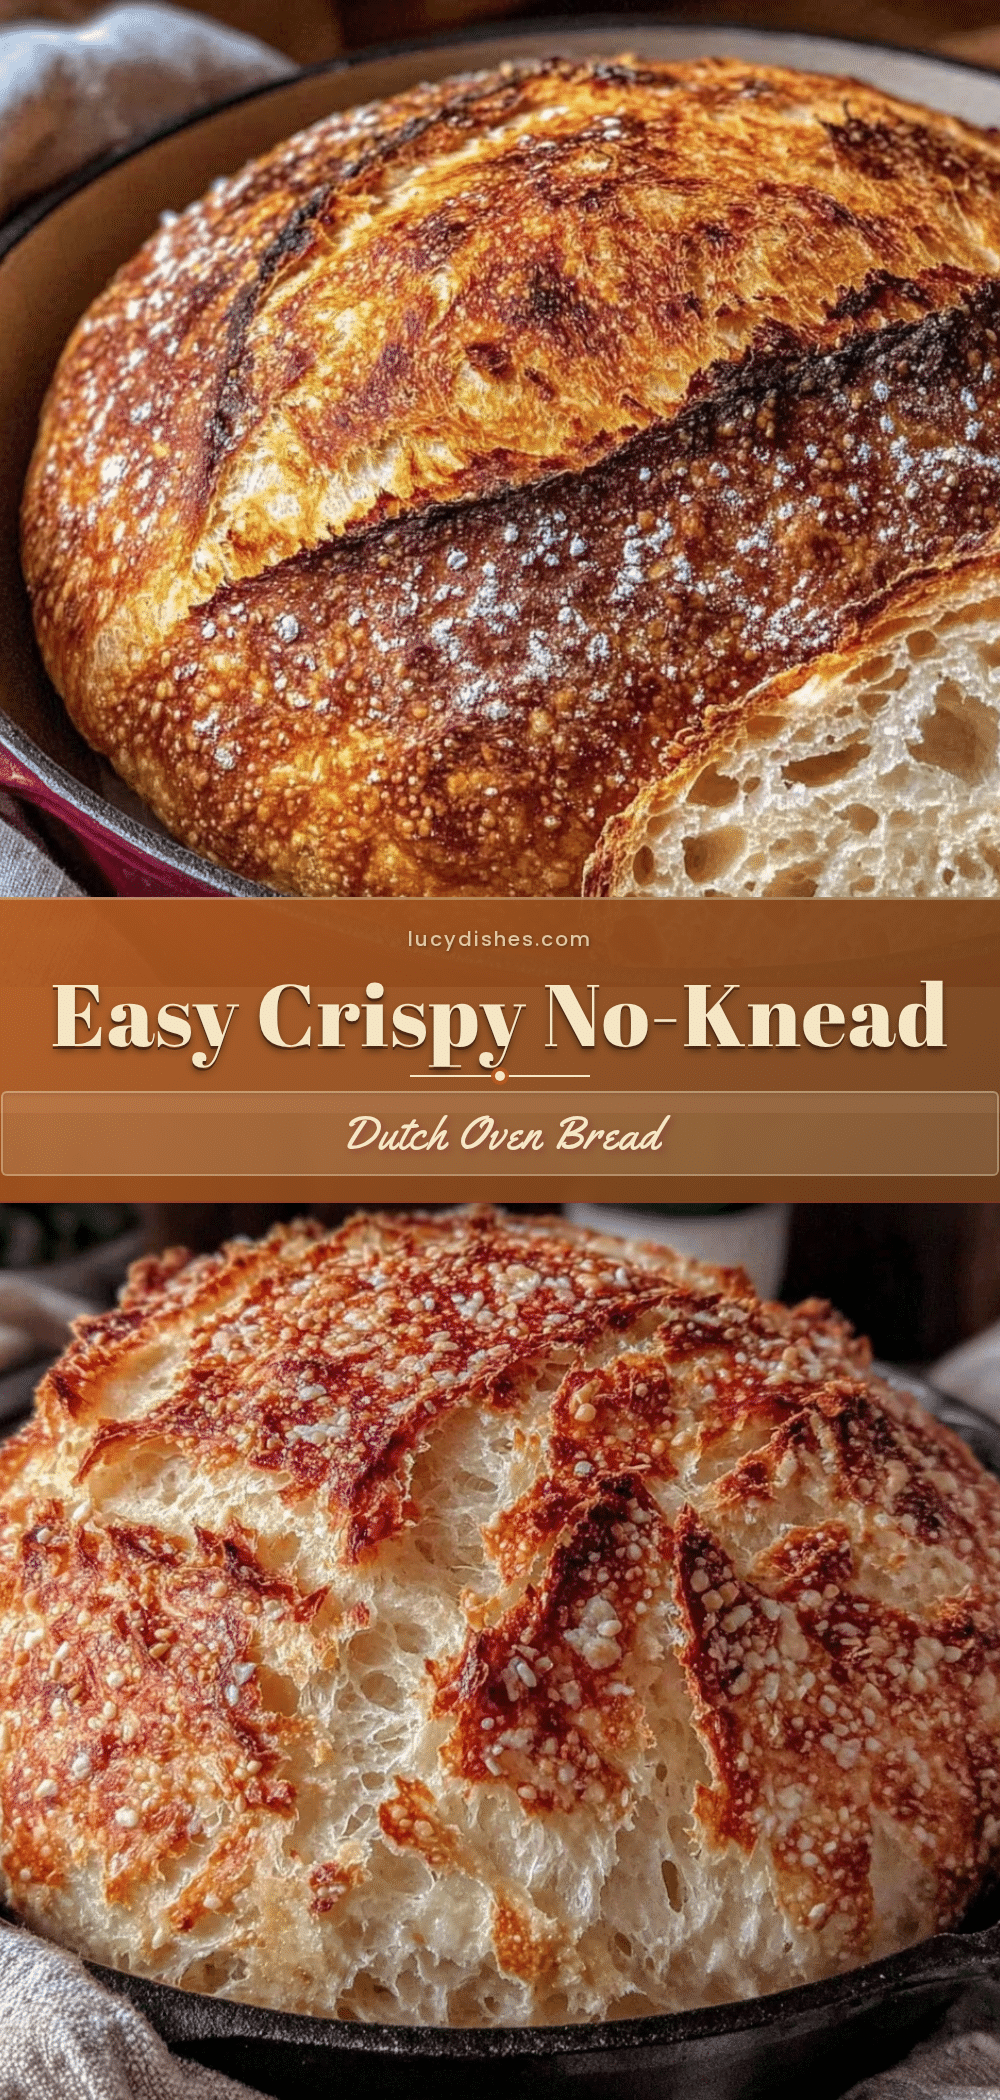
Since then, this easy crispy no-knead Dutch oven bread has become my quiet ritual. No fancy tools, no intimidating steps — just this rustic loaf that pairs perfectly with everything from a simple olive oil dip to that creamy one-pot Tuscan chicken pasta I love making on busy nights. There’s a kind of magic in its simplicity that makes you trust the process without second-guessing. It’s a little reminder that sometimes, the best things in life don’t need to be complicated.
And honestly, isn’t there something so satisfying about cracking into a loaf with that perfect crunchy crust, revealing the tender inside? This bread recipe stuck with me because it’s authentic, forgiving, and so effortless you can fit it into any day — whether you’re a novice or just craving fresh bread without fuss. I’m excited to share how you can make this your go-to bread, too.
Why You’ll Love This Recipe
After testing countless bread recipes, this simple no-knead Dutch oven bread stands out for a bunch of reasons that make it a kitchen favorite:
- Quick & Easy: You mix the dough in 10 minutes, let it rest overnight, and bake it in about 45 minutes – perfect for busy weeknights or last-minute bread cravings.
- Simple Ingredients: Flour, water, salt, and yeast. No fancy flours or additives needed. You probably have everything already.
- Perfect for Any Occasion: Whether it’s casual family dinners, cozy brunches, or accompanying your favorite meals like savory stuffed bell peppers, this bread fits right in.
- Crowd-Pleaser: It’s crusty on the outside, tender inside, and always gets compliments no matter who’s around.
- Unbelievably Delicious: The Dutch oven traps steam to form that signature crispy crust and soft crumb, creating a bakery-style loaf without the fancy equipment.
This recipe isn’t just another no-knead bread — the secret lies in the long fermentation time and baking in a covered Dutch oven. It’s a technique I picked up from a chef friend who swore by it for perfect texture every time. Plus, I love that you can tweak hydration levels or flour types to make it your own. It’s the kind of bread you want to close your eyes and savor with butter or alongside meals like creamy Tuscan chicken pasta or cheesy stuffed peppers.
What Ingredients You Will Need
This recipe uses simple, wholesome ingredients to deliver bold flavor and satisfying texture without the fuss. These pantry staples come together to create that irresistible crust and tender crumb.
- All-purpose flour (3 cups / 360 g) – I prefer King Arthur for consistency, but any unbleached flour works well.
- Instant yeast (1/4 teaspoon) – Using instant yeast speeds up the rise and blends easily without proofing.
- Salt (1 1/2 teaspoons) – Fine sea salt enhances flavor but avoid iodized table salt.
- Warm water (1 1/2 cups / 360 ml, approx. 100°F/38°C) – This activates the yeast and hydrates the flour perfectly.
That’s it! No sugar, no oil—just pure bread fundamentals. I recommend measuring by weight if you can, but volume works too. If you want to experiment, swapping half the all-purpose flour for bread flour adds extra chewiness, and you can try whole wheat for a nuttier flavor (just increase water slightly). For gluten-free options, almond or oat flour won’t work here, but you might enjoy my fresh cucumber salad alongside gluten-free dishes.
Equipment Needed
- Dutch oven or heavy oven-safe pot with lid (about 5-6 quarts) – This is key for trapping steam to create the crispy crust. I’ve used both enameled cast iron and plain cast iron with great results.
- Mixing bowl – Large enough to hold the dough as it rises.
- Wooden spoon or spatula – To mix ingredients without kneading.
- Measuring cups and spoons or kitchen scale for precise measurements.
- Kitchen towel or plastic wrap – To cover the dough during fermentation.
If you don’t have a Dutch oven, a heavy oven-safe pot with a tight lid will work, but make sure it’s oven-proof to at least 450°F (230°C). I once borrowed a friend’s pot without a lid and improvised with foil — still tasty but not quite the same crust. For budget-friendly options, Lodge cast iron Dutch ovens come highly recommended and last forever with proper care.
Preparation Method

- Mix the dough (10 minutes): In your large bowl, combine 3 cups (360 g) all-purpose flour, 1/4 teaspoon instant yeast, and 1 1/2 teaspoons salt. Stir to combine evenly.
- Add warm water: Pour in 1 1/2 cups (360 ml) warm water (about 100°F/38°C). Use a wooden spoon or spatula to mix until the dough is shaggy and sticky with no dry flour patches. The dough will be loose — that’s exactly right.
- Cover and ferment (12-18 hours): Use a kitchen towel or plastic wrap to cover your bowl. Let it rest at room temperature overnight or for about 12-18 hours. You’ll notice bubbles forming and the dough doubling in size — that’s the yeast doing its magic. Don’t skip this slow rise; it develops flavor and texture.
- Preheat your oven and Dutch oven (45 minutes before baking): Place your Dutch oven with the lid on into a cold oven and preheat to 450°F (230°C). This step is crucial for that crispy crust — the pot needs to be screaming hot.
- Shape the dough: Lightly flour a work surface and scrape your dough out. Fold it over itself a few times to shape into a rough ball. Don’t knead — just gentle folds. Let it rest for 30 minutes while the oven finishes preheating.
- Bake the bread: Carefully remove the hot Dutch oven from the oven. Place the dough ball inside (use parchment paper to avoid sticking), cover with the lid, and bake for 30 minutes.
- Finish baking uncovered: Remove the lid and bake for an additional 15 minutes until the crust is deeply golden and crackly.
- Cool completely: Transfer the bread to a wire rack. Let it cool at least 1 hour before slicing to allow the crumb to set — I know it’s tempting, but patience pays off.
If your crust isn’t as crispy as you want, try leaving the bread uncovered a few extra minutes or pop it under the broiler for a short burst—just watch carefully so it doesn’t burn. I learned this the hard way after rushing the cooling step and ending up with a gummy center once. Now, I always make sure to cool it fully before slicing.
Cooking Tips & Techniques
Getting the perfect no-knead Dutch oven bread takes a few tricks that I’ve picked up over multiple bakes:
- Don’t rush the fermentation: The long, slow rise is what builds flavor and texture. If your kitchen is warm, check the dough a bit earlier to avoid overproofing.
- Use instant yeast: It blends directly into the flour, skipping the proofing step, which keeps things simple and fast.
- Preheat your Dutch oven: This creates instant steam when the dough hits the pot, giving you that crackling crust without spraying water in the oven.
- Handle dough gently: This recipe is all about minimal handling. The wet dough is sticky, but resist adding too much flour — it affects the crumb.
- Use parchment paper: It’s a lifesaver for transferring the dough and cleaning up.
- Timing is key: Keep an eye on the baking times but adjust slightly depending on your oven’s quirks. I always rotate the Dutch oven halfway through for even browning.
I once tried skipping the preheat step when I was in a rush, and the crust didn’t form properly. That taught me that the hot Dutch oven is the heart of this recipe. Also, leaving the bread to cool completely before slicing made a huge difference in crumb texture — no more gummy slices!
Variations & Adaptations
This no-knead Dutch oven bread is versatile and easy to tweak:
- Whole wheat twist: Replace half the all-purpose flour with whole wheat for a nuttier flavor. Add a splash more water to keep the dough hydrated.
- Herb and garlic: Mix in minced garlic and fresh rosemary or thyme before the first rise for an aromatic loaf that pairs beautifully with roasted dishes.
- Cheese-stuffed: Gently fold in shredded sharp cheddar or Gruyère before shaping for a melty surprise inside.
- Gluten-free option: This recipe relies on gluten for structure, but you can try a gluten-free no-knead bread with a specialized blend, though the texture will differ.
- Alternative cooking vessels: If you don’t have a Dutch oven, an oven-safe ceramic pot or even a heavy roasting pan with a lid works in a pinch.
Personally, I tried adding sun-dried tomatoes and olives once — it turned the bread into a savory snack that was perfect alongside a fresh Greek cucumber salad, especially when I wanted a lighter, Mediterranean-inspired meal. You can see how this bread fits nicely with lots of dishes, like the salmon bowls with tahini dressing.
Serving & Storage Suggestions
This bread is best enjoyed fresh, warm with butter or dipped in olive oil, but it keeps well too.
- Serving: Slice thick or thin depending on your mood. It’s fantastic with soups, stews, or alongside hearty meals like crockpot beef stew.
- Storage: Wrap cooled bread in a clean kitchen towel and store in a bread box or paper bag for up to 2 days. Avoid plastic bags which trap moisture and soften the crust.
- Freezing: Slice and freeze in a resealable bag for up to 3 months. Toast slices straight from the freezer for that fresh-baked feel.
- Reheating: To refresh the crust, heat the loaf or slices in a 350°F (175°C) oven for 10 minutes or toast slices directly.
The flavors actually develop a bit after resting, so day-old bread isn’t a loss. I find it pairs perfectly with a cozy homemade crockpot beef stew or a creamy pasta dish when I want comfort food without extra effort.
Nutritional Information & Benefits
Here’s an estimate per serving (1/12th of loaf):
| Calories | 150 |
|---|---|
| Carbohydrates | 30g |
| Protein | 5g |
| Fat | 0.5g |
| Fiber | 1g |
This bread is naturally low in fat and sugar, making it a wholesome choice. Using simple ingredients means no preservatives or additives. Whole-grain substitutions add fiber and nutrients. For those watching gluten intake, this recipe isn’t gluten-free but pairs well with gluten-free sides like my fresh Greek cucumber salad. It’s a solid base for balanced meals and fits well into realistic, everyday healthy eating.
Conclusion
Making your own crispy no-knead Dutch oven bread is surprisingly simple and deeply satisfying. This recipe takes the intimidation out of bread baking and rewards you with a loaf full of rustic charm and flavor. Whether you keep it classic or try one of the variations, it’s a staple that’s easy to make part of your routine.
I love how this bread fits seamlessly with everything from quick dinners to weekend gatherings without stealing the show. It’s reliable, forgiving, and always a hit — the kind of recipe you’ll find yourself coming back to again and again.
Give it a try, tweak it your way, and share how it turns out. I’m excited to hear your favorite twists or what meals you pair it with next!
Frequently Asked Questions
Can I use active dry yeast instead of instant yeast?
Yes, but you’ll need to proof active dry yeast in warm water with a pinch of sugar for about 5-10 minutes before adding it to the flour.
Why does the dough need to rest overnight?
The long fermentation develops flavor and texture, making the bread taste more complex and have a better crumb structure.
Can I bake this bread without a Dutch oven?
You can use a heavy oven-safe pot with a lid or create steam in the oven with a pan of water, but the Dutch oven method gives the best crust.
How do I know when the bread is fully baked?
The crust should be deep golden brown, and the loaf should sound hollow when tapped on the bottom.
Can I add seeds or nuts to the dough?
Absolutely! Add about 1/4 cup of your favorite seeds or nuts when mixing the dough for extra texture and flavor.
Pin This Recipe!
Easy Crispy No-Knead Dutch Oven Bread Recipe Perfect for Beginners
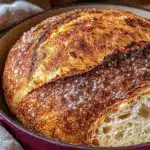
A simple no-knead bread recipe that requires minimal effort and yields a crusty, golden loaf with a tender crumb, perfect for beginners and busy weeknights.
- Prep Time: 10 minutes
- Cook Time: 45 minutes
- Total Time: 12 hours 55 minutes
- Yield: 12 servings 1x
- Category: Bread
- Cuisine: American
Ingredients
- 3 cups (360 g) all-purpose flour
- 1/4 teaspoon instant yeast
- 1 1/2 teaspoons fine sea salt
- 1 1/2 cups (360 ml) warm water (about 100°F/38°C)
Instructions
- In a large bowl, combine 3 cups (360 g) all-purpose flour, 1/4 teaspoon instant yeast, and 1 1/2 teaspoons salt. Stir to combine evenly.
- Pour in 1 1/2 cups (360 ml) warm water (about 100°F/38°C). Mix with a wooden spoon or spatula until the dough is shaggy and sticky with no dry flour patches.
- Cover the bowl with a kitchen towel or plastic wrap and let the dough rest at room temperature for 12-18 hours until it doubles in size and bubbles form.
- Place your Dutch oven with the lid on into a cold oven and preheat to 450°F (230°C) about 45 minutes before baking.
- Lightly flour a work surface and scrape the dough out. Fold it over itself a few times to shape into a rough ball. Let it rest for 30 minutes while the oven preheats.
- Carefully remove the hot Dutch oven from the oven. Place the dough ball inside using parchment paper to prevent sticking. Cover with the lid and bake for 30 minutes.
- Remove the lid and bake for an additional 15 minutes until the crust is deeply golden and crackly.
- Transfer the bread to a wire rack and let it cool completely for at least 1 hour before slicing.
Notes
Do not rush the fermentation; the long, slow rise develops flavor and texture. Preheat the Dutch oven to trap steam for a crispy crust. Use parchment paper to transfer dough easily. Cool bread completely before slicing to avoid gummy texture. If crust is not crispy enough, leave uncovered a few extra minutes or briefly broil while watching carefully.
Nutrition
- Serving Size: 1 slice (1/12th of l
- Calories: 150
- Fat: 0.5
- Carbohydrates: 30
- Fiber: 1
- Protein: 5
Keywords: no-knead bread, Dutch oven bread, easy bread recipe, crispy crust bread, beginner bread recipe, homemade bread


