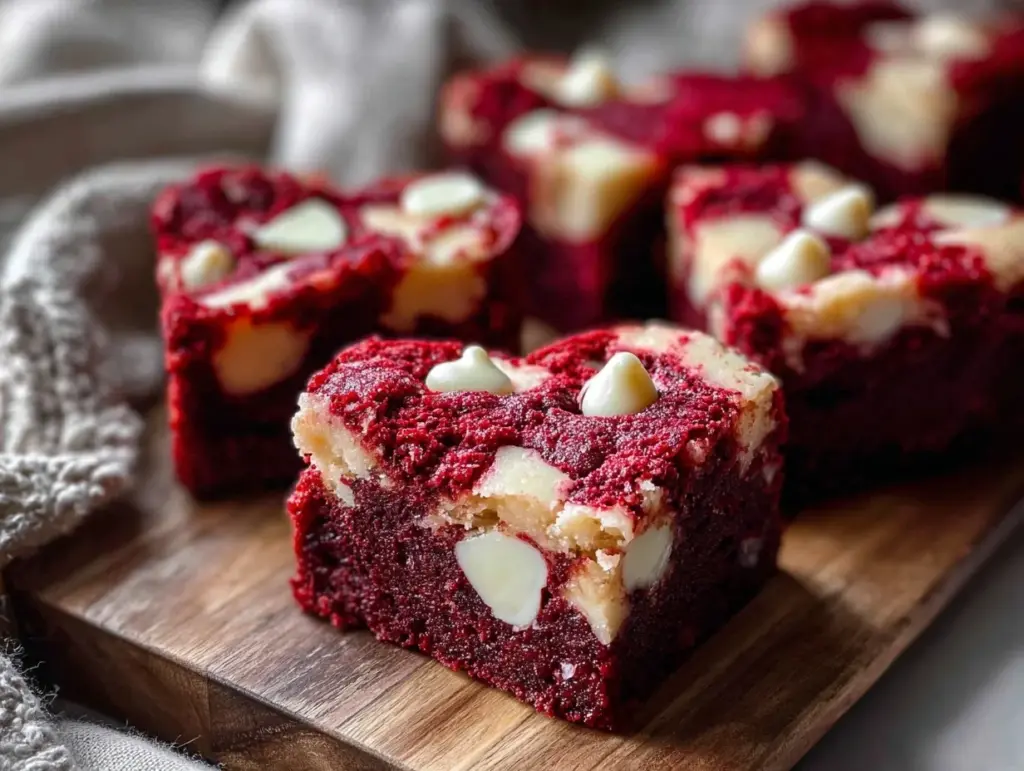
“Are you seriously making brownies shaped like hearts again?” my roommate joked, watching me cut out perfectly imperfect red velvet brownies with a cookie cutter. Honestly, it started as a last-minute plan when I realized Valentine’s Day was creeping up, and I hadn’t baked a thing. I was scrambling through my pantry, half-dreading the whole candy-heart frenzy, when I stumbled upon a bag of white chocolate chunks I’d forgotten about. I figured, why not? The mix of deep red velvet and creamy white chocolate felt like a win, even if I wasn’t sure how it would turn out.
What surprised me most was how these heart-shaped red velvet brownies became a quick favorite, not just for their look but for that rich, tender crumb and just the right amount of sweetness from the white chocolate. I made them three times that week, tweaking the texture and the chocolate ratio each time — you know, the obsessive kind of baking that’s half fun, half “I just want to get this right.”
It’s funny how something so simple can turn a hectic evening into a cozy, sweet ritual. The smell of cocoa and vanilla filling the kitchen, the gentle crackle of white chocolate melting into the batter, and that satisfying pop when you press the cutters down — all little moments that made me pause and smile. These brownies aren’t just a pretty Valentine’s Day treat; they’re a reminder that sometimes the best desserts come from a bit of happy accident and a dash of “let’s just see what happens.”
So, if you’re like me—juggling a million things but craving something that feels special without fuss—these heart-shaped red velvet brownies with white chocolate might just become your go-to. They’re sweet, tender, and packed with love in every bite (no fancy skills required). Plus, they’re perfect for sharing or just sneaking bites when no one’s looking.
Why You’ll Love This Recipe
From my countless trials in the kitchen, this heart-shaped red velvet brownies recipe stands out because it strikes a beautiful balance between classic comfort and a little festive fun. Here’s why it’s become a reliable favorite:
- Quick & Easy: You can whip up the batter and have these brownies in the oven in under 15 minutes, making them perfect for last-minute Valentine’s Day plans or unexpected guests.
- Simple Ingredients: No need to hunt down odd ingredients—just pantry staples like cocoa powder, red food coloring, and good-quality white chocolate (I swear by Ghirardelli for that creamy melt).
- Perfect for Occasions: Whether it’s Valentine’s Day, an anniversary, or just a cozy weekend treat, these brownies deliver festive vibes without extra fuss.
- Crowd-Pleaser: Everyone I’ve shared these with—from friends to coworkers—has asked for the recipe or a second helping, which honestly feels like the best compliment.
- Unbelievably Delicious: The tender crumb, rich cocoa flavor, and pockets of melty white chocolate take these brownies to the next level of comfort food.
What makes this recipe different? It’s the way the white chocolate chunks melt just enough to create little creamy pockets inside, without overpowering the deep, velvety texture of the brownie. Plus, shaping them into hearts adds that extra touch of charm that’s perfect for gifting or impressing without stress.
Honestly, this recipe isn’t just dessert—it’s a little moment of joy baked into your day. It’s the kind of treat that makes you close your eyes after the first bite and smile, knowing you nailed it without any fancy tricks.
What Ingredients You Will Need
This recipe keeps things straightforward with ingredients that deliver rich flavor and a moist, tender texture. Most are pantry staples, and substitutions are easy if you want to tweak for dietary needs.
- Unsalted butter, melted (adds richness and helps with the fudgy texture)
- Sugar (granulated works best for that classic brownie sweetness)
- Large eggs, room temperature (for structure and moisture)
- Vanilla extract (pure vanilla gives the best aroma and flavor)
- Cocoa powder, unsweetened (I prefer Dutch-processed for smoothness and depth)
- All-purpose flour (you can swap for almond flour if you want gluten-free)
- Red food coloring (gel-based for vibrant color without thinning the batter)
- White chocolate chunks or chips (Ghirardelli or Callebaut melt beautifully)
- Salt (just a pinch to balance the sweetness)
- Baking powder (for a slight lift, but not too much—you want fudgy, not cakey)
If you want to switch things up, you can replace the white chocolate with semi-sweet chips or even swirl in some cream cheese for a marbled effect. In summer, fresh raspberries added on top before baking make a lovely seasonal note.
Equipment Needed
- 8×8-inch (20×20 cm) square baking pan: Perfect size for thick, tender brownies. If you don’t have this exact size, a similar-sized pan will work but adjust baking time accordingly.
- Heart-shaped cookie cutter: The key to that charming presentation. Mine’s about 2.5 inches wide, but use whatever size you prefer.
- Mixing bowls: One for wet ingredients, one for dry. Easy to clean and sturdy bowls help speed up mixing.
- Whisk and spatula: A whisk to blend wet ingredients smoothly, and a spatula to fold in flour and chocolate chunks gently.
- Measuring cups and spoons: Accuracy matters here for that perfect texture.
If you don’t own a heart-shaped cutter, a sharp knife and a steady hand will do—just cut out squares or rectangles and call it your signature style. For cleanup, I find lining the pan with parchment paper saves a lot of scrubbing later.
Preparation Method
- Preheat your oven to 350°F (175°C). Line your 8×8-inch baking pan with parchment paper, leaving overhang on the sides for easy removal.
- Melt 1/2 cup (115 g) unsalted butter in a microwave-safe bowl or on the stove until just melted. Let it cool slightly but don’t let it solidify again.
- Whisk together the melted butter and 1 1/4 cups (250 g) granulated sugar until combined and glossy—this helps create that fudgy texture.
- Add 2 large eggs, one at a time, whisking well after each. Then stir in 1 teaspoon pure vanilla extract. The batter will look shiny and thick.
- In a separate bowl, sift together 3/4 cup (95 g) all-purpose flour, 1/4 cup (25 g) unsweetened cocoa powder, 1/2 teaspoon baking powder, and 1/4 teaspoon salt.
- Fold the dry ingredients gently into the wet mixture using a spatula. Don’t overmix—stop as soon as you don’t see flour.
- Mix in 2 tablespoons red gel food coloring. This is what gives that iconic red velvet hue without changing the batter’s consistency.
- Stir in 3/4 cup (135 g) white chocolate chunks, folding evenly but gently. You want those creamy pockets throughout the batter.
- Pour the batter into your prepared pan and smooth the top with a spatula. Tap the pan lightly on the counter to release any air bubbles.
- Bake for 25 to 30 minutes. Start checking at 25 minutes by inserting a toothpick near the center; it should come out with a few moist crumbs. Avoid overbaking to keep the brownies fudgy.
- Cool completely in the pan on a wire rack. This step is crucial before cutting—warm brownies will crumble or stick badly.
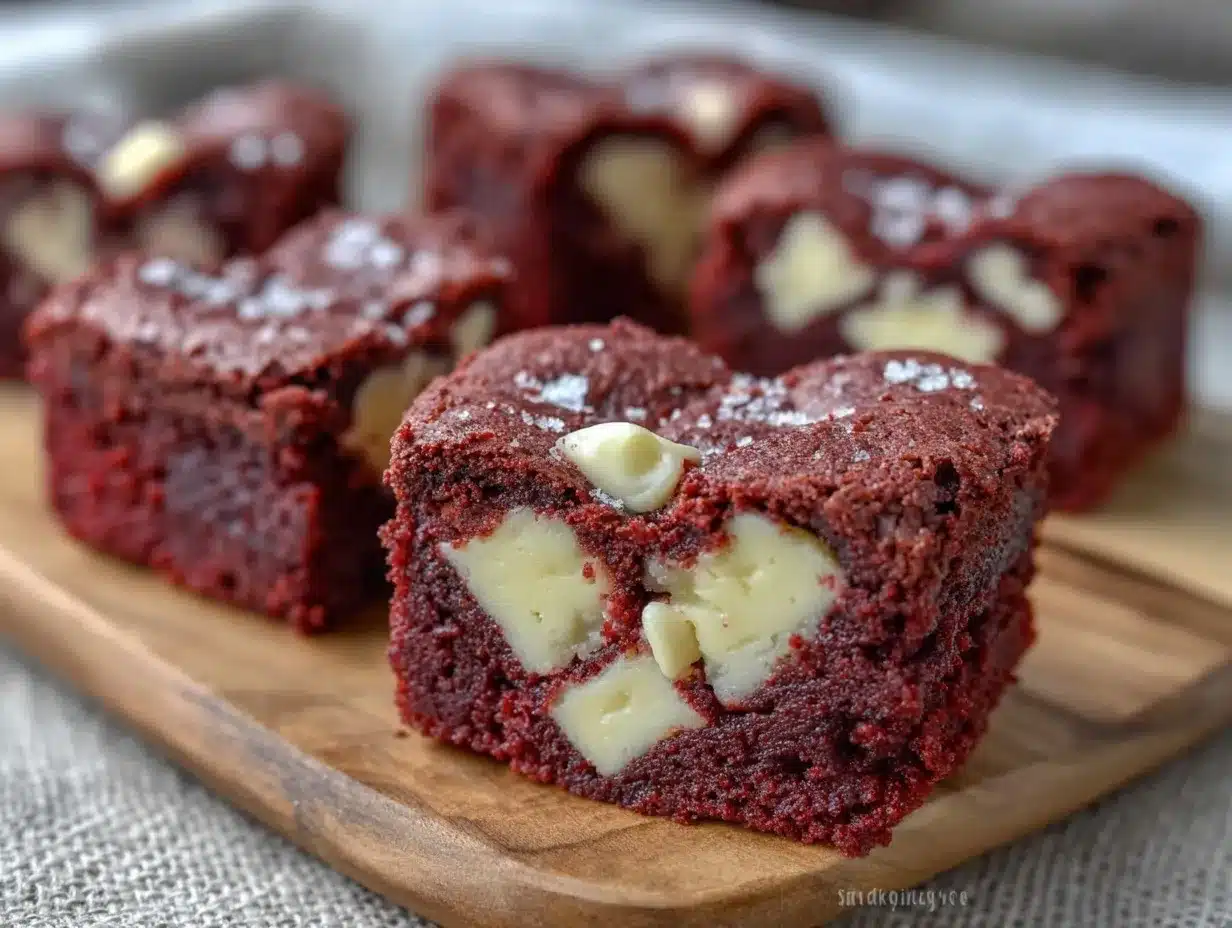
- Once cooled, lift the brownies out of the pan using the parchment overhang. Use your heart-shaped cookie cutter to press down firmly and cut out shapes. Don’t twist the cutter, just press straight down and gently pop out the brownies.
- Arrange on a serving platter and, if you want, drizzle with extra melted white chocolate or a dusting of powdered sugar for a finishing touch.
Pro tip: If the batter feels too thick, a tablespoon of buttermilk or whole milk can loosen it slightly without losing the dense texture. And if your white chocolate chunks start to melt too fast during mixing, pop the bowl in the fridge for 10 minutes before folding.
Cooking Tips & Techniques
Making red velvet brownies with that perfect tender crumb and vibrant color takes a few tricks I’ve learned the hard way:
- Don’t skip the parchment paper: It’s a lifesaver for clean edges and easy removal, especially when you want neat heart shapes.
- Use gel food coloring: Liquid food coloring can thin the batter, making the brownies cakier instead of fudgy.
- Measure flour carefully: Too much flour means dry brownies. I spoon flour into the cup and level it off instead of scooping directly.
- Watch your baking time: Overbaked brownies lose that luscious moistness. Mine always come out best when I take them out just before a toothpick is completely clean.
- Mix white chocolate gently: I fold it in at the very end to keep the chunks intact, so you get those melty pockets instead of a blended swirl.
- Cutting shapes when fully cooled: Warm brownies are fragile. I usually chill mine for 30 minutes after cooling at room temperature for cleaner cuts.
One time, I tried using cream cheese as a swirl for a fancier twist but ended up with a mess of cracks and soggy spots. Lesson learned: keep the batter simple and rely on the white chocolate to add that creamy surprise.
If you’re juggling other cooking tasks (maybe prepping a creamy Tuscan chicken pasta for dinner), get your brownie batter ready first, then bake while you finish the savory parts. Having a sweet finish waiting for you is the best kind of motivation.
Variations & Adaptations
These brownies are versatile and fun to tweak according to your mood or dietary needs:
- Nutty Upgrade: Add 1/2 cup chopped pecans or walnuts to the batter for crunch and a nutty contrast to the smooth white chocolate.
- Vegan Version: Swap butter for coconut oil, use flax eggs (2 tbsp flaxseed meal + 6 tbsp water), and dairy-free white chocolate chips. The texture changes slightly but still hits the spot.
- Spicy Twist: Add 1/4 teaspoon cinnamon and a pinch of cayenne pepper to the dry ingredients for a subtle warmth that plays nicely with the cocoa.
- Frosted Treat: Spread a layer of cream cheese frosting on top before cutting or drizzle melted white chocolate for extra indulgence.
- Different Shapes: If you want to skip the heart cutter, try making mini muffins or using a silicone mold for fun shapes that suit any occasion.
Personally, I once tried folding in a handful of dried cherries along with the white chocolate chunks—it added a tart burst that balanced the sweetness beautifully, especially when serving these alongside a refreshing Greek cucumber salad at a casual dinner party.
Serving & Storage Suggestions
These heart-shaped red velvet brownies shine best served at room temperature, letting the white chocolate pockets be soft and creamy. For a fancier touch, a light dusting of powdered sugar or a drizzle of melted white chocolate looks delightful.
Pair them with a creamy cup of coffee, tea, or even a cold glass of milk — the perfect counterpoint to their rich flavor. If you’re planning a romantic breakfast or brunch, they’re a sweet finish alongside dishes like fluffy scrambled eggs or even a savory stuffed bell peppers.
For storage, keep the brownies in an airtight container at room temperature for up to 3 days. If you want to hold onto them longer, wrap tightly and freeze for up to 3 months. When ready to enjoy, thaw at room temperature and warm slightly in the microwave for 10-15 seconds to bring back that just-baked softness.
Flavors tend to deepen and meld after resting overnight, so if you can wait, that’s often the best time to serve them.
Nutritional Information & Benefits
One heart-shaped red velvet brownie (about 2 inches) roughly contains:
| Calories | 170 |
|---|---|
| Fat | 9g |
| Carbohydrates | 22g |
| Protein | 2g |
| Sugar | 16g |
While this treat is on the indulgent side, key ingredients like cocoa powder provide antioxidants, and using real butter and eggs adds wholesome fats and protein. For a slightly lighter version, try swapping half the sugar with coconut sugar or using unsweetened applesauce to reduce fat.
These brownies are naturally gluten-free if you substitute the flour with almond or oat flour and choose dairy-free white chocolate chips, making them a flexible option for various dietary preferences. Just watch out for allergens like dairy and nuts if you’re adapting.
From a wellness perspective, I love how this recipe balances indulgence with real, simple ingredients—no weird fillers or excessive processing. It’s a dessert that feels satisfying without the guilt of mystery ingredients.
Conclusion
If you’re looking for a dessert that’s easy, festive, and downright delicious, these heart-shaped red velvet brownies with white chocolate are a winner every time. Their tender crumb, creamy pockets of white chocolate, and charming shape make them perfect for Valentine’s Day or any moment you want to add a little sweetness to your day.
Feel free to customize them with nuts, berries, or even a frosting swirl—cooking should always have room for your own spin. Personally, I keep coming back to this recipe because it’s that rare treat that’s both effortless and impressive, making it a trusted go-to when I want to bake something special without the stress.
If you give these brownies a try, I’d love to hear how you make them your own or any fun shapes you’ve experimented with. Sharing those little kitchen victories always feels good. Here’s to sweet moments that stick with you long after the last bite.
Frequently Asked Questions
Can I make these brownies ahead of time?
Yes! You can bake the brownies a day or two in advance. Keep them stored in an airtight container at room temperature, or freeze the cut brownies for longer storage.
What if I don’t have a heart-shaped cookie cutter?
No worries—cut the brownies into squares or rectangles, or use any cookie cutter shape you like. The flavor will be just as irresistible.
Can I use white chocolate chips instead of chunks?
Absolutely! White chocolate chips melt a little faster, so fold them in gently to keep some texture.
How can I make these brownies vegan?
Swap butter for coconut oil, eggs for flax eggs, and use dairy-free white chocolate chips. The texture will be slightly different but still tasty.
Why are my red velvet brownies not as red as expected?
Make sure to use gel-based red food coloring, which is more concentrated. Also, avoid overbaking as it can dull the vibrant color.
Pin This Recipe!
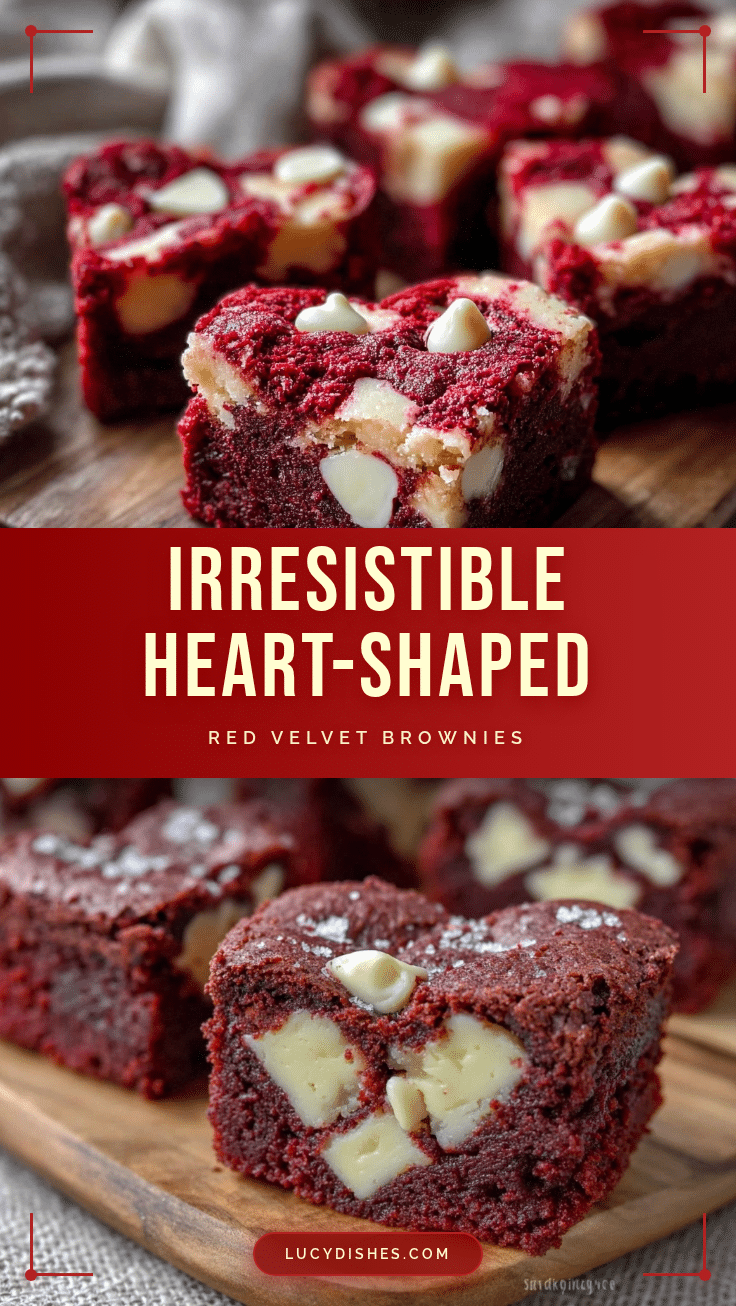
Irresistible Heart-Shaped Red Velvet Brownies
These heart-shaped red velvet brownies with white chocolate chunks are tender, rich, and perfect for Valentine’s Day or any special occasion. They combine a fudgy texture with creamy pockets of white chocolate and a charming presentation.
- Prep Time: 15 minutes
- Cook Time: 25-30 minutes
- Total Time: 40-45 minutes
- Yield: 16 servings (heart-shaped brownies about 2 inches each) 1x
- Category: Dessert
- Cuisine: American
Ingredients
- 1/2 cup (115 g) unsalted butter, melted
- 1 1/4 cups (250 g) granulated sugar
- 2 large eggs, room temperature
- 1 teaspoon pure vanilla extract
- 3/4 cup (95 g) all-purpose flour (can substitute almond flour for gluten-free)
- 1/4 cup (25 g) unsweetened cocoa powder (preferably Dutch-processed)
- 1/2 teaspoon baking powder
- 1/4 teaspoon salt
- 2 tablespoons red gel food coloring
- 3/4 cup (135 g) white chocolate chunks or chips
- Optional: 1/2 cup chopped pecans or walnuts
- Optional: 1/4 teaspoon cinnamon and a pinch of cayenne pepper
- Optional: cream cheese for marbling or frosting
- Optional: fresh raspberries for topping
Instructions
- Preheat your oven to 350°F (175°C). Line an 8×8-inch (20×20 cm) square baking pan with parchment paper, leaving overhang on the sides for easy removal.
- Melt 1/2 cup unsalted butter in a microwave-safe bowl or on the stove until just melted. Let it cool slightly but do not let it solidify.
- Whisk together the melted butter and 1 1/4 cups granulated sugar until combined and glossy.
- Add 2 large eggs one at a time, whisking well after each addition. Stir in 1 teaspoon pure vanilla extract.
- In a separate bowl, sift together 3/4 cup all-purpose flour, 1/4 cup unsweetened cocoa powder, 1/2 teaspoon baking powder, and 1/4 teaspoon salt.
- Fold the dry ingredients gently into the wet mixture using a spatula. Stop mixing as soon as the flour disappears.
- Mix in 2 tablespoons red gel food coloring until evenly distributed.
- Fold in 3/4 cup white chocolate chunks gently to keep pockets intact.
- Pour the batter into the prepared pan and smooth the top with a spatula. Tap the pan lightly on the counter to release air bubbles.
- Bake for 25 to 30 minutes. Start checking at 25 minutes by inserting a toothpick near the center; it should come out with a few moist crumbs.
- Cool completely in the pan on a wire rack before cutting.
- Once cooled, lift the brownies out using the parchment overhang. Use a heart-shaped cookie cutter to press down firmly and cut out shapes. Do not twist the cutter.
- Arrange the heart-shaped brownies on a serving platter. Optionally, drizzle with melted white chocolate or dust with powdered sugar.
Notes
Use gel-based red food coloring for vibrant color without thinning the batter. Do not overbake to keep brownies fudgy. Fold white chocolate chunks gently to maintain creamy pockets. Cool brownies completely before cutting shapes for clean edges. Optional additions include nuts, cinnamon, cayenne, or cream cheese swirl. For vegan version, substitute butter with coconut oil, eggs with flax eggs, and use dairy-free white chocolate chips.
Nutrition
- Serving Size: One heart-shaped bro
- Calories: 170
- Sugar: 16
- Fat: 9
- Carbohydrates: 22
- Protein: 2
Keywords: red velvet brownies, heart-shaped brownies, Valentine's Day dessert, white chocolate brownies, easy brownies, festive dessert


