“Hey, have you seen these Baby Yoda treats?” my friend texted me one sleepy Sunday afternoon. I was halfway through reorganizing my pantry—okay, avoiding it—but her message pulled me right into the kitchen. Honestly, the idea of cute creamy Baby Yoda matcha Rice Krispie treats sounded like a total whimsy, maybe even a little silly. But, you know how it goes: sometimes the silliest ideas turn out to be the best ones.
At first, I thought, “Matcha in Rice Krispies? Really?” Skepticism was real. But then I remembered how much I adore the gentle earthiness of matcha, and the way that creamy texture could soften those crispy marshmallow bites. Plus, who doesn’t want a little Baby Yoda magic to brighten an afternoon snack? I started experimenting right after that text, making tiny green ears out of fondant and swirling in just the right amount of creamy goodness. It became a bit of an obsession—I made them a few times that week, each batch better than the last.
What stuck with me, though, was how these treats fit perfectly into those quiet moments when you just want something fun but comforting—like a hug in dessert form. And not just for kids; grown-ups who love that subtle matcha twist keep asking for more. This recipe found a way to be playful and soothing at the same time, and honestly, that’s why it’s stayed in my rotation. I’m guessing after you try them, you’ll get it too.
Why You’ll Love This Recipe
Making these Cute Creamy Baby Yoda Matcha Rice Krispie Treats felt like bringing a little joy to the kitchen, and it’s not just about the adorable factor. Here’s why this recipe has won me over—and why it might just become your go-to snack or party hit:
- Quick & Easy: Whips up in about 20 minutes—perfect for when you want a fun treat without fuss.
- Simple Ingredients: No need for obscure stuff; most are pantry staples, with matcha powder adding just the right twist.
- Perfect for Gatherings: These are fantastic for themed parties, casual get-togethers, or just cheering up a midweek slump.
- Crowd-Pleaser: Kids love the character shapes, and adults appreciate the creamy matcha flavor that’s not too sweet.
- Unbelievably Delicious: The creamy texture balances the crispy rice cereal, while the matcha offers a subtle earthiness that’s both refreshing and comforting.
This isn’t your standard Rice Krispie treat. The creamy addition—using a blend of softened cream cheese and marshmallows—makes them softer and richer. The matcha powder isn’t just for color; it adds a gentle bitterness that cuts through the sweetness, which I found makes these treats feel special, almost grown-up. If you’ve enjoyed recipes like the creamy trifle bowl banana pudding, you’ll appreciate the way texture and flavor play together here too.
What Ingredients You Will Need
This recipe uses simple, wholesome ingredients that come together to create bold flavor and a fun, satisfying texture without any complicated steps. Most of these are easy to find in your pantry or local store, and you can swap a few to fit your preferences or dietary needs.
- Rice Cereal: 6 cups of classic Rice Krispies cereal (or a gluten-free version if needed).
- Marshmallows: 10 ounces (about 280 grams) of mini marshmallows or regular marshmallows chopped into smaller pieces (I like using Jet-Puffed for best melting).
- Unsalted Butter: 4 tablespoons (about 56 grams), softened (adds richness and helps with binding).
- Cream Cheese: 4 ounces (about 115 grams), softened (this is key for that creamy texture).
- Matcha Powder: 2 teaspoons, preferably ceremonial grade for vibrant green color and smooth flavor (you can find it in specialty stores or online).
- Vanilla Extract: 1 teaspoon (adds warmth and rounds out the flavors).
- Green Food Coloring: Optional, a few drops to deepen Baby Yoda’s signature hue if your matcha isn’t bright enough.
- Fondant or Modeling Chocolate: Small amounts in green and black for Baby Yoda ears and eyes (optional but adds the cute factor).
If you want to make these dairy-free, swap the butter with coconut oil and use a dairy-free cream cheese alternative. For a gluten-free treat, just make sure your rice cereal is certified gluten-free. I usually keep a stash of matcha powder from a trusted brand to keep the flavor consistent, but in summer, I’ve played around with adding a little fresh lemon zest for a zingy twist.
Equipment Needed
- Large mixing bowl – sturdy enough to mix sticky marshmallow and cereal.
- Medium saucepan – to melt butter and marshmallows gently.
- Rubber spatula or wooden spoon – for folding the mixture without breaking the cereal.
- 8×8-inch (20×20 cm) baking pan – to press and set the treats.
- Plastic wrap or parchment paper – to line the pan and prevent sticking.
- Measuring cups and spoons – for precise amounts.
- Optional: Small rolling pin and fondant tools – if you want to craft Baby Yoda ears and eyes for decoration.
If you don’t have a rubber spatula, a wooden spoon works fine, but be gentle when mixing so you don’t crush the cereal. For pressing the mixture into the pan, I find using a piece of parchment paper to gently press down helps avoid sticky fingers. No fancy equipment needed, and this makes for a great kitchen project with kids or friends.
Preparation Method
- Prepare the pan: Line your 8×8-inch pan with parchment paper or plastic wrap, leaving some overhang on the sides to help lift out the treats later. This step saves a lot of cleanup hassle.
- Melt butter and marshmallows: In a medium saucepan over low heat, melt 4 tablespoons (56 grams) of unsalted butter. Once melted, add 10 ounces (280 grams) of marshmallows and stir gently but constantly until completely melted and smooth—about 5 to 7 minutes. Watch closely so the marshmallows don’t burn or stick.
- Add cream cheese and matcha: Remove the pan from heat. Quickly whisk in the softened 4 ounces (115 grams) of cream cheese until fully incorporated. Then sift in 2 teaspoons of matcha powder to avoid clumps, stirring until you get a smooth, creamy, light green mixture. Add 1 teaspoon of vanilla extract and a few drops of green food coloring if you want a brighter color.
- Mix in the cereal: Immediately add 6 cups of Rice Krispies cereal to the mixture. Use a rubber spatula to fold everything together gently but thoroughly, ensuring all the cereal is coated while keeping the texture light and crispy. This should take about 2 to 3 minutes.
- Press into the pan: Transfer the mixture into the prepared pan. Use a piece of parchment paper or a buttered spatula to press it evenly and firmly, but don’t compact it too much—leave some airiness.
- Cool and set: Let the treats cool at room temperature for about 30 minutes to set up. For faster results, pop the pan into the fridge for 15 to 20 minutes.
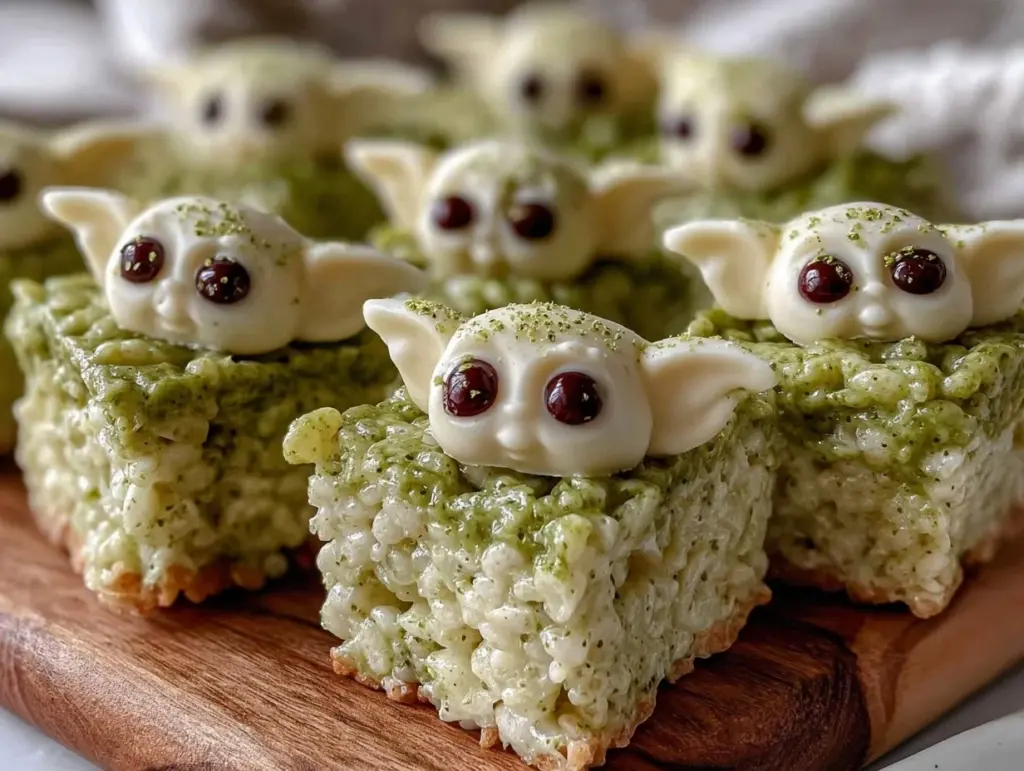
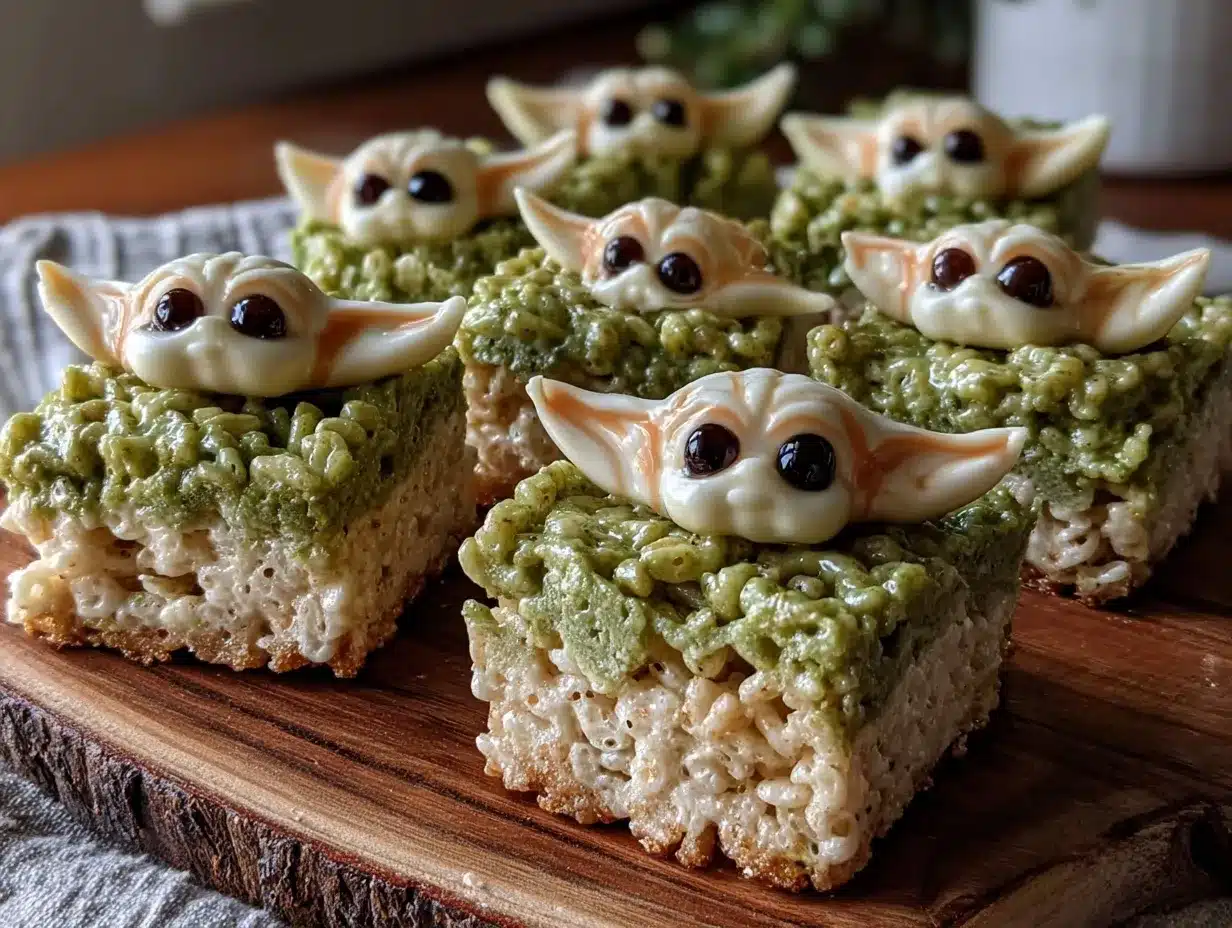
- Create Baby Yoda shapes: Once set, lift the treats out of the pan using the parchment overhang. Cut into squares or rectangles. Use small pieces of green and black fondant or modeling chocolate to craft Baby Yoda ears and eyes, attaching them gently with a dab of water or leftover marshmallow mix.
A quick tip: if your marshmallow mixture gets too thick before adding cereal, warm it gently for a few seconds to loosen it up. When folding in the cereal, try not to overmix—you want the treats to stay light and crisp, not mushy.
Cooking Tips & Techniques
Getting the creamy texture just right with these Baby Yoda treats took a few tries. Here’s what I learned:
- Use softened cream cheese: This helps the marshmallow mixture stay silky and avoids lumps. Take it out of the fridge about 30 minutes before starting.
- Low and slow melting: Melting butter and marshmallows over low heat prevents scorching. Stir often, so you don’t get sticky burnt spots.
- Sift your matcha powder: It keeps the mixture smooth and avoids bitter clumps. Also, ceremonial grade matcha tastes best—don’t use cooking grade here.
- Press treats gently: You want them packed enough to hold shape but not so tight they lose their crunch.
- Timing matters: Work quickly after mixing marshmallows and cream cheese to fold in cereal before the mixture cools and thickens.
One time, I let the marshmallow mix get too cool before adding cereal, and the treats turned dense and sticky. Lesson learned: always keep things moving. If you want to multitask, prepare your fondant shapes ahead, like I do when making these alongside a batch of rainbow lemonade drinks for the kiddos on a sunny afternoon.
Variations & Adaptations
These Baby Yoda treats are pretty adaptable, so you can tweak them to fit your mood or dietary needs:
- Vegan/Dairy-Free: Swap butter with coconut oil, use vegan marshmallows, and dairy-free cream cheese alternatives. The texture will be slightly different but still yummy.
- Flavor Twists: Add a teaspoon of toasted coconut flakes or chopped pistachios for extra texture. You can also mix in white chocolate chips instead of cream cheese for a sweeter, less tangy version.
- Seasonal Spins: In fall, blend in a pinch of pumpkin spice with the matcha for a cozy vibe. Or, during holidays, swap green food coloring for festive colors and shape into other characters.
- Alternative Cereals: Use gluten-free puffed rice or even puffed quinoa for a different crunch profile.
- Personal Touch: I once added a dash of almond extract instead of vanilla—it was subtle but gave a lovely nutty warmth that surprised me.
If you’re interested in more creamy, crowd-pleasing snacks, you might enjoy my creamy slow cooker buffalo chicken dip—another recipe that’s all about balancing bold flavor with ease.
Serving & Storage Suggestions
These treats are best served at room temperature so that creamy matcha flavor shines through without being too firm or sticky. Arrange them on a cute platter for parties, or wrap individual pieces in wax paper for lunchbox fun.
They pair beautifully with light drinks—green tea, lemonade, or even a mild coffee. For a kid-friendly combo, serve with a glass of milk or one of my fun rainbow lemonade drinks.
Store leftovers in an airtight container at room temperature for up to 3 days. If your kitchen is warm, pop them in the fridge to keep their shape longer—just note they’ll firm up and might lose some of that creamy softness. For longer storage, freeze wrapped treats for up to a month; thaw at room temperature before enjoying.
Flavors actually mellow and deepen a bit after a day, making them even tastier the next day if you can wait that long!
Nutritional Information & Benefits
Each treat (based on 16 servings) roughly contains:
| Calories | 150 kcal |
|---|---|
| Fat | 6g (mostly from butter and cream cheese) |
| Carbohydrates | 22g (mostly from cereal and marshmallows) |
| Protein | 2g |
Matcha powder not only adds flavor but also brings antioxidants and a mild caffeine boost, making these treats a little more energizing than your standard sweet snack. The cream cheese adds a touch of protein and calcium, balancing the sugary marshmallows.
This recipe is gluten-free if you choose certified gluten-free cereal, and can be made dairy-free with substitutions. Keep in mind marshmallows often contain gelatin, so vegans should pick vegan-certified options.
From a wellness perspective, these treats satisfy a sweet craving with a touch of green tea goodness, making them a playful choice when you want something a little different but not overly indulgent.
Conclusion
These Cute Creamy Baby Yoda Matcha Rice Krispie Treats are the kind of recipe that feels like a little celebration in every bite. They’re fun, a bit whimsical, and creamy with just the right hint of matcha earthiness. I love how they bring a smile, whether for an afternoon pick-me-up or a themed party snack.
Feel free to tweak the matcha amount to your liking, or experiment with different mix-ins to make them truly yours. This recipe has become a small kitchen ritual for me—sometimes just for the joy of shaping those tiny Baby Yoda ears and sharing a sweet moment with friends.
If you give them a try, I’d love to hear how you customized your batch or what occasions you served them for. Sharing those little kitchen stories makes the magic last longer. Happy snacking, and may the treats be with you!
FAQs About Baby Yoda Matcha Rice Krispie Treats
Can I make these treats ahead of time?
Yes! They keep well for a few days at room temperature or longer in the fridge. Just store airtight to keep them fresh and soft.
What if I don’t have matcha powder? Can I skip it?
You can skip matcha, but it’s what gives these treats their signature flavor and color. Without it, you’ll have classic creamy Rice Krispie treats—still tasty but missing the Baby Yoda vibe.
How do I make the Baby Yoda ears and eyes?
Using green and black fondant or modeling chocolate, shape small ears and oval eyes. Attach with a dab of water or leftover marshmallow mixture. No fondant? You can skip this step or use edible markers on white fondant for details.
Are these treats gluten-free?
They can be if you use gluten-free Rice Krispies cereal and ensure your marshmallows are gluten-free. Always check packaging labels to be sure.
Can I freeze these treats?
Absolutely! Wrap them tightly in plastic wrap and place in a freezer-safe container. Thaw at room temperature before eating for the best texture.
Pin This Recipe!
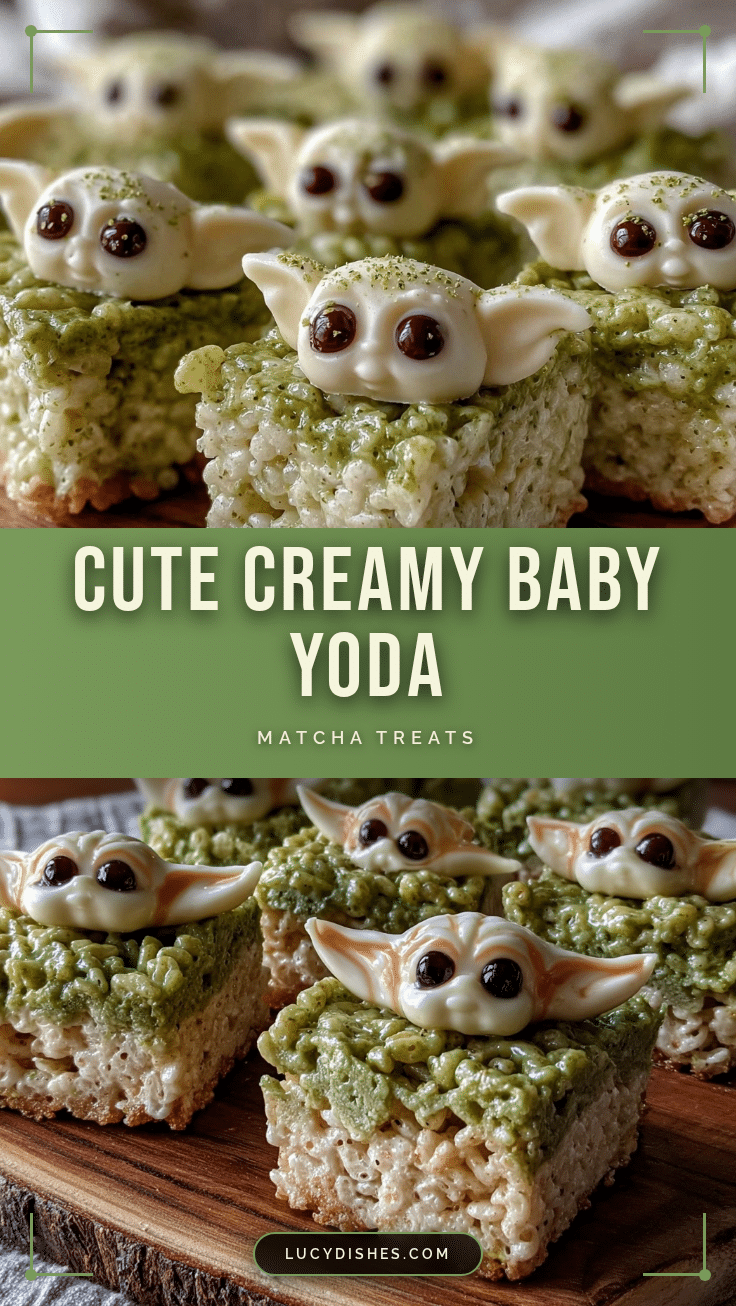
Cute Creamy Baby Yoda Matcha Rice Krispie Treats

These cute creamy Baby Yoda Matcha Rice Krispie Treats combine the earthiness of matcha with a soft, creamy texture, making a fun and comforting snack perfect for kids and adults alike.
- Prep Time: 10 minutes
- Cook Time: 10 minutes
- Total Time: 30-40 minutes
- Yield: 16 servings 1x
- Category: Dessert
- Cuisine: American
Ingredients
- 6 cups Rice Krispies cereal (or gluten-free version)
- 10 ounces mini marshmallows or chopped regular marshmallows
- 4 tablespoons unsalted butter, softened
- 4 ounces cream cheese, softened
- 2 teaspoons matcha powder (preferably ceremonial grade)
- 1 teaspoon vanilla extract
- Green food coloring (optional)
- Fondant or modeling chocolate in green and black for Baby Yoda ears and eyes (optional)
Instructions
- Line an 8×8-inch pan with parchment paper or plastic wrap, leaving overhang for easy removal.
- In a medium saucepan over low heat, melt 4 tablespoons unsalted butter.
- Add 10 ounces marshmallows and stir constantly until melted and smooth, about 5 to 7 minutes.
- Remove from heat and quickly whisk in 4 ounces softened cream cheese until fully incorporated.
- Sift in 2 teaspoons matcha powder and stir until smooth and creamy.
- Add 1 teaspoon vanilla extract and a few drops of green food coloring if desired.
- Immediately fold in 6 cups Rice Krispies cereal gently but thoroughly with a rubber spatula.
- Transfer mixture to prepared pan and press evenly but not too tightly using parchment paper or a buttered spatula.
- Let cool at room temperature for about 30 minutes or refrigerate for 15 to 20 minutes to set.
- Lift treats out using parchment overhang, cut into squares or rectangles.
- Use green and black fondant or modeling chocolate to craft Baby Yoda ears and eyes, attaching with water or leftover marshmallow mixture.
Notes
Use softened cream cheese for smooth texture. Melt butter and marshmallows over low heat to avoid burning. Sift matcha powder to prevent clumps. Press treats gently to keep crunch. Work quickly to fold in cereal before mixture thickens. For dairy-free, substitute butter with coconut oil and use vegan marshmallows and cream cheese. Store airtight at room temperature up to 3 days or freeze for up to a month.
Nutrition
- Serving Size: 1 treat (based on 16
- Calories: 150
- Fat: 6
- Carbohydrates: 22
- Protein: 2
Keywords: Baby Yoda treats, matcha rice krispie treats, creamy rice krispie treats, easy dessert, kid-friendly snacks, gluten-free dessert option


