“Can you believe it? The graduation party is tomorrow, and I still don’t have a snack game plan,” my friend texted me just the night before. Honestly, I was knee-deep in prepping other dishes and feeling the kind of late-night panic every last-minute host knows too well. I threw together what I had in the fridge, thinking, “How bad can a charcuterie board be?” Turns out, it wasn’t just good—it was a hit. The trick? Tying it all together with vibrant school colors, which somehow made the whole spread pop with pride and celebration.
There’s something about a charcuterie board that feels effortlessly festive and fancy, but when you layer in the grad’s colors, it suddenly becomes this personal, joyful centerpiece. I’ve since made the Perfect Graduation Charcuterie Board with Vibrant School Colors a staple for every party I host. It’s quick to assemble, visually striking, and honestly, it’s fun to see people’s faces light up when they spot their school colors woven through cheeses, meats, and fruits.
What I love most is how this board doesn’t just fill a space—it creates a vibe, a subtle nod to the accomplishment without shouting it. Plus, it’s flexible enough to work for any grad’s colors and dietary preferences. After a few trial runs (and a few “why didn’t I think of that?” moments), I’ve nailed down the way to blend flavor, color, and texture into one showstopper. If you’re juggling party prep like I was and want something that feels special but won’t stress you out, this is the recipe to trust.
Why You’ll Love This Recipe
From my experience crafting this graduation charcuterie board, I’ve learned a few things that make this recipe stand apart from the usual cheese-and-meat spread you see at parties. Here’s why it’s worth your time:
- Quick & Easy: You can put this board together in under 30 minutes, making it perfect for last-minute celebrations or spontaneous gatherings.
- Simple Ingredients: No need to hunt down obscure items. Most of the components are pantry staples or easy finds at your local grocery store.
- Perfect for Graduation Parties: The vibrant school colors theme adds a meaningful touch that resonates with the graduate and guests alike.
- Crowd-Pleaser: The mix of savory, sweet, and crunchy textures keeps everyone coming back for more, from kids to adults.
- Unbelievably Delicious: Balancing creamy cheeses with salty cured meats and fresh fruits creates a flavor combo that’s just right—not too heavy, not too plain.
What sets this board apart is the thoughtful way colors are incorporated—not just splashed on but woven through every bite. Using natural ingredients to mimic school colors keeps the board vibrant without artificial dyes. Plus, I’ve found that adding little details, like color-coordinated dips or customized labels, takes it next-level. This isn’t just a charcuterie board; it’s a conversation starter and a memory maker.
And, honestly, it’s the kind of spread that makes you pause after the first bite, close your eyes, and appreciate the celebration. Whether you’re hosting a big family gathering or a small backyard party, this board brings the right mix of festivity and flavor without the fuss.
What Ingredients You Will Need
This recipe uses simple, wholesome ingredients to deliver bold flavor and a satisfying array of textures without any complicated prep. Most components are pantry staples or fresh finds, with plenty of room to swap in your grad’s school colors or dietary needs.
- Cheeses:
- Sharp cheddar, sliced or cubed (classic and vibrant orange)
- Fresh mozzarella balls or slices (bright white, creamy texture)
- Blue cheese crumbles or chunks (optional, for a bold flavor contrast)
- Cured Meats:
- Thinly sliced prosciutto or ham (adds saltiness and elegance)
- Soppressata or pepperoni rounds (for a bit of spice and red hues)
- Salami slices (classic crowd favorite)
- Fresh Produce & Fruits:
- Red grapes or strawberries (for pops of red)
- Green grapes, cucumber slices, or celery sticks (for fresh green accents)
- Orange slices or baby carrots (to complement warm color tones)
- Crunchy Elements:
- Assorted crackers (multigrain or plain, choose shapes that fit your board)
- Mixed nuts like almonds or pistachios (adds texture and color)
- Pretzel twists or breadsticks (for salty crunch)
- Dips & Spreads:
- Hummus (classic or roasted red pepper for color)
- Honey or fig jam (adds sweetness and pairs well with cheeses)
- Guacamole or herbed cream cheese (for green color and creaminess)
- Garnishes:
- Fresh herbs such as rosemary or thyme sprigs (for aroma and greenery)
- Edible flowers (optional, for an elegant touch)
- Olives (black or green, depending on color scheme)
When choosing cheeses, I usually go with brands like Cabot for cheddar and BelGioioso for mozzarella—they both bring dependable flavor and texture. If you want to keep it dairy-free, swaps like vegan cheeses or marinated tofu cubes work well, too.
For the fresh produce, look for the ripest fruits possible; they’re not only tastier but add that natural, vibrant color. If your grad’s school colors are less common (like purple or teal), consider using edible flowers or colored dips to fill in the palette.
Substitutions are easy here. For gluten-free options, crackers made from almond or coconut flour are great. And if spicy isn’t your thing, swap pepperoni with milder turkey slices or smoked turkey breast. The key is balance: creamy, salty, sweet, and crunchy elements coming together in harmony.
Equipment Needed
Building a charcuterie board doesn’t require fancy gadgets, but having the right tools makes life easier and presentation prettier.
- Large wooden or slate serving board: A sturdy base gives you room to arrange everything and adds rustic charm.
- Small bowls or ramekins: Perfect for dips, nuts, and olives—keeps things neat and prevents mixing.
- Cheese knives and spreaders: Different knives for soft and hard cheeses help with clean cuts and easy serving.
- Tongs or toothpicks: Helpful for grabbing small items hygienically without poking the whole board.
- Sharp kitchen knife: For slicing cheeses, fruits, and meats precisely.
If you don’t have a fancy wooden board, a large cookie sheet lined with parchment paper works just fine. I’ve also used a clean cutting board in a pinch. For budget-friendly options, dollar stores often carry small ramekins and spreaders that do the job without breaking the bank.
Pro tip: Wipe your knives between slicing different cheeses or meats to keep flavors pure and presentation clean. And if you want to get ahead, prep your components a day in advance and cover them tightly in the fridge to save party-day stress.
Preparation Method
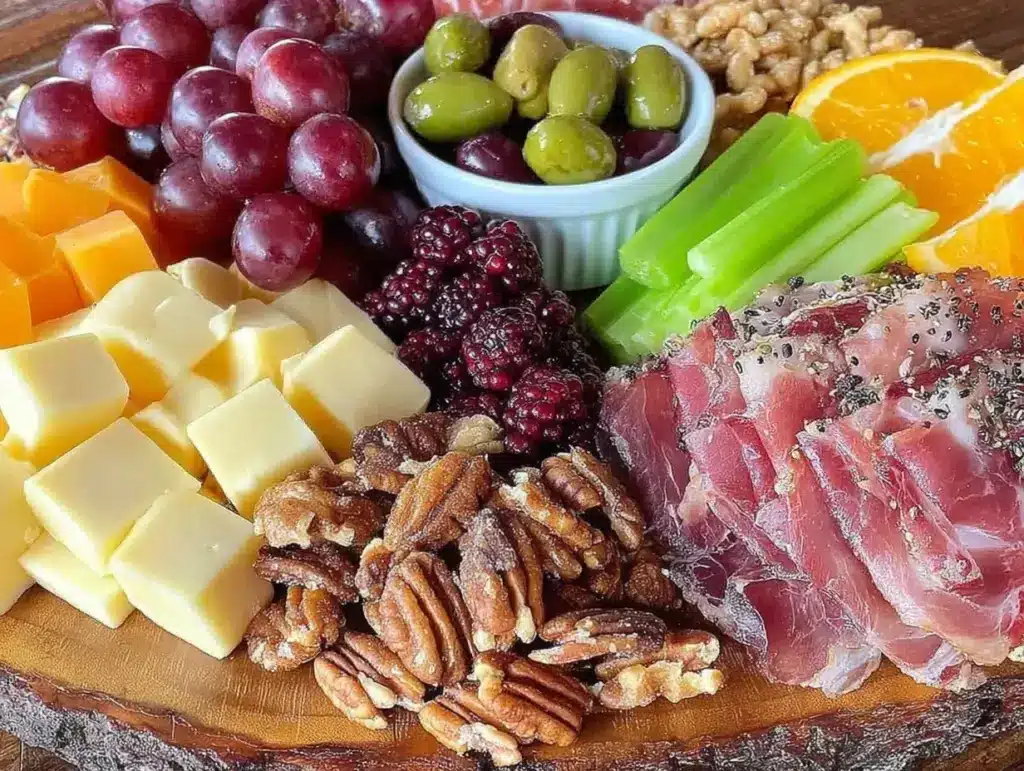
- Plan your color zones: Before placing anything, decide which sections of your board will showcase each school color. This helps keep colors vibrant and distinct. For example, cluster orange cheddar and baby carrots together, then arrange green grapes and cucumber slices nearby.
- Prep cheeses and meats: Slice your cheddar into cubes or triangles (about 1-inch pieces). Roll or fold prosciutto and salami slices into bite-sized bundles. Mozzarella balls can be left whole or halved depending on size. Set aside on separate plates to avoid mixing flavors prematurely.
- Wash and slice produce: Rinse grapes, strawberries, and cucumbers thoroughly. Slice cucumbers into thin rounds and strawberries into halves or quarters. Keep grapes on their stems for easy picking. Dry everything well to prevent sogginess.
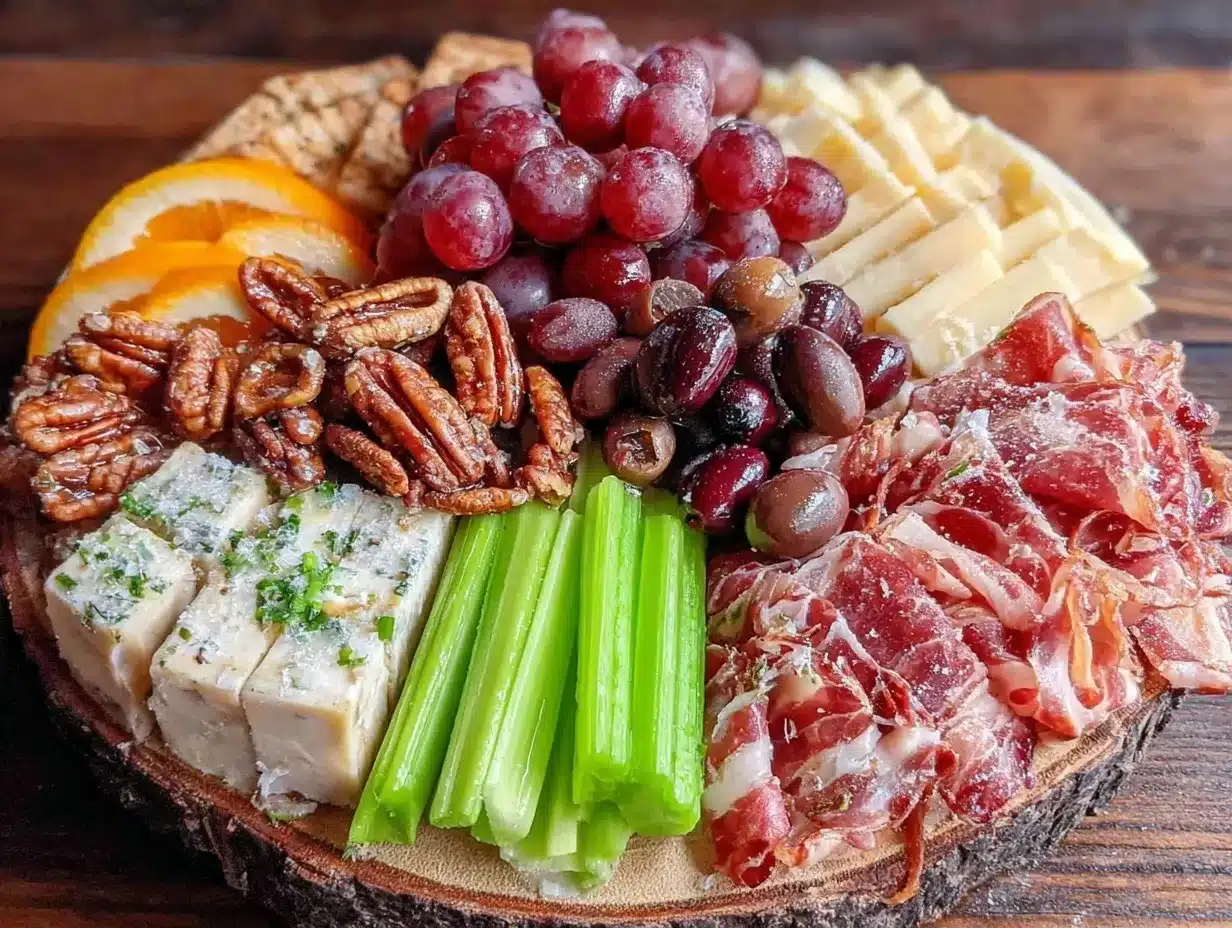
- Arrange the board: Start with placing small bowls for dips, nuts, and olives strategically across the board to anchor the layout. Then, build outwards by placing cheese clusters, followed by meats, then fruits, and lastly crackers and crunchy snacks. Vary shapes and heights for visual interest.
- Add garnishes and final touches: Sprinkle fresh herbs and edible flowers where there are gaps. Drizzle honey over cheese clusters or place a small jar of fig jam near crackers. Use toothpicks with colorful ends to hold folded meats or cheese cubes for easy grabbing.
- Final check: Step back and look for color balance. Fill any sparse spots with extra nuts, olives, or small fruit clusters. The board should feel full without overcrowding—leave some space so guests can easily pick items.
This whole process usually takes about 25-30 minutes once your ingredients are ready. If you’re short on time, prepping meats and cheeses the night before and assembling the board on party day is a lifesaver. Just cover the ingredients tightly with plastic wrap to keep them fresh.
One thing I learned the hard way: don’t overcrowd the board. It’s tempting to pile on everything at once, but a little breathing room helps each item shine and prevents crushed crackers or squished fruit. Trust me, it’s worth the extra step of spacing.
Cooking Tips & Techniques
Since this recipe is more about assembly than cooking, the focus is on techniques and tips to make your charcuterie board stand out and stay fresh.
- Choose cheeses with varying textures: Combining hard, soft, and creamy cheeses gives guests a range of flavors and mouthfeel. Mixing sharp cheddar with mild mozzarella and a tangy blue cheese really keeps the palate interested.
- Roll or fold meats: Instead of laying slices flat, folding or rolling them makes the board look more inviting and helps portion control. It also creates little pockets of flavor that guests appreciate.
- Use fresh fruits to add moisture and brightness: Fruits like grapes and strawberries contrast salty meats and creamy cheeses perfectly. Just make sure they’re dry before placing them to avoid sogginess.
- Mind the timing: Assemble the board as close to serving time as possible to keep everything fresh. If prepping ahead, store components separately and combine just before guests arrive.
- Multitask efficiently: While slicing cheeses, prep fruits in batches. Use small bowls to keep nuts and olives contained, which speeds up the final assembly.
- Common mistake to avoid: overcrowding the board or mixing colors too much. Clear separation of school colors makes the board visually pleasing and easier to navigate.
One time, I learned the importance of knife sharpening the hard way—dull knives crush cheeses instead of slicing cleanly, ruining the presentation. Keeping your knives sharp is a small detail that makes a big difference.
Variations & Adaptations
The beauty of this graduation charcuterie board is how adaptable it is to different tastes, dietary needs, and color schemes.
- Dietary variations: For vegetarian guests, add marinated artichokes, roasted red peppers, and more fresh vegetables like cherry tomatoes and snap peas. Swap meats for plant-based deli slices or smoked tofu cubes.
- Seasonal swaps: Summer parties? Use fresh berries, peaches, or melon chunks instead of grapes and strawberries. In winter, opt for dried fruits like apricots and figs to complement the cheeses.
- Flavor twists: Try flavored hummus (like roasted red pepper or garlic) or different jams (fig, apricot) to add interest. Sprinkle nuts with a pinch of smoked paprika or cinnamon for a little extra zing.
- Cooking method adjustments: If you want a warm touch, serve baked brie with a drizzle of honey right on the board. It adds a gooey, luxurious element without complicating prep.
- Personal variation: I once made a board with a bold black and gold theme for a grad’s colors, using black olives, gold-wrapped chocolates, and blackberries. It was unexpectedly elegant and got tons of compliments.
Serving & Storage Suggestions
Serve the charcuterie board at room temperature to bring out the full flavors and textures of the cheeses and meats. Take it out of the fridge about 30 minutes before guests arrive.
Presentation counts here—arrange the board on a wooden platter or slate slab for rustic appeal. Add small labels or tags naming each cheese or dip, especially if you have unique options. Pair with crisp white wine, sparkling water, or a themed drink like a refreshing lemonade to keep the celebration lively.
To store leftovers, wrap each component separately in airtight containers or plastic wrap and refrigerate. Most cheeses keep well for up to a week, while meats last about 3-4 days. Crackers and crunchy items are best stored at room temperature in sealed bags to avoid sogginess.
When reheating or serving leftovers, bring cheeses back to room temp and refresh fruits if needed. The flavors often deepen after a day or two, so if you have the luxury of prepping early, your board might actually taste better the next day.
Nutritional Information & Benefits
This graduation charcuterie board balances indulgence with nourishing elements. A typical serving provides a mix of protein, healthy fats, and fiber-rich fruits and nuts.
| Component | Calories (per serving) | Key Nutrients |
|---|---|---|
| Cheese (1 oz / 28g) | 110-120 | Calcium, Protein, Fat |
| Cured Meat (1 oz / 28g) | 70-90 | Protein, Sodium |
| Fresh Fruit (1/2 cup) | 30-50 | Fiber, Vitamins C & A |
| Nuts (1 oz / 28g) | 160-180 | Healthy Fats, Protein, Fiber |
Key benefits include calcium from cheeses, antioxidants from fresh fruits, and healthy fats from nuts. This recipe can be adapted to be gluten-free by choosing appropriate crackers or skipping them. It’s a balanced option that feels indulgent but also brings some nutritional value to the party table.
Conclusion
This Perfect Graduation Charcuterie Board with Vibrant School Colors recipe has become my go-to for celebrations that need a little extra cheer without fuss. It’s flexible, visually impressive, and packed with flavors that please all palates. What’s more, it lets you tailor the board to any grad’s personality and school spirit, making your party feel thoughtful and festive.
Feel free to make it your own by swapping ingredients or adding personal touches—you can’t go wrong here. I love how this board sparks conversations and keeps guests grazing happily all evening. If you give it a try, I’d love to hear how you customized it or any fun color combos you picked!
Wishing you a joyful celebration and a board that brings everyone together.
FAQs
- Can I prepare the charcuterie board in advance?
Yes, slice and prep all ingredients up to a day ahead, but assemble the board just before serving for the best freshness. - What if the graduate’s school colors include unusual shades?
Use dips, edible flowers, or colored nuts to mimic those colors naturally if fresh produce isn’t available. - How do I keep crackers from getting soggy?
Place crackers on the board right before serving and keep them separate from moist fruits or dips until the last minute. - Can I make this board vegan?
Absolutely! Substitute cheeses with vegan varieties and use plant-based meats or extra veggies and nuts. - What drinks pair well with this charcuterie board?
Crisp white wines, sparkling water, or a homemade drink like the rainbow lemonade complement the flavors beautifully.
Pin This Recipe!
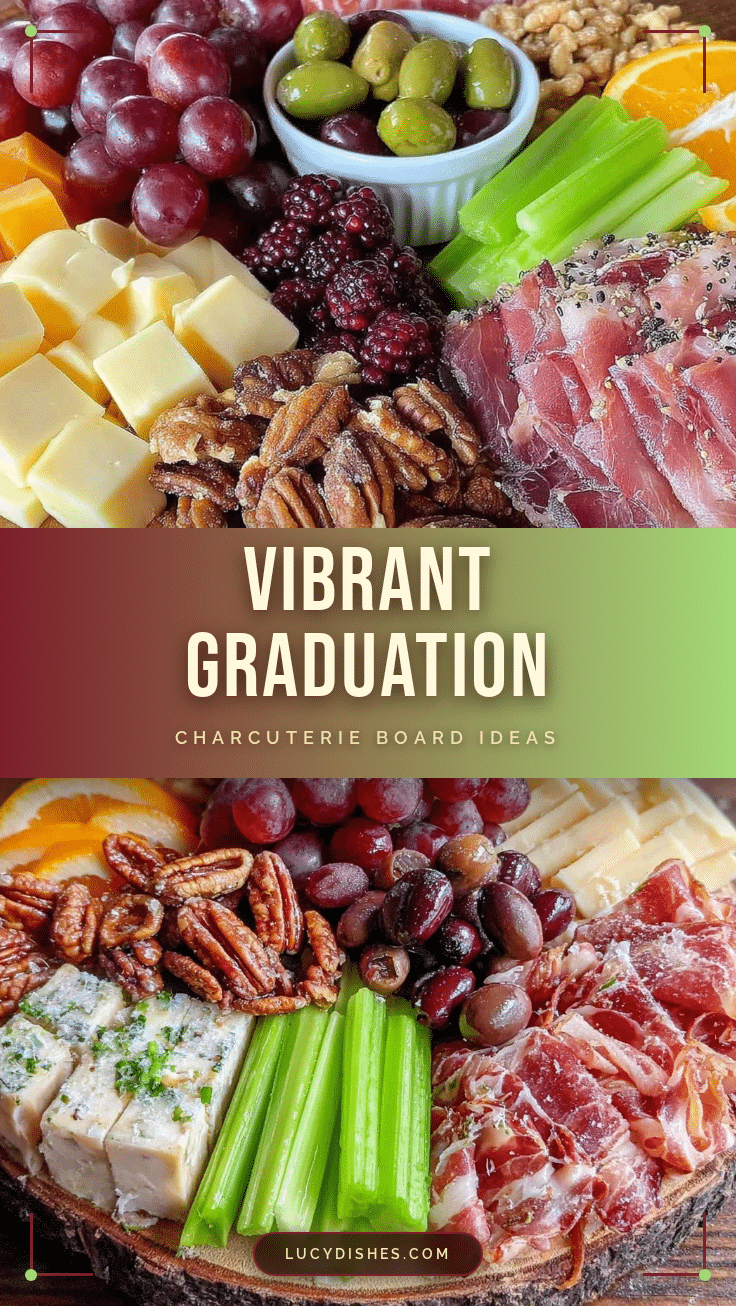
Perfect Graduation Charcuterie Board Easy Vibrant School Colors Setup Guide
A quick and easy charcuterie board recipe that celebrates graduation with vibrant school colors, combining cheeses, cured meats, fresh fruits, and crunchy elements for a festive and crowd-pleasing centerpiece.
- Prep Time: 20 minutes
- Cook Time: 0 minutes
- Total Time: 25-30 minutes
- Yield: 8 servings
- Category: Appetizer
- Cuisine: American
Ingredients
- Sharp cheddar cheese, sliced or cubed (classic and vibrant orange)
- Fresh mozzarella balls or slices (bright white, creamy texture)
- Blue cheese crumbles or chunks (optional)
- Thinly sliced prosciutto or ham
- Soppressata or pepperoni rounds
- Salami slices
- Red grapes or strawberries
- Green grapes, cucumber slices, or celery sticks
- Orange slices or baby carrots
- Assorted crackers (multigrain or plain)
- Mixed nuts like almonds or pistachios
- Pretzel twists or breadsticks
- Hummus (classic or roasted red pepper)
- Honey or fig jam
- Guacamole or herbed cream cheese
- Fresh herbs such as rosemary or thyme sprigs
- Edible flowers (optional)
- Olives (black or green)
Instructions
- Plan your color zones on the board to showcase each school color distinctly.
- Slice cheddar into 1-inch cubes or triangles; roll or fold prosciutto and salami into bite-sized bundles; leave mozzarella balls whole or halved.
- Wash and slice produce: rinse grapes, strawberries, and cucumbers; slice cucumbers into thin rounds and strawberries into halves or quarters; keep grapes on stems and dry all well.
- Arrange the board by placing small bowls for dips, nuts, and olives first, then add cheese clusters, followed by meats, fruits, and finally crackers and crunchy snacks, varying shapes and heights for visual interest.
- Add garnishes like fresh herbs and edible flowers; drizzle honey over cheese clusters or place fig jam near crackers; use toothpicks with colorful ends to hold folded meats or cheese cubes.
- Perform a final check for color balance and fill sparse spots with extra nuts, olives, or fruit clusters; avoid overcrowding to keep the board visually appealing and easy to navigate.
Notes
Prep cheeses and meats a day ahead and assemble just before serving for freshness. Keep knives sharp for clean slicing. Avoid overcrowding the board to maintain visual appeal and prevent crushed crackers or soggy fruit. Use natural ingredients to mimic school colors and customize dips or labels for a personal touch. Store leftovers separately in airtight containers; cheeses keep up to a week, meats 3-4 days, crackers at room temperature.
Nutrition
- Serving Size: Approximately 1/8th
- Calories: 350
- Sugar: 7
- Sodium: 450
- Fat: 25
- Saturated Fat: 8
- Carbohydrates: 15
- Fiber: 3
- Protein: 12
Keywords: charcuterie board, graduation party, school colors, easy appetizer, cheese board, party snacks, vibrant colors, crowd-pleaser


