“You’re telling me I don’t have to knead this dough for hours?” That’s exactly what I thought the first time I stumbled onto this easy no-knead sourdough bread recipe with open crumb. Honestly, I’d always been intimidated by sourdough—the whole process felt like some mystical craft reserved for baking gurus. But one late Sunday evening, after a long day and zero energy to fuss, I decided to give this hands-off method a shot. The kitchen smelled like warm, rustic comfort the next morning, and that open crumb—those big, airy holes—just blew me away.
What surprised me most was how forgiving the recipe was. I wasn’t measuring obsessively or perfecting every fold; instead, the dough did its own thing, slowly bubbling away as I went about other chores. This bread became my quiet weekend ritual, the kind of thing I could almost sleep through and still get a bakery-worthy loaf. It’s the kind of recipe that makes you realize sourdough isn’t some fancy, unattainable art; it’s just good, honest bread that anyone can make.
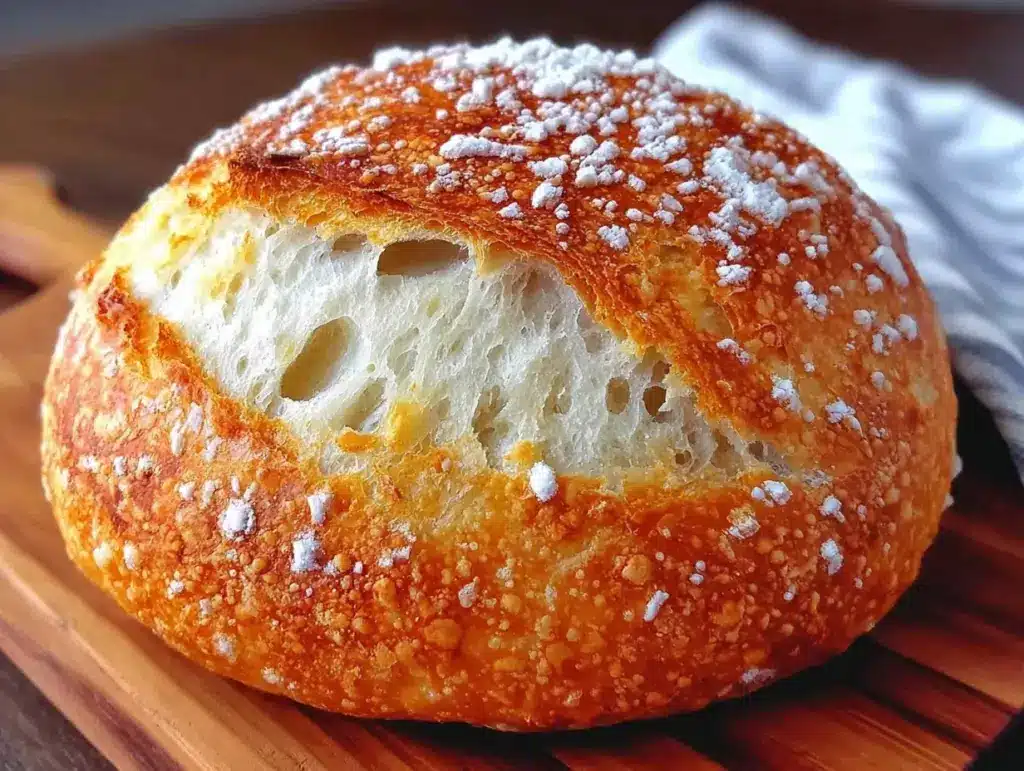
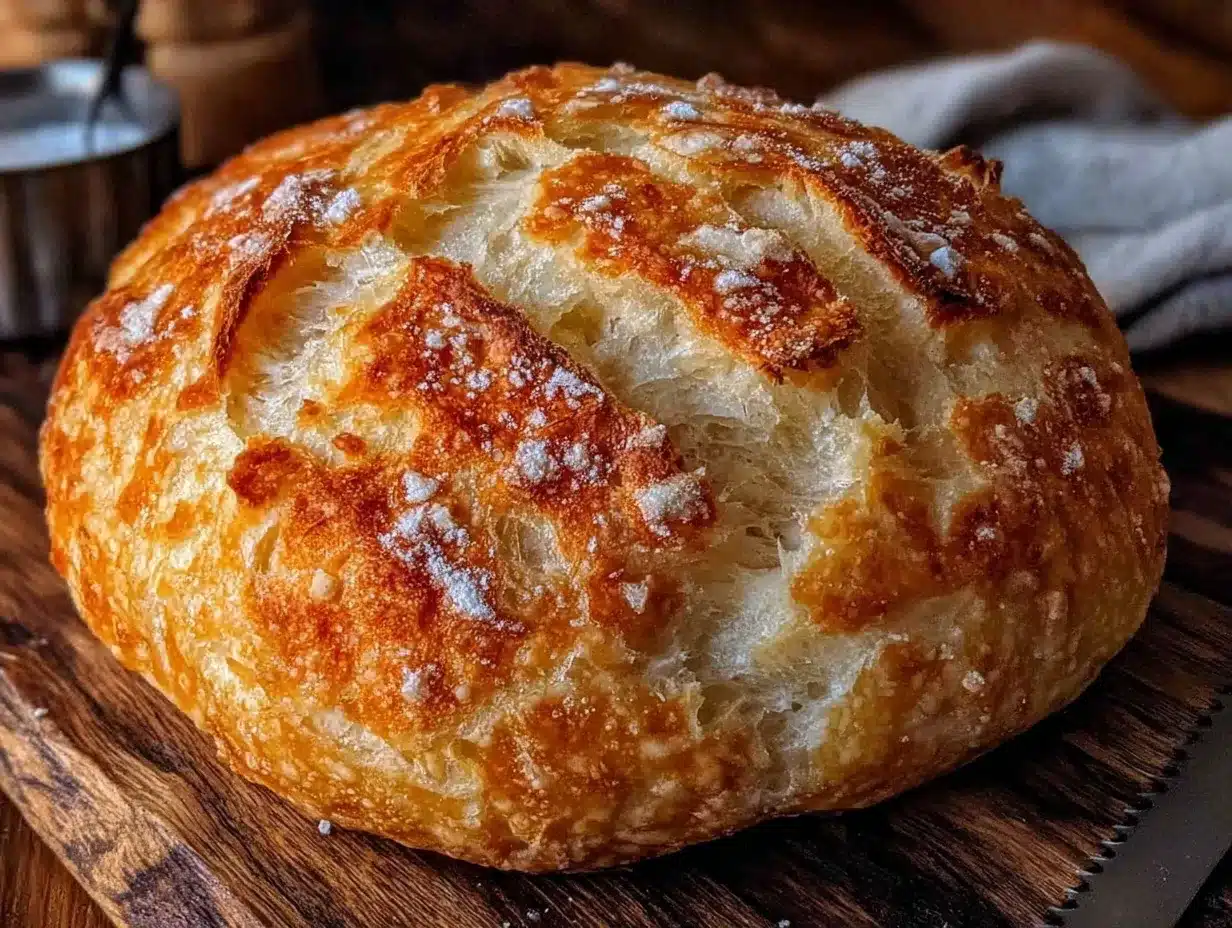
And here’s the kicker—the texture. The crust crisps up like it’s fresh from a stone oven, while the inside is soft, moist, and open like clouds. I’ve since made it multiple times, tweaking hydration here and there (more water for bigger holes!), and even my skeptical friends have asked for the recipe. This easy no-knead sourdough bread with open crumb is my go-to whenever I want homemade bread without the drama.
It’s not just bread; it’s that quiet moment of satisfaction in an otherwise busy week. And if you’re like me, juggling a million things but dreaming of that perfect loaf—this is it.
Why You’ll Love This Recipe
This easy no-knead sourdough bread recipe is a gem for beginners and bread lovers who want impressive results without hours of labor. I’ve tested and tweaked this recipe several times, and here’s why it’s a keeper:
- Quick & Easy: While sourdough needs time to ferment, the hands-on work is minimal—less than 15 minutes to mix and fold, perfect for busy schedules.
- Simple Ingredients: Only flour, water, salt, and your sourdough starter. No fancy additives or specialty flours required.
- Perfect for Beginners: No kneading or complicated shaping needed; just gentle folds and patience.
- Open Crumb Texture: The recipe is designed to deliver those coveted large air pockets—ideal for sandwiches or dipping into homemade soups.
- Crowd-Pleaser: Every time I bring this bread to a brunch or dinner, it disappears fast, often paired with a creamy dip or hearty stew.
- Authentic Flavor: That tangy sourdough taste you love, achieved naturally through fermentation and slow rising.
This recipe stands apart because it embraces patience but cuts out the intimidation. The secret is in the long fermentation and minimal handling, which lets the dough develop flavor and structure naturally. The open crumb is a direct result of generous hydration and gentle folding, not hours of kneading or fancy equipment.
What I really appreciate is how this bread feels like a small victory—you bake it yourself, and the reward is a loaf that tastes like it came from a cozy artisan bakery. If you’ve ever been hesitant about sourdough, this method will gently win you over.
What Ingredients You Will Need
This recipe uses simple, wholesome ingredients to deliver bold flavor and satisfying texture without the fuss. You’ll likely have most of these pantry staples on hand, and the ingredient list is very approachable.
- Bread Flour (500g / 4 cups): I recommend King Arthur or Bob’s Red Mill for reliable protein content that helps with structure. Bread flour is preferred for that chewy texture.
- Water (375g / 1 ½ cups, lukewarm): Use filtered or spring water if possible; chlorine can inhibit fermentation.
- Active Sourdough Starter (100g / ½ cup): Make sure your starter is bubbly and fed within the last 4-6 hours for best rise.
- Sea Salt (10g / 1 ½ tsp): Adds flavor and strengthens gluten—don’t skip it!
Optional but helpful:
- Rice Flour or Cornmeal (for dusting): Keeps the dough from sticking when transferring to the Dutch oven.
- Olive Oil (for greasing): To lightly oil your container or hands when handling dough.
If you want to experiment, whole wheat or rye flour can replace up to 20% of the bread flour for extra flavor complexity, but keep in mind it may affect hydration and texture. For gluten-free, this recipe isn’t suitable without major adjustments, but you can try variations like oat or spelt flour in other recipes.
Equipment Needed
- Large Mixing Bowl: A glass or plastic bowl works well for mixing and fermenting dough.
- Dutch Oven or Heavy Oven-Safe Pot with Lid: This traps steam and creates that crisp crust. I’ve used both cast iron and enameled versions. If you don’t have one, a baking stone with a pan of hot water can help.
- Dough Scraper or Spatula: Essential for folding and handling sticky dough without frustration.
- Kitchen Scale: For precise measurements—baking is a science, and accuracy makes a difference.
- Proofing Basket or Bowl Lined with a Towel: Helps shape the dough during the final rise. You can use a colander dusted with flour as a budget-friendly option.
- Oven Mitts: For safely handling the hot Dutch oven—trust me, you want thick ones.
Personal tip: I once tried shaping without a scraper and ended up with dough stuck everywhere—investing in one made things way less messy. Also, preheating your Dutch oven at least 30 minutes before baking really helps achieve that bakery crust.
Preparation Method
- Mix the Dough (10 minutes): In your large mixing bowl, combine 500g (4 cups) bread flour and 375g (1 ½ cups) lukewarm water. Stir with a spoon or your hand until no dry flour remains. The dough will be shaggy and sticky—that’s perfect. Cover the bowl with a towel or plastic wrap and let it rest for 45 minutes. This autolyse step hydrates the flour and kickstarts gluten development.
- Add Starter and Salt (5 minutes): Sprinkle in 10g (1 ½ tsp) sea salt and 100g (½ cup) active sourdough starter. Fold the dough gently using wet hands or a spatula until everything is fully incorporated. The dough will feel sticky but elastic. Cover again and let it rest for 30 minutes.
- Perform Stretch and Folds (15 minutes total): Every 30 minutes for the next 2 hours, wet your hands and gently stretch one side of the dough upwards, then fold it over the center. Rotate the bowl and repeat 4 times per session. This strengthens gluten and traps air bubbles, essential for the open crumb. After the last fold, cover and let the dough ferment at room temperature for 3-4 hours, or until it has nearly doubled in size and shows bubbles on the surface.
- Shape the Dough (5 minutes): Lightly flour your work surface and turn the dough out gently. Shape it into a round loaf by folding edges into the center, then flip it seam-side down. Place it into a floured proofing basket or bowl lined with a floured towel. Cover and refrigerate overnight or for at least 8 hours. This cold proof develops flavor and tightens the crumb structure.
- Preheat Oven and Dutch Oven (30 minutes): Place your Dutch oven with lid inside the oven and preheat to 450°F (232°C). Preheating ensures the pot is scorching hot, which helps the bread rise rapidly and crisp up.
- Bake the Bread (45 minutes): Carefully remove the Dutch oven, sprinkle the bottom with rice flour or cornmeal, and gently flip the dough onto it (seam side up). Score the top with a sharp knife or razor blade to help expansion. Cover with the lid and bake for 30 minutes. Remove the lid and bake an additional 15 minutes to brown the crust beautifully.
- Cool Before Slicing (at least 1 hour): Transfer the loaf to a wire rack and let it cool completely. This step is crucial as the crumb sets during cooling. Cutting too early leads to gummy bread.
Pro tip: If your dough feels too sticky to handle during shaping, dust hands and surface lightly but avoid adding too much flour to keep hydration high for that open crumb.
Cooking Tips & Techniques
Getting that perfect open crumb and crust can be tricky, but these tips have saved me more than once:
- Hydration is Key: Higher water content (around 75%) helps create those airy holes. If your dough feels too stiff, add a tablespoon more water next time.
- Be Gentle With Folding: The stretch and fold method traps air without deflating the dough. Don’t rush or knead hard.
- Watch Fermentation Times: Room temperature affects rise time. If your kitchen is cool, expect longer fermentation. Over-proofing can cause collapse, under-proofing leads to dense crumb.
- Use a Sharp Scoring Tool: A lame or razor blade yields cleaner cuts than a regular knife, allowing better oven spring.
- Preheat Dutch Oven Fully: This mimics a professional steam oven. I learned the hard way that skipping this step leads to flat loaves.
- Patience on Cooling: Trust me, it’s worth waiting for the bread to cool before slicing. The crumb firms up and the flavor deepens.
Once, I forgot to cover my dough during the bulk fermentation, and it formed a tough skin—lesson learned to always keep it covered. Also, I often multitask during the long rises, which makes the process feel less like babysitting dough and more like a part of my day.
Variations & Adaptations
This easy no-knead sourdough bread is versatile and lends itself well to tweaks:
- Whole Wheat Blend: Replace up to 150g (1 ¼ cups) of bread flour with whole wheat flour for a nuttier flavor and denser crumb.
- Seeded Loaf: Add 50g (½ cup) mixed seeds like sunflower, flax, and sesame during the initial mix for extra texture and nutrition.
- Herb Infusion: Fold in chopped fresh rosemary or thyme with the salt to add a fragrant twist, perfect alongside soups like a creamy loaded baked potato soup.
- Alternative Baking Vessels: If you don’t have a Dutch oven, bake on a preheated baking stone and place a tray of boiling water in the oven to create steam.
- Gluten-Free Adaptation: This recipe isn’t naturally gluten-free, but you might try a separate sourdough gluten-free starter and flour mix—expect a different texture.
One of my favorite personal tweaks is adding a tablespoon of honey to the dough for a touch of sweetness, especially when serving with savory dishes like chicken with basil pesto. It balances the tang beautifully.
Serving & Storage Suggestions
Serve this sourdough warm or at room temperature. It pairs wonderfully with butter, olive oil, or your favorite spreads. It’s also fantastic alongside hearty soups or salads like a fresh Lebanese fattoush salad with crunchy pita chips.
To store, wrap cooled bread loosely in a clean kitchen towel or place in a bread box to maintain crust crispness. For longer storage, slice and freeze in resealable bags. Toast slices directly from the freezer for a quick, fresh taste.
Reheating in a 350°F (175°C) oven for 10 minutes helps crisp up the crust again. Over time, the flavor develops deeper, especially if you slice and toast the bread the next day.
Nutritional Information & Benefits
A typical serving (1 slice, about 50g) of this sourdough bread provides approximately:
| Nutrient | Amount |
|---|---|
| Calories | 130 |
| Carbohydrates | 27g |
| Protein | 4g |
| Fat | 0.5g |
| Fiber | 1.5g |
Sourdough fermentation enhances digestibility and may increase nutrient availability, making it a better choice than commercial breads. The natural lactic acid bacteria also help reduce phytic acid, boosting mineral absorption.
This recipe is gluten-containing due to wheat flour and includes no added sugars or preservatives. For those seeking a wholesome, minimally processed bread with a satisfying chew and tang, this is a great fit.
Conclusion
Making your own easy no-knead sourdough bread with open crumb isn’t just about baking—it’s about reclaiming a simple pleasure that feels both timeless and satisfying. This recipe has become a quiet favorite for me, the kind of loaf that turns ordinary meals into something special with minimal fuss. Whether you’re a novice or someone who’s tried and failed at sourdough before, this approach will help you gain confidence and enjoy the process.
Feel free to tweak hydration, flour blends, or add herbs to make it truly yours—there’s no one perfect sourdough, only your perfect loaf. If you’ve enjoyed recipes like my creamy Chick-fil-A sauce or the loaded baked potato soup, you know I love comforting, homemade flavors that come together easily. This bread fits right in.
Happy baking, and may your kitchen smell forever like fresh sourdough!
FAQs About Easy No-Knead Sourdough Bread
How active should my sourdough starter be for this recipe?
Your starter should be bubbly and have doubled in volume within 4-6 hours of feeding to provide enough yeast activity for proper fermentation.
Can I use all-purpose flour instead of bread flour?
You can, but bread flour’s higher protein content helps develop gluten better, resulting in a chewier texture and better rise.
What if my dough feels too sticky to handle?
Lightly flour your hands and surface to manage stickiness, but avoid adding too much flour or the crumb may become dense.
How long can I refrigerate the dough before baking?
Up to 24 hours is fine; longer cold proofing deepens flavor but avoid exceeding 36 hours to prevent over-fermentation.
Why doesn’t my bread have large holes in the crumb?
Try increasing hydration slightly, be gentle during folding to keep air bubbles intact, and ensure proper fermentation time for gas development.
Pin This Recipe!

Easy No-Knead Sourdough Bread Recipe with Open Crumb for Beginners

An easy no-knead sourdough bread recipe perfect for beginners, delivering a bakery-quality loaf with an open crumb and crispy crust using minimal hands-on time.
- Prep Time: 15 minutes
- Cook Time: 45 minutes
- Total Time: Overnight (about 12-16 hours including fermentation and proofing)
- Yield: 1 loaf (about 12-16 slices) 1x
- Category: Bread
- Cuisine: American
Ingredients
- 500g (4 cups) bread flour
- 375g (1 ½ cups) lukewarm water
- 100g (½ cup) active sourdough starter
- 10g (1 ½ tsp) sea salt
- Rice flour or cornmeal (for dusting, optional)
- Olive oil (for greasing, optional)
Instructions
- Mix the dough: In a large mixing bowl, combine 500g (4 cups) bread flour and 375g (1 ½ cups) lukewarm water. Stir until no dry flour remains. Cover and rest for 45 minutes.
- Add starter and salt: Sprinkle in 10g (1 ½ tsp) sea salt and 100g (½ cup) active sourdough starter. Fold gently until incorporated. Cover and rest for 30 minutes.
- Perform stretch and folds: Every 30 minutes for 2 hours, stretch and fold the dough 4 times per session. After the last fold, ferment at room temperature for 3-4 hours until nearly doubled and bubbly.
- Shape the dough: Lightly flour surface, shape into a round loaf, place seam-side down in a floured proofing basket or bowl lined with a towel. Cover and refrigerate overnight or at least 8 hours.
- Preheat oven and Dutch oven: Place Dutch oven with lid inside oven and preheat to 450°F (232°C) for 30 minutes.
- Bake the bread: Remove Dutch oven, sprinkle bottom with rice flour or cornmeal, flip dough seam side up onto it, score top. Cover and bake 30 minutes, then remove lid and bake 15 more minutes.
- Cool before slicing: Transfer loaf to wire rack and cool completely for at least 1 hour before slicing.
Notes
Preheat Dutch oven for at least 30 minutes before baking to achieve a crispy crust. Use a sharp scoring tool for better oven spring. Cool bread completely before slicing to avoid gummy texture. If dough is too sticky, lightly dust hands and surface but avoid adding too much flour to maintain hydration and open crumb.
Nutrition
- Serving Size: 1 slice (about 50g)
- Calories: 130
- Fat: 0.5
- Carbohydrates: 27
- Fiber: 1.5
- Protein: 4
Keywords: no-knead sourdough bread, easy sourdough recipe, open crumb bread, beginner sourdough, artisan bread, homemade bread


