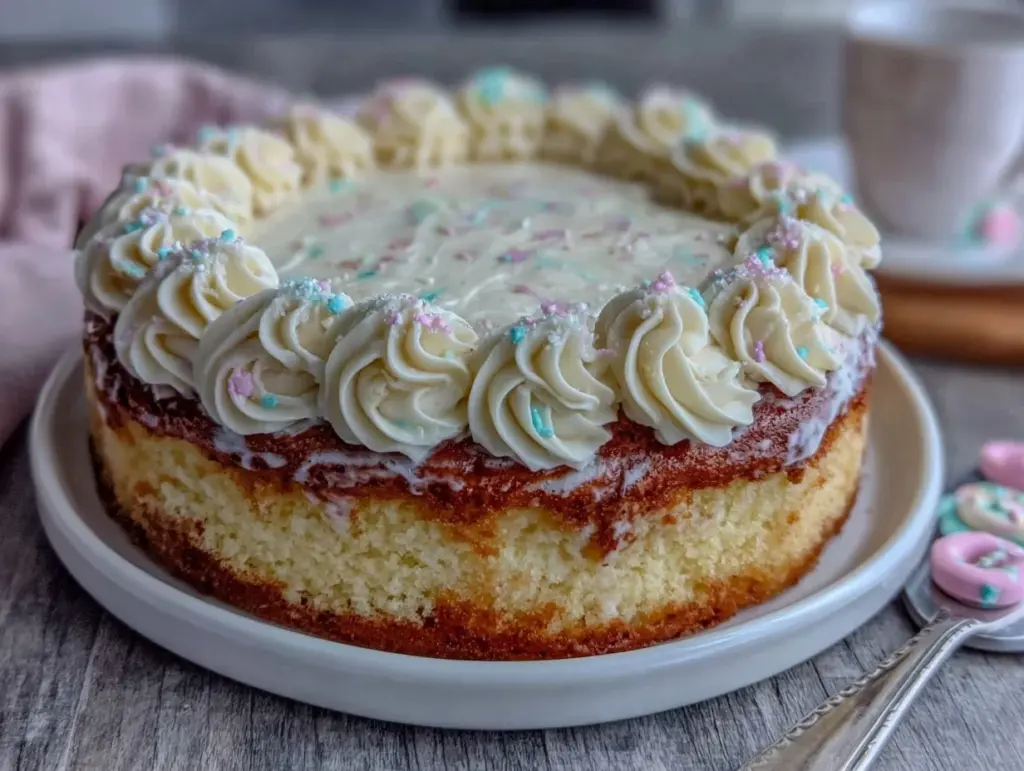
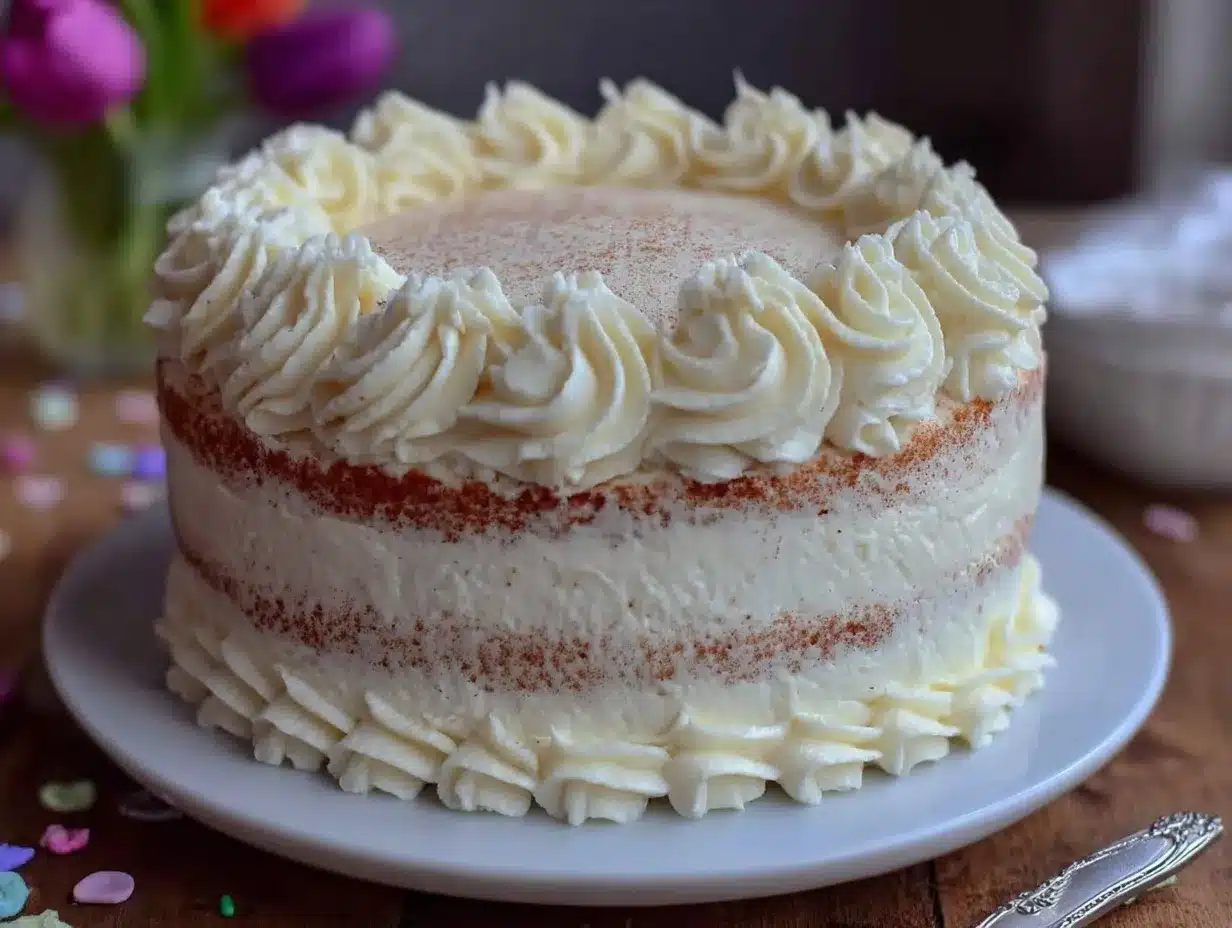
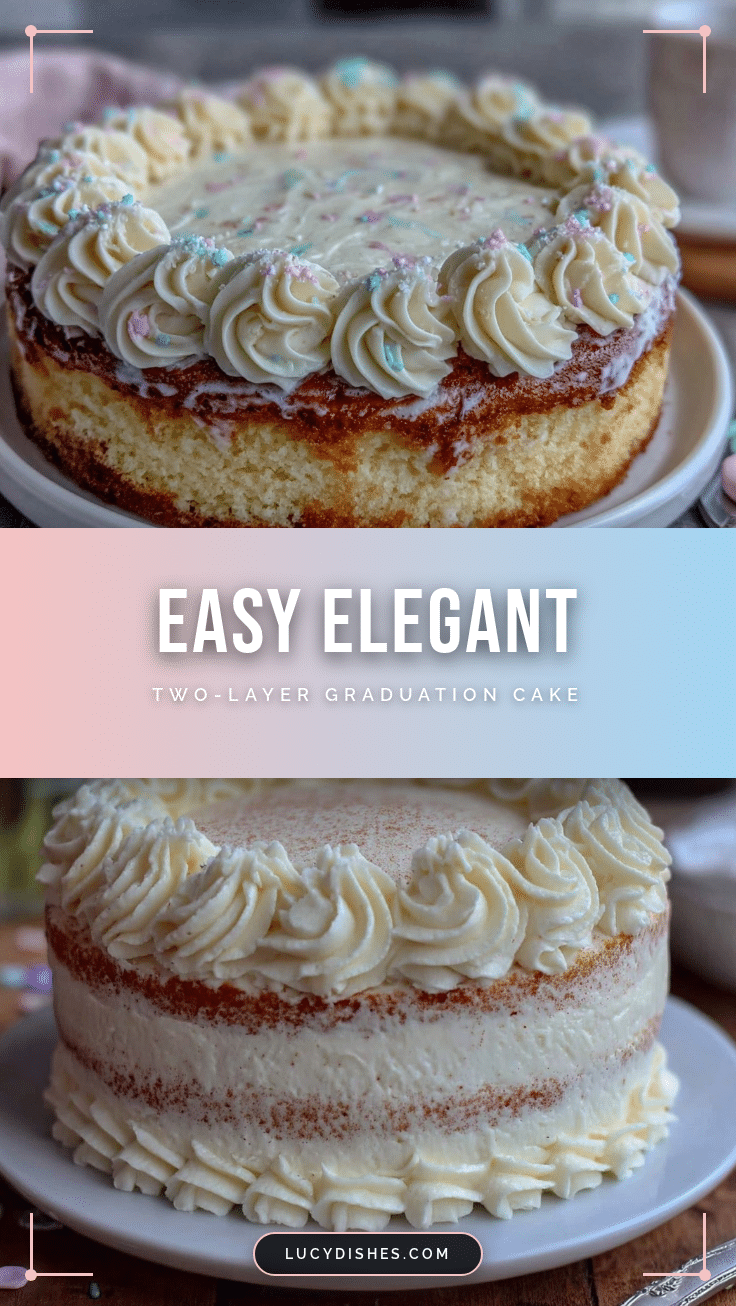
“Did you really make this yourself?” That question caught me off guard just as I was wiping the last crumb off my hands. The cake had been sitting quietly on the counter, all two layers stacked with smooth buttercream piping, looking like something you’d snag from a fancy bakery window. But nope, this easy elegant two-layer graduation cake was my handiwork — and honestly, it came together faster than I expected.
It all started on a chaotic afternoon when I realized the graduation party was in less than 24 hours and the usual cake order fell through. I was scrambling, half convinced I’d need to run to the store for a last-minute replacement. Instead, I found a simple recipe tucked away in my notes that promised elegance without fuss. Honestly, I was skeptical: how could a two-layer cake with buttercream piping be “easy” and still look this good?
Turns out, sometimes the best recipes come from a pinch of panic and a dash of necessity. The batter whipped up in under 15 minutes, and while my piping skills aren’t professional, the result felt personal and festive. Guests kept coming back for slices, and that quiet moment when I realized this cake was the highlight of the party? That’s what made it stick with me. It’s the kind of recipe that lets you pull off something special without the stress or hours in the kitchen.
So, if you’re after a graduation cake that’s both simple and impressive — without the bakery price or drama — this is the one you’ll want to trust for your next celebration.
Why You’ll Love This Recipe
Having baked this easy elegant two-layer graduation cake a handful of times now, I can say it’s become my go-to for special occasions that need a touch of class and a whole lot of ease. Here’s why it’s a winner:
- Quick & Easy: From mixing to decorating, you can have this cake ready in about 2 hours, perfect when the clock is ticking.
- Simple Ingredients: No hunting for fancy items here; basic pantry staples and a few fridge essentials are all you need.
- Perfect for Graduations & Celebrations: Its elegant look works beautifully for milestone parties, but it’s casual enough for any heartfelt gathering.
- Crowd-Pleaser: Whether it’s kids or adults, the classic vanilla sponge paired with creamy buttercream always gets rave reviews.
- Unbelievably Delicious: The texture is light, fluffy, and moist — the buttercream adds just the right amount of sweet richness without overwhelming.
What sets this cake apart is the balance between simplicity and presentation. The buttercream piping isn’t just decorative fluff — it’s a technique that gives the cake a polished finish without needing professional skills. I love that you don’t have to fuss over complex fondant or multiple layers to make a statement. Plus, this recipe invites you to make it your own with easy flavor swaps or color themes.
Honestly, after baking this a few times, I find myself reaching for it when I want something that feels like a special occasion but doesn’t take over the day. It’s the kind of cake that lets you enjoy the party, not just the baking.
What Ingredients You Will Need
This recipe uses simple, wholesome ingredients to deliver a bold flavor and satisfying texture without the fuss. Most of these are pantry staples or basic fridge items, making this cake easy to pull together anytime. Here’s what you’ll need:
- For the Cake Batter:
- All-purpose flour – 2 ½ cups (320g), sifted for lightness
- Baking powder – 2 ½ teaspoons (10g), to make it rise beautifully
- Salt – ½ teaspoon (3g), balances sweetness
- Unsalted butter – 1 cup (227g), softened (I recommend Kerrygold for that creamy texture)
- Granulated sugar – 1 ¾ cups (350g), for just the right sweetness
- Large eggs – 4, room temperature (helps with smooth batter)
- Pure vanilla extract – 2 teaspoons (10ml), for classic flavor
- Whole milk – 1 cup (240ml), room temperature (can substitute with almond milk for dairy-free)
- For the Buttercream Piping:
- Unsalted butter – 1 cup (227g), softened
- Powdered sugar – 4 cups (480g), sifted for smoothness
- Heavy cream – 2 tablespoons (30ml), adds creaminess
- Pure vanilla extract – 1 teaspoon (5ml)
- Pinch of salt – to balance sweetness
- Optional: food coloring gel for custom colors
For best results, I suggest using fresh, high-quality butter since it’s the star of the buttercream. Also, if you want a gluten-free option, try swapping the all-purpose flour with a gluten-free blend—just keep in mind the texture will be slightly different but still delicious.
Equipment Needed
Here’s a list of kitchen tools that make this cake a breeze to assemble and decorate. No fancy gadgets required, but a few basics help:
- Two 8-inch (20 cm) round cake pans – I find non-stick pans work best for easy release.
- Mixing bowls – a large one for batter and a medium one for buttercream.
- Electric hand mixer or stand mixer – speeds up creaming the butter and sugar and whipping the buttercream.
- Rubber spatula – perfect for folding in dry ingredients gently.
- Offset spatula – essential for spreading buttercream smoothly between layers and on the sides.
- Piping bags and tips – I prefer a medium star tip for classic buttercream piping, but a round tip works well too.
- Cooling racks – to let the cakes rest before frosting.
If you don’t have a stand mixer, no worries—an electric hand mixer does the job just fine. For piping, if you’re new to it, you can even use a zip-top bag with a small corner snipped off as a budget-friendly alternative.
Preparation Method
- Preheat and Prepare Pans: Preheat your oven to 350°F (175°C). Grease two 8-inch round cake pans and line the bottoms with parchment paper for easy release. This step prevents sticking and ensures clean edges.
- Mix Dry Ingredients: In a medium bowl, sift together 2 ½ cups (320g) all-purpose flour, 2 ½ teaspoons (10g) baking powder, and ½ teaspoon (3g) salt. Set aside. This helps keep the cake light and evenly risen.
- Cream Butter & Sugar: In a large bowl, beat 1 cup (227g) softened unsalted butter with 1 ¾ cups (350g) granulated sugar using a mixer on medium speed. Beat for about 4-5 minutes until light and fluffy. You’ll notice the color lighten and texture become creamy—this is key for a tender crumb.
- Add Eggs and Vanilla: Add 4 large eggs one at a time, mixing well after each addition. Then stir in 2 teaspoons (10ml) vanilla extract. The batter might look slightly curdled at this point, but that’s normal.
- Alternate Adding Dry Ingredients and Milk: Lower mixer speed to low. Add the dry ingredients and 1 cup (240ml) whole milk alternately in three parts, starting and ending with dry ingredients. Mix just until combined—overmixing can make the cake dense.
- Divide and Bake: Evenly pour the batter into the prepared pans. Tap the pans gently on the counter to release air bubbles. Bake for 30-35 minutes or until a toothpick inserted in the center comes out clean. Ovens vary, so start checking around 30 minutes.
- Cool Completely: Let the cakes cool in the pans for 15 minutes, then run a knife around the edges and invert onto cooling racks. Peel off parchment paper and cool fully before frosting.
- Make Buttercream: Beat 1 cup (227g) softened unsalted butter on medium speed until creamy (about 2 minutes). Gradually add 4 cups (480g) powdered sugar, mixing on low speed to avoid a sugar cloud. Add 2 tablespoons (30ml) heavy cream, 1 teaspoon (5ml) vanilla, and a pinch of salt. Beat on high for 3-4 minutes until fluffy. Adjust consistency with more cream or powdered sugar if needed.
- Assemble Cake: Place one cake layer on a serving plate. Spread a thick, even layer of buttercream on top with an offset spatula. Place the second layer on top and cover the entire cake with a thin crumb coat. Chill for 15-20 minutes to set.
- Pipe Buttercream: Load buttercream into a piping bag fitted with your chosen tip. Pipe swirls, rosettes, or borders around the cake edges. Don’t stress about perfection—each swirl adds charm and personality.
Pro tip: If your buttercream gets too soft while piping, pop the piping bag in the fridge for 10 minutes. Cold buttercream holds shape better but can be smoothed slightly once back at room temp.
Cooking Tips & Techniques
When it comes to making this easy elegant two-layer graduation cake, a few insider tricks make all the difference. First, always use room temperature eggs and butter. It helps the batter come together smoothly and traps air for a lighter texture.
One trap I fell into early on was overmixing the batter once the flour went in. It’s tempting to mix until everything looks perfect, but that can toughen the cake. Mixing just until the flour disappears keeps it tender.
Another tip: don’t skip sifting the powdered sugar for the buttercream. It prevents lumps and gives you that silky smooth finish that’s easier to pipe. Speaking of piping, if you’re new to it, practice a few swirls on parchment paper before decorating your cake. It’s surprisingly relaxing and helps build confidence.
Timing-wise, chill the frosted cake for at least 15 minutes before piping. It sets the crumb coat, so your decorations stay neat. I usually multitask here—prepping party drinks or tidying up the kitchen.
Lastly, if you want to speed things up, you can bake the layers a day ahead and wrap them tightly in plastic wrap. Just bring them to room temperature before frosting.
Variations & Adaptations
This cake recipe is a fantastic base to customize your graduation celebration. Here are a few ways to make it your own:
- Flavor Swap: Add ¼ cup (25g) cocoa powder to the flour for a chocolate version. Or fold in lemon zest and substitute milk with buttermilk for a tangy twist.
- Dietary Adjustments: Use almond flour for a gluten-free version, adjusting liquids slightly. For dairy-free, swap butter and cream with plant-based alternatives like vegan butter and coconut cream.
- Colorful Buttercream: Tint your frosting with gel food coloring to match school colors or party themes. I once made a blue and gold combo that was a real showstopper.
- Decorative Toppings: Fresh flowers, edible gold leaf, or sprinkles add a personal touch. You can also add piped lettering with a small round tip for a congratulatory message.
- Alternative Piping Styles: Instead of rosettes, try shell borders or simple dots for a different look. The chick-fil-a sauce recipe taught me that simple can be stunning with the right technique.
Serving & Storage Suggestions
This cake shines best served at room temperature, allowing the buttercream to be creamy and the sponge tender. I usually slice it about 30 minutes before serving, giving the flavors time to blossom.
Pair it with fresh berries or a light fruit salad to balance the richness. A cup of coffee or sparkling punch makes a festive combo. For the party, why not set up a dessert table with other favorites like my fresh Lebanese fattoush salad to add something crisp and refreshing alongside?
To store, tightly cover leftover cake with plastic wrap or keep in an airtight container in the fridge for up to 4 days. Buttercream can firm up when chilled, so bring the cake to room temperature before serving again. If freezing, wrap the cake layers separately and freeze for up to 2 months; thaw overnight in the fridge before assembling.
Nutritional Information & Benefits
While this easy elegant two-layer graduation cake is definitely a treat, it’s made with simple ingredients and free from artificial additives. Each slice (assuming 12 servings) has approximately 350 calories, with 18g fat, 45g carbs, and 4g protein.
Using real butter and whole milk adds richness but also provides vitamin A and calcium. The vanilla extract is pure and free from synthetic flavors, which I always prefer for a cleaner taste.
For those watching dietary needs, this recipe is adaptable for gluten-free and dairy-free diets as discussed. I find it strikes a nice balance between indulgence and homemade goodness, perfect for celebrating milestones without guilt.
Conclusion
This easy elegant two-layer graduation cake with buttercream piping has become my trusty solution when celebrations call for something beautiful yet approachable. It’s proof you don’t need fancy skills or hours in the kitchen to impress a crowd.
Feel free to tweak the flavors, colors, or decoration style—it’s your moment to shine as much as the graduate’s. I keep coming back to this recipe because it’s flexible, reliable, and delicious every time.
If you give it a try, I’d love to hear how you make it your own. Leave a comment or share your versions so we can keep the inspiration going. Here’s to creating sweet memories without the stress!
FAQs About the Easy Elegant Two-Layer Graduation Cake
Can I make this cake ahead of time?
Absolutely! You can bake the layers up to two days in advance and wrap them tightly in plastic wrap. Store frosted cakes in the fridge and bring to room temperature before serving.
What if I don’t have a piping bag or tips?
No problem! Use a sturdy zip-top plastic bag and snip a small corner off to pipe. It’s a simple hack that works well for buttercream decorations.
Can I substitute butter with oil in this recipe?
Butter gives the cake richness and helps with structure, so I don’t recommend swapping it for oil here. For a dairy-free option, try vegan butter instead.
How do I fix buttercream that’s too runny?
Pop it in the fridge for 10-15 minutes to firm up, then whip again briefly. If it’s still soft, add a bit more powdered sugar to thicken.
What’s the best way to get smooth sides on my cake?
Apply a thin crumb coat of buttercream and chill it to set before adding your final layer. Use an offset spatula or bench scraper to smooth the sides gently.
Pin This Recipe!
Easy Elegant Two-Layer Graduation Cake Recipe with Buttercream Piping Tutorial
A simple yet elegant two-layer vanilla cake with creamy buttercream piping, perfect for graduation celebrations and special occasions. This recipe is quick, easy, and uses basic pantry ingredients.
- Prep Time: 20 minutes
- Cook Time: 35 minutes
- Total Time: 2 hours
- Yield: 12 servings 1x
- Category: Dessert
- Cuisine: American
Ingredients
- 2 ½ cups (320g) all-purpose flour, sifted
- 2 ½ teaspoons (10g) baking powder
- ½ teaspoon (3g) salt
- 1 cup (227g) unsalted butter, softened
- 1 ¾ cups (350g) granulated sugar
- 4 large eggs, room temperature
- 2 teaspoons (10ml) pure vanilla extract
- 1 cup (240ml) whole milk, room temperature
- 1 cup (227g) unsalted butter, softened (for buttercream)
- 4 cups (480g) powdered sugar, sifted
- 2 tablespoons (30ml) heavy cream
- 1 teaspoon (5ml) pure vanilla extract
- Pinch of salt
- Optional: food coloring gel for custom colors
Instructions
- Preheat oven to 350°F (175°C). Grease two 8-inch round cake pans and line bottoms with parchment paper.
- In a medium bowl, sift together flour, baking powder, and salt. Set aside.
- In a large bowl, beat softened butter and granulated sugar on medium speed for 4-5 minutes until light and fluffy.
- Add eggs one at a time, mixing well after each addition. Stir in vanilla extract.
- On low speed, alternately add dry ingredients and milk in three parts, starting and ending with dry ingredients. Mix just until combined.
- Divide batter evenly between prepared pans. Tap pans gently to release air bubbles.
- Bake for 30-35 minutes or until a toothpick inserted in the center comes out clean. Cool in pans for 15 minutes, then invert onto cooling racks and cool completely.
- For buttercream, beat softened butter on medium speed until creamy (about 2 minutes). Gradually add powdered sugar on low speed to avoid dust cloud.
- Add heavy cream, vanilla extract, and salt. Beat on high for 3-4 minutes until fluffy. Adjust consistency with more cream or powdered sugar if needed.
- Place one cake layer on serving plate. Spread thick, even layer of buttercream on top. Place second layer on top and cover entire cake with thin crumb coat. Chill for 15-20 minutes.
- Load buttercream into piping bag fitted with desired tip. Pipe swirls, rosettes, or borders around cake edges.
Notes
Use room temperature eggs and butter for best texture. Do not overmix batter after adding flour to keep cake tender. Sift powdered sugar for smooth buttercream. Chill cake after crumb coat before piping. If buttercream softens while piping, refrigerate piping bag for 10 minutes. Cake layers can be baked a day ahead and wrapped tightly.
Nutrition
- Serving Size: 1 slice (1/12 of cak
- Calories: 350
- Fat: 18
- Carbohydrates: 45
- Protein: 4
Keywords: graduation cake, two-layer cake, buttercream piping, vanilla cake, easy cake recipe, celebration cake, party dessert


