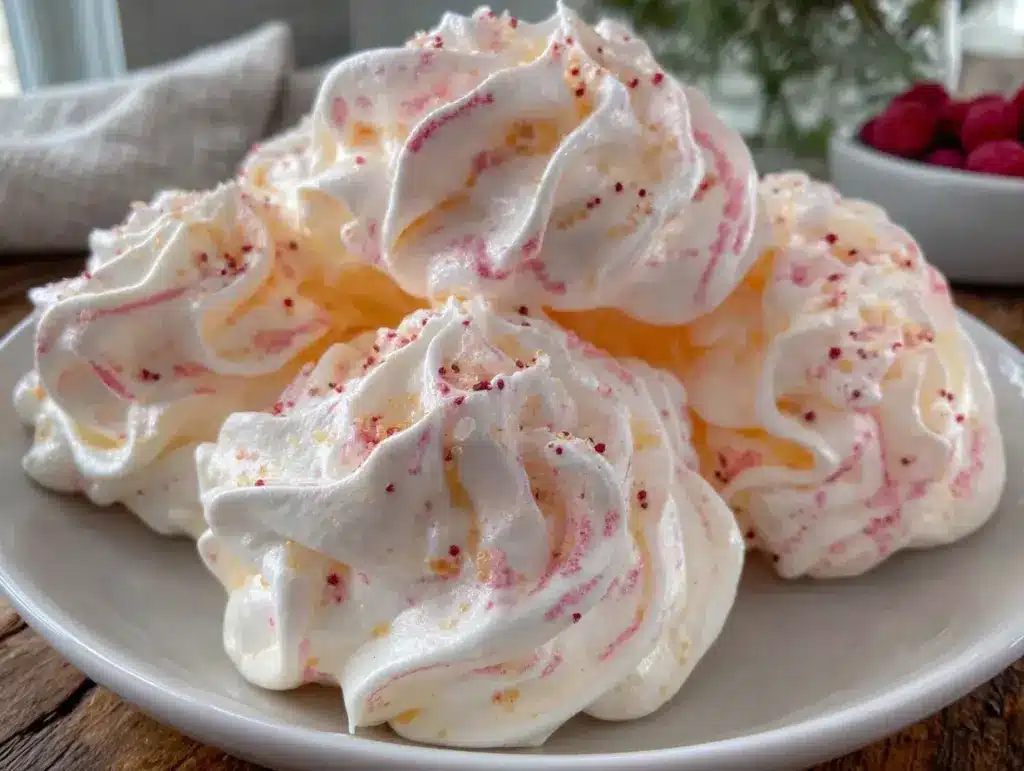
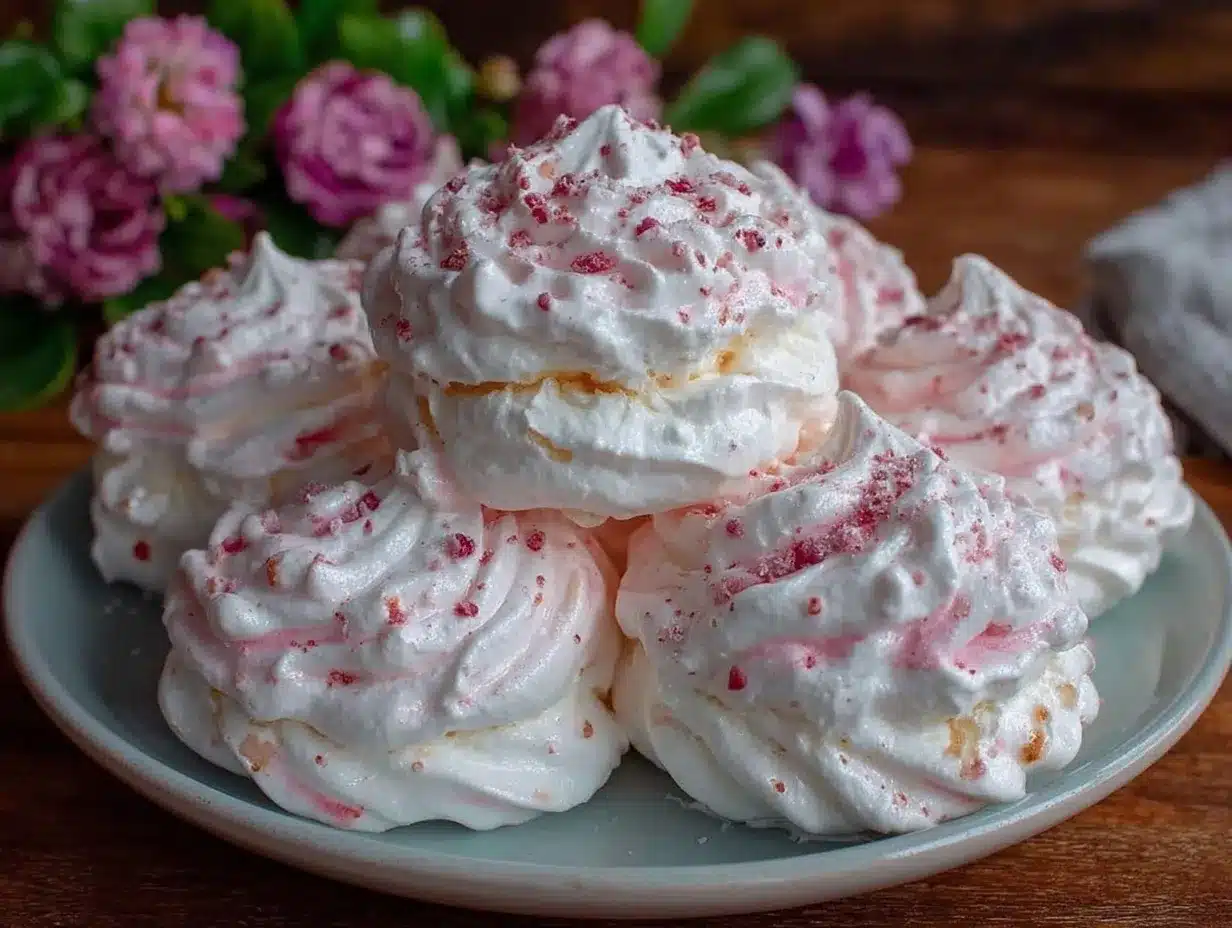
Let me tell you, the scent of sweet vanilla and delicate sugar caramelizing as these tender pink meringues bake is enough to make anyone’s mouth water. The first time I made this Tender Pink Meringue Delight, I was instantly hooked—the kind of moment where you pause, take a deep breath, and just smile because you know you’re onto something truly special. It was years ago, on a rainy weekend when I was knee-high to a grasshopper, helping grandma in her cozy kitchen. She swore by this recipe, passed down from a friend who always brought them to potlucks, and I wish I’d discovered it even sooner.
Honestly, my family couldn’t stop sneaking these off the cooling rack (and I can’t really blame them). The delicate pink hue makes it perfect for brightening up your Pinterest cookie board or serving as a sweet treat for your kids’ birthday parties. Let’s face it, these aren’t your ordinary meringues—they’re dangerously easy to whip up and provide pure, nostalgic comfort in every bite.
After testing this recipe multiple times (in the name of research, of course), it’s become a staple for family gatherings, gifting, and those moments when you just need a little something sweet that feels like a warm hug. Trust me, you’re going to want to bookmark this one.
Why You’ll Love This Tender Pink Meringue Delight Recipe
From my years of baking and tasting, this recipe stands out for several reasons, and I’m excited to share why it’s one you’ll keep coming back to:
- Quick & Easy: Whips together in under 20 minutes, perfect for those last-minute dessert cravings or a spontaneous tea time treat.
- Simple Ingredients: No fancy grocery trips needed; you probably have everything in your pantry already.
- Perfect for Any Occasion: Whether it’s a chic brunch, a festive gathering, or a cozy afternoon snack, this meringue fits right in.
- Crowd-Pleaser: Kids and adults alike rave about its melt-in-your-mouth, airy texture and subtle sweetness.
- Unbelievably Delicious: The tender, light-as-air bite combined with the soft pink color makes it feel like a little celebration in every mouthful.
What really sets this recipe apart is the careful balance of sweetness and texture. I use a gentle folding technique that keeps the meringue light and airy without any risk of collapsing. Plus, a tiny splash of cream of tartar helps stabilize the egg whites, making these meringues less prone to cracking or weeping. This isn’t just another meringue recipe—it’s the best version you’ll find, made with love and a few secret tweaks learned through trial and error.
Eating one of these treats feels like closing your eyes after the first bite, savoring a moment of pure joy. It’s comfort food with a delicate twist, perfect for impressing guests without breaking a sweat or turning your kitchen upside down.
What Ingredients You Will Need
This Tender Pink Meringue Delight uses simple, wholesome ingredients to deliver bold flavor and that signature melt-in-your-mouth texture without the fuss. Most of these are pantry staples, and substitutions are easy if you need them.
- Egg Whites (4 large, room temperature) – The essential base for any meringue, room temperature helps whip up fluffier peaks.
- Granulated Sugar (1 cup / 200 g) – Provides sweetness and structure; I recommend fine sugar for best dissolving.
- Cream of Tartar (1/4 teaspoon) – Helps stabilize the egg whites for a glossy, firm meringue.
- Vanilla Extract (1 teaspoon) – Adds a warm, familiar flavor that complements the delicate sweetness.
- Pink Food Coloring (a few drops) – Use gel or liquid food coloring to get a soft pink hue; adjust to your preference.
- Optional: A pinch of Salt – To balance sweetness and enhance flavor.
Ingredient Tips: For the egg whites, I like to use organic or free-range eggs for better flavor and stability. If you want a natural color twist, beet juice powder can substitute the pink food coloring for a subtle tint. Looking for a sugar alternative? Fine caster sugar works just as well, but avoid coarse sugar or powdered sugar—they can affect texture.
Equipment Needed
- Electric Mixer or Stand Mixer: Essential for whipping egg whites to stiff peaks. I’ve tried hand whisks, but it’s honestly a workout and less consistent.
- Mixing Bowl: Preferably glass or metal—avoid plastic as it can hold grease, which prevents egg whites from whipping properly.
- Baking Sheet: A rimmed cookie sheet works best to hold the meringues in place during baking.
- Parchment Paper or Silicone Baking Mat: To prevent sticking and make cleanup a breeze.
- Spatula or Spoon: For gentle folding of ingredients.
- Cooling Rack: Allows meringues to cool evenly without getting soggy.
For budget-conscious bakers, hand mixers do the job fine, but a stand mixer saves your arms and time. Maintenance tip: Keep your mixing bowl and beaters squeaky clean and dry for best results—any grease sabotages the meringue’s rise.
Preparation Method
- Preheat your oven to 225°F (110°C). Line a baking sheet with parchment paper or a silicone mat. This low temperature is key to drying out the meringues gently, keeping them tender and airy.
- Separate the egg whites carefully, ensuring no yolk gets in. At room temperature, they whip more easily. Beat the egg whites on medium speed until foamy (about 1-2 minutes), then add the cream of tartar and a pinch of salt to stabilize.
- Gradually add the sugar, one tablespoon at a time, while whipping on high speed. This slow addition allows the sugar to dissolve properly and the mixture to become glossy and stiff. This process should take about 5-7 minutes. You’ll know it’s ready when stiff peaks form and the mixture looks shiny and smooth.
- Gently fold in vanilla extract and pink food coloring with a spatula. Be careful not to deflate the egg whites—that tender pink color will make your meringues irresistible!
- Pipe or spoon the meringue onto the baking sheet in small, round dollops or whimsical shapes, about 1.5 inches (4 cm) wide. Keep them evenly spaced since they won’t spread much.
- Bake at 225°F (110°C) for 60-70 minutes. The meringues should be crisp on the outside yet still soft and tender inside. Avoid opening the oven door during baking to prevent cracks.
- Turn off the oven and leave the meringues inside for another 30 minutes to dry out without browning. This step locks in that light, airy texture and helps prevent sticky bottoms.
- Transfer to a cooling rack and let cool completely before storing or serving.
Pro tip: If your meringue looks grainy or wet, it means the sugar hasn’t dissolved fully—keep whipping until glossy peaks form. And if you notice cracks after baking, try baking at a slightly lower temperature next time or bake longer at the same temp for even drying.
Cooking Tips & Techniques
Whipping egg whites can feel tricky at first, but a few tricks make it foolproof. Always use a clean, grease-free bowl and beaters—any fat will stop your whites from whipping properly. I learned this the hard way after wasting a batch due to a stray drop of yolk.
Start whipping at medium speed to build foam, then increase to high for stiff peaks. Adding sugar slowly is key—dumping it all in at once can deflate the mixture. And don’t rush folding in flavors or colors; gentle motions keep the air trapped inside.
Timing counts too! Baking low and slow dries out the meringues without browning or burning. Patience here pays off in that perfect melt-in-your-mouth texture. I usually multitask by prepping tea or cleaning up while they bake.
For consistent results across batches, weigh your ingredients. I trust grams over cups for sugar and egg whites. And if your kitchen is humid, try baking on a dry day or use a dehumidifier; moisture in the air can affect crispness.
Variations & Adaptations
- Flavor Twists: Swap vanilla for almond extract or rose water for a floral note. I once made a lavender version that was a hit at a garden party!
- Color Variations: Use natural food powders like matcha for green or beetroot for deeper pinks—great if you prefer no artificial colors.
- Dietary Adaptations: This recipe is naturally gluten-free and low-fat. For vegan meringues, aquafaba (chickpea water) can substitute egg whites, but results vary and need extra whipping time.
- Cooking Methods: If you don’t have an oven, a dehydrator set to a low temp can work but expect longer drying times.
Personally, I love adding crushed freeze-dried raspberries on top before baking for a subtle tart crunch. It’s a little surprise that guests adore.
Serving & Storage Suggestions
Serve these tender pink meringues at room temperature for the best texture. They pair wonderfully with fresh berries, whipped cream, or a drizzle of chocolate sauce for an extra-special touch. Perfect for tea parties, bridal showers, or just a sweet afternoon pick-me-up.
Store them in an airtight container at room temperature to keep them crisp. Avoid the fridge, as humidity will soften them quickly. They’ll stay fresh for up to a week if kept dry. For longer storage, freeze them in sealed bags for up to a month—just thaw at room temp before serving.
Reheating isn’t necessary, but if you want to freshen them up, pop them in a low oven (around 200°F/90°C) for 5-10 minutes to crisp the exterior again. Flavors actually deepen a bit after a day or two, so making them ahead is a smart move for your next gathering.
Nutritional Information & Benefits
This Tender Pink Meringue Delight is a light treat with roughly 70-90 calories per serving (depending on size), mostly from sugar and egg whites. It’s naturally fat-free and gluten-free, making it a go-to for those avoiding heavy desserts.
Egg whites provide a good source of protein without cholesterol when separated carefully. The recipe’s minimal ingredients mean fewer additives or preservatives compared to store-bought meringues.
Keep in mind the sugar content, but honestly, this recipe is perfect for occasional indulgence without feeling weighed down. If you want to reduce sugar, try substituting half with a fine granulated sweetener, but results may vary.
Conclusion
This Tender Pink Meringue Delight recipe is truly worth trying if you crave a light, airy dessert that’s simple yet impressive. The balance of delicate sweetness and melt-in-your-mouth texture makes it a winner every time. Customize it with your favorite flavors or colors to make it uniquely yours.
I love this recipe because it brings back memories of cozy afternoons and happy smiles around the kitchen table. It’s a little piece of joy you can whip up anytime, no stress, just fun and deliciousness.
Give it a shot, and don’t forget to share your own versions or questions in the comments—I’m always excited to hear how folks make it their own. Happy baking, friends!
Frequently Asked Questions
How do I know when the meringue is done baking?
They should be dry to the touch and easily lift off the parchment. The outside will be crisp, and if you gently press, the inside remains soft and airy.
Can I make these meringues ahead of time?
Absolutely! They keep well in an airtight container at room temperature for up to a week and even freeze nicely for longer storage.
Why did my meringue turn out grainy or weepy?
This usually means the sugar wasn’t fully dissolved or the meringue was exposed to moisture. Be sure to add sugar gradually and bake in a dry environment.
Can I use powdered sugar instead of granulated sugar?
Powdered sugar isn’t recommended because it contains cornstarch, which can affect the meringue’s texture and stability.
What’s the best way to add color without affecting texture?
Use gel or liquid food coloring sparingly and fold in gently at the end. Natural powders like beetroot or matcha work too but may slightly alter texture or flavor.
Pin This Recipe!

Tender Pink Meringue Delight
A light, airy, and tender pink meringue with a delicate vanilla flavor and melt-in-your-mouth texture, perfect for any occasion.
- Prep Time: 15 minutes
- Cook Time: 1 hour 30 minutes
- Total Time: 1 hour 45 minutes
- Yield: About 24 small meringues 1x
- Category: Dessert
- Cuisine: American
Ingredients
- 4 large egg whites, room temperature
- 1 cup (200 g) granulated sugar
- 1/4 teaspoon cream of tartar
- 1 teaspoon vanilla extract
- A few drops pink food coloring (gel or liquid)
- Optional: pinch of salt
Instructions
- Preheat your oven to 225°F (110°C). Line a baking sheet with parchment paper or a silicone mat.
- Separate the egg whites carefully, ensuring no yolk gets in. Beat the egg whites on medium speed until foamy (about 1-2 minutes), then add the cream of tartar and a pinch of salt to stabilize.
- Gradually add the sugar, one tablespoon at a time, while whipping on high speed. Continue for about 5-7 minutes until stiff, glossy peaks form.
- Gently fold in vanilla extract and pink food coloring with a spatula, being careful not to deflate the egg whites.
- Pipe or spoon the meringue onto the baking sheet in small, round dollops about 1.5 inches (4 cm) wide, spaced evenly.
- Bake at 225°F (110°C) for 60-70 minutes until crisp on the outside but still soft inside. Avoid opening the oven door during baking.
- Turn off the oven and leave the meringues inside for another 30 minutes to dry out without browning.
- Transfer to a cooling rack and let cool completely before storing or serving.
Notes
Use a clean, grease-free bowl and beaters to ensure egg whites whip properly. Add sugar gradually to avoid deflating the mixture. Bake low and slow to keep meringues tender and avoid cracks. Store in an airtight container at room temperature to keep crisp. Avoid refrigeration due to humidity. For vegan option, aquafaba can substitute egg whites but requires longer whipping.
Nutrition
- Serving Size: 1 small meringue (ap
- Calories: 80
- Sugar: 20
- Sodium: 10
- Carbohydrates: 20
- Protein: 1
Keywords: meringue, pink meringue, light dessert, airy meringue, vanilla meringue, easy meringue recipe, gluten-free dessert, low-fat dessert