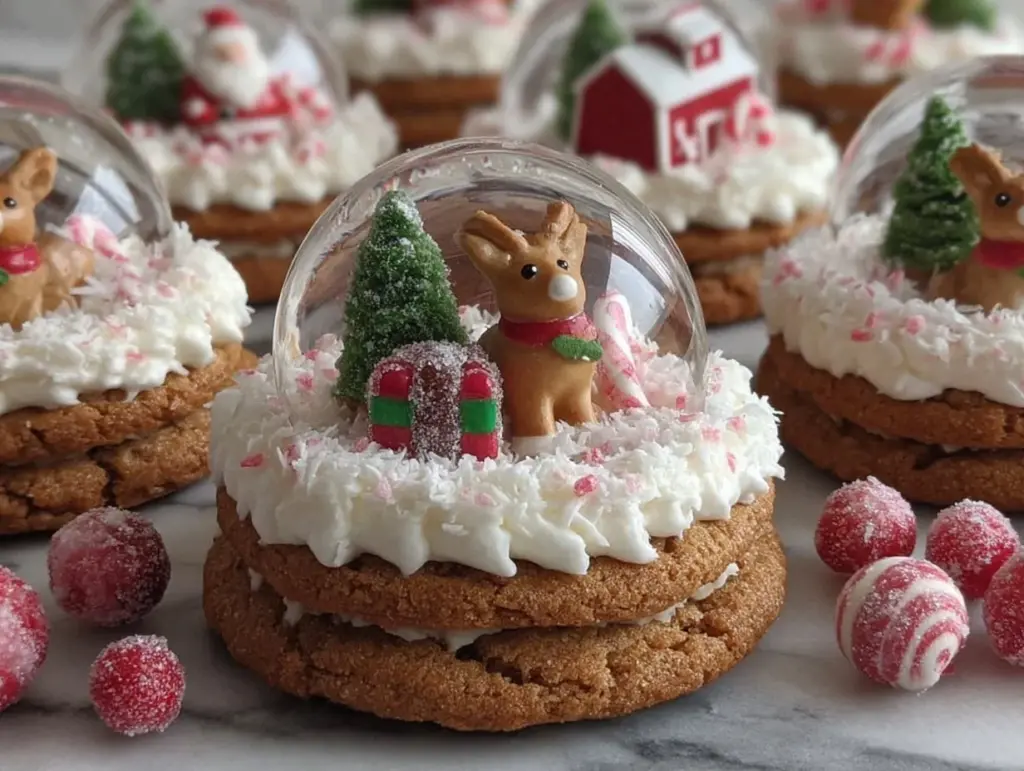
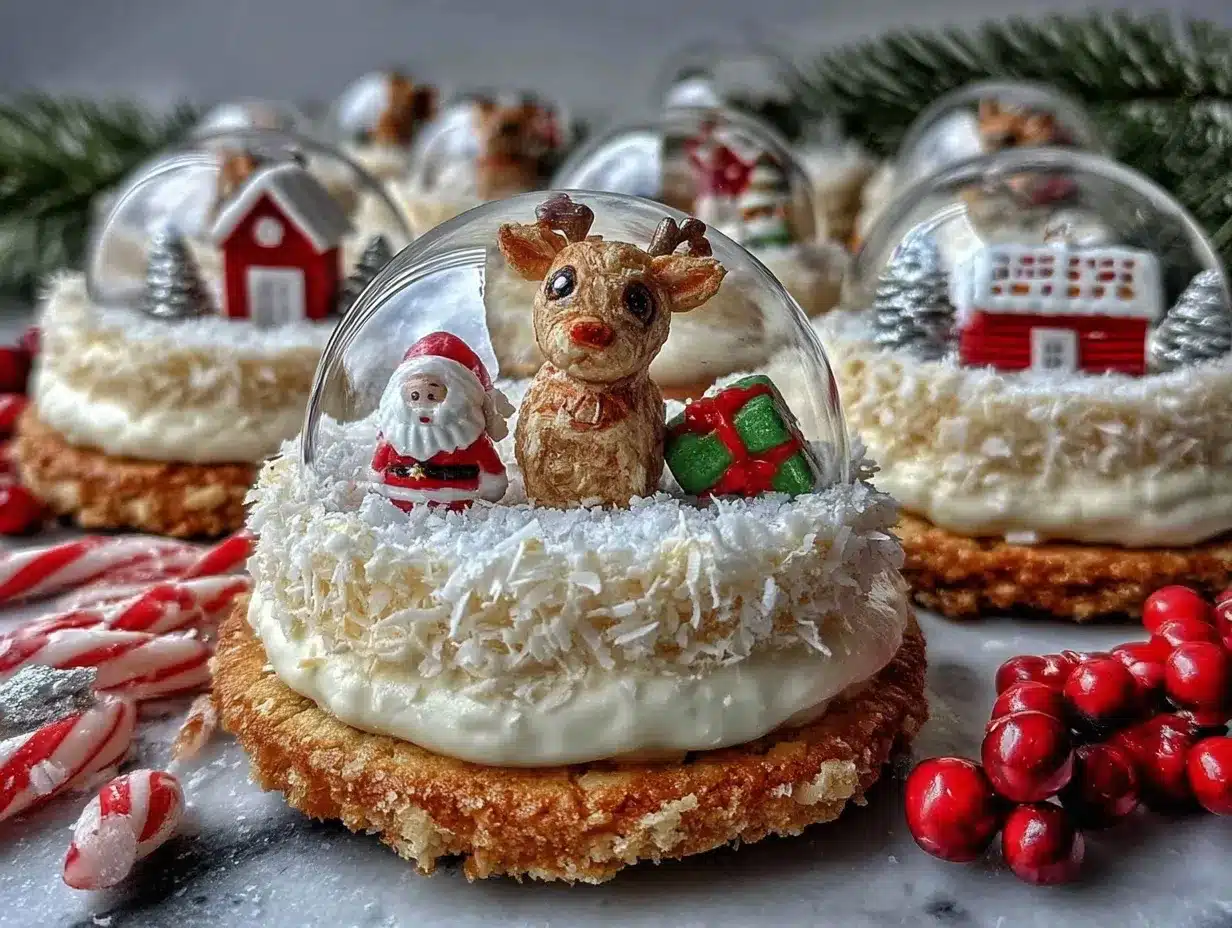
Imagine the sweet scent of butter and vanilla swirling through your kitchen, mingling with hints of almond and sugar, while trays of sparkling snow globe cookies cool on your counter. The first time I made these, I couldn’t help but pause and admire those tiny edible winter scenes—glittering sugar “snow,” cheerful royal icing trees, and little gingerbread people peeking through crystal-clear windows. It was one of those rare moments where you just stop, take a breath, and smile, knowing you’ve created something magical (and a bit nostalgic, honestly).
Back when I was knee-high to a grasshopper, my grandma used to bake sugar cookies every Christmas, but she never fussed with decorating. Years later, I stumbled upon snow globe cookies at a holiday craft fair and was instantly hooked. There’s something about turning a classic cookie into a winter wonderland that feels like pure, festive comfort—dangerously easy, too, once you get the hang of it!
My family couldn’t stop sneaking them off the cooling rack (let’s face it, I caught my husband with frosting on his sleeve more than once). Every year, these cookies end up front and center at our cookie swap, and my kids love helping with the “snow” sprinkles. They’re perfect for gifting, potlucks, or brightening up your Pinterest feed. Snow globe cookies have quickly become our go-to holiday treat, and after testing this recipe more times than I care to admit (in the name of research, of course), I can safely say you’re going to want to bookmark this one for every festive occasion. It’s a staple for family gatherings, gifting, and—let’s be honest—those cozy nights in when you need a warm hug from the oven.
Why You’ll Love These Snow Globe Cookies
If you’re searching for a beginner-friendly holiday baking project that delivers maximum “wow” factor with minimum stress, snow globe cookies are about to become your new favorite. Here’s why these cookies stand out—and why folks come back for seconds (and thirds):
- Quick & Easy: The dough comes together in under 15 minutes, and the decorating is genuinely fun—even for little hands or impatient adults.
- Simple Ingredients: No fancy grocery trips required. You probably have everything you need in your pantry already. I swear, the hardest part is waiting for the cookies to cool!
- Perfect for Holiday Decorating: These cookies are ideal for festive gatherings, classroom parties, or adding sparkle to your holiday cookie board. They’re a hit everywhere—trust me.
- Crowd-Pleaser: My kids, neighbors, and even the mailman rave about these. They disappear fast at every party, and people always ask for the recipe.
- Unbelievably Delicious: The combo of buttery sugar cookie base, sweet royal icing, and crunchy sprinkles is next-level comfort food with a whimsical twist.
What sets these snow globe cookies apart is the crystal-clear “window” made with melted candies—no tricky gelatin or complicated techniques. You get the classic holiday cookie flavor, plus a fun decorating project that’s actually doable. Whether you’re a seasoned holiday baker or just starting out, this recipe brings a little extra magic to your kitchen. The cookies aren’t just pretty—they’re the kind of treat that makes you close your eyes after the first bite and savor the moment. They’re festive, creative, and just plain fun! If you want to impress guests without stress, or turn a simple afternoon into something memorable, snow globe cookies are your answer. I’ve made these with my kids, my mom, and my friends—they work for just about everyone, and every skill level.
What Ingredients You Will Need
These snow globe cookies use classic pantry staples to create a buttery, tender cookie that’s easy to decorate. I love how flexible the ingredients are—you can tweak them for dietary needs or flavor preferences without sacrificing the festive look.
- For the Cookie Dough:
- 2 1/2 cups (320g) all-purpose flour (plus extra for rolling)
- 1/2 teaspoon baking powder
- 1/4 teaspoon salt
- 1 cup (226g) unsalted butter, softened (I always use Kerrygold for richer flavor)
- 1 cup (200g) granulated sugar
- 1 large egg, room temperature
- 1 teaspoon pure vanilla extract (Madagascar vanilla is my favorite)
- 1/2 teaspoon almond extract (optional, but adds a classic holiday note)
- For the “Glass” Window:
- 24 clear hard candies (like clear Jolly Ranchers or Isomalt chips)
- For Decorating:
- 2 cups (220g) powdered sugar
- 3-4 tablespoons milk or water (dairy-free works fine)
- 1/2 teaspoon lemon juice (for brightening the icing)
- Gel food coloring (blue, green, red—your choice!)
- Festive sprinkles (white sanding sugar, silver balls, snowflake shapes)
- Mini gingerbread men, trees, or candy decorations (Wilton makes cute edible toppers)
Substitution Tips: For gluten-free cookies, swap the all-purpose flour with a 1:1 gluten-free baking blend (Bob’s Red Mill works well). If you don’t have almond extract, just bump up the vanilla a little. Dairy-free butter substitutes work in a pinch, though the flavor is slightly different. For vegan cookies, use a flax egg (1 tablespoon ground flaxseed + 3 tablespoons water) instead of the egg. If you can’t find clear candies, Isomalt crystals are a solid alternative for that snow globe look.
Seasonal Variations: In winter, I like to add a touch of cinnamon to the dough for warmth. If you want to get really creative, swap the royal icing for chocolate or caramel drizzle—just know the colors won’t be quite as bright. Honestly, there’s room to play here, so don’t be afraid to make these snow globe cookies your own!
Equipment Needed
- Mixing Bowls: At least two—one for the dough, one for the icing.
- Hand mixer or stand mixer: Either works, though a stand mixer saves your arms (especially for big batches).
- Measuring cups and spoons: Accuracy helps with cookies, so don’t eyeball!
- Rolling pin: A sturdy one is best, but a wine bottle works in a pinch (been there, done that).
- Round cookie cutters: 3- to 4-inch diameter is perfect. If you don’t have one, a drinking glass does the job.
- Smaller cutter for “window”: Try a 2-inch round or oval cutter. Improvise with a jar lid if needed.
- Baking sheets: Heavy-duty ones help cookies bake evenly.
- Silicone baking mats or parchment paper: Prevent sticking and make cleanup a breeze.
- Wire cooling racks: Let cookies cool completely before decorating for best results.
- Small offset spatula or butter knife: For spreading icing.
- Piping bags and tips: Optional, for detailed decorating. You can use zip-top bags with the corner snipped off.
- Toothpicks: Great for moving decorations or swirling colors.
If you’re just starting out, don’t stress about fancy equipment—most of this you’ll have already, and budget-friendly options work just fine. I’ve used a rolling pin from the dollar store for years, and it’s still kicking. For specialty cutters, check thrift stores or online for deals. A little care (like hand-washing and air-drying baking sheets) keeps your tools in good shape for many holiday seasons.
Preparation Method
- Mix the Dough (10 minutes):
In a large bowl, cream together 1 cup unsalted butter and 1 cup granulated sugar with a hand mixer on medium speed until light and fluffy (about 2 minutes). Add 1 large egg, 1 teaspoon vanilla extract, and 1/2 teaspoon almond extract. Beat until combined.
In another bowl, whisk together 2 1/2 cups all-purpose flour, 1/2 teaspoon baking powder, and 1/4 teaspoon salt.
Gradually add dry ingredients to the butter mixture, mixing just until a soft dough forms. If the dough feels sticky, add up to 2 tablespoons extra flour.
Tip: Don’t overmix—the cookies will be tough! - Chill the Dough (30 minutes):
Shape dough into a disk, wrap in plastic, and refrigerate for at least 30 minutes. Chilling helps prevent spreading and gives you cleaner edges.
Sensory cue: The dough should feel cool, firm, and slightly tacky. - Roll & Cut (15 minutes):
On a floured surface, roll dough to 1/4-inch (6mm) thickness. Use a 3- to 4-inch round cutter for cookie bases.
For the snow globe “window,” use a 2-inch cutter to cut out a circle from the center of half your cookies. You want to end up with an equal number of bases and “window” tops.
Troubleshooting: If dough sticks, dust with flour or chill for another 10 minutes. - Assemble & Bake (10 minutes prep, 12 minutes bake):
Place cookie bases and tops on lined baking sheets, spacing about 1 inch apart. Fill the cut-out windows with 1-2 clear hard candies.
Bake at 350°F (175°C) for 10-12 minutes, until edges are lightly golden and candy is melted.
Warning: Don’t overbake—the candy will bubble! Watch for a smooth, glassy finish. - Cool Completely (15 minutes):
Let cookies cool on the sheet for 5 minutes, then transfer to wire racks. The “glass” will harden as it cools.
Sensory cue: Cookies should feel firm, not crumbly. Candy should be clear, not cloudy. - Decorate (20-30 minutes):
In a bowl, mix 2 cups powdered sugar with 3-4 tablespoons milk or water and 1/2 teaspoon lemon juice until smooth but thick. Divide and tint with gel colors.
Pipe or spread icing on the cookie bases, then add sprinkles, candies, and edible decorations. Use a toothpick for detail work.
Efficiency tip: Decorate in stages—outline, fill, then add details. Let icing set completely (about 30 minutes) before stacking or packaging.
Personal note: The first time I tried the candy window, my cookies bubbled over—lesson learned, less is more! If you’re making these with kids, set up a decorating station with bowls of sprinkles and let everyone make their own “scene.” The cookies might not be perfect, but the memories are.
Cooking Tips & Techniques
- Chill for Clean Cuts: Chilled dough gives you sharp, defined cookie shapes. If your kitchen is warm, pop the tray in the fridge for a few minutes before baking.
- Even Thickness: Roll dough evenly to about 1/4-inch (6mm). Uneven cookies bake unevenly—trust me, I learned that the hard way!
- Watch the Candy: Don’t overload the “window” with hard candy. One or two chips are enough for a clear finish. Too much, and you’ll get sticky, cloudy puddles.
- Royal Icing Consistency: Aim for thick but spreadable icing. If it’s too runny, add extra powdered sugar. For piping, test the flow—if it holds its shape for a few seconds, you’re good.
- Multitasking: While cookies bake, prep your icing and decorations. It makes everything flow smoothly.
- Decorating Efficiency: Start with outlining your snow globe “scene.” Fill in background colors, then add details like trees, snowflakes, or candy figures. Layering dries faster and looks neater.
- Common Mistakes: If your cookies spread too much, you might’ve skipped chilling or overmixed the dough. If the candy “window” cracks, try baking at a slightly lower temp next time.
- Personal Lessons: The first batch I made was a bit lopsided, but honestly, imperfections make them more charming! Relax, have fun, and don’t sweat the small stuff.
If you want consistent results every time, measure carefully and trust your senses—look for golden edges and listen for the satisfying snap as cookies cool. Baking is part science, part art, and a little bit of kitchen chaos is half the fun.
Variations & Adaptations
- Dietary Variation: Make these snow globe cookies gluten-free by using a 1:1 gluten-free flour blend. For dairy-free, swap butter with plant-based margarine and use nondairy milk for icing. Vegan? Use a flaxseed egg and vegan butter.
- Seasonal Variation: Switch the “scene” inside your snow globe! In spring, decorate with flowers and pastel colors. For Halloween, make spooky globes with bats and orange sprinkles. The base recipe works for year-round creativity.
- Flavor Variation: Add 1 teaspoon ground cinnamon or nutmeg to the dough for extra warmth. For citrus lovers, grate in the zest of a lemon or orange.
- Cooking Method Adaptation: If you don’t want to use hard candies for the window, try a thin layer of royal icing tinted light blue for a frosty effect. Not quite see-through, but still festive!
- Allergen Substitutions: For nut-free cookies, skip the almond extract entirely. If you’re avoiding eggs, flaxseed or chia “eggs” work surprisingly well.
One year, I made mini snow globe cookies with gingerbread dough for a spicy twist—so good! Let your imagination run wild, and don’t be afraid to mix and match colors, shapes, and flavors to suit your crowd.
Serving & Storage Suggestions
Snow globe cookies are best served at room temperature, arranged on a pretty platter or nestled in cupcake liners for easy picking. They’re gorgeous as a centerpiece on your holiday table or as take-home favors in clear gift bags tied with ribbon.
Pair with mugs of hot cocoa, mulled cider, or even a frothy latte. For a full spread, serve alongside classic sugar cookies, gingerbread men, or peppermint bark. These cookies also brighten up a holiday dessert board for potlucks and parties.
To store, layer cookies between sheets of parchment paper in an airtight container. They’ll keep fresh on the counter for up to 5 days. For longer storage, freeze in a single layer, then transfer to a freezer bag—they’ll last up to a month. Thaw at room temp before serving.
If icing feels a bit soft after thawing, let cookies air dry for 30 minutes. The flavors actually deepen after a day or two, making them even more delicious for snacking or gifting.
Nutritional Information & Benefits
| Serving Size | Calories | Carbs | Fat | Protein |
|---|---|---|---|---|
| 1 cookie (about 40g) | 150 | 22g | 6g | 2g |
These snow globe cookies aren’t exactly health food, but they do offer a little comfort and joy! The butter provides a bit of vitamin A, and the almond extract (if used) gives a subtle boost of antioxidants. They’re nut-free if you skip the almond, and gluten-free when you use a baking blend (great for sharing at school or work).
Potential allergens include wheat, dairy, and eggs, so swap accordingly if needed. For me, baking these is less about nutrition and more about wellness—sharing, bonding, and making memories. Sometimes, a little sweetness is good for the soul.
Conclusion
If you’re looking for a festive cookie project that’s as fun to make as it is to eat, snow globe cookies really are worth trying. They offer a playful twist on classic holiday baking, and you can easily tailor them to suit your style, flavor preferences, or dietary needs. I love these cookies for their whimsy and warmth—they’re a staple at our house, and always spark smiles and stories.
Go ahead and experiment with colors, fillings, and decorations. Make them with friends, kids, or solo (because decorating cookies is therapeutic, you know!). I hope these snow globe cookies bring as much joy to your kitchen as they have to mine. If you try the recipe (or put your own spin on it), let me know in the comments, share your photos, or spread the cheer on Pinterest. Happy baking, and may your holidays be bright, sweet, and full of cookie magic!
FAQs
How do I keep the candy “window” clear and not cloudy?
Use clear, hard candies like Jolly Ranchers or Isomalt chips, and don’t overbake. Bake just until melted and smooth, then cool completely before moving.
Can I make snow globe cookies ahead of time?
Absolutely! Bake and decorate up to 3 days ahead. Store in an airtight container, layered with parchment paper, to keep them fresh.
What if my dough is too sticky to roll?
Chill the dough for 30-60 minutes. If it’s still sticky, dust your work surface and rolling pin with flour.
Can I decorate these cookies with kids?
Yes! Snow globe cookies are beginner-friendly. Set up bowls of sprinkles and let kids design their own winter scenes. It’s messy, but fun!
How do I make these cookies gluten-free?
Replace the flour with a 1:1 gluten-free blend. The cookies will be just as tasty and hold their shape beautifully.
Pin This Recipe!
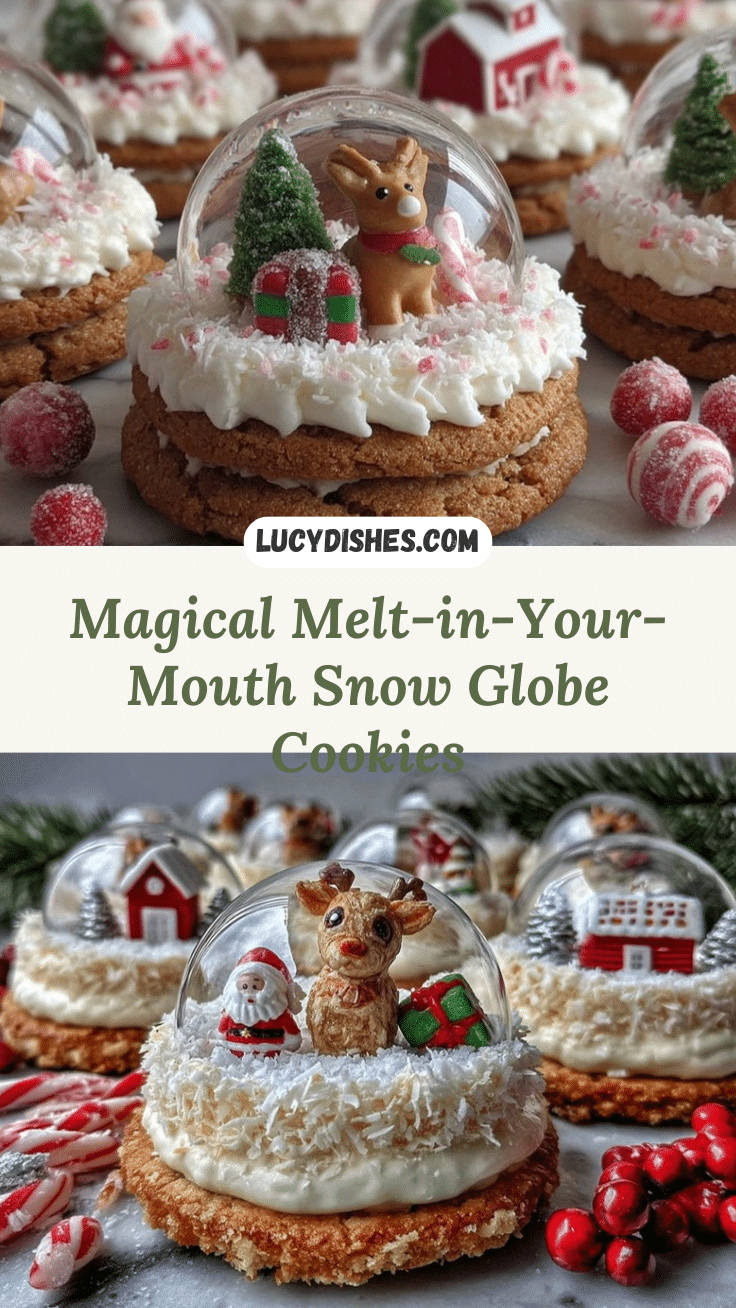
Snow Globe Cookies: Easy Festive Holiday Decorating Ideas for Beginners
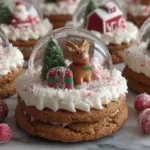
These whimsical snow globe cookies feature a buttery sugar cookie base, crystal-clear candy windows, and festive royal icing decorations. Perfect for holiday gatherings, gifting, or creative baking with kids, they’re beginner-friendly and guaranteed to impress.
- Prep Time: 25 minutes
- Cook Time: 12 minutes
- Total Time: 1 hour 30 minutes
- Yield: 24 cookies 1x
- Category: Dessert
- Cuisine: American
Ingredients
- 2 1/2 cups (320g) all-purpose flour, plus extra for rolling
- 1/2 teaspoon baking powder
- 1/4 teaspoon salt
- 1 cup (226g) unsalted butter, softened
- 1 cup (200g) granulated sugar
- 1 large egg, room temperature
- 1 teaspoon pure vanilla extract
- 1/2 teaspoon almond extract (optional)
- 24 clear hard candies (like clear Jolly Ranchers or Isomalt chips)
- 2 cups (220g) powdered sugar
- 3–4 tablespoons milk or water (dairy-free works fine)
- 1/2 teaspoon lemon juice
- Gel food coloring (blue, green, red, your choice)
- Festive sprinkles (white sanding sugar, silver balls, snowflake shapes)
- Mini gingerbread men, trees, or candy decorations
Instructions
- In a large bowl, cream together butter and granulated sugar with a hand mixer on medium speed until light and fluffy (about 2 minutes).
- Add egg, vanilla extract, and almond extract. Beat until combined.
- In another bowl, whisk together flour, baking powder, and salt.
- Gradually add dry ingredients to the butter mixture, mixing just until a soft dough forms. If dough feels sticky, add up to 2 tablespoons extra flour.
- Shape dough into a disk, wrap in plastic, and refrigerate for at least 30 minutes.
- On a floured surface, roll dough to 1/4-inch thickness. Use a 3- to 4-inch round cutter for cookie bases.
- For the snow globe window, use a 2-inch cutter to cut out a circle from the center of half your cookies. You want equal numbers of bases and window tops.
- Place cookie bases and tops on lined baking sheets, spacing about 1 inch apart. Fill the cut-out windows with 1-2 clear hard candies.
- Bake at 350°F (175°C) for 10-12 minutes, until edges are lightly golden and candy is melted.
- Let cookies cool on the sheet for 5 minutes, then transfer to wire racks. The candy glass will harden as it cools.
- In a bowl, mix powdered sugar with milk or water and lemon juice until smooth but thick. Divide and tint with gel colors.
- Pipe or spread icing on the cookie bases, then add sprinkles, candies, and edible decorations. Use a toothpick for detail work.
- Let icing set completely (about 30 minutes) before stacking or packaging.
Notes
Chill dough for clean cuts and sharp shapes. Use clear hard candies for the best snow globe effect. Decorate in stages for neat results. For gluten-free or vegan adaptations, substitute flour, butter, and egg as needed. Store cookies in an airtight container for up to 5 days, or freeze for up to a month.
Nutrition
- Serving Size: 1 cookie (about 40g)
- Calories: 150
- Sugar: 12
- Sodium: 60
- Fat: 6
- Saturated Fat: 4
- Carbohydrates: 22
- Protein: 2
Keywords: snow globe cookies, holiday cookies, Christmas cookies, festive baking, beginner decorating, sugar cookies, royal icing, edible crafts, winter treats, cookie swap