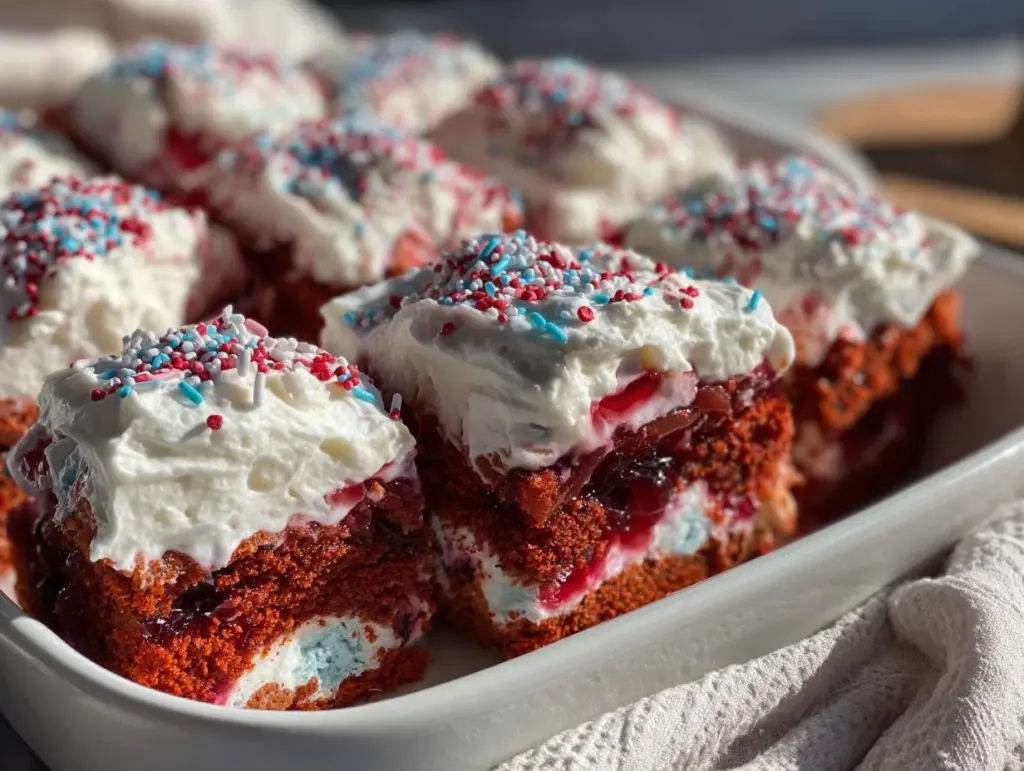
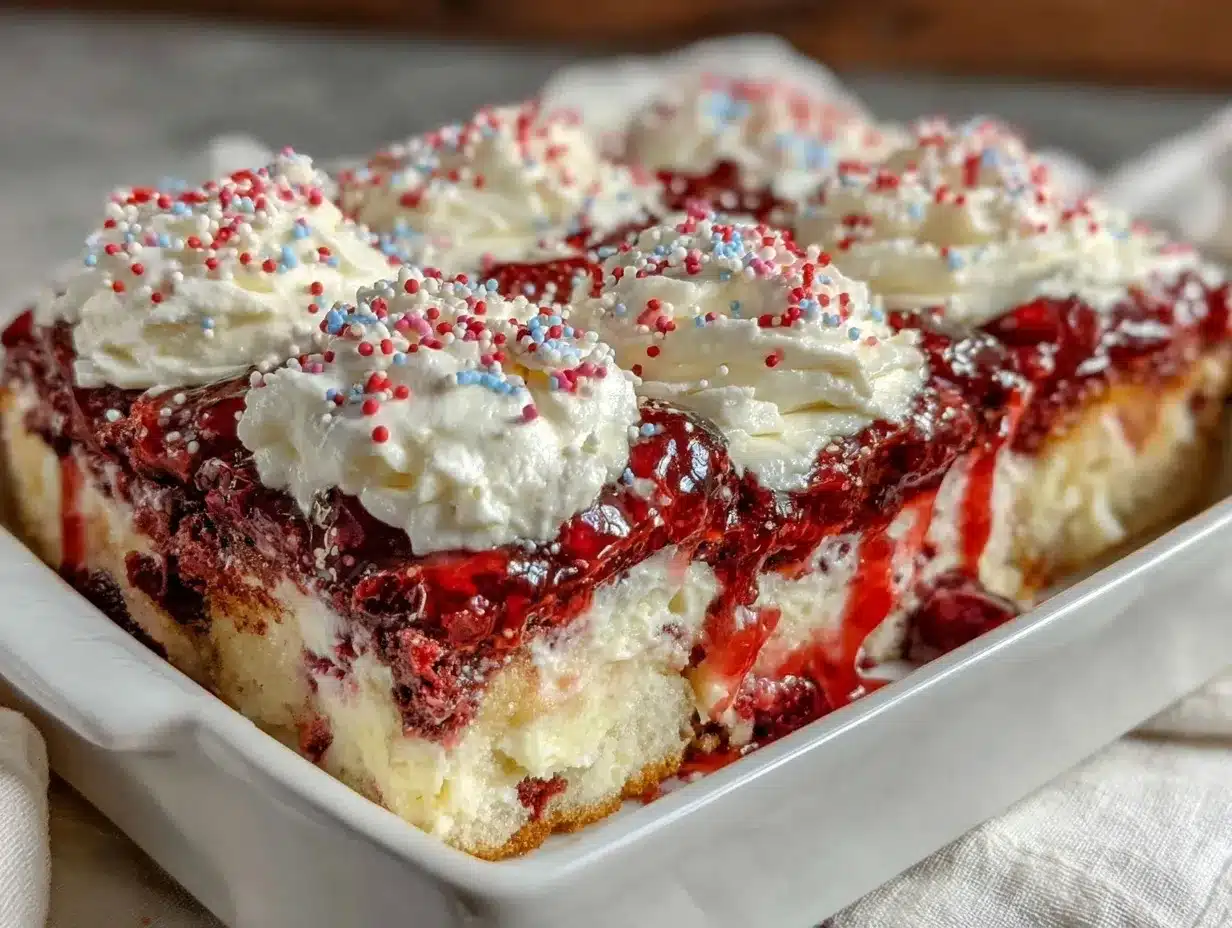
Let me paint you a picture: the air is thick with the sweet, nostalgic scent of vanilla cake, the kind that practically begs you to sneak a taste. Imagine bright swirls of red and blue peeking through fluffy white whipped topping, glittering with festive sprinkles—this Red White and Blue Layered Poke Cake just steals the show at any celebration. The first time I made this, it was a humid July afternoon, and honestly, I was just hoping to add a little “wow” to our family’s backyard barbecue. I’ll never forget the moment I sliced through that cake—the vibrant colors rippling through each layer, the cool Jell-O soaking into every crumb, and my niece’s eyes going wide as saucers. It was one of those moments where you pause, fork in hand, and let the joy of pure, simple fun sink in.
Growing up, my grandma used to make poke cakes for every summer gathering. Back then, I was knee-high to a grasshopper, sneaking the leftover condensed milk from the can while she wasn’t looking. This recipe is my playful twist on her classic—easy enough for a lazy Sunday but flashy enough to brighten up your Pinterest feed or wow the neighbors at a Fourth of July picnic. I stumbled across the layered color idea at a bake sale years ago and thought, “Why didn’t I think of this sooner?” It’s dangerously easy, almost too pretty to eat, and honestly, just pure, nostalgic comfort in every bite.
My family can’t resist picking at the fluffy whipped cream or trying to guess which color their slice will have more of (it’s become a bit of a competition, actually). And let’s face it, when your cake doubles as table decor, you know you’re onto something special. I’ve tested this Red White and Blue Layered Poke Cake more times than I care to admit—all in the name of research, of course. Now, it’s become a staple for celebrations, gifting, and the occasional “just because” treat. If you’re looking for a showstopper dessert that feels like a warm hug and is guaranteed to spark smiles, you’re going to want to bookmark this one.
Why You’ll Love This Festive Red White and Blue Layered Poke Cake
Years of baking for family reunions, classroom parties, and more summer picnics than I can count have taught me that this Red White and Blue Layered Poke Cake is a true crowd-pleaser. It’s not just about the colors or the fun—it’s about creating memories you’ll want to relive every summer.
- Quick & Easy: This cake comes together in under an hour (plus a little chilling time), making it perfect for last-minute party prep or spontaneous celebrations.
- Simple Ingredients: You probably have almost everything in your pantry or fridge already—no hunting for fancy supplies or running to specialty stores.
- Perfect for Celebrations: Whether it’s Memorial Day, Fourth of July, a birthday, or just a random Tuesday, this cake fits right in and brings a pop of cheer to any table.
- Crowd-Pleaser: Kids adore the colors, adults love the nostalgia, and everyone comes back for seconds (I’ve literally seen folks hovering around the dessert table for a second slice).
- Unbelievably Delicious: The combination of super-moist cake, fruity gelatin, and creamy whipped topping hits all the right notes—sweet, tangy, and oh-so-light.
What makes my version different? Instead of just pouring gelatin on top, I layer the colors for a fun, almost tie-dye effect inside each slice. You get those gorgeous red and blue ribbons running through the soft white cake, and every forkful is a little different. Plus, I’ve streamlined the process so you won’t need a parade of mixing bowls or a pastry degree—just a few clever tricks and some patience while the colors soak in.
This isn’t just a dessert; it’s a little edible celebration. The kind of cake that makes you pause after the first bite, eyes closed, and just smile. It’s comfort food reimagined—still packed with soul-soothing goodness, but with an extra dose of party spirit. If you want to impress your guests without breaking a sweat, or just give your family a sweet surprise, this festive poke cake is your new go-to. Trust me, you’ll be looking for excuses to make it all year long.
What Ingredients You Will Need
This Red White and Blue Layered Poke Cake recipe uses basic, familiar ingredients that deliver bold flavor and a soft, dreamy texture—without any complicated steps or hard-to-find items. You can easily grab everything during your regular grocery trip, and I’ve included notes for swaps in case you need a gluten-free or dairy-free version.
- For the Cake Base:
- 1 box white cake mix (15.25 oz/432g) – I love using Betty Crocker or Duncan Hines for consistent results
- 3 large eggs, room temperature
- 1 cup (240ml) water
- 1/3 cup (80ml) vegetable oil or melted unsalted butter
- For the Poke Layers:
- 1 package (3 oz/85g) strawberry or cherry gelatin (for the red layer) – Jell-O brand works great
- 1 package (3 oz/85g) blueberry or berry blue gelatin (for the blue layer)
- 2 cups (480ml) boiling water, divided
- 2 cups (480ml) cold water, divided
- For the Topping:
- 1 tub (8 oz/227g) whipped topping (like Cool Whip), thawed – use a non-dairy version if needed
- Red, white, and blue sprinkles or sanding sugar, for garnish (optional, but highly recommended!)
Ingredient Notes & Substitutions:
- If you prefer homemade, swap the boxed mix for your favorite white cake recipe (just keep the measurements similar).
- For a gluten-free cake, use a certified gluten-free cake mix—King Arthur and Betty Crocker have solid options.
- Dairy-free? Check your cake mix and whipped topping labels—many big brands offer dairy-free choices now.
- No berry gelatin? Raspberry or black cherry works for the red, and grape for the blue.
- If you want a richer flavor, sub half the water in the cake mix for milk (dairy or non-dairy).
- Use fresh fruit to garnish for extra color—sliced strawberries and blueberries make it pop!
Honestly, the best part about this recipe is how flexible it is. You can use whatever you have on hand, and it’ll still come out looking party-ready. Just don’t skip the whipped topping—trust me, it ties everything together!
Equipment Needed
You don’t need a fancy kitchen to whip up this Red White and Blue Layered Poke Cake. In fact, most of these tools are probably already in your cabinets. Here’s what you’ll need (and what you can substitute if you’re in a pinch):
- 9×13-inch (23x33cm) baking dish – Glass or metal both work; just avoid dark nonstick pans for even color
- Mixing bowls – At least two medium bowls for the cake batter and gelatin
- Electric hand mixer or stand mixer – You can mix by hand with a sturdy whisk, but a mixer saves time and arm muscles
- Measuring cups and spoons
- Wooden spoon or silicone spatula – For folding and scraping every last bit of batter
- Fork, chopstick, or the handle of a wooden spoon – For poking holes in the cake (kids love this part!)
- Small ladle or measuring cup – Makes pouring gelatin into the holes a breeze
- Offset spatula or butter knife – For smoothing the whipped topping
Alternative Tools: No mixer? Whisking by hand is totally fine—just mix until smooth. If you don’t have a 9×13 pan, two 8-inch (20cm) square pans work in a pinch, but keep an eye on baking time. For easy cleanup, line your pan with parchment paper.
A quick note—if you use metal pans, avoid leaving the finished cake in them overnight, as it can pick up a metallic taste. I’ve learned that the hard way! Just transfer leftovers to a plastic or glass container if storing long-term.
How to Make Red White and Blue Layered Poke Cake
- Preheat and Prep: Preheat your oven to 350°F (175°C). Grease a 9×13-inch (23x33cm) baking dish lightly with nonstick spray or a thin layer of butter. (This helps the cake release cleanly—trust me, you don’t want to wrestle with stuck cake!)
- Mix the Cake Batter: In a large bowl, combine the white cake mix, 3 eggs, 1 cup (240ml) water, and 1/3 cup (80ml) oil. Use an electric mixer on medium speed (or whisk by hand) until the batter is smooth, about 2 minutes. Scrape down the sides as needed.
- Bake the Cake: Pour the batter into your prepared baking dish and smooth the top with a spatula. Bake for 25–30 minutes, or until a toothpick inserted in the center comes out clean. (My oven usually takes 28 minutes—keep an eye on it after 25.)
- Cool Slightly: Let the cake cool in the pan on a wire rack for 15–20 minutes. You want it warm but not hot, or the gelatin will just soak straight through.
- Poke the Cake: Using a fork, chopstick, or the handle of a wooden spoon, poke holes about 1 inch (2.5cm) apart all over the cake—don’t be shy! You want plenty of places for the colors to seep in. (The kids in my house fight over who gets to do this part.)
- Prepare the Gelatin: In two separate bowls, dissolve each gelatin flavor in 1 cup (240ml) boiling water. Stir until fully dissolved, about 2 minutes. Add 1 cup (240ml) cold water to each and stir again.
- Add the Colors: With a small ladle or measuring cup, carefully pour the red gelatin over half the cake, focusing on some holes. Pour the blue gelatin over the other half. Alternate colors for a tie-dye effect, or do red on one side, blue on the other. (Don’t worry if the gelatin pools a little on top—it’ll soak in as it chills.)
- Chill: Cover the cake loosely with plastic wrap and refrigerate for at least 3 hours, or until fully set. Overnight is even better—the colors intensify and the cake gets extra moist.
- Top It Off: Once the cake is chilled and set, spread the whipped topping evenly over the top with an offset spatula or butter knife. Go all the way to the edges!
- Add Decorations: Sprinkle generously with red, white, and blue sprinkles or sanding sugar. Add fresh berries if you’d like.
- Slice and Serve: Cut into squares and serve chilled. Wipe your knife between cuts for the cleanest, most colorful layers.
Troubleshooting Tips: If your gelatin runs under the cake, don’t panic—it’s still delicious! If the cake seems too soft after chilling, pop it back in the fridge for another hour. For a firmer cake, use a little less water in the gelatin. (I’ve learned all this through trial and, well, a few colorful mishaps.)
Cooking Tips & Techniques
After making this Red White and Blue Layered Poke Cake more times than I can count, I’ve picked up a few tricks that guarantee a gorgeous, tasty result every time.
- Get Even Color Layers: Poke the holes deep but not all the way to the bottom—this helps the gelatin soak in without pooling at the base. If you want really sharp color lines, use a measuring cup to control where you pour the gelatin.
- Don’t Overpoke: Too many holes can turn the cake mushy. Aim for about 1-inch (2.5cm) spacing. (I once let my nephew go wild with the fork—let’s just say, it was more trifle than cake!)
- Chill Time Matters: The longer the cake rests, the more the colors set and the flavors meld. If you’re in a rush, chill for the minimum 3 hours, but overnight is best for parties.
- Neat Slices: For those Pinterest-worthy squares, use a sharp knife dipped in hot water and wiped clean between each cut. This works wonders with the whipped topping layer.
- Make Ahead: You can bake the cake a day ahead and add the whipped topping just before serving. The colors seem to pop more after a night in the fridge (and the cake gets even moister).
- Customize Your Colors: Want to make this for another holiday? Swap in orange and black gelatin for Halloween, or green and red for Christmas. The technique is endlessly adaptable.
One mistake I made early on was pouring all the gelatin in one spot—hello, soggy corner! Pour slowly and move around the cake for even distribution. Multitasking hack: While the cake bakes, prep your gelatin and clear some fridge space so it’s ready to chill as soon as you’re done. And remember, baking should be fun—if your colors swirl together, just call it “tie-dye” and enjoy the compliments!
Variations & Adaptations
This festive poke cake is super flexible, so you can tweak it for dietary needs, seasonal occasions, or just to suit your mood. Here are a few of my favorite variations and swaps:
- Gluten-Free Version: Use a gluten-free white cake mix and double-check your gelatin and whipped topping labels. The rest of the recipe stays exactly the same—no one will know the difference!
- Dairy-Free Adaptation: Choose a non-dairy cake mix (many are accidentally dairy-free), and use coconut-based whipped topping. It adds a subtle tropical note that’s honestly delicious.
- Different Flavors: Try lemon and raspberry gelatin for a fun twist, or go green and gold for St. Patrick’s Day. You can also layer multiple colors for a rainbow effect—just reduce the amount of each gelatin so the cake doesn’t get soggy.
- Fruit Add-Ins: Add a layer of fresh sliced strawberries or blueberries under the whipped topping for extra texture and flavor. This is great if you want to cut the sweetness a bit or use up summer berries.
- Mini Cakes: Bake the cake in muffin tins for individual poke cupcakes. They’re adorable for parties and super easy to serve—just reduce the baking time to about 15 minutes.
- Personal Favorite: One year, I made a triple-layer version in a trifle dish with extra whipped cream and berries between layers. It was messy, but so, so good (and made for a real showpiece on the dessert table).
Don’t be afraid to experiment—this recipe is forgiving and built for fun. If you’ve got allergies to eggs, use an egg replacer or applesauce in the cake mix. You can also swap out the whipped topping for homemade whipped cream if you’re feeling fancy. Just remember, the most important ingredient is a good dose of celebration spirit!
Serving & Storage Suggestions
This Red White and Blue Layered Poke Cake is best served chilled, straight from the fridge. The colors look their brightest when the cake is cold, and the whipped topping stays smooth and creamy. For parties, I like to sprinkle on the decorations just before serving to keep them crisp and vibrant.
Presentation Tips: Slice the cake into neat squares and use a pie server or offset spatula to lift them out. Add a few fresh berries on top for a pop of color, or a mint leaf if you’re feeling fancy. This cake looks gorgeous on a white platter or a patriotic-themed tray—perfect for Pinterest or Instagram snaps.
Pairings: Pair this cake with lemonade, iced tea, or a simple berry punch for a classic summer vibe. It also goes well with grilled foods, burgers, or as a sweet bite after a big picnic spread.
Storage: Leftovers keep well in the fridge for up to 4 days. Cover the cake tightly with plastic wrap or transfer slices to an airtight container. The colors may bleed a little over time, but the flavor only gets better. For longer storage, freeze slices (without whipped topping) for up to 1 month, then thaw and add topping just before serving.
Reheating: This cake is meant to be eaten cold, so no need to reheat. If it sits out too long and gets soft, just pop it back in the fridge for a bit to firm up. The layers actually get even more flavorful as they rest (like most good party foods!).
Nutritional Information & Benefits
Each serving of this Red White and Blue Layered Poke Cake (about 1/15th of the cake) has roughly:
- Calories: 220
- Fat: 6g
- Carbohydrates: 38g
- Protein: 2g
- Sugar: 24g
Health Highlights: The cake is lower in fat thanks to the whipped topping, and you can cut back on sugar by using sugar-free gelatin or light whipped topping. Fresh berries add a boost of antioxidants and vitamin C (I always sneak a few on top for extra color and nutrition!).
Dietary Notes: You can easily make this gluten-free or dairy-free by swapping a few ingredients. It does contain eggs and gelatin (not vegetarian), so keep that in mind for allergies or dietary needs. As always, check your specific product labels for allergen information.
From a wellness perspective, I love that this dessert feels light and refreshing, especially after a big meal. It’s a little sweet treat that brings people together—because honestly, happiness is good for your health, too!
Conclusion
If you’re searching for a dessert that’s as cheerful as it is delicious, this Red White and Blue Layered Poke Cake is your answer. It’s the kind of recipe that turns a simple get-together into a festive celebration, with every colorful slice serving up pure happiness. I love how easy it is to personalize—swap the colors, add fruit, or make it gluten-free, and it still steals the show.
For me, this cake is a reminder that food is about fun, family, and little moments of surprise (like that first colorful forkful). Whether you’re baking with kids, prepping for a party, or just craving something sweet, I hope you’ll give this recipe a try—and make it your own. If you test out a new variation, share it in the comments or tag me on social media. I’d love to see your creations and hear your favorite celebration stories!
So, gather your sprinkles, clear some fridge space, and get ready to whip up a dessert that’s guaranteed to spark smiles. Here’s to easy, festive baking and a summer full of sweet memories!
Frequently Asked Questions
Can I make this Red White and Blue Layered Poke Cake ahead of time?
Absolutely! In fact, the flavors get better after chilling overnight. Just add the whipped topping and sprinkles right before serving for the freshest look.
What if I don’t have red or blue gelatin?
No worries! You can use any flavors you like—raspberry for red, grape for blue, or mix and match depending on the holiday or occasion.
Can I use homemade whipped cream instead of whipped topping?
Yes, homemade whipped cream works beautifully. Whip 1 1/2 cups (360ml) heavy cream with 2 tablespoons sugar until stiff peaks form, then spread on top.
Is it possible to make this cake gluten-free or dairy-free?
Definitely! Just use a gluten-free cake mix and check that your gelatin and whipped topping are suitable for your dietary needs. Many big brands now offer allergy-friendly versions.
How do I get really neat, colorful layers inside the cake?
Poke the holes evenly and pour the gelatin slowly. For super neat slices, chill the cake thoroughly and use a hot, clean knife to cut each piece.
Pin This Recipe!
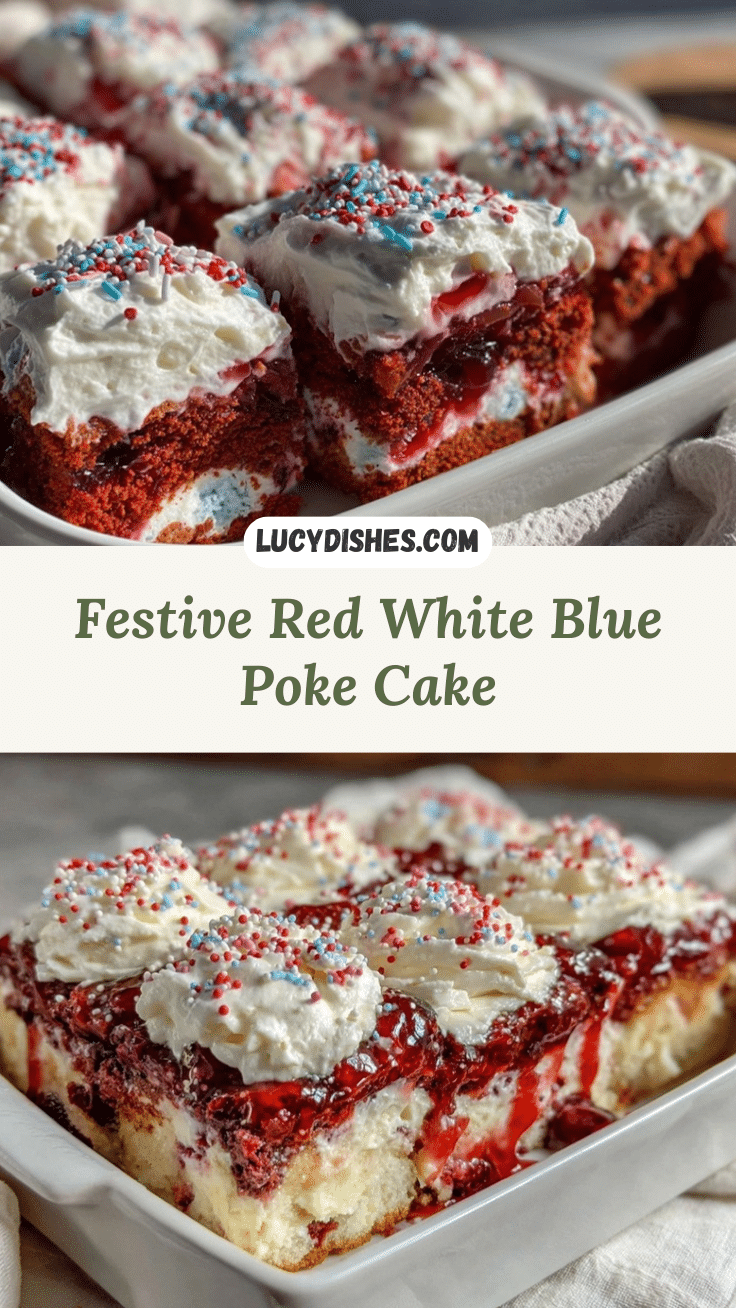
Red White and Blue Layered Poke Cake

This festive poke cake features vibrant red and blue gelatin ribbons running through a soft white cake, topped with fluffy whipped topping and sprinkles. It’s an easy, crowd-pleasing dessert perfect for summer celebrations like Memorial Day and Fourth of July.
- Prep Time: 15 minutes
- Cook Time: 30 minutes
- Total Time: 4 hours
- Yield: 15 servings 1x
- Category: Dessert
- Cuisine: American
Ingredients
- 1 box white cake mix (15.25 oz)
- 3 large eggs, room temperature
- 1 cup water
- 1/3 cup vegetable oil or melted unsalted butter
- 1 package (3 oz) strawberry or cherry gelatin (red layer)
- 1 package (3 oz) blueberry or berry blue gelatin (blue layer)
- 2 cups boiling water, divided
- 2 cups cold water, divided
- 1 tub (8 oz) whipped topping (like Cool Whip), thawed
- Red, white, and blue sprinkles or sanding sugar, for garnish (optional)
Instructions
- Preheat oven to 350°F (175°C). Grease a 9×13-inch baking dish with nonstick spray or butter.
- In a large bowl, combine cake mix, eggs, water, and oil. Mix with an electric mixer on medium speed (or whisk by hand) until smooth, about 2 minutes.
- Pour batter into prepared baking dish and smooth the top. Bake for 25–30 minutes, or until a toothpick inserted in the center comes out clean.
- Let cake cool in the pan on a wire rack for 15–20 minutes until warm but not hot.
- Using a fork, chopstick, or handle of a wooden spoon, poke holes about 1 inch apart all over the cake.
- In two separate bowls, dissolve each gelatin flavor in 1 cup boiling water. Stir until dissolved, then add 1 cup cold water to each and stir again.
- Carefully pour red gelatin over half the cake, focusing on some holes. Pour blue gelatin over the other half, alternating colors for a tie-dye effect.
- Cover cake loosely with plastic wrap and refrigerate for at least 3 hours, or until fully set. Overnight is best.
- Once chilled and set, spread whipped topping evenly over the cake with an offset spatula or butter knife.
- Sprinkle generously with red, white, and blue sprinkles or sanding sugar. Add fresh berries if desired.
- Slice into squares and serve chilled. Wipe knife between cuts for clean layers.
Notes
For gluten-free or dairy-free, use appropriate cake mix and whipped topping. Chill overnight for best color and flavor. Use a hot, clean knife for neat slices. Customize colors for other holidays. Add fresh berries for extra flavor and nutrition.
Nutrition
- Serving Size: 1/15th of cake (abou
- Calories: 220
- Sugar: 24
- Sodium: 220
- Fat: 6
- Saturated Fat: 2
- Carbohydrates: 38
- Protein: 2
Keywords: poke cake, red white blue cake, Fourth of July dessert, patriotic cake, summer dessert, easy cake, party cake, layered cake, festive cake