Let me tell you, the scent of buttery vanilla sugar cookies baking in the oven, mingling with the sweet aroma of royal icing drying on top, is enough to make anyone’s mouth water — especially around Christmas time. The first time I baked these Perfect Soft Christmas Sugar Cookies with Royal Icing, I was instantly hooked. It was one of those rare moments where you pause, take a deep breath, and just smile because you know you’re onto something truly special. I remember when I was knee-high to a grasshopper, my grandma’s kitchen would fill with the same heavenly smell, and we’d all sneak cookies off the cooling rack before anyone noticed.
Years ago, I stumbled upon this recipe during a cozy, rainy weekend, trying to recreate that nostalgic magic for my own family. Honestly, I wish I had found this treasure trove of softness and sweetness years ago—it’s dangerously easy and delivers pure, nostalgic comfort. My family couldn’t stop sneaking them off the cooling rack (and I can’t really blame them). Whether you’re looking to brighten up your Pinterest cookie board or whip up a sweet treat for your kids’ holiday party, these cookies are just the ticket. After testing this recipe more times than I care to admit (in the name of research, of course), it’s become a staple for family gatherings and gifting. Trust me, this feels like a warm hug you’re going to want to bookmark.
Why You’ll Love This Recipe
There’s a reason these Perfect Soft Christmas Sugar Cookies with Royal Icing have become a favorite in my kitchen year after year. They hit all the right notes when it comes to texture, flavor, and ease. Here’s why you’re going to love making them:
- Quick & Easy: These cookies come together in under 30 minutes, perfect for busy weeknights or last-minute holiday baking marathons.
- Simple Ingredients: No fancy trips to specialty stores needed — you probably have everything in your pantry already.
- Perfect for Christmas Celebrations: Whether it’s a cookie exchange, holiday brunch, or cozy family night, these cookies fit right in.
- Crowd-Pleaser: Kids and adults alike rave about how soft and flavorful these cookies are, especially with the smooth, sweet royal icing on top.
- Unbelievably Delicious: The texture is just right — soft and tender, with a little chew that melts in your mouth. The royal icing adds that perfect glossy finish and subtle sweetness.
What sets this recipe apart? Well, it’s all about the technique: gently creaming the butter and sugar for that ultra-soft crumb, chilling the dough to keep the shape just right, and the royal icing tutorial that’s beginner-friendly but looks like you spent hours decorating. This isn’t just another sugar cookie recipe — it’s your new go-to for holiday baking that impresses without stress. Honestly, after the first bite, you’ll close your eyes and savor every bit of comfort food magic.
What Ingredients You Will Need
This recipe uses simple, wholesome ingredients to deliver bold flavor and a satisfying, soft texture without the fuss. Most are pantry staples, and if you’re missing something, I’ve got some easy swaps for you.
- For the Cookie Dough:
- 2 ¾ cups (345g) all-purpose flour (I recommend King Arthur for consistent texture)
- 1 teaspoon baking powder
- ½ teaspoon salt
- 1 cup (227g) unsalted butter, softened (room temperature for easy creaming)
- 1 ½ cups (300g) granulated sugar
- 1 large egg, room temperature
- 2 teaspoons pure vanilla extract (always go for pure, not imitation)
- ¼ cup (60ml) whole milk (use dairy-free milk like almond if needed)
- For the Royal Icing:
- 3 cups (360g) powdered sugar, sifted
- 2 large egg whites or 4 tablespoons meringue powder mixed with water
- 1 teaspoon lemon juice or vanilla extract (for flavor)
- Food coloring gels (optional, for festive touches)
You can swap all-purpose flour with a gluten-free blend if needed, but be sure it includes xanthan gum for structure. Also, for a dairy-free twist, swap butter for a plant-based alternative and milk for your favorite non-dairy option. I’ve found that chilled dough slices easier when shaped, so don’t skip that step!
Equipment Needed
- Mixing bowls (preferably glass or stainless steel)
- Electric mixer or stand mixer with paddle attachment (makes creaming butter a breeze)
- Measuring cups and spoons (accuracy is key with baking)
- Rolling pin
- Cookie cutters (holiday-themed shapes like stars, trees, or bells – I love using metal cutters for clean edges)
- Baking sheets lined with parchment paper or silicone mats (to prevent sticking)
- Wire cooling racks (essential for letting cookies cool evenly)
- Small piping bags or ziplock bags with the corner snipped (for royal icing decoration)
If you don’t have a stand mixer, an electric hand mixer works just fine, though it might take a bit more arm work. For budget-friendly options, silicone mats are reusable and save you from buying parchment all the time. Keep your tools clean and dry, especially when working with royal icing, to avoid clumps and consistency issues.
Preparation Method
- Mix Dry Ingredients: In a medium bowl, whisk together 2 ¾ cups (345g) flour, 1 teaspoon baking powder, and ½ teaspoon salt. Set aside. This ensures even distribution of leavening and salt.
- Cream Butter and Sugar: In a large bowl, use an electric mixer to cream 1 cup (227g) softened unsalted butter and 1 ½ cups (300g) granulated sugar until light and fluffy — about 3-4 minutes on medium speed. You’ll notice the mixture turns pale and airy; that’s the secret to soft cookies.
- Add Egg and Vanilla: Beat in 1 large egg (room temperature) and 2 teaspoons pure vanilla extract until fully combined. The batter will look glossy and smooth now.
- Alternate Adding Dry Ingredients and Milk: Gradually add the dry flour mixture in three parts, alternating with ¼ cup (60ml) whole milk. Begin and end with the dry ingredients. Mix on low speed just until combined — overmixing will toughen the dough.
- Chill the Dough: Cover the dough tightly with plastic wrap and chill for at least 1 hour or up to overnight. This step helps the dough firm up, making it easier to roll and cuts down on spreading during baking.
- Preheat Oven and Prepare Baking Sheets: Preheat your oven to 350°F (175°C). Line baking sheets with parchment paper or silicone mats.
- Roll and Cut: Lightly flour your work surface and rolling pin. Roll chilled dough to about ¼-inch (6mm) thickness. Use cookie cutters to cut shapes, placing them about 1 inch (2.5 cm) apart on prepared sheets.
- Bake: Bake cookies for 8-10 minutes, or until the edges are just starting to turn golden. The centers should still look soft — this keeps them tender.
- Cool: Let cookies cool on the baking sheet for 5 minutes before transferring to wire racks to cool completely. This prevents breakage and helps the icing set nicely.
- Make Royal Icing: While cookies cool, whisk together 3 cups (360g) sifted powdered sugar, 2 large egg whites (or meringue powder mix), and 1 teaspoon lemon juice or vanilla extract until smooth and glossy. Adjust consistency with a few drops of water, if needed, for piping or flooding.
- Decorate: Transfer icing to piping bags. Outline and fill your cookies with royal icing. Allow the icing to dry completely (overnight is best) before stacking or storing.
Cooking Tips & Techniques
One trick I learned is not to skip chilling the dough. It’s tempting to bake right away, but chilling helps the cookies keep their soft texture and prevents too much spreading. Also, don’t overroll your dough; keeping it about ¼-inch thick ensures tenderness without being too fragile.
When creaming butter and sugar, patience is key. Take your time until the mixture is pale and fluffy—that’s where you get that melt-in-your-mouth softness. If your butter isn’t soft enough, the cookies can turn out dense or crumbly.
For royal icing, always sift your powdered sugar first to avoid lumps. I’ve learned the hard way that dry or cracked icing usually means you didn’t mix it enough or added too much sugar. Keep a damp cloth over the bowl while decorating to prevent drying out.
Timing matters with royal icing too; outline your cookies first and let that set before flooding the inside. This prevents icing from running off the edges. Also, use gel food coloring instead of liquid to keep the icing at the right consistency.
Variations & Adaptations
- Gluten-Free Option: Swap the all-purpose flour with a 1-to-1 gluten-free baking flour blend. Just make sure it has xanthan gum, or add ½ teaspoon for structure.
- Flavor Twists: Try adding finely grated lemon or orange zest to the dough for a citrusy kick. Alternatively, use almond extract instead of vanilla for a nutty aroma.
- Vegan Version: Replace butter with vegan margarine and use a flax egg (1 tablespoon ground flaxseed + 3 tablespoons water) instead of a chicken egg. Use aquafaba (chickpea water) for royal icing instead of egg whites.
- Decorating Styles: Beyond royal icing, you can dust cookies with colored sugar before baking or drizzle melted chocolate on top for a different look and flavor.
I once made these with peppermint extract and crushed candy canes sprinkled on top — a festive hit that my kids absolutely adored. Don’t hesitate to get creative!
Serving & Storage Suggestions
Serve these Perfect Soft Christmas Sugar Cookies with Royal Icing at room temperature for the best texture and flavor. They pair wonderfully with hot cocoa, spiced cider, or a simple glass of milk. For holiday parties, arrange them on a festive platter with some fresh cranberries or pine sprigs for ambiance.
Store cookies in an airtight container at room temperature for up to 5 days. If you need to keep them longer, freeze them in a single layer on a baking sheet, then transfer to a freezer-safe container for up to 3 months. Just thaw at room temperature before serving.
Royal icing flavors deepen and set beautifully overnight, so if you can wait, that’s the sweet spot. Avoid stacking decorated cookies until the icing is fully dry to keep your masterpieces intact.
Nutritional Information & Benefits
Each cookie (depending on size) averages around 120-150 calories, with moderate amounts of fat and sugar, making them a delightful occasional treat. The recipe uses real butter and egg whites, offering some protein and essential fats, unlike many processed sweets.
Using real vanilla and fresh ingredients means no artificial additives, and the option to swap dairy and gluten components makes it friendly to various dietary needs. While these cookies aren’t health food (let’s be honest), they’re made with love and quality ingredients, which counts for something in my book!
Conclusion
These Perfect Soft Christmas Sugar Cookies with Royal Icing are more than just a holiday treat—they’re a tradition in the making. Soft, tender, and sweet with that glossy, decorative icing, this recipe hits all the right feelings of comfort and festive cheer. I encourage you to make it your own by trying different flavors or decorations.
I love this recipe because it’s foolproof and brings my family together with smiles and sticky fingers every time. Don’t forget to share your cookie creations with me in the comments below—I’d love to see your decorating skills and hear about your twists! Happy baking, and may your holidays be extra sweet!
FAQs
How do I keep my sugar cookies soft?
Chilling the dough before baking and not overbaking are key. Also, storing cookies in an airtight container helps retain moisture.
Can I make royal icing ahead of time?
Yes, royal icing can be made ahead and stored in an airtight container in the fridge for up to a week. Stir well before using.
What if I don’t have egg whites for the royal icing?
You can substitute with meringue powder mixed with water or use aquafaba (the liquid from canned chickpeas) for an egg-free version.
Can these cookies be frozen?
Absolutely! Freeze baked cookies in a single layer, then transfer to a freezer-safe container. Thaw at room temperature before decorating or serving.
How do I prevent royal icing from cracking?
Make sure the icing is mixed until smooth and glossy without lumps. Avoid adding too much powdered sugar, and don’t let the icing dry out while decorating by covering your bowl.
Pin This Recipe!

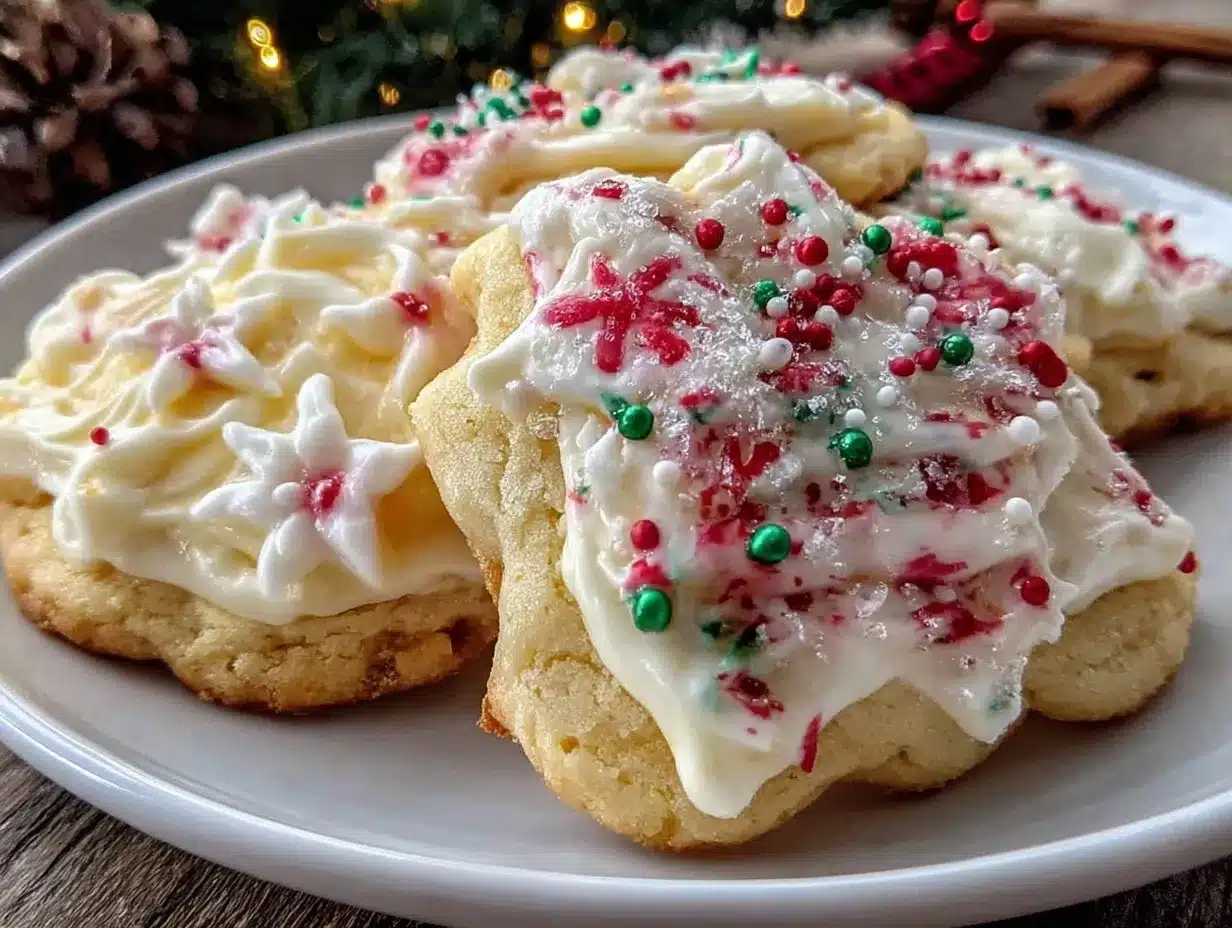
Perfect Soft Christmas Sugar Cookies Recipe with Easy Royal Icing Tutorial

Soft, tender sugar cookies with a melt-in-your-mouth texture, topped with smooth, sweet royal icing. Perfect for holiday celebrations and easy to decorate.
- Prep Time: 20 minutes
- Cook Time: 10 minutes
- Total Time: 1 hour 30 minutes
- Yield: 24 servings 1x
- Category: Dessert
- Cuisine: American
Ingredients
- 2 ¾ cups (345g) all-purpose flour
- 1 teaspoon baking powder
- ½ teaspoon salt
- 1 cup (227g) unsalted butter, softened
- 1 ½ cups (300g) granulated sugar
- 1 large egg, room temperature
- 2 teaspoons pure vanilla extract
- ¼ cup (60ml) whole milk
- 3 cups (360g) powdered sugar, sifted
- 2 large egg whites or 4 tablespoons meringue powder mixed with water
- 1 teaspoon lemon juice or vanilla extract
- Food coloring gels (optional)
Instructions
- Mix dry ingredients: whisk together flour, baking powder, and salt in a medium bowl; set aside.
- Cream butter and sugar: beat softened butter and granulated sugar with an electric mixer until light and fluffy, about 3-4 minutes.
- Add egg and vanilla: beat in egg and vanilla extract until fully combined and glossy.
- Alternate adding dry ingredients and milk: gradually add flour mixture in three parts, alternating with milk, beginning and ending with flour; mix on low speed just until combined.
- Chill the dough: cover tightly with plastic wrap and chill for at least 1 hour or overnight.
- Preheat oven to 350°F (175°C) and line baking sheets with parchment paper or silicone mats.
- Roll and cut: lightly flour surface and rolling pin; roll dough to ¼-inch thickness; cut shapes with cookie cutters and place 1 inch apart on baking sheets.
- Bake: 8-10 minutes until edges start to turn golden but centers remain soft.
- Cool: let cookies cool on baking sheet for 5 minutes, then transfer to wire racks to cool completely.
- Make royal icing: whisk powdered sugar, egg whites (or meringue powder mix), and lemon juice or vanilla extract until smooth and glossy; adjust consistency with water if needed.
- Decorate: transfer icing to piping bags; outline and fill cookies; allow icing to dry completely, preferably overnight.
Notes
Chill dough for at least 1 hour to prevent spreading and keep cookies soft. Use gel food coloring for royal icing to maintain consistency. Store cookies in an airtight container at room temperature for up to 5 days or freeze for up to 3 months. Allow royal icing to dry overnight before stacking.
Nutrition
- Serving Size: 1 cookie
- Calories: 135
- Sugar: 12
- Sodium: 90
- Fat: 6
- Saturated Fat: 4
- Carbohydrates: 20
- Fiber: 0.5
- Protein: 2
Keywords: Christmas cookies, sugar cookies, royal icing, holiday baking, soft cookies, festive cookies, easy cookie recipe