“Are you really sure you want to eat flowers?” my friend teased, eyeing the delicate petals that I was carefully pressing between parchment paper. Honestly, I wasn’t always sold on the idea of edible flowers, let alone layering them onto a cake that looked like a watercolor dream. But after a few attempts and a mild obsession that had me baking this Perfect Ombre Floral Cake with Pressed Edible Flowers multiple times in a week, I finally got it just right.
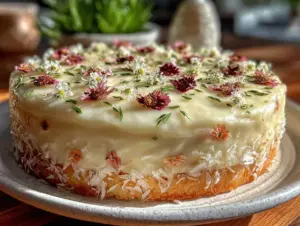
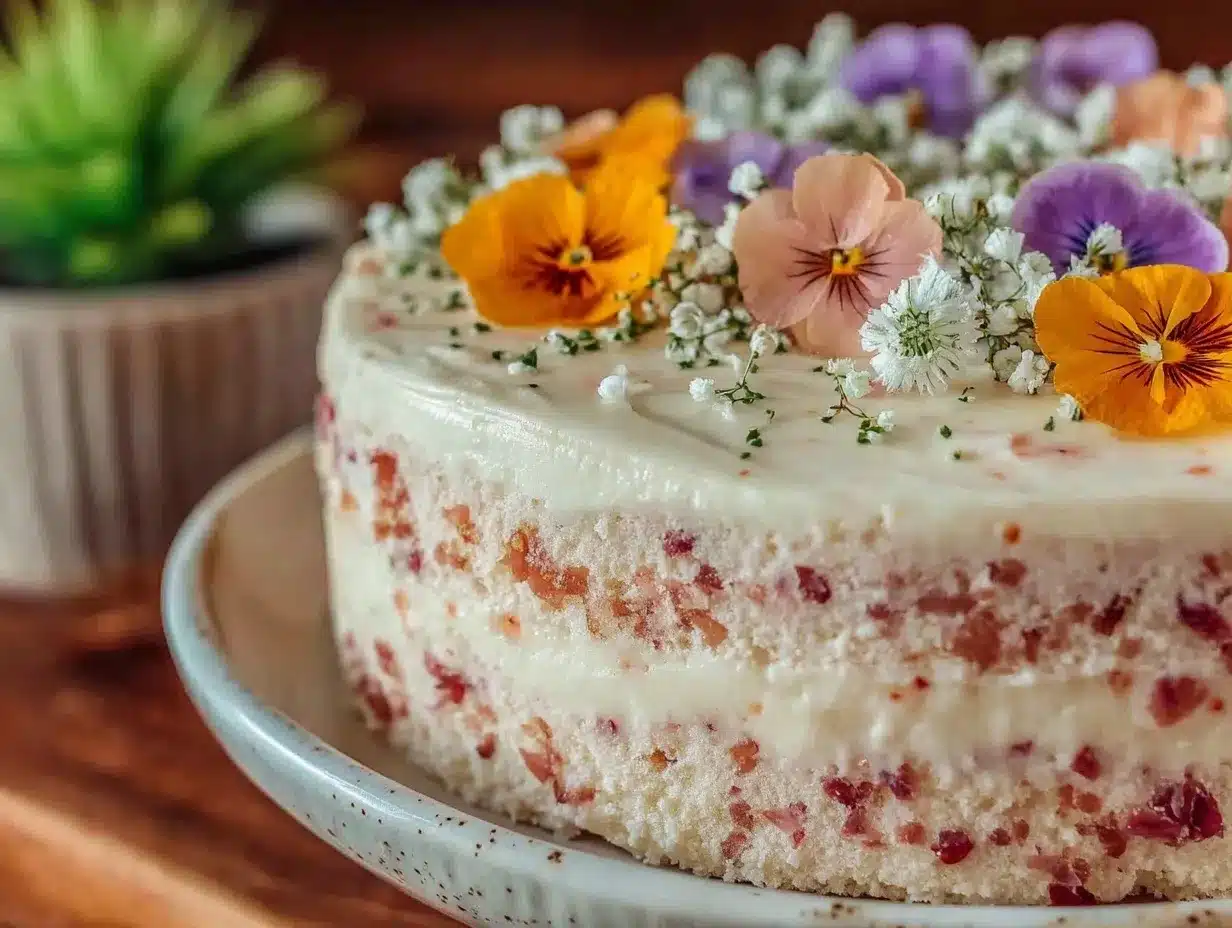
The first time I made this cake, it was a last-minute plan to bring something unique to a garden party. I rummaged through my fridge and pantry, grabbed some simple essentials, and paired them with flowers from my backyard — pansies, violets, and tiny daisies. The ombre effect on the frosting was a happy accident after I mixed too much food coloring in one bowl and decided to blend it out across layers. It looked stunning and tasted like a soft, sweet cloud, with the flowers adding a subtle floral note that was oddly comforting.
What stuck with me most was how this cake carried a quiet kind of elegance without needing fancy ingredients or complicated steps. It became my go-to when I wanted to impress without stressing out the night before a gathering. Plus, there’s something soothing about pressing flowers and watching them dry — a calm pause in the usual kitchen chaos. If you’re curious about making a cake that feels like a little piece of art (and tastes like one, too), this recipe is just the thing. It’s a gentle reminder that beautiful things don’t have to be complicated.
Why You’ll Love This Recipe
After baking the Perfect Ombre Floral Cake with Pressed Edible Flowers several times, I can say it’s got a few standout perks that keep me coming back:
- Quick & Easy: You can whip this up in about 1.5 hours, including baking and decorating — perfect for a last-minute celebration or a creative weekend project.
- Simple Ingredients: No need for exotic or pricey items. Flour, sugar, eggs, butter, and a few basic pantry staples are all it takes to build this showstopper.
- Perfect for Special Occasions: Whether it’s a birthday, bridal shower, or just an afternoon tea with friends, this cake brings a delicate charm that’s hard to beat.
- Crowd-Pleaser: I’ve had both kids and adults marvel at the pretty layers and the subtle floral flavor — it’s a hit every time.
- Unbelievably Delicious: The ombre frosting isn’t just for looks; its creamy, smooth texture complements the moist cake layers beautifully.
What sets this recipe apart is the pressed edible flowers technique. Instead of buying pricey floral decorations, pressing your own flowers adds a personal touch and a real connection to the cake. Plus, the ombre effect is achieved with a simple frosting swirl that anyone can master — no fancy piping skills required.
Honestly, this cake isn’t just a dessert; it’s a conversation starter and a calming craft rolled into one. If you’re into creating beautiful food that tastes as good as it looks, you’ll appreciate how this recipe turns simple ingredients into something memorable.
What Ingredients You Will Need
This recipe uses straightforward ingredients that build a moist, flavorful cake with a dreamy ombre frosting. The pressed edible flowers add a delicate natural touch without overwhelming the flavors.
For the Cake
- All-purpose flour, 2 ½ cups (315 g) — for a tender crumb, I like King Arthur brand
- Baking powder, 2 ½ teaspoons — helps the cake rise evenly
- Salt, ½ teaspoon — balances the sweetness
- Unsalted butter, 1 cup (227 g), softened — room temperature for easy creaming
- Granulated sugar, 1 ¾ cups (350 g) — sweet but not overpowering
- Large eggs, 4, room temperature — essential for structure and moisture
- Pure vanilla extract, 2 teaspoons — quality vanilla makes a noticeable difference
- Whole milk, 1 cup (240 ml), room temperature — keeps the batter smooth and moist
For the Ombre Buttercream Frosting
- Unsalted butter, 1 cup (227 g), softened — gives the frosting a rich base
- Powdered sugar, 4 cups (480 g), sifted — for smooth texture
- Heavy cream or whole milk, 2-3 tablespoons — adjust for desired consistency
- Pure vanilla extract, 1 ½ teaspoons — adds depth to the sweetness
- Gel food coloring in shades of pink or purple (I prefer AmeriColor brand for vibrant hues)
For the Pressed Edible Flowers
- Fresh edible flowers (pansies, violets, nasturtiums, or daisies) — make sure they are pesticide-free and safe to eat
- Parchment paper — for pressing flowers gently
- Heavy books or a flower press — to flatten and dry flowers over several days
If you want to swap for gluten-free, almond flour blends work well with this recipe, though the texture will be slightly denser. For dairy-free frosting, coconut oil whipped with powdered sugar can be a decent alternative, but it won’t hold the ombre effect quite as smoothly. You can also experiment with seasonal flowers — in summer, fresh edible lavender adds a lovely scent, while violets are perfect for spring.
Equipment Needed
- Two 8-inch (20 cm) round cake pans — non-stick or lined with parchment for easy removal
- Mixing bowls — at least two, for batter and frosting
- Electric mixer or stand mixer — makes creaming butter and whipping frosting much easier
- Offset spatula — essential for smoothing frosting layers and creating the ombre effect
- Measuring cups and spoons — for precise ingredient amounts
- Cooling rack — lets cakes cool evenly to avoid sogginess
- Flower press or heavy books — for pressing edible flowers over several days
If you don’t have a flower press, no worries! You can DIY one by placing flowers between sheets of parchment paper and stacking heavy books on top. I’ve used everything from my largest cookbook to a couple of hefty dictionaries — they work just fine. For frosting, a handheld mixer is fine if you don’t own a stand mixer; just be patient when whipping the butter and sugar.
Preparation Method
- Prepare your flowers first. Start by picking fresh edible flowers and placing them carefully between parchment sheets inside your flower press or under heavy books. Let them dry for 3-5 days until they’re completely flat and dry — this step can be done ahead to save time.
- Preheat your oven to 350°F (175°C). Grease and flour two 8-inch round cake pans or line them with parchment paper. This prevents sticking and helps cakes release cleanly.
- Mix the dry ingredients. In a medium bowl, whisk together 2 ½ cups (315 g) all-purpose flour, 2 ½ teaspoons baking powder, and ½ teaspoon salt. Set aside.
- Cream the butter and sugar. Using a stand or electric mixer on medium speed, beat 1 cup (227 g) softened unsalted butter with 1 ¾ cups (350 g) granulated sugar until light and fluffy, about 4-5 minutes. This step is key for a tender cake.
- Add eggs and vanilla. Beat in 4 large eggs, one at a time, mixing well after each addition. Then stir in 2 teaspoons pure vanilla extract.
- Combine wet and dry. Alternately add the flour mixture and 1 cup (240 ml) whole milk to the butter mixture in three parts, beginning and ending with flour. Mix gently but thoroughly to avoid overworking the batter.
- Divide batter for ombre effect. Separate the batter equally into 3 bowls. Add a small amount of gel food coloring to each bowl, increasing the intensity progressively (e.g., 1 drop, 2 drops, 3 drops) to create a gentle gradient.
- Layer the batters. Pour the darkest batter into the bottom of each cake pan, followed by the medium, then the lightest batter on top. Use a spatula to level gently.
- Bake for 30-35 minutes. Check doneness by inserting a toothpick; it should come out clean or with a few moist crumbs. Let cakes cool in pans for 10 minutes, then transfer to a cooling rack.
- Prepare the buttercream frosting. Beat 1 cup (227 g) softened butter until creamy. Gradually add 4 cups (480 g) powdered sugar, alternating with 2-3 tablespoons heavy cream and 1 ½ teaspoons vanilla. Whip until fluffy and smooth.
- Create the ombre frosting. Divide the frosting into 3 bowls. Tint each with gel food coloring, matching the cake layers’ shades but slightly lighter. This contrast makes the ombre effect more visible.
- Assemble and frost. Place the darkest cake layer on a serving plate, spread the matching frosting layer smoothly. Repeat with the medium and lightest layers. Then frost the exterior with the lightest shade. Use an offset spatula to blend the frosting colors vertically with gentle strokes, creating a seamless ombre transition.
- Decorate with pressed flowers. Carefully place the dried pressed edible flowers on the cake’s sides and top. You can use a small dab of frosting to secure them. Avoid handling flowers too much as they are fragile.
- Chill before serving. Let the cake chill in the refrigerator for 30 minutes to firm up the frosting and set the flowers in place.
Pro tip: If your cake layers domed too much in the oven, a quick trim with a serrated knife will level them for an even stack. Also, when mixing food coloring, start with less — you can always add more to get the perfect shade.
Cooking Tips & Techniques
One thing I learned the hard way is that patience really pays off with this cake. For example, rushing the flower pressing step leads to petals that bruise or curl up, which doesn’t look great on the finished cake. So, give yourself some days ahead or start the process early.
When it comes to frosting, temperature matters. If your butter is too cold, it won’t whip into a smooth, fluffy frosting, but if it’s too warm, the frosting gets runny and hard to work with. I usually set the butter out about an hour before starting, or zap it in 5-second bursts in the microwave if I’m in a hurry — just enough to soften, not melt.
Creating a smooth ombre effect is easier with an offset spatula and a light hand. Apply frosting in vertical stripes, then gently swipe the spatula up and down to blend the colors without muddying them. This technique also works beautifully on cakes like cheesy loaded baked rigatoni—not that they need frosting, but you get the idea of careful color blending.
A common mistake is overmixing the cake batter once you add the flour which can lead to a tough texture. Mix just until the flour disappears. Also, don’t skip the sifting of powdered sugar for the frosting — it really helps avoid lumps and keeps the texture light.
Lastly, multitasking helps here. While the cake layers are baking, I prep and press the flowers or whip up the frosting. This keeps the momentum going and makes the whole process feel less daunting.
Variations & Adaptations
This cake is very adaptable to different tastes and dietary needs. Here are a few ways I’ve tweaked it over time:
- Flavor variations: Add lemon zest or a splash of rose water to the batter for a subtle aromatic twist. Lavender-infused frosting pairs lovely with pressed lavender flowers.
- Dietary adaptations: Swap all-purpose flour with a gluten-free blend (like Bob’s Red Mill 1-to-1) for a gluten-free version. Use coconut cream or vegan butter for a dairy-free, vegan-friendly frosting.
- Seasonal flowers: In fall, I like to press tiny chrysanthemums or marigolds for a warm tone. Spring calls for pansies and violets, while summer offers nasturtiums and calendula.
- Alternative decorating methods: Instead of pressed flowers, fresh edible blooms or sugared flower petals can add a different texture and look. Just be mindful of moisture affecting the frosting.
Personally, I once swapped the vanilla buttercream for a cream cheese frosting with a hint of honey, which gave the cake a tangy depth that balanced the sweetness perfectly. It was a hit at a friend’s bridal shower. If you want to try a more rustic look, a naked cake style with just a thin frosting coat and scattered flowers works beautifully too.
Serving & Storage Suggestions
This cake shines best served at room temperature, which lets the flavors and textures come alive. I usually slice it with a sharp serrated knife and serve alongside a cup of herbal tea or a light sparkling wine.
For a more complete spread, pair it with fresh fruit or a simple salad like the crunchy pita chips in my fresh Lebanese fattoush salad to balance the sweetness.
Store leftover cake in an airtight container in the fridge for up to 3 days. The flowers may lose some crispness but will still look pretty. To keep the cake moist, let it come back to room temperature before serving again.
You can freeze the cake layers (unfrosted) wrapped tightly in plastic and foil for up to 2 months. Thaw overnight in the fridge before frosting and decorating.
Reheating isn’t really needed, but if you want to warm a slice slightly, a few seconds in the microwave works fine—just don’t overdo it or the frosting might melt.
Nutritional Information & Benefits
Each slice of this cake (assuming 12 servings) contains approximately:
| Nutrient | Amount |
|---|---|
| Calories | 350 |
| Fat | 18 g |
| Carbohydrates | 45 g |
| Protein | 4 g |
| Sugar | 30 g |
Aside from being a treat, the edible flowers add a small boost of antioxidants and vitamins depending on your selection. For instance, pansies contain vitamin C and flavonoids, which are beneficial for overall wellness.
While this isn’t a low-calorie dessert, it’s made with natural ingredients and no artificial additives. Plus, you can adjust sugar levels or swap to natural sweeteners if you prefer a lighter version.
Be mindful of allergies: some people may react to certain flowers or the dairy and gluten in the cake. Always use flowers that are confirmed edible and pesticide-free.
Conclusion
This Perfect Ombre Floral Cake with Pressed Edible Flowers is one of those recipes that feels more like a personal celebration than just dessert. It’s delicate, pretty, and surprisingly approachable, even if you’re not typically the “cake decorator” type. The way the ombre frosting melts into each layer, combined with the gentle floral notes, makes it a standout on any table.
Give yourself the freedom to experiment with colors, flowers, or flavors that suit your mood or occasion. I’ve found that the best part is watching friends’ reactions when they realize you made the beautiful flowers edible — it’s a small magic trick that always sparks conversation.
If you try this recipe, I’d love to hear how your cake turned out or what flowers you chose. Sharing your twists and tips helps keep the baking community vibrant and inspired.
Happy baking and flower pressing — here’s to creating sweet moments that look as lovely as they taste.
FAQs About the Perfect Ombre Floral Cake
Can I use any type of flowers for pressing and decorating?
Only use flowers that are edible and pesticide-free. Common safe options include pansies, violets, nasturtiums, and daisies. Avoid flowers like foxglove or oleander, which are toxic.
How long does it take to press edible flowers properly?
Pressing flowers takes about 3-5 days depending on thickness and moisture. The petals should be completely dry and flat before using them on the cake.
Can I make the cake layers ahead of time?
Yes, you can bake the layers up to 2 days ahead. Wrap them tightly in plastic wrap and store at room temperature or in the fridge before frosting.
What if I don’t have gel food coloring?
Gel colors work best for vibrant ombre effects without thinning the frosting. If you only have liquid food coloring, use less and add slowly, but the colors may be lighter and the frosting softer.
How do I store the decorated cake to keep the flowers looking fresh?
Store the cake in a cool, dry place or the fridge inside a cake box or airtight container. Avoid humid environments that can cause the flowers to wilt or colors to bleed.
Pin This Recipe!
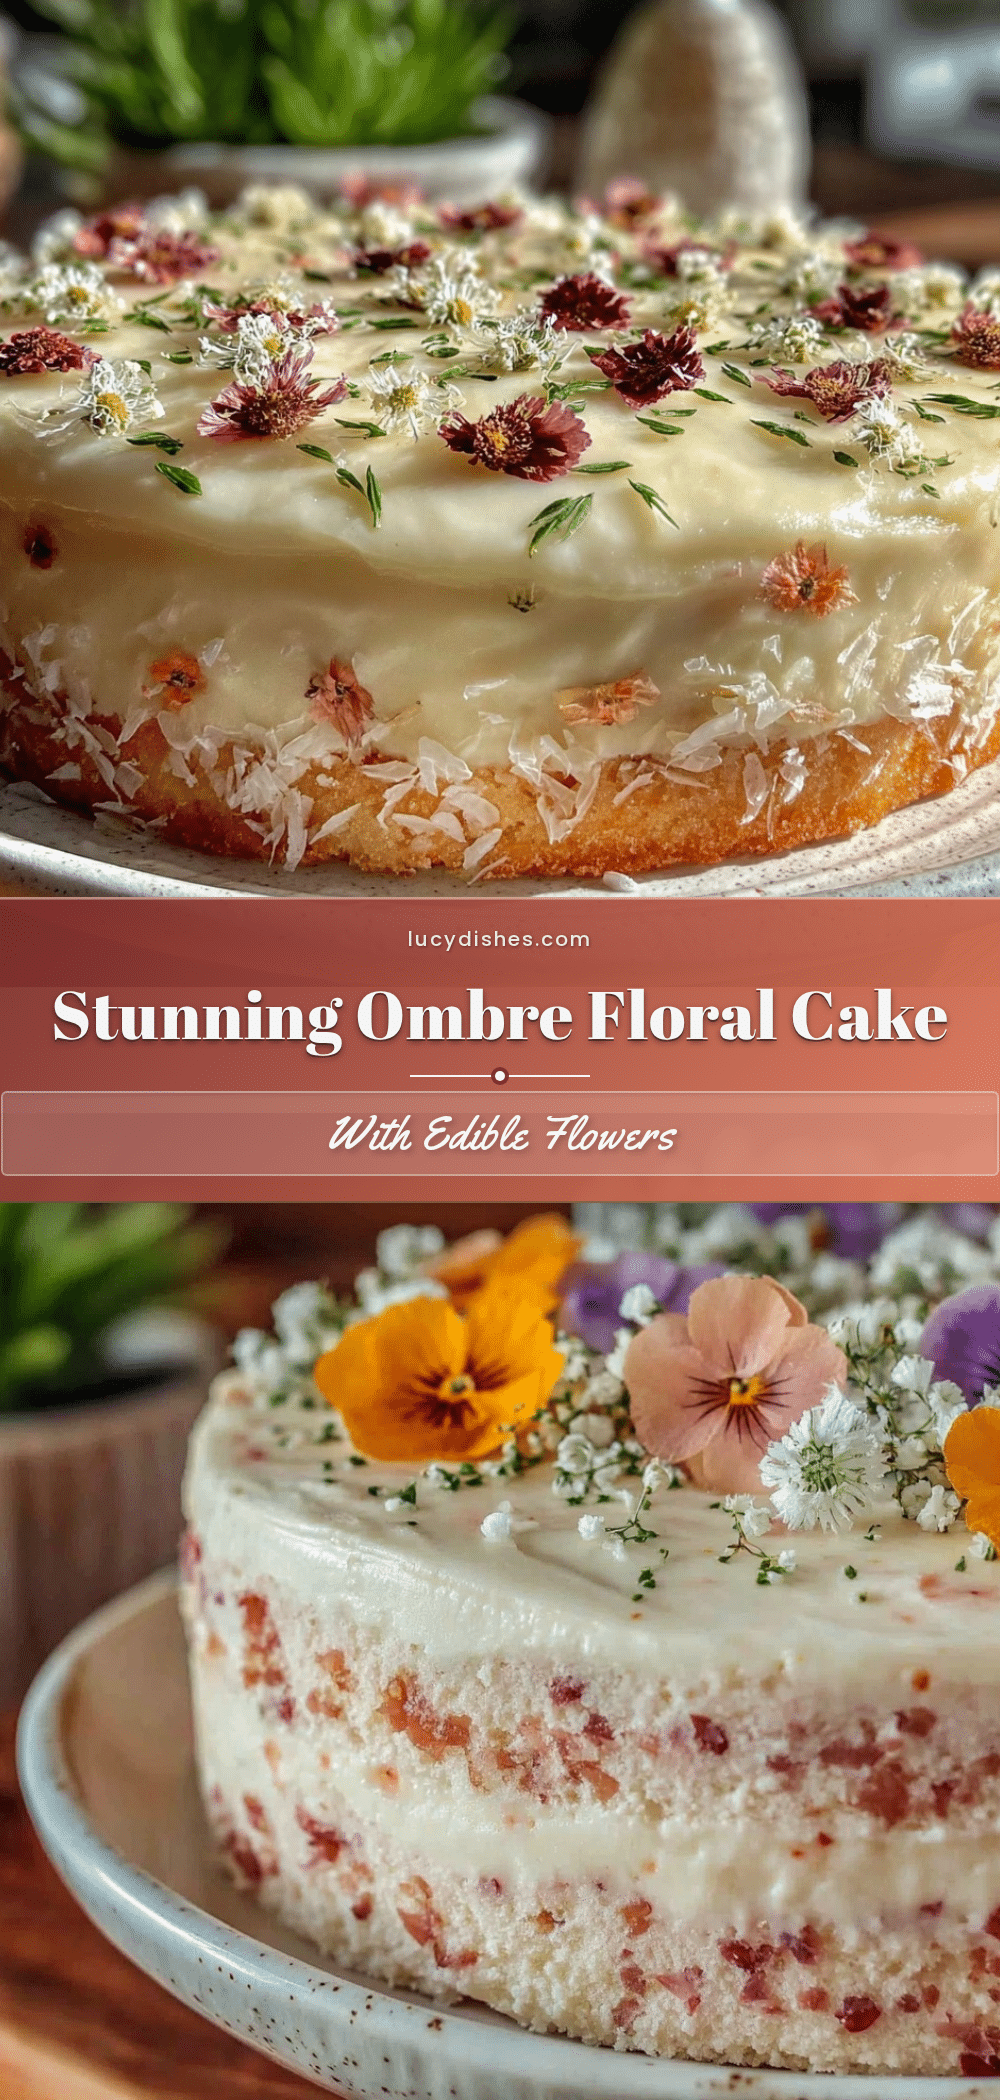
Perfect Ombre Floral Cake Recipe with Easy Pressed Edible Flowers Tutorial

A delicate and elegant ombre layered cake decorated with pressed edible flowers, featuring a moist cake and creamy buttercream frosting with a subtle floral note.
- Prep Time: 15 minutes (plus 3-5 days for flower pressing)
- Cook Time: 30-35 minutes
- Total Time: 1 hour 45 minutes (excluding flower pressing time)
- Yield: 12 servings 1x
- Category: Dessert
- Cuisine: American
Ingredients
- 2 ½ cups (315 g) all-purpose flour
- 2 ½ teaspoons baking powder
- ½ teaspoon salt
- 1 cup (227 g) unsalted butter, softened
- 1 ¾ cups (350 g) granulated sugar
- 4 large eggs, room temperature
- 2 teaspoons pure vanilla extract
- 1 cup (240 ml) whole milk, room temperature
- 1 cup (227 g) unsalted butter, softened (for frosting)
- 4 cups (480 g) powdered sugar, sifted
- 2–3 tablespoons heavy cream or whole milk
- 1 ½ teaspoons pure vanilla extract (for frosting)
- Gel food coloring in shades of pink or purple
- Fresh edible flowers (pansies, violets, nasturtiums, or daisies), pesticide-free
- Parchment paper (for pressing flowers)
- Heavy books or flower press (for pressing flowers)
Instructions
- Prepare your flowers first by placing fresh edible flowers between parchment sheets inside a flower press or under heavy books. Let dry for 3-5 days until flat and dry.
- Preheat oven to 350°F (175°C). Grease and flour two 8-inch round cake pans or line with parchment paper.
- Whisk together flour, baking powder, and salt in a medium bowl.
- Beat 1 cup softened butter with granulated sugar on medium speed until light and fluffy, about 4-5 minutes.
- Add eggs one at a time, mixing well after each addition, then stir in vanilla extract.
- Alternately add flour mixture and milk to butter mixture in three parts, beginning and ending with flour. Mix gently until combined.
- Divide batter equally into 3 bowls. Add increasing drops of gel food coloring to create an ombre effect.
- Layer the batters in cake pans starting with darkest on bottom, then medium, then lightest. Level gently with a spatula.
- Bake for 30-35 minutes until a toothpick inserted comes out clean or with a few moist crumbs. Cool in pans 10 minutes, then transfer to cooling rack.
- Beat 1 cup softened butter until creamy. Gradually add powdered sugar alternating with heavy cream and vanilla extract. Whip until fluffy and smooth.
- Divide frosting into 3 bowls and tint each with gel food coloring matching cake layers but lighter.
- Assemble cake by layering darkest cake layer with matching frosting, then medium, then lightest. Frost exterior with lightest shade and blend vertically with offset spatula for ombre effect.
- Decorate cake with pressed edible flowers, securing with small dabs of frosting. Handle flowers gently.
- Chill cake in refrigerator for 30 minutes to firm frosting and set flowers.
Notes
Press flowers 3-5 days ahead for best results. Use room temperature ingredients for smooth batter and frosting. Start with less food coloring and add more to achieve perfect ombre shades. Chill cake before serving to set frosting and flowers. For gluten-free, use almond flour blends; for dairy-free frosting, use coconut oil whipped with powdered sugar but ombre effect may be less smooth.
Nutrition
- Serving Size: 1 slice (1/12 of cak
- Calories: 350
- Sugar: 30
- Fat: 18
- Carbohydrates: 45
- Protein: 4
Keywords: ombre cake, pressed edible flowers, floral cake, buttercream frosting, layered cake, easy cake recipe, garden party cake