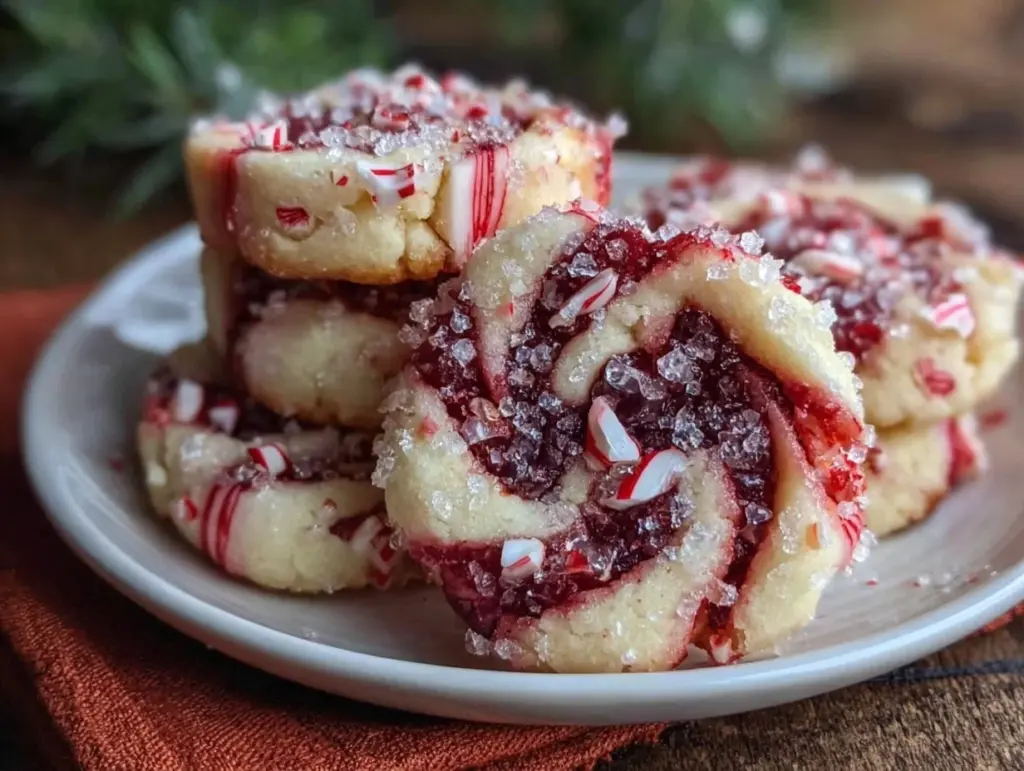
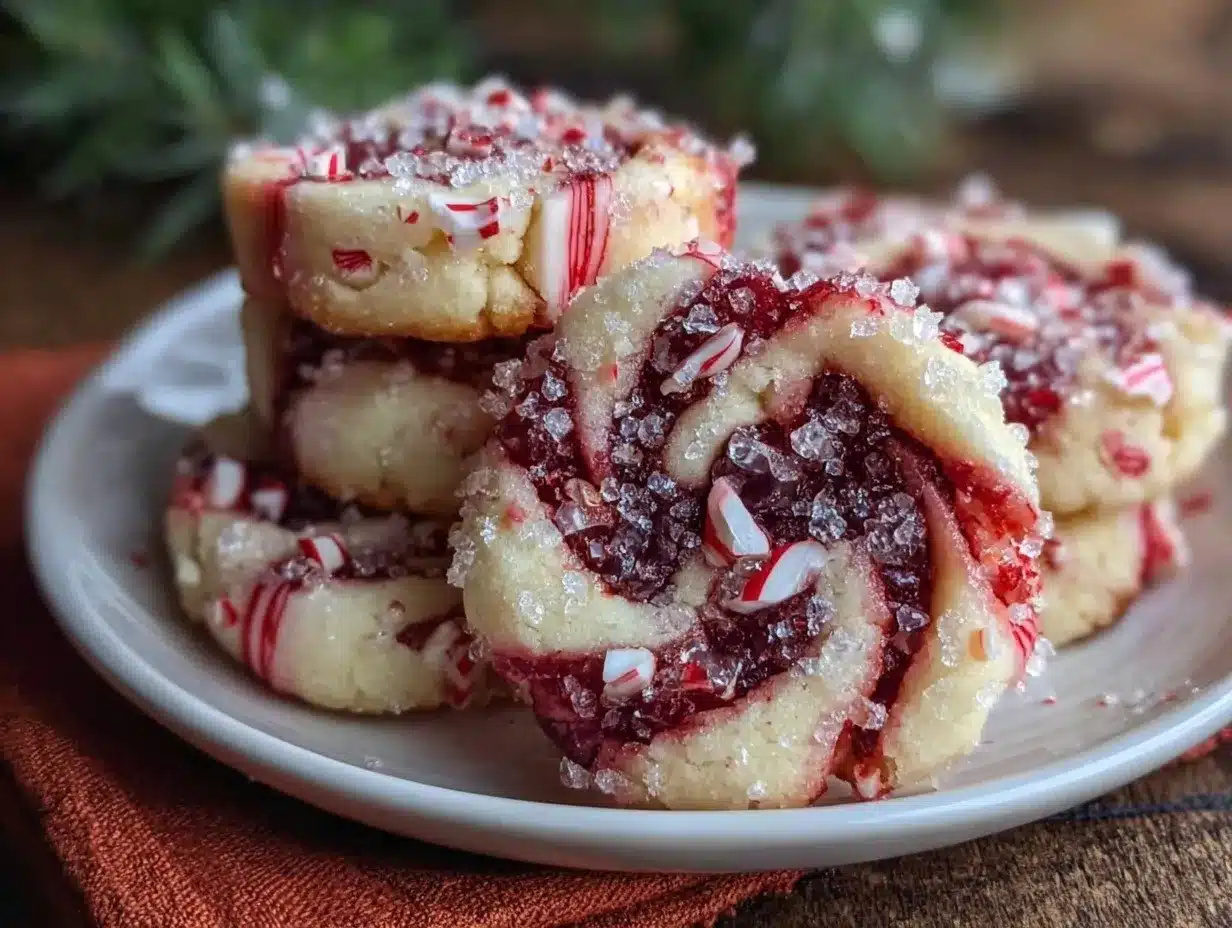
Let me tell you, the scent of peppermint filling my kitchen while baking these cookies is honestly the highlight of my December. It’s like a candy cane exploded (in a good way!) and the sweet aroma wraps around you, stirring up all those holiday memories. When I pull a tray of these tender Peppermint Swirl Cookies from the oven, the colors alone are enough to make you pause—creamy vanilla dough twisted with festive red swirls, each cookie looking like it was crafted for a Christmas Pinterest board.
The first time I made these, I was knee-high to a grasshopper, standing on a rickety stool next to my grandma as she showed me how to roll out cookie dough and swirl in the peppermint. Honestly, I was instantly hooked. There’s something magical about watching those swirls form—it’s the kind of moment where you pause, take a deep breath, and just smile because you know you’re onto something truly special.
My family couldn’t stop sneaking them off the cooling rack (and, you know, I can’t really blame them). These cookies have become a staple for our Christmas gatherings, cookie swaps, and even teacher gifts. They’re dangerously easy to make—so much so, I’ve tested them at least a dozen times in the name of research, of course. Each batch brings pure, nostalgic comfort, and honestly, I wish I’d discovered this peppermint swirl cookie recipe years ago. If you’re looking for a festive treat that feels like a warm hug and tastes like the holidays, you’re going to want to bookmark this one. Perfect for potlucks, brightening up your holiday dessert table, or simply sharing with friends and family.
Why You’ll Love This Peppermint Swirl Cookie Recipe
- Quick & Easy: Comes together in under an hour—just what you need when the holiday rush sneaks up on you. No chilling required, so you can whip these up even if you’re short on time.
- Simple Ingredients: No hunting for fancy stuff. Most of what you need is already in your pantry or fridge. Think butter, sugar, flour, and a splash of peppermint extract—classic, uncomplicated, and cozy.
- Perfect for Christmas Parties: These peppermint swirl cookies are a showstopper at holiday gatherings. Their vibrant colors and festive flavor make them the ultimate Christmas treat for parties, cookie exchanges, and school events.
- Crowd-Pleaser: Kids love them for their candy cane stripes, adults love them for their melt-in-your-mouth texture. They’re always the first to disappear from the dessert tray.
- Unbelievably Delicious: Soft, buttery vanilla cookie meets cool peppermint in every bite. The texture is tender, almost cake-like, with a gentle snap on the edges and a soft center. Trust me, you’ll want a second (and maybe a third).
What makes this peppermint swirl cookie recipe stand out? I use a special technique—rolling the doughs together and slicing to reveal perfect pinwheels. This isn’t just another peppermint cookie; it’s my best version, balancing the peppermint so it’s never overpowering. It’s comfort food with a festive twist—easier, faster, but with all the holiday flavor you crave. I’ve tested different extracts, experimented with dough thickness, and found the sweet spot for tender cookies that hold their shape but melt in your mouth. Whether you’re impressing guests or just treating yourself, these cookies deliver that soul-soothing satisfaction we all want during the holidays. Close your eyes after the first bite, and you’ll know what I mean!
What Ingredients You Will Need
This peppermint swirl cookies recipe uses simple, wholesome ingredients to deliver that classic holiday flavor and eye-catching swirl—without any fuss. You probably have most of these on hand already, which makes this recipe a real winner for last-minute baking.
- For the Vanilla Dough:
- 1 cup (226 g) unsalted butter, softened (adds richness and keeps the cookies tender)
- 1 cup (200 g) granulated sugar (for sweetness and classic cookie texture)
- 1 large egg, room temperature (for binding and structure)
- 2 teaspoons pure vanilla extract (I love Nielsen-Massey for a deep flavor)
- 2 3/4 cups (345 g) all-purpose flour (King Arthur is my go-to for consistent results)
- 1/2 teaspoon baking powder (lends a gentle lift)
- 1/4 teaspoon salt (balances sweetness)
- For the Peppermint Dough:
- Half of the above vanilla dough (after mixing, we’ll divide and color)
- 1 teaspoon peppermint extract (McCormick is reliable—don’t overdo it, peppermint can be strong!)
- Red gel food coloring (Wilton or Americolor gives vibrant swirls without making the dough sticky)
- Optional for Decorating:
- Crushed peppermint candies or candy canes (for sprinkling on top before baking—adds crunch and extra festivity)
- White chocolate chips (melted for drizzle, if you want an extra touch of sweetness)
Ingredient Tips: Use softened butter for the perfect creamy texture. If you’re out of peppermint extract, try mint extract instead, but know it may taste a bit different. Want gluten-free? Sub in a 1:1 gluten-free baking flour blend. For dairy-free, swap the butter with a vegan alternative like Earth Balance (the texture may be a tad different, but still good!). In summer, I sometimes swap peppermint for lemon extract and yellow gel coloring—just as pretty and refreshing!
Equipment Needed
- Stand Mixer or Hand Mixer: You’ll want something sturdy for creaming butter and sugar. A hand mixer works fine if you don’t have a stand mixer.
- Mixing Bowls: At least two—one for the main dough and one for mixing the colored dough.
- Measuring Cups and Spoons: Precision matters! I always recommend metal measuring spoons—they last forever.
- Rolling Pin: For rolling out the dough evenly. If you don’t have one, a cleaned wine bottle works in a pinch (been there, done that).
- Baking Sheets: Standard rimmed sheets are best. Parchment paper makes cleanup a breeze and prevents sticking.
- Sharp Knife or Bench Scraper: For slicing your cookie log into tidy swirls. Bench scrapers are my secret weapon for straight edges.
- Plastic Wrap: For rolling and chilling the dough (if needed). Keeps things tidy!
If you’re short on specialty items, don’t sweat it. I’ve made these with just a bowl and a fork for mixing—but a mixer really helps with creaming. If you use nonstick pans, watch the baking time since cookies color up faster. Keep your rolling pin clean and dusted with flour to prevent sticking. And if you’re on a budget, all these items can be found at discount stores—no need for fancy brands!
Preparation Method
- Cream the Butter and Sugar: In a large mixing bowl, beat 1 cup (226 g) unsalted butter and 1 cup (200 g) granulated sugar together until pale and fluffy—about 2-3 minutes. You’ll know it’s ready when it looks light and airy and smells sweet. If the mixture looks greasy, keep beating.
- Add Egg and Vanilla: Crack in 1 large egg and pour in 2 teaspoons vanilla extract. Beat until fully combined—about 1 minute. Scrape down the bowl as needed to catch any sneaky bits.
- Combine Dry Ingredients: In a separate bowl, whisk together 2 3/4 cups (345 g) flour, 1/2 teaspoon baking powder, and 1/4 teaspoon salt. Gradually add dry mixture to the wet ingredients, mixing just until a soft dough forms. Don’t overmix or the cookies can turn out tough.
- Divide the Dough: Split the dough in half. Leave one half plain (this is your vanilla base). To the other half, add 1 teaspoon peppermint extract and a few drops of red gel food coloring. Mix until the color is even (add more coloring for a deeper red, but go slow—you want a swirl, not a solid red).
- Shape and Swirl: On a lightly floured surface, roll out each dough half into a rectangle about 9×12 inches (23×30 cm) and about 1/4 inch (6 mm) thick. Place the colored dough over the vanilla dough. Gently roll them together into a tight log, starting from the long edge. If the dough cracks, just press it together—no worries, imperfections add charm!
- Slice the Cookies: Use a sharp knife or bench scraper to cut the log into 1/4-inch (6 mm) thick slices. Lay the slices on parchment-lined baking sheets, spacing them about 2 inches (5 cm) apart.
- Decorate (optional): Sprinkle a little crushed peppermint candy or drizzle melted white chocolate over each cookie before baking for extra sparkle and crunch.
- Bake: Preheat oven to 350°F (175°C). Bake cookies for 10-12 minutes, until edges are just set and bottoms are lightly golden. Keep an eye out—overbaking will dry them out, and you want them tender!
- Cool: Let cookies cool on the baking sheet for 5 minutes, then transfer to a wire rack to cool completely. They’ll seem soft at first but firm up as they cool.
Preparation Notes: If your dough gets sticky, chill it for 10-15 minutes before rolling. For sharper swirls, roll tightly and slice cleanly. If you’re making ahead, wrap the log in plastic and refrigerate for up to 2 days—or freeze for longer storage. Sensory cues: dough should feel soft, not crumbly; cookies should smell sweet and pepperminty, with edges just turning golden. My tip: bake one test cookie first to check timing (I’ve learned this the hard way more than once!).
Cooking Tips & Techniques
Here’s where all those years of cookie baking pay off! These peppermint swirl cookies turn out best when you pay attention to a few key techniques.
- Don’t Overmix: Once you add flour, mix just until combined. Overmixed dough gets tough and loses its tender bite.
- Use Gel Food Coloring: Liquid coloring can make the dough sticky and dull. Gel gives vibrant color without messing up the texture.
- Roll Evenly: Aim for a uniform thickness when rolling out dough. Uneven dough leads to some cookies baking faster than others (been there, had half a batch burn!).
- Chill If Needed: If your kitchen is warm or dough feels sticky, a quick chill in the fridge helps. It makes slicing easier and helps keep those swirls sharp.
- Watch the Oven: Because these cookies are pale, it’s easy to overbake. Check at the 10-minute mark—the edges should just start to color.
- Personal Lessons: One year, I tried rushing without chilling the dough and my swirls turned into blobs. Oops! Since then, I take the extra minute to check dough texture before rolling.
- Multitasking: Prep the next tray while the first batch bakes. It keeps things flowing, especially when you’re making several dozen for a party.
- Consistency Tip: Slicing with a bench scraper or serrated knife gives clean edges. If your slices are uneven, just reshape gently—there’s no cookie police!
Above all, remember: cookies should be fun. Perfection is overrated. Each swirl is unique, and every batch is a little different—embrace it!
Variations & Adaptations
One of my favorite things about this peppermint swirl cookies recipe is how easy it is to make it your own. Here are some tried-and-true variations:
- Gluten-Free: Use a 1:1 gluten-free baking flour blend like Bob’s Red Mill. The texture stays tender, and nobody will know the difference.
- Chocolate Swirl: Substitute 1/4 cup (30 g) flour in the colored dough with unsweetened cocoa powder. You’ll get a chocolate-peppermint swirl that’s rich and decadent.
- Lemon Swirl: Swap peppermint extract for lemon extract and red coloring for yellow. It’s a bright, summery twist that works for Easter or spring parties.
- Dairy-Free: Use vegan butter and check that your food coloring is plant-based. I’ve tried Earth Balance and it works beautifully.
- Different Baking Methods: Try baking in a convection oven for extra even browning. Lower the temperature by 15°F (8°C) and reduce baking time slightly.
- Personal Favorite: Last year, I added a handful of mini chocolate chips to the vanilla dough before rolling. The result? Chocolate-peppermint pinwheels that disappeared even faster!
Don’t be afraid to experiment—if you like stronger mint, add an extra dash of extract. Allergic to eggs? Replace with 1 tablespoon ground flaxseed mixed with 2.5 tablespoons water. There’s a version for everyone!
Serving & Storage Suggestions
These peppermint swirl cookies are best served at room temperature, arranged on a pretty platter or tiered cake stand for that Pinterest-worthy look. They make a gorgeous centerpiece for holiday brunches, Christmas parties, or as a sweet treat with afternoon tea. Pair with hot cocoa, spiced cider, or even a peppermint mocha for the full festive experience.
For gifting, stack a dozen in a clear cellophane bag with a ribbon—they’re sturdy and travel well. Store any leftovers in an airtight container at room temperature for up to five days. If you want to freeze them, layer cookies between sheets of parchment and store in a freezer-safe bag for up to two months. To reheat, just let them come to room temperature or pop in a 300°F (150°C) oven for 2-3 minutes to refresh the texture.
And here’s a secret: the peppermint flavor deepens overnight, so they’re even better on day two! Perfect for making ahead before your party.
Nutritional Information & Benefits
Each peppermint swirl cookie (about 28g) contains approximately:
- Calories: 110
- Fat: 6g
- Saturated Fat: 4g
- Carbohydrates: 14g
- Protein: 1g
- Sugar: 7g
Butter provides a dose of vitamin A and healthy fats (in moderation!), and peppermint extract offers a fresh taste without extra calories. If you use gluten-free flour or dairy-free butter, these cookies fit more dietary needs. Note: Contains wheat, egg, and dairy (unless adapted). Always check your extracts and food coloring for allergens. For me, these cookies strike a balance—festive, sweet, and not too heavy, so I can enjoy one or two without guilt.
Conclusion
If you’re looking for the perfect festive treat, this peppermint swirl cookies recipe is worth every minute. It’s easy to customize, makes a gorgeous presentation, and brings smiles to everyone who tries it. I love these cookies for their nostalgic comfort and how simple they are to whip up, even when life gets busy. So go ahead—give them a try, tweak them to suit your taste, and make them a new holiday staple in your home.
Let me know in the comments how you like your swirls (thick or thin?) or what fun variations you try out! If you share your creations on Pinterest or Instagram, tag me—I’d love to see your holiday baking adventures. Wishing you a season filled with sweet moments and peppermint goodness!
FAQs
How do I get vibrant red swirls in my peppermint swirl cookies?
Use gel food coloring instead of liquid. It provides a bold color without making the dough sticky. If you want deeper red, add a little at a time and mix thoroughly.
Can I make peppermint swirl cookies ahead of time?
Absolutely! You can prepare the dough log in advance and refrigerate for up to two days, or freeze for up to two months. Slice and bake whenever you need fresh cookies.
What if I don’t have peppermint extract?
You can use mint extract, but the flavor will be slightly different—more spearmint than peppermint. For a non-mint version, lemon or almond extract works well, too.
Do these cookies work with gluten-free flour?
Yes! Use a 1:1 gluten-free baking flour blend for great results. The texture stays tender and the swirls look just as pretty.
Can I decorate peppermint swirl cookies with chocolate or sprinkles?
Of course! Drizzle with melted white or dark chocolate, or add festive sprinkles before baking. Crushed peppermint candies also add crunch and extra holiday flair.
Pin This Recipe!
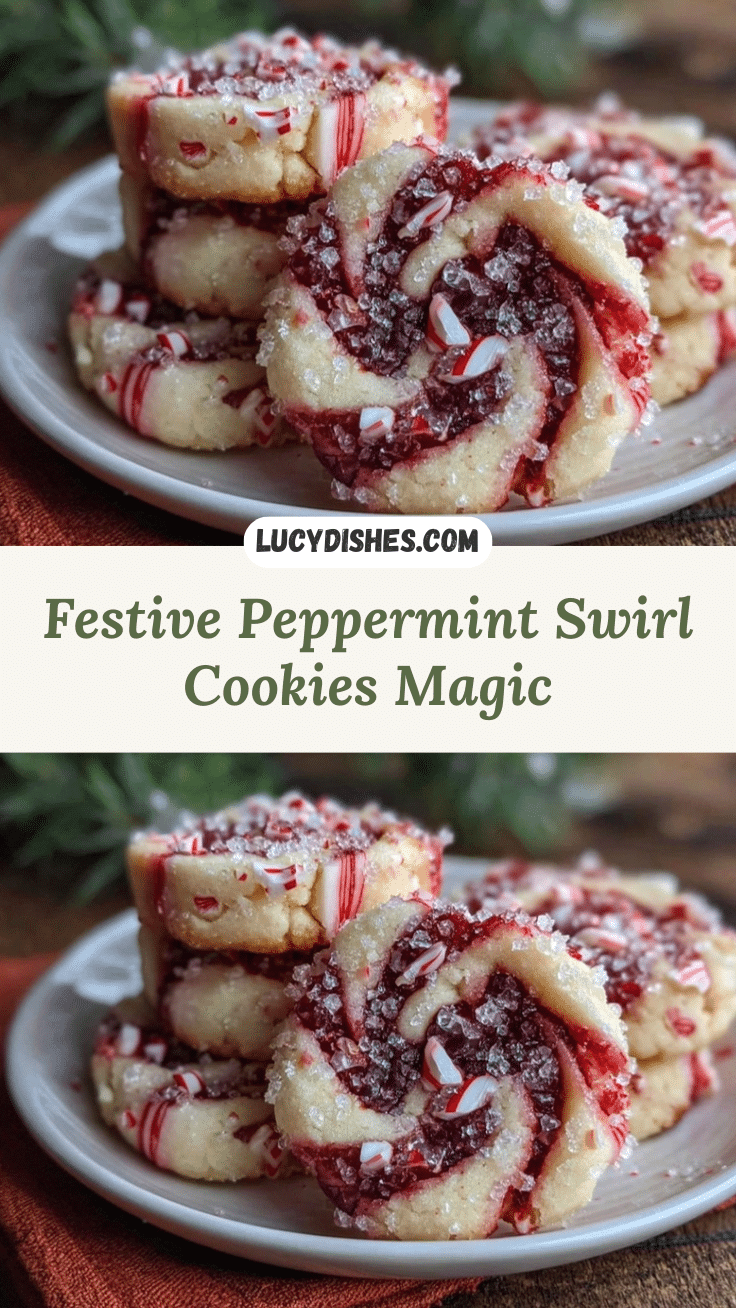
Peppermint Swirl Cookies
Festive, tender vanilla cookies swirled with peppermint and vibrant red color, perfect for Christmas parties, cookie swaps, and holiday gifting. These easy, no-chill cookies deliver nostalgic comfort and eye-catching presentation in under an hour.
- Prep Time: 20 minutes
- Cook Time: 12 minutes
- Total Time: 32 minutes
- Yield: 36 cookies 1x
- Category: Dessert
- Cuisine: American
Ingredients
- 1 cup (226 g) unsalted butter, softened
- 1 cup (200 g) granulated sugar
- 1 large egg, room temperature
- 2 teaspoons pure vanilla extract
- 2 3/4 cups (345 g) all-purpose flour
- 1/2 teaspoon baking powder
- 1/4 teaspoon salt
- 1 teaspoon peppermint extract
- Red gel food coloring
- Crushed peppermint candies or candy canes (optional, for decorating)
- White chocolate chips, melted (optional, for drizzle)
Instructions
- In a large mixing bowl, beat butter and sugar together until pale and fluffy, about 2-3 minutes.
- Add egg and vanilla extract; beat until fully combined, scraping down the bowl as needed.
- In a separate bowl, whisk together flour, baking powder, and salt. Gradually add dry mixture to wet ingredients, mixing just until a soft dough forms.
- Divide the dough in half. Leave one half plain (vanilla base). To the other half, add peppermint extract and a few drops of red gel food coloring. Mix until color is even.
- On a lightly floured surface, roll out each dough half into a rectangle about 9×12 inches and 1/4 inch thick. Place colored dough over vanilla dough. Gently roll together into a tight log from the long edge.
- Slice the log into 1/4-inch thick slices using a sharp knife or bench scraper. Lay slices on parchment-lined baking sheets, spacing about 2 inches apart.
- Sprinkle crushed peppermint candy or drizzle melted white chocolate over cookies before baking, if desired.
- Preheat oven to 350°F (175°C). Bake cookies for 10-12 minutes, until edges are just set and bottoms are lightly golden.
- Let cookies cool on the baking sheet for 5 minutes, then transfer to a wire rack to cool completely.
Notes
For best swirls, use gel food coloring and roll dough tightly. If dough is sticky, chill for 10-15 minutes before rolling. Cookies can be made ahead; refrigerate dough log for up to 2 days or freeze for up to 2 months. For gluten-free, use a 1:1 baking flour blend. Dairy-free butter works, but texture may vary. Decorate with crushed peppermint, chocolate drizzle, or festive sprinkles.
Nutrition
- Serving Size: 1 cookie (about 28g)
- Calories: 110
- Sugar: 7
- Sodium: 40
- Fat: 6
- Saturated Fat: 4
- Carbohydrates: 14
- Protein: 1
Keywords: peppermint swirl cookies, Christmas cookies, holiday dessert, easy cookies, party treats, peppermint cookies, pinwheel cookies, festive baking