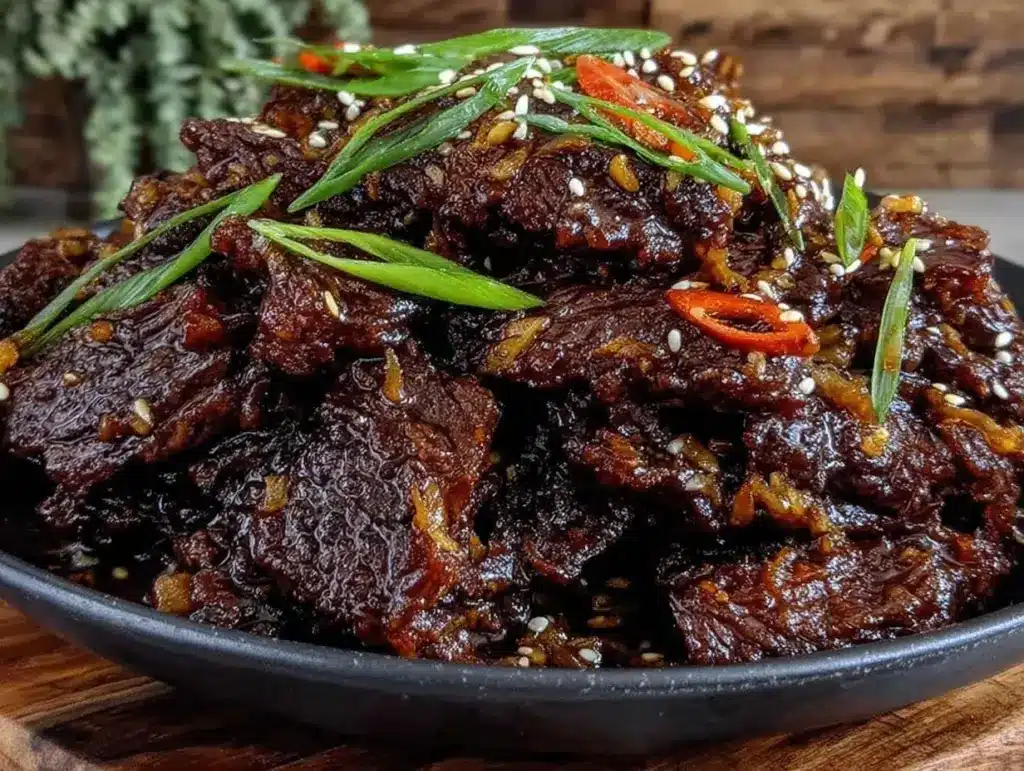
Let me set the scene: the aroma of garlic and ginger swirling through my kitchen, soy sauce bubbling away, and tender strips of beef practically melting into a savory, glossy sauce. That’s the magic of Mongolian Beef made in a pressure cooker—the kind of smell that draws everyone from their rooms, noses leading the way. You know what I mean, right? The first time I made this Mongolian Beef Pressure Cooker recipe, I was hit with a wave of nostalgia—the same feeling I got years ago when I tasted Mongolian beef at a bustling family-style restaurant. It was one of those moments where you pause, take a deep breath, and just smile because you know you’re onto something truly special.
Honestly, I wish I’d found this recipe sooner (it would’ve saved a lot of takeout orders and questionable stir-fries). My grandma used to make a version that simmered for hours—tender, yes, but not exactly weeknight-friendly. Fast forward to me, knee-high to a grasshopper, watching the sauce thicken and the beef turn silky. Flash forward again, and I’m testing this pressure cooker Mongolian beef “in the name of research, of course,” until it’s just right—so tender you barely need a fork. My family couldn’t stop sneaking bites from the pot (and I can’t really blame them; it’s dangerously easy to make).
This dish has become a staple at our gatherings—perfect for potlucks, cozy Friday dinners, or just those nights when you need a hug in a bowl. It’s pure, nostalgic comfort, but with the modern twist of pressure cooking that delivers results fast. Trust me, bookmark this one if you want a weeknight dinner that feels like you pulled off something fancy without spending all evening in the kitchen.
Why You’ll Love This Mongolian Beef Pressure Cooker Recipe
As someone who’s made Mongolian Beef every which way—slow cooker, stovetop, and now pressure cooker—I can tell you this version is a total game changer. It’s the recipe I reach for when time is tight but flavor is non-negotiable. Here’s why you’re going to love it:
- Quick & Easy: Ready in just 30 minutes (yes, really!), which means you can whip it up on a busy weeknight or when you get a last-minute craving.
- Simple Ingredients: Nothing fancy or hard to find; you probably have most of the items in your pantry right now.
- Perfect for Any Occasion: Great for family dinners, meal prepping lunches, or even serving at casual get-togethers.
- Crowd-Pleaser: Both kids and adults rave about the flavor and tenderness—every time I’ve served it, the pot is scraped clean.
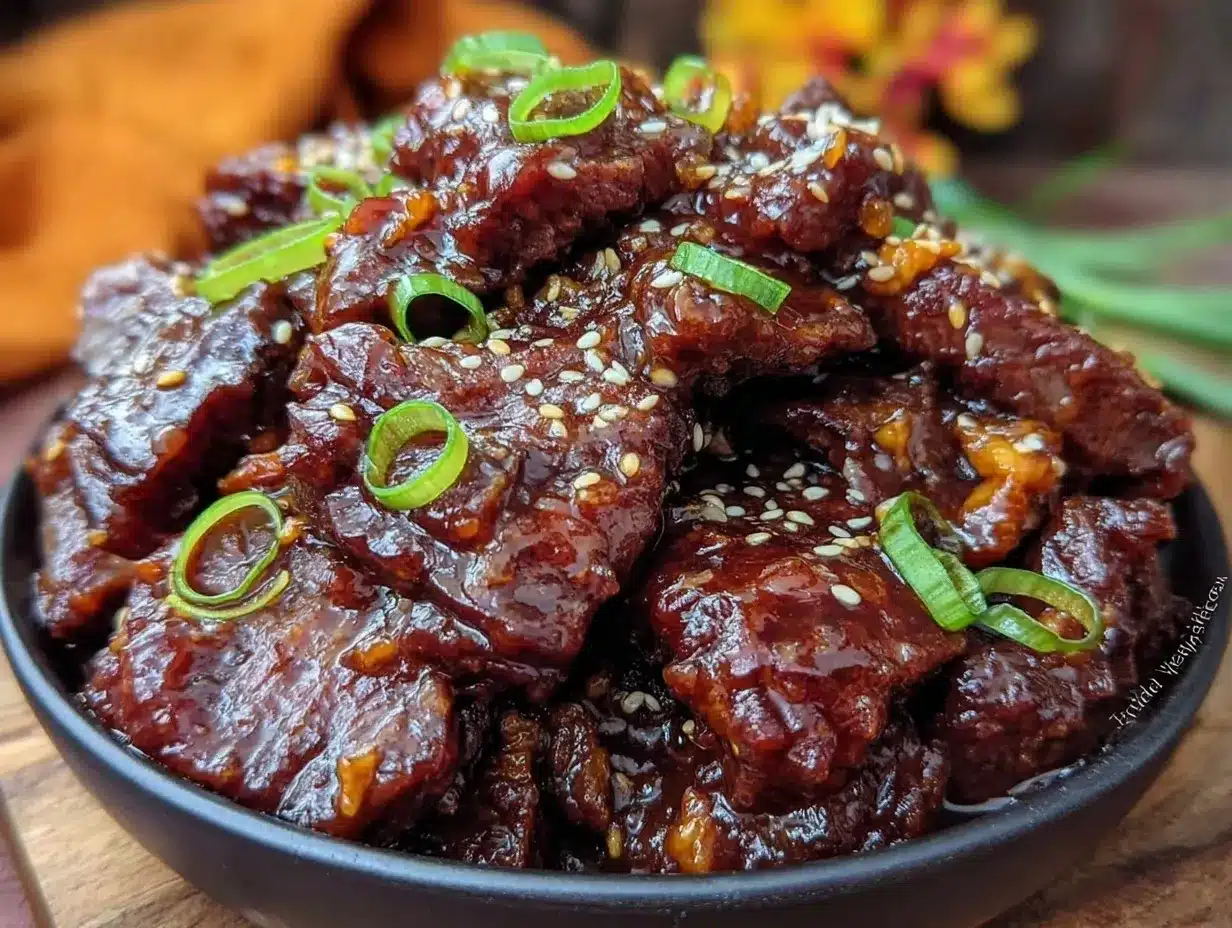
- Unbelievably Delicious: The sauce is rich, slightly sweet, and packs that classic savory punch. The beef turns out melt-in-your-mouth tender, and the whole thing just screams comfort food.
What sets this recipe apart? The pressure cooker locks in flavor fast—no fussing over a stovetop for hours. I use a little cornstarch slurry at the end for that restaurant-style glossy sauce (so good!). My secret is using flank steak and slicing it against the grain—makes all the difference for texture. Plus, I toss in extra ginger for a pop of warmth and depth.
This Mongolian Beef Pressure Cooker recipe isn’t just another “quick dinner.” It’s the kind of meal that makes you close your eyes on the first bite, totally satisfied. Healthier than takeout, faster than delivery, and every bit as comforting. Whether you’re trying to impress guests or just want a stress-free dinner that’ll make your family smile, this one hits all the right notes.
What Ingredients You Will Need
This Mongolian Beef Pressure Cooker recipe relies on a handful of familiar ingredients that come together for big flavor. Most are pantry staples—nothing fancy or intimidating. Let’s break it down:
- For the Beef:
- Flank steak (1 ½ lb / 680 g), sliced thin against the grain (for tenderness and quick cooking; you can use sirloin or skirt steak as an alternative)
- Cornstarch (¼ cup / 32 g), for coating the beef (helps thicken the sauce and gives that classic silky finish)
- For the Sauce:
- Soy sauce (½ cup / 120 ml, low sodium preferred)
- Brown sugar (⅓ cup / 65 g; dark for richer flavor, light works too)
- Beef broth (½ cup / 120 ml, homemade or store-bought)
- Garlic (4 cloves, minced; I use fresh for punch, but jarred works in a pinch)
- Fresh ginger (1 tablespoon / 15 g, grated; adds warmth and depth)
- Sesame oil (2 teaspoons / 10 ml; for nutty aroma)
- Rice vinegar (1 tablespoon / 15 ml; balances the sweetness)
- Red pepper flakes (½ teaspoon / 1 g; optional for a gentle kick)
- For Thickening & Garnish:
- Cornstarch slurry (2 tablespoons / 16 g cornstarch + 2 tablespoons water)
- Green onions (3 stalks, sliced; for a fresh pop)
- Sesame seeds (1 tablespoon / 8 g, toasted; totally optional but adds crunch and a bit of flair)
Ingredient Tips and Substitutions:
- Swap flank steak with chicken breast for a lighter take, or tofu for a vegetarian twist.
- Use tamari or coconut aminos for gluten-free needs.
- Brown sugar can be replaced with honey or coconut sugar if preferred.
- If you’re out of beef broth, vegetable broth works fine.
- For extra veggies, toss in bell peppers or snap peas before pressure cooking.
- I recommend San-J or Kikkoman for soy sauce—the flavor is reliable.
- Fresh ginger makes a big difference, but ground ginger works if you’re in a hurry.
This ingredient list is forgiving—don’t stress if you need to swap something. The goal is tender beef and that signature Mongolian sauce flavor.
Equipment Needed
Here’s what you’ll need to make Mongolian Beef in your pressure cooker:
- Pressure Cooker: Any electric model (I use an Instant Pot 6-quart, but Ninja Foodi and Crock-Pot Express work too)
- Sharp chef’s knife: For slicing beef thinly—makes all the difference for tenderness
- Cutting board: Preferably non-slip; helps when slicing steak against the grain
- Mixing bowls: For tossing beef in cornstarch and prepping sauce ingredients
- Tongs or spoon: For sautéing and transferring beef
- Measuring cups and spoons: Accuracy helps balance the sauce flavors
- Small whisk: To mix cornstarch slurry (a fork works, too, in a pinch)
- Serving platter or bowl: For presentation (I love using a wide shallow bowl so the sauce pools nicely!)
If you don’t own a fancy pressure cooker, stovetop models work as well—just adjust timing. I’ve used budget-friendly knives and cutting boards; just keep them sharp and clean. For maintenance, wipe down your pressure cooker’s sealing ring and lid after use (trust me, sticky sauce loves to hide there). This recipe is forgiving about equipment—just use what you’ve got.
Preparation Method
- Prep the Beef:
Slice 1 ½ lb (680 g) flank steak thinly against the grain—about ¼ inch (6 mm) thick strips. Toss beef in ¼ cup (32 g) cornstarch until evenly coated. (Tip: Don’t skip this, it’s key for velvety texture!) Set aside. Takes about 5 minutes. - Mix the Sauce:
In a mixing bowl, combine ½ cup (120 ml) soy sauce, ⅓ cup (65 g) brown sugar, ½ cup (120 ml) beef broth, 4 minced garlic cloves, 1 tablespoon (15 g) grated fresh ginger, 2 teaspoons (10 ml) sesame oil, 1 tablespoon (15 ml) rice vinegar, and ½ teaspoon (1 g) red pepper flakes (optional). Stir until sugar dissolves. This takes 2 minutes. - Sauté the Beef:
Set your pressure cooker to sauté mode. Add a splash of oil (about 1 tablespoon / 15 ml) and let it heat up. Drop in the coated beef strips and sauté for 2-3 minutes, turning until lightly browned but not cooked through. (Don’t overcrowd—work in batches if needed.) Remove beef and set aside. - Deglaze the Pot:
Pour a little beef broth (2-3 tablespoons / 30-45 ml) into the pot and scrape up any browned bits with a wooden spoon. This prevents the “burn” notice and adds flavor. - Pressure Cook:
Return browned beef to the pot. Pour sauce mixture over the beef. Lock the lid, set valve to sealing, and cook on high pressure for 10 minutes. (It really only needs this short time for tenderness—longer can make it mushy.) - Quick Release:
Once the timer goes off, do a quick release by turning the valve to “venting.” Steamy! Open lid carefully. The beef should be tender and the sauce slightly thin. - Thicken the Sauce:
Set pressure cooker to sauté mode again. Mix 2 tablespoons (16 g) cornstarch with 2 tablespoons water to make a slurry. Stir into the pot; cook for 2-3 minutes until sauce thickens and is glossy. Stir often to avoid lumps. (If sauce is too runny, add another teaspoon of cornstarch slurry.) - Finish and Garnish:
Turn off heat. Stir in 3 sliced green onions and sprinkle with 1 tablespoon (8 g) toasted sesame seeds. The beef should be coated in a shiny, savory sauce—smells amazing! - Serve:
Spoon Mongolian Beef over steamed rice, noodles, or cauliflower rice. Scatter extra green onions on top if you like. Now’s the time to taste and adjust seasoning if needed.
Notes & Troubleshooting:
If beef isn’t tender, check thickness of slices—thicker pieces may need 2-3 more minutes. Sauce too salty? Use low-sodium soy sauce and balance with extra brown sugar or broth. Too sweet? Add a splash more vinegar. If the sauce sticks to the bottom, deglaze thoroughly before pressure cooking. For time-saving, prep sauce and beef ahead! This recipe is forgiving—just follow the sensory cues (beef should be soft, sauce glossy, aroma irresistible).
Cooking Tips & Techniques
I’ve made Mongolian Beef in just about every way you can imagine, and these are the tricks that make the pressure cooker version shine:
- Slice Beef Thinly: Cutting flank steak against the grain (¼ inch / 6 mm) ensures the beef stays tender after pressure cooking. Thicker pieces just don’t get as melt-in-your-mouth.
- Don’t Skip Cornstarch: The cornstarch coating is a little messy, but it’s essential for that silky, restaurant-style texture and helps the sauce cling beautifully.
- Layer Flavor: Sautéing the beef first adds depth. I tried skipping this step once—result was tasty, but not as rich.
- Deglaze Thoroughly: After browning, use broth to scrape up those tasty bits. If you miss this, you might get a “burn” warning and lose flavor.
- Timing is Everything: Overcooking can make the beef mushy, so stick to 10 minutes at high pressure. I learned this the hard way after walking away once (don’t do that!).
- Finish with Fresh Garnish: Green onions and sesame seeds add crunch and brightness—makes it look as good as it tastes.
- Multitasking: While the pressure cooker does its thing, I use the time to make rice or steam veggies. It’s a kitchen rhythm you get into after a few tries.
Biggest lesson? Don’t be afraid to adjust seasoning after cooking. Every pressure cooker behaves a little differently, so taste and tweak. The more you make it, the more you’ll feel like a pro (even if you still drop a few beef strips on the floor like I do sometimes—hey, it happens).
Variations & Adaptations
This Mongolian Beef Pressure Cooker recipe is super flexible, making it easy to adapt for dietary needs, seasonal ingredients, or just a change of pace. Here are my favorite twists:
- Dietary Adaptations:
- For gluten-free, swap regular soy sauce for tamari or coconut aminos.
- To make it low-carb, serve over cauliflower rice and use a sugar substitute like Swerve or monk fruit instead of brown sugar.
- Vegetarian? Substitute tofu or jackfruit for steak; pressure cook for just 5 minutes and thicken as usual.
- Seasonal Twists:
- Add snap peas, carrots, or bell peppers to the pot before pressure cooking for extra color and crunch.
- In winter, toss in mushrooms or baby bok choy for heartiness.
- Flavor Variations:
- Spicy Mongolian Beef: Double the red pepper flakes or add a splash of chili oil at the end.
- Garlic Lovers: Add 2 extra minced cloves for a punchier sauce.
- Peanut Mongolian Beef: Stir in 2 tablespoons (30 g) peanut butter before pressure cooking for a nutty twist.
Personally, I love adding bell peppers and a handful of baby spinach at the end—they wilt beautifully and soak up the sauce. Don’t hesitate to play with the ingredients; the pressure cooker is forgiving, and you might just stumble onto your own signature version.
Serving & Storage Suggestions
Mongolian Beef is best served hot, straight from the pressure cooker. The sauce glistens, the beef is tender, and the whole dish is just begging to be spooned over fluffy white rice or noodles. For a pretty presentation, use a wide shallow bowl and sprinkle with extra green onions and sesame seeds.
Perfect Pairings: Pair with steamed broccoli, Asian slaw, or even crispy spring rolls. For drinks, green tea or light beer works, but my kids love a simple iced lemonade.
Storage: Store leftovers in an airtight container in the refrigerator for up to 4 days. The sauce thickens nicely overnight, soaking into the beef even more. You can freeze for up to 2 months; just thaw overnight in the fridge.
Reheating Tips: Reheat gently in a saucepan over low heat, adding a splash of water if the sauce is too thick. Microwave works too—cover loosely and heat in 1-minute bursts. Trust me, the flavors only get deeper with time, so leftovers are a bonus!
Nutritional Information & Benefits
Here’s a quick snapshot of the nutrition per serving (about 1 cup or 200 g):
- Calories: ~320
- Protein: 26 g
- Carbs: 24 g
- Fat: 13 g
- Sodium: ~800 mg (using low-sodium soy sauce)
Health Benefits: Flank steak provides lean protein and iron, while ginger and garlic offer anti-inflammatory and immune-boosting properties. If you swap in cauliflower rice, you’ll lower the carb count a lot. The recipe can easily be adjusted for gluten-free or low-sugar diets.
Allergens to watch for: soy (in sauce), sesame, and gluten (unless you use tamari). From a personal wellness perspective, I love how this recipe delivers “takeout flavor” with way less oil and sugar than the restaurant version. It’s comfort food that doesn’t feel heavy—just satisfying.
Conclusion
If you’re craving takeout-style comfort with a homemade touch, this Mongolian Beef Pressure Cooker recipe is honestly worth every minute. It’s fast, forgiving, and packed with flavor—the kind of meal that makes you feel like a kitchen superstar even on a rushed weeknight.
I love this recipe because it’s endlessly adaptable, always tender, and 100% satisfying. Whether you’re cooking for picky kids, hungry teens, or just yourself after a long day, it never disappoints. Don’t be afraid to tweak to your taste—add veggies, swap proteins, play with spice levels. Bookmark it, share it, and let me know how you make it your own!
Drop a comment below if you try this Mongolian Beef Pressure Cooker recipe, or share your favorite adaptations. I can’t wait to hear your stories—let’s keep the comfort food magic going. Happy cooking!
Frequently Asked Questions
Can I use a different cut of beef for this Mongolian Beef Pressure Cooker recipe?
Absolutely! Flank steak is ideal for tenderness, but sirloin, skirt steak, or even chuck roast (cut thin) will work. Just slice against the grain for best texture.
What if I don’t have brown sugar—can I use something else?
You can substitute honey, coconut sugar, or even white sugar in a pinch. Each one gives a slightly different flavor, but the sauce still turns out delicious.
How do I make this recipe gluten-free?
Swap regular soy sauce for tamari or coconut aminos, and double-check that your beef broth is gluten-free. Easy as that!
Can I add vegetables to the pressure cooker with the beef?
Definitely! Bell peppers, carrots, snow peas, or mushrooms work well. Just chop them into bite-sized pieces and add before pressure cooking.
How do I prevent the sauce from burning or sticking in the pressure cooker?
Always deglaze the pot after sautéing the beef—add a splash of broth and scrape up any browned bits. This keeps the sauce smooth and avoids burn warnings.
Pin This Recipe!
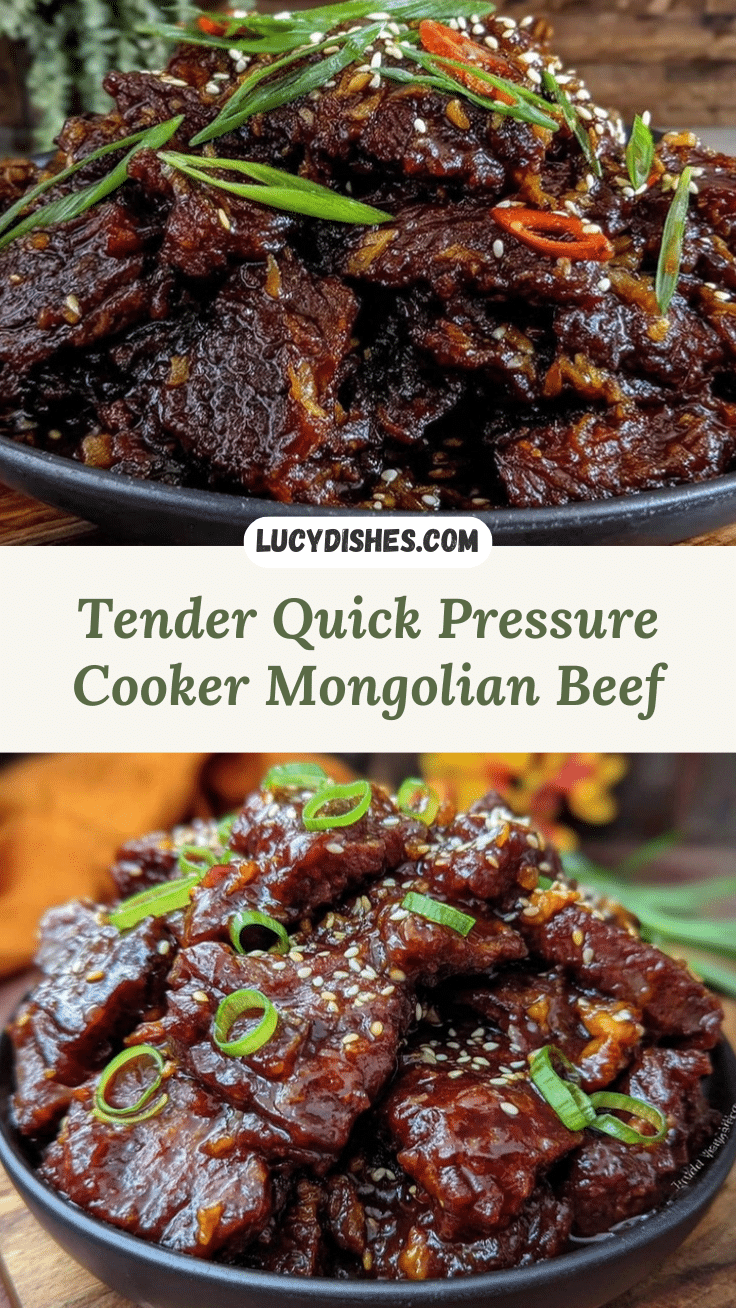
Mongolian Beef Pressure Cooker Recipe Easy Tender 30-Minute Dinner
This Mongolian Beef Pressure Cooker recipe delivers tender, melt-in-your-mouth beef in a rich, savory sauce in just 30 minutes. It’s a comforting, crowd-pleasing dinner that’s faster and healthier than takeout.
- Prep Time: 10 minutes
- Cook Time: 20 minutes
- Total Time: 30 minutes
- Yield: 4 servings 1x
- Category: Main Course
- Cuisine: Chinese-American
Ingredients
- 1 1/2 lb flank steak, sliced thin against the grain (or sirloin/skirt steak)
- 1/4 cup cornstarch, for coating beef
- 1 tablespoon vegetable oil (for sautéing)
- 1/2 cup low sodium soy sauce
- 1/3 cup brown sugar (dark or light)
- 1/2 cup beef broth
- 4 cloves garlic, minced
- 1 tablespoon fresh ginger, grated
- 2 teaspoons sesame oil
- 1 tablespoon rice vinegar
- 1/2 teaspoon red pepper flakes (optional)
- 2 tablespoons cornstarch + 2 tablespoons water (for slurry)
- 3 green onions, sliced
- 1 tablespoon toasted sesame seeds (optional)
- Steamed rice, noodles, or cauliflower rice for serving
Instructions
- Slice flank steak thinly against the grain (about 1/4 inch thick strips). Toss beef in 1/4 cup cornstarch until evenly coated. Set aside.
- In a mixing bowl, combine soy sauce, brown sugar, beef broth, garlic, ginger, sesame oil, rice vinegar, and red pepper flakes. Stir until sugar dissolves.
- Set pressure cooker to sauté mode. Add vegetable oil and heat. Add coated beef strips and sauté for 2-3 minutes until lightly browned (work in batches if needed). Remove beef and set aside.
- Pour a little beef broth (2-3 tablespoons) into the pot and scrape up any browned bits with a wooden spoon.
- Return browned beef to the pot. Pour sauce mixture over the beef. Lock lid, set valve to sealing, and cook on high pressure for 10 minutes.
- Quick release the pressure by turning the valve to venting. Open lid carefully.
- Set pressure cooker to sauté mode. Mix 2 tablespoons cornstarch with 2 tablespoons water to make a slurry. Stir into the pot; cook for 2-3 minutes until sauce thickens and is glossy.
- Turn off heat. Stir in sliced green onions and sprinkle with toasted sesame seeds.
- Serve Mongolian Beef over steamed rice, noodles, or cauliflower rice. Garnish with extra green onions if desired.
Notes
Slice beef thinly against the grain for tenderness. Deglaze the pot after sautéing to prevent burning. Adjust seasoning after cooking to taste. For gluten-free, use tamari or coconut aminos. Add vegetables like bell peppers or snap peas for extra nutrition. Leftovers keep well and flavors deepen overnight.
Nutrition
- Serving Size: About 1 cup (200 g)
- Calories: 320
- Sugar: 12
- Sodium: 800
- Fat: 13
- Saturated Fat: 4
- Carbohydrates: 24
- Fiber: 1
- Protein: 26
Keywords: Mongolian beef, pressure cooker, instant pot, easy dinner, beef recipe, Chinese takeout, weeknight meal, gluten-free option, quick dinner, comfort food