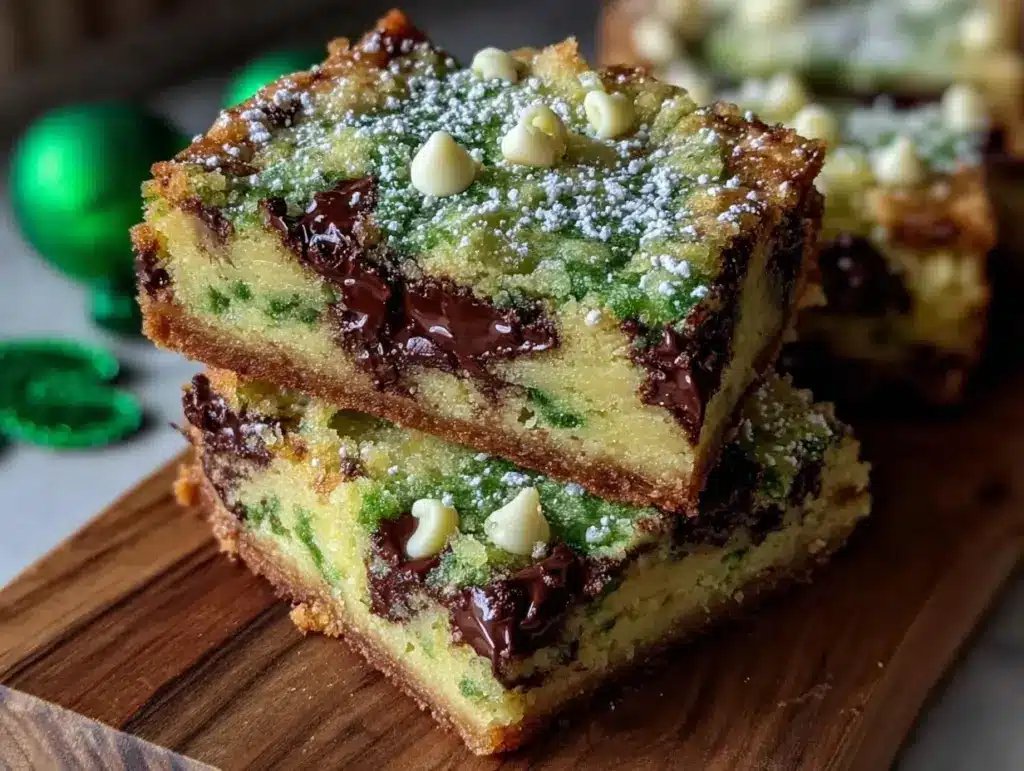
Let me tell you, the scent of rich chocolate melting together with fresh mint filling the kitchen is enough to make anyone’s mouth water. The first time I baked these St Patrick’s Day dessert bars with mint & chocolate, I was instantly hooked—the kind of moment where you pause, take a deep breath, and just smile because you know you’re onto something truly special. It was years ago, when I was knee-high to a grasshopper, that my grandma used to make something similar, but honestly, these bars have that extra punch of minty freshness and gooey chocolate that I didn’t know I needed until I tried this recipe. I wish I had discovered them back then because they bring that pure, nostalgic comfort with a modern twist.
My family couldn’t stop sneaking these bars off the cooling rack (and I can’t really blame them). Whether it was for a cozy evening in or brightening up a St Patrick’s Day party, these dessert bars quickly became a staple. You know what? They’re dangerously easy to whip up, making them perfect for potlucks or a sweet treat for your kids after school. Honestly, if you’re looking to brighten up your Pinterest cookie board or add a festive flair to your dessert lineup, these St Patrick’s Day dessert bars with mint & chocolate are exactly what you want in your baking repertoire.
I’ve tested this recipe multiple times—in the name of research, of course—and each batch feels like a warm hug. Once you try them, you’re going to want to bookmark this one for every St Patrick’s Day and beyond.
Why You’ll Love This Recipe
As someone who’s spent years experimenting with desserts, I can say these St Patrick’s Day dessert bars with mint & chocolate truly stand out. Here’s why:
- Quick & Easy: The whole batch comes together in under 45 minutes, perfect for those last-minute festive cravings.
- Simple Ingredients: No fancy grocery runs here—most of the ingredients are pantry staples you probably already have.
- Perfect for Celebrations: Whether it’s a St Patrick’s Day party, a casual gathering, or just a cozy night in, these bars fit right in.
- Crowd-Pleaser: Kids and adults alike rave about the creamy mint swirls and the rich, chocolatey base.
- Unbelievably Delicious: The combination of cool mint and smooth chocolate is like comfort food with a little festive magic.
What makes this recipe different? Well, it’s all about that fresh mint infusion balanced with the deep chocolate flavor—no artificial mint extracts that overpower. Plus, the bars have a luscious, slightly fudgy texture that’s just the right balance between chewy and soft. Honestly, this isn’t just another mint chocolate dessert; it’s the best version you’ll find, perfect for impressing guests without breaking a sweat.
What Ingredients You Will Need
This recipe uses simple, wholesome ingredients to deliver bold flavor and satisfying texture without the fuss. Most of these should be easy to find in your pantry or local store.
- For the Base:
- 1 cup (125g) all-purpose flour
- ½ cup (100g) granulated sugar
- ¼ cup (25g) unsweetened cocoa powder (I recommend Ghirardelli for best richness)
- ½ teaspoon baking powder
- ¼ teaspoon salt
- ½ cup (115g) unsalted butter, melted and cooled (adds richness and moistness)
- 1 large egg, room temperature
- 1 teaspoon pure vanilla extract
- For the Mint Layer:
- 1 cup (240g) cream cheese, softened
- ½ cup (60g) powdered sugar, sifted
- 1 teaspoon peppermint extract (use pure extract for best flavor)
- Green food coloring (optional, for that festive St Patrick’s Day vibe)
- For the Topping:
- ½ cup (90g) semi-sweet chocolate chips
- 1 tablespoon heavy cream (to melt with the chocolate for a glossy finish)
If you want a gluten-free option, swapping the all-purpose flour for a 1-to-1 gluten-free baking flour works beautifully. And if dairy is an issue, try coconut cream cheese and vegan butter alternatives—trust me, it still turns out fantastic.
Equipment Needed
- 8×8 inch (20×20 cm) baking pan – I personally prefer glass pans for even baking, but a metal one works, too.
- Mixing bowls – at least two, one for the base, one for the mint layer.
- Electric mixer or sturdy whisk – makes beating the cream cheese smooth way easier.
- Rubber spatula – perfect for folding ingredients without losing air.
- Measuring cups and spoons – for accurate ingredient amounts.
- Microwave-safe bowl or double boiler – to melt the chocolate topping smoothly.
If you don’t have an electric mixer, no worries! I’ve made these bars by hand with a whisk before—just takes a bit more elbow grease. Also, a silicone spatula cleans easier and is gentler on your bowls.
Preparation Method
- Preheat your oven to 350°F (175°C). Line your 8×8 inch pan with parchment paper, leaving some overhang for easy removal later. This step saves you from sticky situations!
- Prepare the base. In a medium bowl, whisk together the flour, sugar, cocoa powder, baking powder, and salt until evenly combined.
- Add the wet ingredients. Pour in the melted butter, egg, and vanilla extract. Stir gently with a spatula until just combined. The batter will be thick and fudgy—don’t overmix or it might turn cakey.
- Spread two-thirds of the batter evenly into the prepared pan. Use the back of a spoon or spatula to smooth it out. This forms the chocolate base. Set the rest aside for later.
- Make the mint layer. In a separate bowl, beat the softened cream cheese with powdered sugar and peppermint extract until smooth and creamy. If you want that festive green color, add a few drops of green food coloring and mix until you get the shade you like.
- Spread the mint mixture evenly over the chocolate base. It should cover the entire surface, creating a thick, creamy layer.
- Drop spoonfuls of the remaining chocolate batter over the mint layer. Use a knife or skewer to gently swirl the chocolate into the mint layer for a marbled effect. This not only looks stunning but ensures every bite is a perfect mint-chocolate combo.
- Bake for 25–30 minutes. The edges should be set, and the center slightly soft but not jiggly. A toothpick inserted into the chocolate base (avoid the mint swirls) should come out with a few moist crumbs but no raw batter.
- Cool completely in the pan on a wire rack. This helps the bars set nicely and makes cutting easier.
- Prepare the chocolate topping. Melt the chocolate chips with heavy cream in 20-second intervals in the microwave, stirring in between, or use a double boiler. The ganache should be smooth and glossy.
- Pour the melted chocolate over the cooled bars and spread evenly. Let it set at room temperature or pop it in the fridge for 15 minutes for a firmer finish.
- Once set, lift the bars out using the parchment overhang and cut into squares. I usually get 16 bars, but feel free to make them larger if you prefer.
Pro tip: If your cream cheese is too cold, the mint layer can turn lumpy—make sure it’s soft before mixing. Also, don’t rush the cooling; cutting warm bars will make a mess.
Cooking Tips & Techniques
When it comes to these St Patrick’s Day dessert bars with mint & chocolate, timing and texture are everything. Here are some tips I’ve learned from a few trial-and-error sessions:
- Softened cream cheese is your friend. Let it sit out for at least 30 minutes before mixing. Cold cream cheese leads to uneven texture.
- Don’t skip sifting your powdered sugar. It prevents lumps and makes the mint layer silky smooth.
- Swirling technique matters. Use a gentle hand when swirling the chocolate on the mint layer. Overmixing can blend layers together and lose that beautiful contrast.
- Watch your bake time carefully. Bars can go from fudgy perfection to dry fast. Start checking at 25 minutes, and remember that residual heat continues cooking after you remove the pan.
- Melting chocolate with cream creates a shiny ganache. Avoid overheating chocolate as it can seize. Gentle stirring and short bursts in the microwave work best.
Honestly, the first time I tried baking these, I left them in too long, and they were dry as a biscuit. Lesson learned! Now, I always set a timer and peek early.
Variations & Adaptations
These dessert bars are flexible! Here are some ways to switch things up:
- Dietary swaps: Use almond flour instead of all-purpose for a gluten-free twist. Swap cream cheese for vegan cream cheese and butter for coconut oil to make it dairy-free.
- Flavor twists: Add a teaspoon of espresso powder to the chocolate base for a mocha mint vibe. Or sprinkle crushed peppermint candies on top of the ganache for extra crunch.
- Seasonal variations: Swap the mint layer for a raspberry cream cheese swirl in summer for a fruity kick that’s equally stunning.
- Cooking method: These bars can also be baked in a muffin tin for individual servings—bake for about 18–20 minutes in that case.
- Personal variation: I once added a tablespoon of Irish cream liqueur to the mint layer for a boozy adult version. It was dangerously good!
Serving & Storage Suggestions
Serve these bars chilled or at room temperature. I like them straight from the fridge for a refreshing minty bite, but they soften beautifully if left out for 15 minutes. For presentation, dust with a little powdered sugar or garnish with a sprig of fresh mint to add a classy touch.
They pair wonderfully with a cup of hot coffee, an Irish cream latte, or even a glass of milk if you want to keep it classic. For parties, cut them into bite-sized squares and display on a festive platter with green napkins—guaranteed crowd-pleaser!
Store leftover bars in an airtight container in the refrigerator for up to 5 days. They also freeze well—wrap individual bars in plastic wrap and place in a freezer bag. Thaw in the fridge overnight and bring to room temperature before serving.
Fun fact: the flavors mellow and deepen after a day or two, so if you can manage to wait, the bars taste even better the next day.
Nutritional Information & Benefits
Each bar (assuming 16 servings) contains approximately 180 calories, 10g fat, 22g carbs, and 2g protein. The cream cheese adds a dose of calcium, while peppermint extract can aid digestion and freshen breath, which is a nice bonus after a rich dessert.
Using real cocoa powder means you’re getting antioxidants alongside that delicious chocolate flavor. Plus, this recipe can be adapted for gluten-free or dairy-free diets, making it inclusive for most guests.
From a wellness perspective, treating yourself to a homemade dessert like this—made with quality ingredients—is a satisfying way to enjoy a festive treat without any guilt about mysterious additives.
Conclusion
This recipe for St Patrick’s Day dessert bars with mint & chocolate is well worth your time. It’s simple, scrumptious, and brings that perfect balance of festive fun and classic comfort. You can easily customize it to suit your dietary needs or flavor preferences, making it your go-to for celebrations or whenever you need a sweet pick-me-up.
I genuinely love these bars because they remind me of family gatherings and the joy of sharing something homemade. If you give them a try, please drop a comment below to share your experience or any creative twists you’ve added—I’d love to hear!
Now go on, get baking, and make your St Patrick’s Day a little sweeter—your taste buds will thank you!
FAQs About St Patrick’s Day Dessert Bars with Mint & Chocolate
Can I use regular vanilla extract instead of peppermint extract?
You can, but the mint flavor is what makes these bars special for St Patrick’s Day. Without peppermint extract, it’ll taste more like a classic chocolate cream cheese bar.
How do I prevent the mint layer from cracking?
Make sure your cream cheese is softened and mix until smooth. Avoid overbaking, and cool the bars completely before adding the chocolate topping.
Can I make these bars ahead of time?
Absolutely! They keep well in the fridge for up to 5 days and actually taste better after resting overnight.
Is there a way to make these bars less sweet?
You can reduce the powdered sugar in the mint layer slightly or use semi-sweet chocolate chips with higher cocoa content for a more balanced sweetness.
Can I freeze the bars after baking?
Yes, wrap individual bars tightly and freeze for up to 3 months. Thaw in the fridge overnight before serving for best results.
Pin This Recipe!

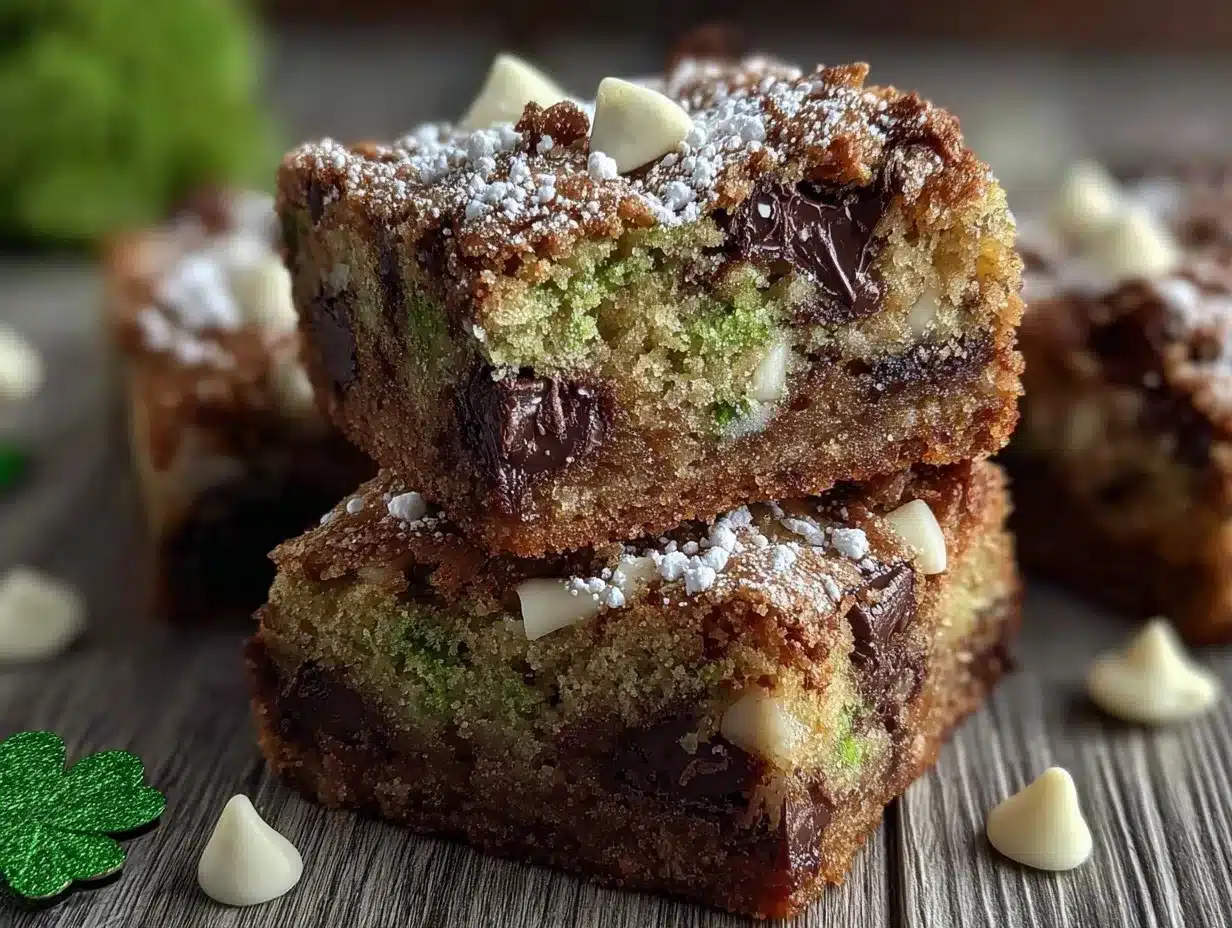
Irresistible St Patrick’s Day Dessert Bars with Mint and Chocolate

These St Patrick’s Day dessert bars combine rich chocolate and fresh mint for a fudgy, creamy treat perfect for celebrations or cozy nights in. Easy to make with simple pantry ingredients, they offer a nostalgic yet modern twist on a classic dessert.
- Prep Time: 15 minutes
- Cook Time: 30 minutes
- Total Time: 45 minutes
- Yield: 16 bars 1x
- Category: Dessert
- Cuisine: American
Ingredients
- 1 cup (125g) all-purpose flour
- ½ cup (100g) granulated sugar
- ¼ cup (25g) unsweetened cocoa powder
- ½ teaspoon baking powder
- ¼ teaspoon salt
- ½ cup (115g) unsalted butter, melted and cooled
- 1 large egg, room temperature
- 1 teaspoon pure vanilla extract
- 1 cup (240g) cream cheese, softened
- ½ cup (60g) powdered sugar, sifted
- 1 teaspoon peppermint extract
- Green food coloring (optional)
- ½ cup (90g) semi-sweet chocolate chips
- 1 tablespoon heavy cream
Instructions
- Preheat oven to 350°F (175°C). Line an 8×8 inch baking pan with parchment paper, leaving overhang for easy removal.
- In a medium bowl, whisk together flour, sugar, cocoa powder, baking powder, and salt until combined.
- Add melted butter, egg, and vanilla extract to dry ingredients. Stir gently until just combined; batter will be thick and fudgy.
- Spread two-thirds of the batter evenly into the prepared pan to form the chocolate base. Set remaining batter aside.
- In a separate bowl, beat softened cream cheese with powdered sugar and peppermint extract until smooth. Add green food coloring if desired.
- Spread the mint mixture evenly over the chocolate base.
- Drop spoonfuls of the remaining chocolate batter over the mint layer. Use a knife or skewer to gently swirl the chocolate into the mint layer for a marbled effect.
- Bake for 25–30 minutes until edges are set and center is slightly soft but not jiggly. A toothpick inserted into the chocolate base should come out with moist crumbs but no raw batter.
- Cool completely in the pan on a wire rack.
- Melt chocolate chips with heavy cream in 20-second intervals in the microwave or use a double boiler, stirring until smooth and glossy.
- Pour melted chocolate over cooled bars and spread evenly. Let set at room temperature or refrigerate for 15 minutes for a firmer finish.
- Lift bars out using parchment overhang and cut into 16 squares.
Notes
Ensure cream cheese is softened before mixing to avoid lumps in the mint layer. Do not overmix the batter to keep a fudgy texture. Cool bars completely before adding chocolate topping to prevent melting. Bars can be made gluten-free by substituting all-purpose flour with gluten-free baking flour and dairy-free by using vegan alternatives.
Nutrition
- Serving Size: 1 bar (assuming 16 b
- Calories: 180
- Fat: 10
- Carbohydrates: 22
- Protein: 2
Keywords: St Patrick’s Day, dessert bars, mint chocolate, easy dessert, homemade treats, festive dessert, chocolate bars, mint bars