“You just have to try these pickled veggies,” my friend texted me one evening after a long day that had me juggling deadlines and a kitchen mess. Honestly, I was skeptical—pickled vegetables always felt like an intimidating project, something for seasoned fermenters or the ultra-patient. But curiosity won over exhaustion. The next morning, I found myself chopping crisp cabbage, vibrant carrots, and earthy beets, thinking, “Well, why not?”
That first batch of my healthy fermented pickled vegetables probiotic boost recipe wasn’t perfect—some jars bubbled wildly while others barely fizzed. Still, when I finally tasted them a week later, there was this surprising tang and crunch that felt like a gentle nudge toward something good for my gut and soul. I started making them almost obsessively, tweaking spices and ratios with each batch, especially when paired alongside a cozy lunch like the crispy ultimate Reuben sandwich I love.
There’s something grounding about fermenting your own food—it’s slow, it’s alive, and it’s wonderfully imperfect. This recipe stuck with me because it’s as simple as it is satisfying, offering a probiotic boost that’s just as tasty as it is good for you. No fancy equipment, no scary cultures, just real food doing its thing. And if you’re like me, juggling a million things but wanting to eat well, these fermented pickled vegetables might quietly become your new kitchen companion.
Why You’ll Love This Recipe
This healthy fermented pickled vegetables recipe has been tested and tweaked over many batches, and it’s honestly one of those kitchen wins you didn’t expect but can’t live without once it’s in your routine. Here’s why it’s a keeper:
- Quick & Easy: The hands-on time is under 30 minutes—perfect for busy weekdays or when you want a project that doesn’t demand all your attention.
- Simple Ingredients: Most are pantry staples or fresh veggies you can snag at any market; no weird additives or preservatives.
- Perfect for Meal Prep: These pickled veggies add zing to sandwiches, bowls, or even a snack plate—think of them alongside my fresh healthy quinoa salad for a quick, nourishing lunch.
- Crowd-Pleaser: Tangy, crunchy, and a little spicy—kids and adults alike usually ask for more, which is always a win.
- Unbelievably Delicious: The fermentation process transforms simple vegetables into something complex and vibrant, with that subtle fizz and depth you don’t get from regular pickles.
What makes this recipe stand out? It’s the balance—enough salt to encourage good bacteria, just the right mix of spices for flavor without overpowering, and a method that’s forgiving if you’re new to fermenting. Plus, the texture is spot-on: crisp but tender, not mushy or soggy. If you’ve tried other fermented veggies that turned out meh, this one might just change your mind.
It’s not just about nutrition or trends, either. This is comfort food that feels alive, something you can make your own, whether you’re pairing it with hearty meals or snacking straight from the jar. Honestly, it’s been a quiet revolution in my kitchen—little jars of good-for-you magic that add life to everyday eating.
What Ingredients You Will Need
This recipe uses simple, wholesome ingredients that combine to create bold flavors and satisfying textures without fuss or fancy shopping trips. Most of these are pantry staples or fresh veggies you can find year-round.
- Vegetables for Fermenting:
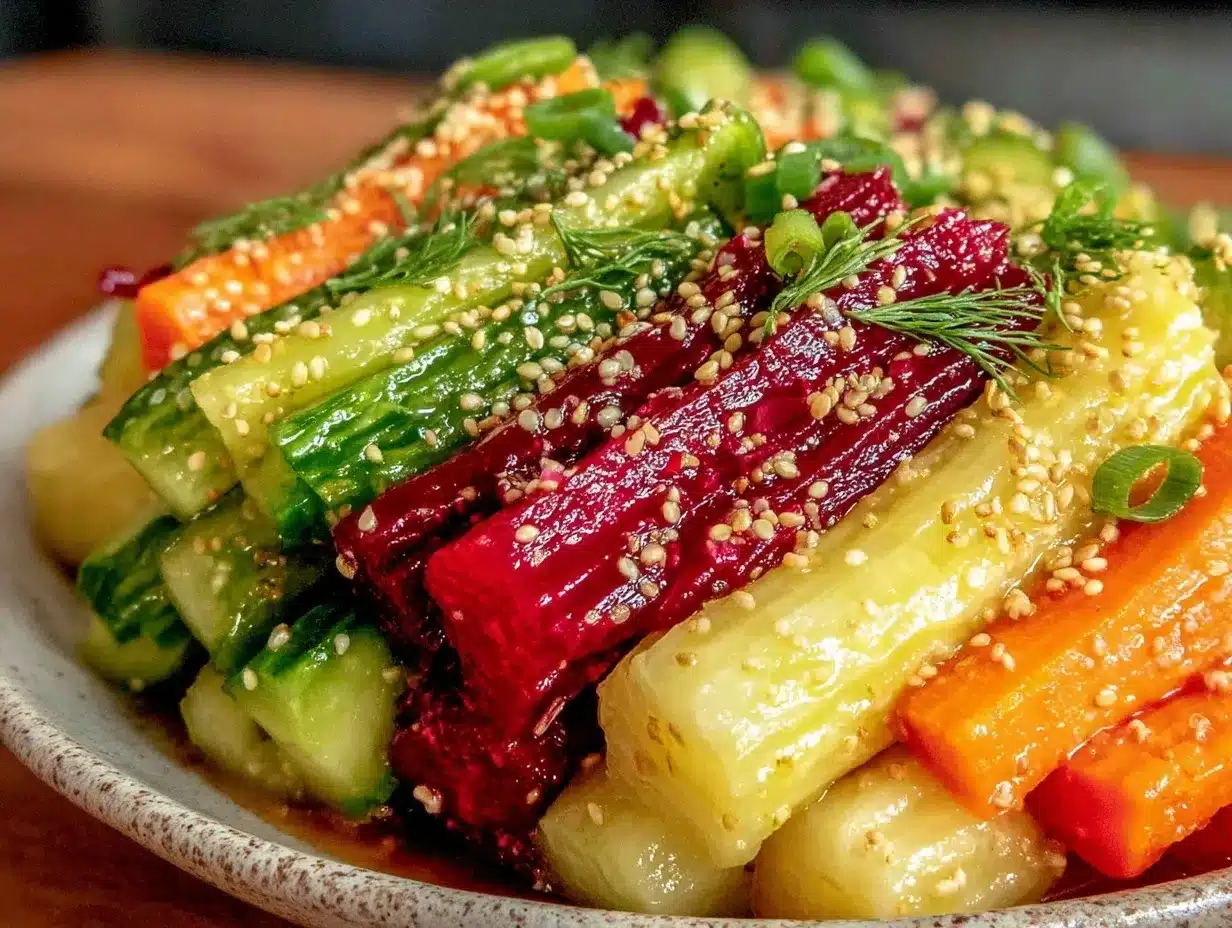
- Green cabbage, shredded (about 1 medium head) – the crunchy base
- Carrots, peeled and julienned or sliced thin (3 medium carrots) – adds sweetness and color
- Beets, peeled and thinly sliced or grated (2 medium beets) – earthy depth and vibrant color
- Daikon radish, peeled and sliced (optional, 1 small) – mild peppery crunch
- Garlic cloves, peeled and lightly crushed (3 cloves) – natural antimicrobial and flavor boost
- Fresh dill sprigs (a few sprigs) – classic herbaceous note
- Brine & Flavoring:
- Non-iodized salt (such as sea salt or kosher salt), about 3 tablespoons – critical for fermentation (I prefer Diamond Crystal for its texture)
- Filtered water, 4 cups (1 liter) – chlorine-free is best to protect beneficial bacteria
- Whole black peppercorns (1 teaspoon) – subtle spice
- Mustard seeds (1 teaspoon) – adds a gentle tang
- Red pepper flakes (optional, ¼ teaspoon) – for a mild kick
If you want to swap vegetables based on season or preference, napa cabbage or kale work well, and you can add sliced green beans or bell peppers for extra crunch. You can also use pink Himalayan salt instead of sea salt, but avoid iodized salt as it can interfere with fermentation.
For a dairy-free probiotic boost, this recipe stays plant-based and friendly for most diets, unlike some cultured dairy ferments. Plus, it pairs beautifully with homemade breads like the rustic Irish soda bread, making for a cozy, nourishing snack or side.
Equipment Needed
Fermenting doesn’t require a ton of fancy gear, which is part of why I love this recipe so much. Here’s what you’ll want on hand:
- Large mixing bowl – for tossing the vegetables and salt
- Fermentation jar or glass mason jars (1-quart or larger) – wide-mouth jars make packing easier
- Weight or smaller jar to keep veggies submerged – you can use a clean rock, a fermentation weight, or even a zip-top bag filled with brine
- Clean cloth or fermentation lid – a breathable cloth secured with a rubber band works if you don’t have a fancy lid
- Sharp knife or mandoline – for consistent slicing
If you don’t have a specialized fermentation crock, no worries. Mason jars are budget-friendly and easy to clean. Just make sure your jars and utensils are very clean to keep unwanted bacteria out. I’ve tried ceramic weights before, but a simple ziplock bag filled with salty brine works just as well to keep the veggies submerged without fuss.
Preparation Method
- Prepare the Vegetables (15-20 minutes): Wash all vegetables thoroughly. Shred the cabbage finely, peel and julienne the carrots, slice the beets thinly (a mandoline speeds this up), and slice the daikon radish if using. Peel and lightly crush garlic cloves. Place all veggies and garlic in a large bowl.
- Salt and Massage (5-10 minutes): Sprinkle the non-iodized salt evenly over the vegetables. Using clean hands, massage and squeeze the mixture until the vegetables begin to release their juices and soften. This step is crucial—it helps start the fermentation by creating a natural brine. It should look wet and glossy by the end.
- Pack into Jars (5 minutes): Tightly pack the salted vegetables into clean fermentation jars, pressing down firmly to remove air pockets and submerge the veggies in their brine. Leave about 1-2 inches (2.5-5 cm) of headspace at the top to allow for expansion during fermentation. Add peppercorns, mustard seeds, red pepper flakes, and dill sprigs on top as flavor boosters.
- Weight Down (2 minutes): Place a fermentation weight or a smaller jar inside the jar to keep the vegetables submerged completely under the brine. This prevents exposure to air, which can cause mold.
- Cover and Store: Cover the jar with a fermentation lid or a clean cloth secured with a rubber band to keep out dust but allow gases to escape. Store the jar in a cool, dark place (about 65-72°F / 18-22°C) for fermentation.
- Fermentation Time (7-14 days): Check the jar daily. You should see bubbles forming and smell a pleasantly tangy aroma. Press down if veggies float above the brine. Start tasting after 7 days; fermentation time depends on your temperature and taste preference. The longer it ferments, the tangier it gets.
- Refrigerate and Enjoy: Once you reach your desired tanginess, seal the jar with an airtight lid and move it to the fridge. It will keep developing flavor slowly and stay good for several months.
Note: If you see any scum or mold on top, carefully skim it off. It’s normal for wild fermentation, but if the jar smells rotten or off, discard and try again. Patience and cleanliness are your best friends here.
Cooking Tips & Techniques
- Use the Right Salt: Non-iodized salt is a must. Iodine can inhibit fermentation bacteria. Sea salt or kosher salt works well—my go-to is Diamond Crystal for consistent texture.
- Keep Veggies Submerged: This is key. Air exposure invites mold, so use weights or a brine-filled plastic bag pressed gently to keep everything underwater.
- Temperature Matters: Fermentation slows down if it’s too cold and speeds up if it’s warm. Aim for a steady 65-72°F (18-22°C).
- Don’t Rush Tasting: The flavor changes daily. Start tasting around day 7, but give it up to two weeks for full depth. I’ve learned to track each batch in a notebook to remember my favorites.
- Patience Pays Off: The first batch might be uneven. I once had a jar explode (oops) because I sealed it too tight too soon. Now I always release gases gently during fermentation.
- Experiment with Spices: Adding things like coriander seeds, bay leaves, or fresh ginger can layer new flavors. Just don’t overload the jar at first.
Variations & Adaptations
This recipe is a great base and welcomes all kinds of twists depending on your taste, dietary needs, or what’s fresh at the market.
- Spicy Kick: Add sliced jalapeños or increase the red pepper flakes for a bolder heat that pairs well with richer dishes.
- Low-Sodium Option: Reduce salt slightly and extend fermentation time to compensate. Just be mindful that salt is crucial for safety and texture.
- Seasonal Veggies: Swap in summer favorites like green beans, cukes, or even cauliflower florets. In winter, hearty roots like turnips or parsnips make great substitutes.
- Different Herbs: Fresh thyme, rosemary, or even bay leaves add a unique aroma. Dill is classic but feel free to customize.
- Allergen Friendly: This recipe is naturally gluten-free and vegan, making it accessible for most diets. Just avoid cross-contamination if you have severe allergies.
Personally, I once added a handful of dried cranberries for a subtle tartness that surprised my family. It’s fun to experiment—fermentation is forgiving as long as you keep the basic principles in place.
Serving & Storage Suggestions
Fermented pickled vegetables are versatile and can be served chilled or at room temperature. I like to serve them crisp and cool to complement heavier dishes.
- Serving Ideas: They shine as a tangy side to sandwiches (for example, the ultimate Reuben sandwich), atop grain bowls, or even as a crunchy topping on creamy dishes like avocado toast or soft cheeses.
- Storage: Keep your jars sealed and refrigerated once fermentation is complete. They stay fresh for up to 3 months but often get better with a little age.
- Reheating: These veggies are best enjoyed raw to preserve probiotics, but they can be gently warmed with cooked dishes if desired—just avoid high heat.
- Flavor Development: The tang and complexity deepen over time, so don’t hesitate to wait a few days after refrigeration before diving in.
Nutritional Information & Benefits
Fermented pickled vegetables pack a punch nutritionally. One serving (about ½ cup or 120 grams) typically contains:
| Nutrient | Amount |
|---|---|
| Calories | 25-35 |
| Fiber | 2-3 grams |
| Vitamin C | 20-30% of daily value |
| Probiotics | Rich in live beneficial bacteria |
The probiotics help support gut health and digestion, while the fiber contributes to fullness and stable blood sugar. The antioxidants in beets and carrots add extra nutrition, and the low-calorie profile makes these great for weight-conscious diets.
Because this recipe uses only plant-based ingredients and no gluten-containing grains, it fits well with vegan, vegetarian, and gluten-free lifestyles. Just be mindful of salt intake if you’re watching sodium.
Conclusion
This healthy fermented pickled vegetables probiotic boost recipe is one of those rare kitchen projects that feels rewarding every step of the way. From the simple prep to the bubbling jars and finally to that first crunchy, tangy bite—it’s a gentle nudge toward better health without sacrificing flavor.
Feel free to make this recipe your own, swapping vegetables or spices to suit your mood (and your pantry). I still find myself reaching for these jars when I want a quick flavor punch or a nourishing snack, especially alongside warm homemade breads like the easy rustic Irish soda bread I bake on weekends.
Give it a try, and don’t be surprised if you start making these pickled veggies on repeat—sometimes the best kitchen experiments come from a simple text message and a little curiosity.
FAQs
How long do fermented pickled vegetables take to be ready?
Typically, 7 to 14 days at room temperature (65-72°F / 18-22°C) is enough for good fermentation. Taste after a week and continue fermenting until you like the tang.
Can I use regular table salt for fermentation?
It’s best to avoid iodized table salt because iodine can inhibit the beneficial bacteria needed for fermentation. Use non-iodized sea salt or kosher salt instead.
What if I see mold on my ferment?
A thin white film (kahm yeast) can be normal and harmless—just skim it off. If you see fuzzy mold or it smells rotten, discard and start fresh.
Do I need special fermentation jars?
Nope! Mason jars work great for beginners, especially wide-mouth ones. Just keep the veggies submerged and cover loosely to let gases escape.
Can I add other vegetables to this recipe?
Absolutely! Feel free to add cucumbers, green beans, cauliflower, or any firm veggie you like. Just adjust the salt and brine ratios accordingly.
Pin This Recipe!
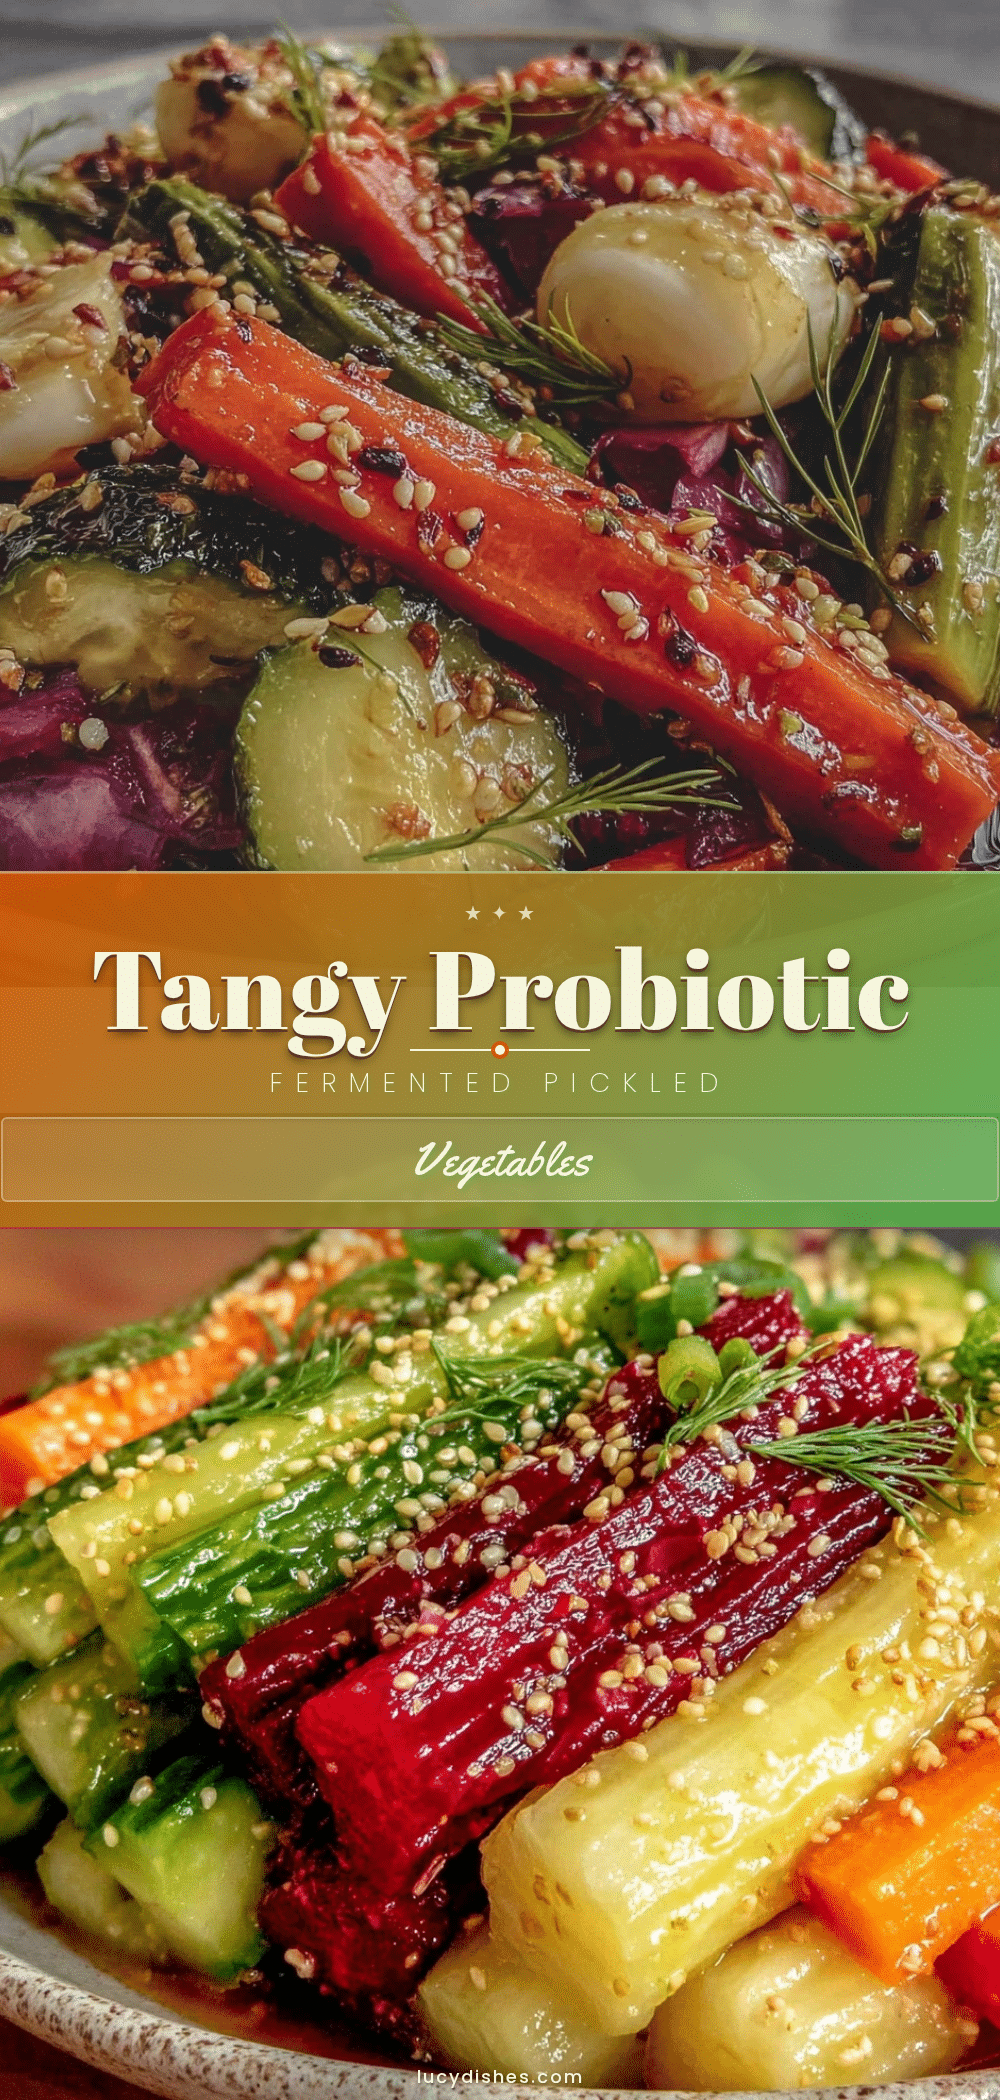
Healthy Fermented Pickled Vegetables Recipe

A simple and satisfying fermented pickled vegetables recipe that offers a probiotic boost with tangy, crunchy, and flavorful results. Perfect for busy kitchens and versatile for many meals.
- Prep Time: 20 minutes
- Cook Time: 0 minutes
- Total Time: 7 to 14 days fermentation time
- Yield: About 4 cups (8 servings) 1x
- Category: Condiment / Side Dish
- Cuisine: Fermented / Probiotic
Ingredients
- 1 medium head green cabbage, shredded
- 3 medium carrots, peeled and julienned or sliced thin
- 2 medium beets, peeled and thinly sliced or grated
- 1 small daikon radish, peeled and sliced (optional)
- 3 garlic cloves, peeled and lightly crushed
- A few fresh dill sprigs
- 3 tablespoons non-iodized salt (sea salt or kosher salt, Diamond Crystal preferred)
- 4 cups filtered water (chlorine-free)
- 1 teaspoon whole black peppercorns
- 1 teaspoon mustard seeds
- ¼ teaspoon red pepper flakes (optional)
Instructions
- Wash all vegetables thoroughly. Shred the cabbage finely, peel and julienne the carrots, slice the beets thinly, and slice the daikon radish if using. Peel and lightly crush garlic cloves. Place all veggies and garlic in a large bowl.
- Sprinkle the non-iodized salt evenly over the vegetables. Using clean hands, massage and squeeze the mixture until the vegetables begin to release their juices and soften, creating a natural brine. The mixture should look wet and glossy.
- Tightly pack the salted vegetables into clean fermentation jars, pressing down firmly to remove air pockets and submerge the veggies in their brine. Leave about 1-2 inches of headspace at the top for expansion during fermentation. Add peppercorns, mustard seeds, red pepper flakes, and dill sprigs on top.
- Place a fermentation weight or a smaller jar inside the jar to keep the vegetables submerged completely under the brine to prevent mold.
- Cover the jar with a fermentation lid or a clean cloth secured with a rubber band to keep out dust but allow gases to escape. Store the jar in a cool, dark place at about 65-72°F (18-22°C) for fermentation.
- Check the jar daily for bubbles and a pleasantly tangy aroma. Press down if veggies float above the brine. Start tasting after 7 days; fermentation time depends on temperature and taste preference. The longer it ferments, the tangier it gets.
- Once desired tanginess is reached, seal the jar with an airtight lid and move it to the refrigerator. The flavor will continue to develop slowly and the pickles will keep for several months.
Notes
[‘Use non-iodized salt such as sea salt or kosher salt to avoid inhibiting fermentation.’, ‘Keep vegetables fully submerged under the brine to prevent mold growth.’, ‘Maintain fermentation temperature between 65-72°F (18-22°C) for best results.’, ‘Start tasting after 7 days and ferment up to 14 days or longer for stronger tang.’, ‘If mold or off smells develop, discard the batch and start fresh.’, ‘Experiment with spices like coriander seeds, bay leaves, or fresh ginger for flavor variations.’, ‘Reduce salt for a low-sodium option but extend fermentation time accordingly.’, ‘Fermented pickled vegetables keep refrigerated for up to 3 months and improve with age.’]
Nutrition
- Serving Size: ½ cup (about 120 gra
- Calories: 30
- Sugar: 3
- Sodium: 400
- Carbohydrates: 6
- Fiber: 2.5
- Protein: 1
Keywords: fermented vegetables, pickled vegetables, probiotic recipe, healthy pickles, gut health, vegan, gluten-free, easy fermentation