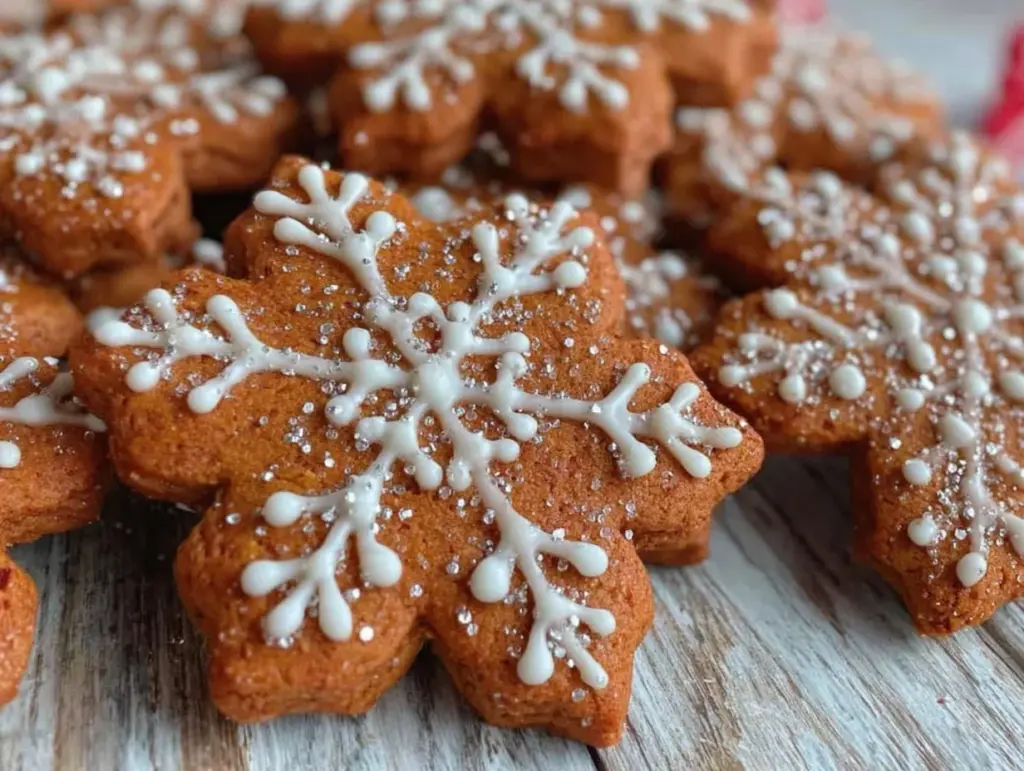
Let me paint you a picture: the kitchen is humming, the scent of warm molasses and spicy ginger wraps itself around you like a cozy blanket—the kind of aroma that whispers “holiday magic” and tempts everyone to sneak into the kitchen, just to sniff the air. The first time I baked these gingerbread cookie snowflakes, it was a blustery December afternoon, snow swirling outside and my hands dusted with flour (not exactly tidy, but that’s half the fun). I was instantly hooked by the way these cookies came out of the oven—crisp edges, soft centers, and those deep caramel hues that practically beg to be decorated. It was the kind of moment where you pause, take a deep breath, and just smile because you know you’re onto something truly special.
When I was knee-high to a grasshopper, my grandma used to let me help with holiday baking. She’d hand me a rolling pin, set out her trusty gingerbread dough, and watch as I cut out snowflakes—sometimes wonky, sometimes perfect, but always delicious. Fast forward to today, and these gingerbread cookie snowflakes have become a staple at our family gatherings, right alongside mugs of hot cocoa and twinkling lights. Honestly, I wish I’d discovered this exact recipe years ago—it’s dangerously easy and offers pure, nostalgic comfort with every bite. Let’s face it, nothing gets my family circling the kitchen quite like the promise of freshly baked gingerbread cookies. They can’t stop sneaking them off the cooling rack (and neither can I, to be honest).
If you’re looking for a sweet treat for your kids, a fun activity for a chilly afternoon, or something to brighten up your Pinterest cookie board, these gingerbread cookie snowflakes are it. I’ve tested this recipe more times than I can count—in the name of research, of course—and it never lets me down. It feels like a warm hug on a winter’s day, and you’re going to want to bookmark this one for every festive occasion.
Why You’ll Love This Recipe
This gingerbread cookie snowflakes recipe is the result of years of baking trials, family taste tests, and more than a few decorating marathons. Whether you’re a seasoned baker or just dipping your toes into holiday treats, this recipe brings together taste, texture, and festive fun in one batch. Here’s why it stands out:
- Quick & Easy: Whips up in under 30 minutes of prep—plus baking time—so you don’t have to spend hours in the kitchen.
- Simple Ingredients: No fancy grocery trips required. Most of what you need is probably already in your pantry (molasses, flour, ginger, cinnamon—you know, the classics).
- Perfect for Decorating Parties: These snowflakes are sturdy enough for little hands to decorate, but tender enough to keep everyone reaching for seconds. Great for holiday brunch, cookie swaps, or just a cozy night in.
- Crowd-Pleaser: I’ve made these for kids’ parties, teacher gifts, and even my pickiest friends. They always disappear fast (seriously, you might want to double the batch).
- Unbelievably Delicious: The blend of ginger, cinnamon, and molasses creates a flavor profile that’s bold, warming, and just sweet enough. The texture is soft in the middle, crisp on the edges—the holy grail of cookie consistency.
What sets this gingerbread cookie snowflakes recipe apart? It’s all about the balance: just enough spice for grown-up palates, but not so much that the kiddos wrinkle their noses. I use a special method of chilling the dough and rolling it between parchment—keeps things neat and gives every cookie those perfect, crisp lines. You won’t get bland or brittle cookies here; just the kind that makes you close your eyes after the first bite and savor every crumb.
These cookies aren’t just good—they’re memory-makers. They’re comfort food for the holidays: reliable, easy to master, and guaranteed to spread cheer. If you’re aiming to impress guests without breaking a sweat, this is the recipe that’ll turn a simple afternoon into something everyone remembers.
What Ingredients You Will Need
This gingerbread cookie snowflakes recipe uses simple, wholesome ingredients to deliver bold flavor and satisfying texture—no complicated shopping lists required. Here’s what you’ll need:
- For the Cookie Dough:
- 2 3/4 cups (330g) all-purpose flour (plus more for rolling)
- 1 tablespoon ground ginger (freshly ground for best flavor)
- 2 teaspoons ground cinnamon
- 1/2 teaspoon ground cloves
- 1/4 teaspoon ground nutmeg
- 1/2 teaspoon baking soda
- 1/4 teaspoon salt
- 3/4 cup (170g) unsalted butter, softened
- 1/2 cup (100g) brown sugar, packed (I recommend light brown for a milder flavor)
- 1 large egg, room temperature
- 2/3 cup (160ml) unsulfured molasses (I use Grandma’s brand for consistency)
- 1 teaspoon vanilla extract (real vanilla makes a difference!)
- For Decorating:
- Royal icing (homemade or store-bought, your call)
- Assorted sprinkles, sugar pearls, edible glitter (for extra festive flair)
- Food coloring gels (optional, for colored icing)
Ingredient Tips:
- If you need gluten-free cookies, swap the all-purpose flour for a 1:1 gluten-free baking blend. I’ve used Bob’s Red Mill with great results.
- For dairy-free, use a plant-based butter. Earth Balance is reliable and keeps the texture soft.
- Not a fan of molasses? Substitute with dark honey or maple syrup, but the classic gingerbread flavor comes from molasses—so I’d stick with it if you can.
- Play with spices! Add a pinch of black pepper for a little heat, or use orange zest for a citrusy twist.
- Seasonal berries or dried fruit can be pressed into the dough before baking for a fruity surprise.
All these ingredients come together to create cookies that are both flavorful and perfectly shaped for decorating. You don’t need anything fancy—just a few pantry staples, some spice, and lots of holiday spirit.
Equipment Needed
Making gingerbread cookie snowflakes doesn’t require fancy gadgets, but a few trusty tools make the process smoother:
- Mixing bowls: At least two—one for dry, one for wet ingredients.
- Electric mixer: Stand or hand mixer. I’ve used both, but hand mixers are easier to clean.
- Rolling pin: Wooden, marble, or even a wine bottle in a pinch (been there, done that).
- Snowflake cookie cutters: Assorted sizes for visual interest. If you don’t have snowflake cutters, stars work too.
- Parchment paper: For rolling and lining trays. Makes cleanup a breeze.
- Baking sheets: At least two, so you can batch bake without waiting.
- Wire cooling racks: For crisp cookies and speedy cooling.
- Spatula: Thin metal or silicone spatulas work best for transferring cookies without breakage.
- Piping bags and tips: For icing. If you don’t have these, a zip-top bag snipped in the corner does the trick.
I’ve used budget cookie cutters from the dollar store and they work just fine—just be gentle when pressing them into cold dough. For baking sheets, nonstick or rimmed pans are best (less drama if the cookies spread). If you’re short on cooling racks, flip a muffin tin upside down to improvise. Keep equipment clean and dry—especially for icing, as any grease will mess with consistency.
Preparation Method
Ready to bake your gingerbread cookie snowflakes? Here’s a step-by-step guide:
- Combine Dry Ingredients:
In a large bowl, whisk together 2 3/4 cups (330g) all-purpose flour, 1 tablespoon ginger, 2 teaspoons cinnamon, 1/2 teaspoon cloves, 1/4 teaspoon nutmeg, 1/2 teaspoon baking soda, and 1/4 teaspoon salt. Set aside. - Cream Butter and Sugar:
In another bowl, beat 3/4 cup (170g) unsalted butter and 1/2 cup (100g) brown sugar until light and fluffy—about 2-3 minutes using medium speed. The mixture should look pale and airy. - Add Wet Ingredients:
Beat in 1 large egg, then pour in 2/3 cup (160ml) molasses and 1 teaspoon vanilla extract. Mix until everything’s fully combined. Don’t worry if it looks a bit separated—that’s normal. - Mix Dry and Wet:
Gradually add the dry ingredients to the wet mixture, mixing on low speed. The dough will get thick—switch to a spatula if the mixer struggles. Scrape down sides as needed. - Chill the Dough:
Form dough into a disk, wrap tightly in plastic, and chill for at least 1 hour (or overnight for deeper flavor). Chilling is key for easy rolling and perfect shapes. - Preheat Oven:
Heat your oven to 350°F (175°C). Line baking sheets with parchment paper. - Roll Out Dough:
Lightly flour a clean surface (or sandwich dough between parchment sheets—my preferred method for less mess). Roll to about 1/4-inch (6mm) thickness. If dough cracks, let it warm up for a few minutes. - Cut Snowflakes:
Use snowflake cookie cutters to shape cookies. Press firmly, but gently wiggle cutters if dough sticks. Transfer cookies to baking sheets, spacing about 1 inch (2.5cm) apart. - Bake:
Bake for 8-10 minutes, until edges are set and centers are still slightly soft. Watch closely—over-baking leads to dry cookies. - Cool:
Let cookies sit on the tray for 2 minutes, then move to wire racks to cool completely. They’ll firm up as they cool. - Decorate:
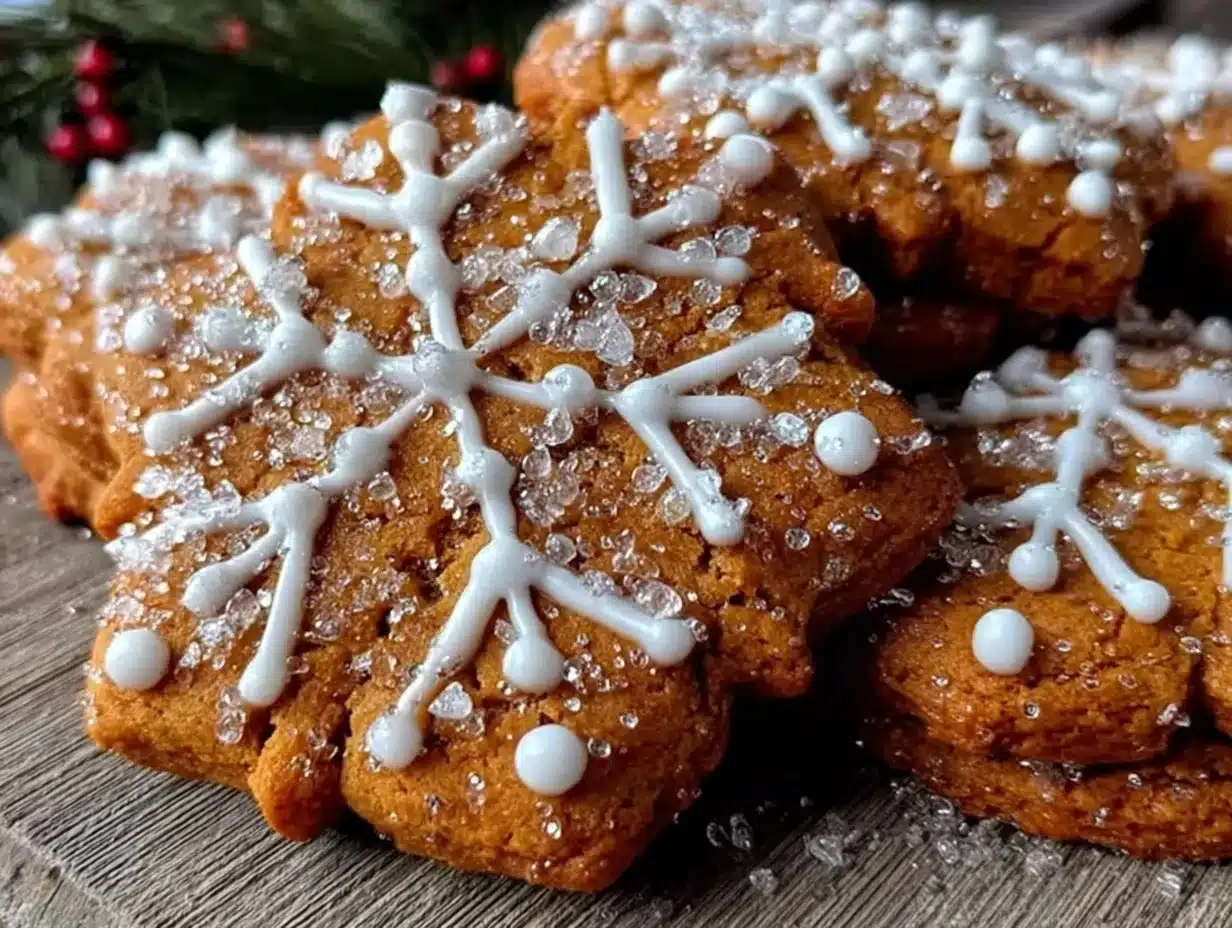
Once fully cool, pipe royal icing in snowflake patterns. Add sprinkles, sugar pearls, or edible glitter for extra sparkle. Let icing set for at least 30 minutes before stacking or serving.
Preparation Notes: If dough gets sticky, pop it back in the fridge for 10 minutes. For extra crispness, bake a minute longer (just don’t burn). If icing is too runny, add more powdered sugar. For bold snowflake designs, use contrasting icing colors and layer details after the first coat dries.
Efficiency tip: Roll and cut cookies while the first batch bakes to keep things moving. If cookies break, just eat the evidence—no shame, happens to the best of us!
Cooking Tips & Techniques
After many gingerbread cookie snowflakes baking sessions, I’ve picked up some tricks (plus a few lessons from my cookie fails):
- Chill for Control: Cold dough is easier to work with and keeps cookie edges sharp. I once skipped chilling, and my snowflakes looked more like blobs. Lesson learned.
- Even Rolling: Use rolling pin guides or two wooden dowels for uniform thickness. Uneven dough leads to overbaked edges and raw centers.
- Don’t Overmix: Stop mixing as soon as flour disappears. Overmixed dough = tough cookies. Trust me, it’s tempting to keep going, but restraint pays off.
- Work in Small Batches: Only roll out part of the dough at a time, keeping the rest chilled. Warmer dough sticks and loses shape.
- Flour Smartly: Use just enough flour to prevent sticking. Too much flour makes cookies dry and pale.
- Bake on Middle Rack: Even heat ensures uniform baking. If you bake on lower racks, cookies brown too quickly underneath.
- Decorate with Dry Cookies: Only decorate cooled cookies. Warm cookies melt icing, turning snowflakes into puddles (been there, regretted that).
Timing is everything: prep icing while cookies cool, and set up a decorating station with sprinkles, tools, and napkins. Multitasking keeps things fun and efficient, especially with kids or guests. For consistent results, measure ingredients carefully and use a timer—don’t just guess. If you’re batch baking, rotate trays halfway through for even color.
Above all, relax and have fun. Gingerbread snowflakes are meant to be festive, not perfect! If a cookie cracks or a design flops, just call it “rustic.”
Variations & Adaptations
One of the best things about gingerbread cookie snowflakes is how easily you can make them your own. Here are a few tried-and-true variations:
- Gluten-Free: Use a 1:1 gluten-free flour blend. I’ve made these for my niece, and they come out just as tasty (sometimes a touch more crumbly—add a splash of milk if needed).
- Vegan: Swap butter for vegan margarine and use a flaxseed “egg” (1 tablespoon ground flaxseed + 3 tablespoons water). No one notices the difference—promise!
- Spicy Kick: Add 1/4 teaspoon black pepper or cayenne for grown-up heat. My brother swears by this version.
- Chocolate Gingerbread: Mix in 1/4 cup (25g) cocoa powder with the flour for a rich, dark twist. Decorate with white icing for contrast.
- Nutty Crunch: Press chopped pecans or walnuts into the dough before baking. Adds texture and a nutty flavor.
If you want to switch up the decorating, try lemon or orange icing instead of classic royal. For different cooking methods, these cookies also work great in an air fryer—just lower bake time by a minute or two. Allergies? Skip the egg and use applesauce as a binder (I’ve done this for my egg-free friends and it works beautifully). My personal favorite: mini snowflakes with extra cinnamon, piped with pale blue icing for a “frosty” look.
Serving & Storage Suggestions
Serve gingerbread cookie snowflakes at room temperature, piled high on a festive platter—add sprigs of rosemary or cranberries for instant holiday vibes. These cookies pair perfectly with hot chocolate, spiced tea, or mulled cider (honestly, anything warm and cozy). For parties, set up a decorating station so everyone can customize their own cookies.
Storage: Once decorated and icing is set, store cookies in an airtight container at room temperature for up to 1 week. Layer parchment between cookies to prevent sticking. For longer storage, freeze undecorated cookies in zip-top bags for up to 3 months—just thaw and decorate as needed.
To reheat, pop cookies in a warm oven (300°F/150°C) for 2-3 minutes. Flavors deepen after a day or two, so these are perfect for baking ahead. If cookies lose crunch, leave the lid off the container for a few hours to crisp them back up. Honestly, they’re just as good on day four as fresh!
Nutritional Information & Benefits
Each gingerbread cookie snowflake (based on a batch of 24) has about 120 calories, 5g fat, 18g carbs, and 2g protein. They’re low in cholesterol and contain a good dose of warming spices—ginger and cinnamon are known for their anti-inflammatory benefits.
Key ingredients like molasses offer trace minerals (iron, calcium, magnesium), making these cookies a little more nourishing than your average treat. For gluten-free or vegan versions, the nutritional values shift slightly (less cholesterol, more fiber).
Potential allergens: contains wheat, egg, and dairy. If you’re baking for dietary needs, adjust as noted above. From my personal wellness perspective, I see these as an occasional treat—full of flavor, fun, and just enough wholesome goodness to feel good about sharing with loved ones.
Conclusion
Gingerbread cookie snowflakes are more than just cookies—they’re a holiday tradition, a creative canvas, and a surefire way to make any winter day a little brighter. They’re easy to make, endlessly customizable, and always crowd-pleasing. Whether you’re a decorating pro or just want to bake something special with family, this recipe is worth trying—and tweaking to fit your style.
I love these cookies because they bring everyone together (and because they taste amazing with a cup of chai). Don’t be afraid to experiment with your own flavors, shapes, or decorating ideas. Share your creations, leave a comment below, or tag me with your gingerbread cookie snowflakes—I’d love to see what you come up with.
So go ahead, grab your rolling pin and make some cookie magic. Wishing you sweet, spicy, and joy-filled baking this season!
Frequently Asked Questions
How thick should I roll the gingerbread cookie snowflake dough?
About 1/4 inch (6mm) is ideal. Too thin and cookies get brittle; too thick and they lose their shape. Use rolling guides for consistency.
Can I freeze gingerbread cookie snowflakes?
Absolutely! Freeze undecorated cookies in zip-top bags for up to 3 months. Thaw at room temperature and decorate when ready.
Do I need to chill the dough?
Yes—chilling for at least 1 hour helps cookies hold their shape and makes rolling easier. Skipping this step can lead to sticky, misshapen cookies.
How can I make the icing set quickly?
Let decorated cookies dry uncovered at room temperature, or speed things up by placing them in front of a fan. Royal icing usually sets in 30-60 minutes.
What if I don’t have snowflake cookie cutters?
No worries! Use stars, circles, or any festive shapes you have on hand. Get creative with knife-cut designs if you’re feeling artistic.
Pin This Recipe!
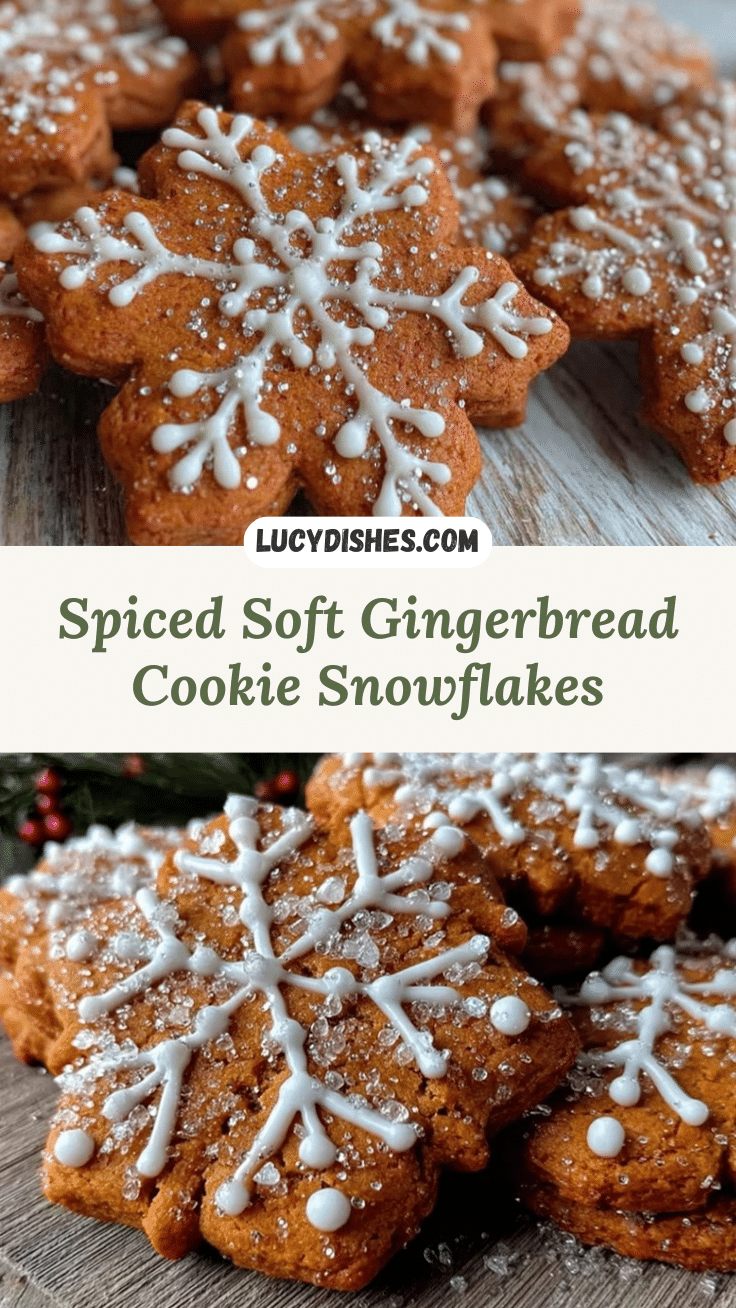
Gingerbread Cookie Snowflakes: Easy Festive Decorating Guide

These gingerbread cookie snowflakes are crisp on the edges, soft in the center, and bursting with warm holiday spices. Perfect for decorating parties, gifting, or cozy winter afternoons, they’re easy to make and guaranteed to spread festive cheer.
- Prep Time: 25 minutes
- Cook Time: 10 minutes
- Total Time: 1 hour 35 minutes
- Yield: 24 cookies 1x
- Category: Dessert
- Cuisine: American
Ingredients
- 2 3/4 cups all-purpose flour (plus more for rolling)
- 1 tablespoon ground ginger
- 2 teaspoons ground cinnamon
- 1/2 teaspoon ground cloves
- 1/4 teaspoon ground nutmeg
- 1/2 teaspoon baking soda
- 1/4 teaspoon salt
- 3/4 cup unsalted butter, softened
- 1/2 cup brown sugar, packed
- 1 large egg, room temperature
- 2/3 cup unsulfured molasses
- 1 teaspoon vanilla extract
- Royal icing (homemade or store-bought)
- Assorted sprinkles, sugar pearls, edible glitter
- Food coloring gels (optional)
Instructions
- In a large bowl, whisk together flour, ginger, cinnamon, cloves, nutmeg, baking soda, and salt. Set aside.
- In another bowl, beat butter and brown sugar until light and fluffy (2-3 minutes on medium speed).
- Beat in the egg, then add molasses and vanilla extract. Mix until fully combined.
- Gradually add dry ingredients to wet mixture, mixing on low speed. Switch to a spatula if dough gets thick.
- Form dough into a disk, wrap tightly in plastic, and chill for at least 1 hour (or overnight).
- Preheat oven to 350°F (175°C). Line baking sheets with parchment paper.
- Lightly flour a clean surface or roll dough between parchment sheets to 1/4-inch thickness.
- Use snowflake cookie cutters to shape cookies. Transfer to baking sheets, spacing about 1 inch apart.
- Bake for 8-10 minutes, until edges are set and centers are slightly soft.
- Let cookies cool on tray for 2 minutes, then transfer to wire racks to cool completely.
- Once cool, decorate with royal icing, sprinkles, sugar pearls, or edible glitter. Let icing set for at least 30 minutes before stacking or serving.
Notes
Chill dough for sharp edges and easy rolling. Roll dough evenly for consistent baking. Only decorate cooled cookies to prevent icing from melting. For gluten-free or vegan adaptations, substitute flour and butter as needed. Store decorated cookies in an airtight container for up to 1 week, or freeze undecorated cookies for up to 3 months.
Nutrition
- Serving Size: 1 cookie
- Calories: 120
- Sugar: 9
- Sodium: 70
- Fat: 5
- Saturated Fat: 3
- Carbohydrates: 18
- Fiber: 1
- Protein: 2
Keywords: gingerbread, cookies, snowflakes, holiday, Christmas, festive, decorating, easy, baking, winter