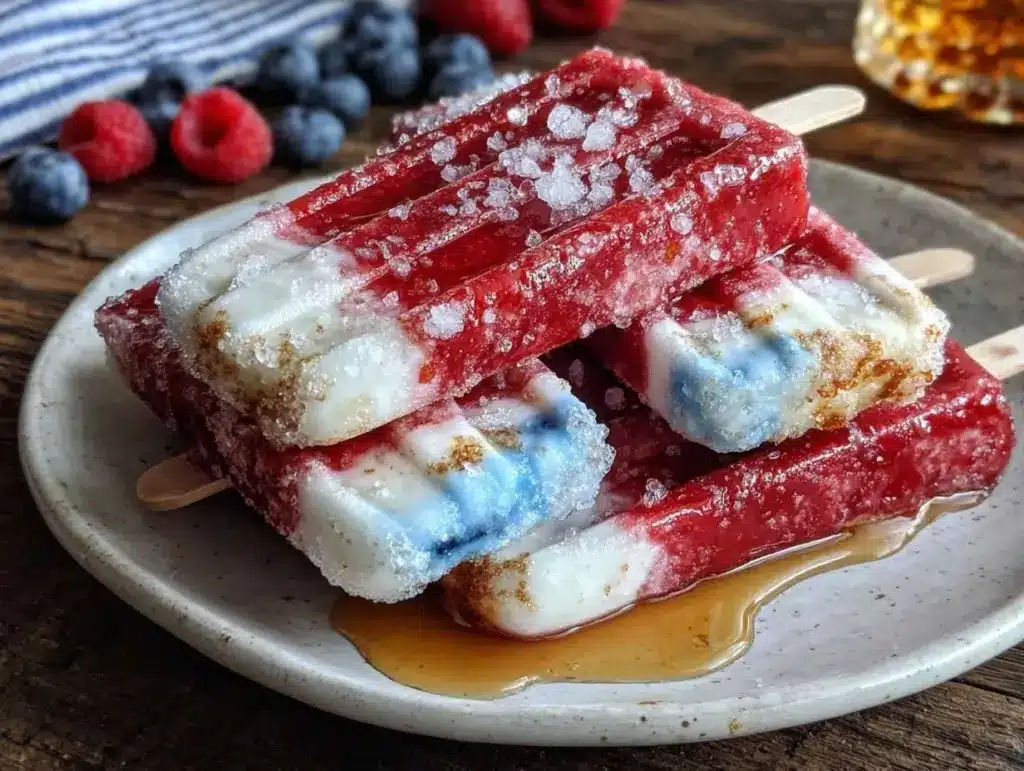
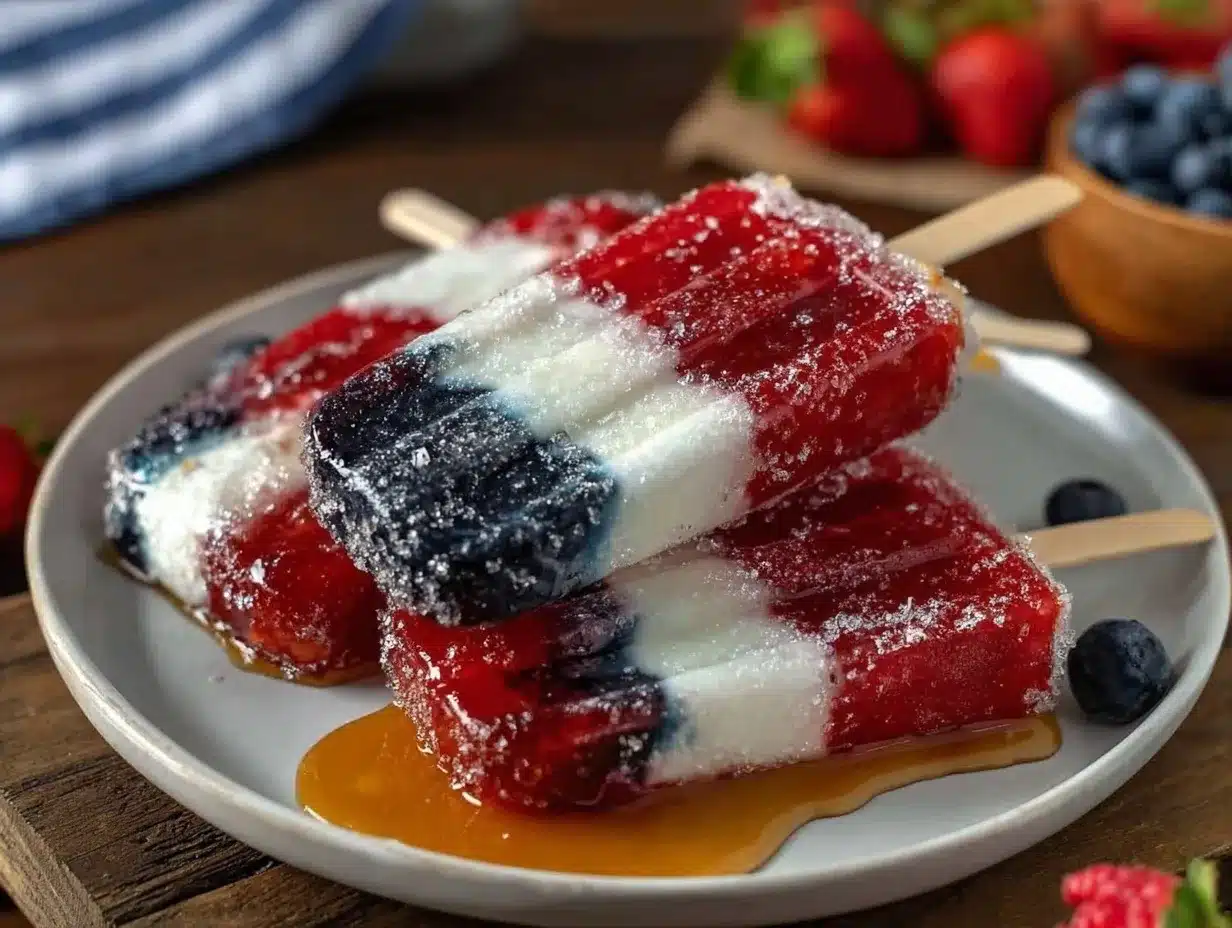
There’s something downright magical about that first burst of icy cold, sweet-tart fruit hitting your tongue on a hot summer afternoon. The moment I pull a tray of these Fresh Bomb Pop Popsicles from the freezer, the colors alone—vivid red, creamy white, and bold blue—make me stop and grin. It’s like every fireworks show I’ve ever watched wrapped up in a frozen treat, and honestly, the anticipation of that first bite gets me every time.
The first time I made these bomb pop popsicles, it was a sticky July day and my kids were running wild, begging for something “fun and cold!” I remembered those classic rocket-shaped pops from when I was knee-high to a grasshopper, and I thought, why not bring that nostalgia right into our kitchen? I cobbled together fresh berries, tangy yogurt, and a splash of lemonade, and—let’s face it—hoped for the best. When the pops came out, I swear, the kitchen was filled with the kind of happy chaos I live for. My family couldn’t wait for them to freeze and kept peeking into the freezer (patience is not our strong suit).
There’s a kind of joy in seeing those stripes, knowing each layer is packed with real fruit flavor. These pops are dangerously easy to whip up, which means they’ve become a staple for every 4th of July, birthday party, and, honestly, any random Tuesday when we need a little pick-me-up. If you’ve never made homemade popsicles, you’re in for pure, nostalgic comfort—way better than the store-bought kind. And you know what? I’ve tested this fresh bomb pop popsicles recipe more times than I care to admit (in the name of research, of course) and it’s always a hit. Bookmark this one, because the feeling of sharing these with your favorite people is like a warm hug in the middle of summer.
Why You’ll Love This Recipe
Let me tell you, after making these Fresh Bomb Pop Popsicles for years, I can promise you’re in for something special. Here’s why this easy 4th of July treat stands out every single time:
- Quick & Easy: These popsicles come together in under 30 minutes (plus freezing time). They’re perfect for busy summer days or when you need a last-minute dessert for your cookout.
- Simple Ingredients: No fancy ingredients here—just fresh fruit, yogurt, and lemonade. If your fridge is anything like mine, you probably have everything you need right now.
- Perfect for Celebrations: I always bust these out for our 4th of July bash, but they’re equally at home at birthday parties, backyard barbecues, or lazy pool days. The colors make them a showstopper for any summer gathering.
- Crowd-Pleaser: Kids, adults, grandparents—everyone loves these. My youngest calls them “firework pops,” and my neighbor once asked for the recipe before she’d even finished hers.
- Unbelievably Delicious: The blend of juicy strawberries, creamy vanilla yogurt, and sweet blueberries is next-level. Each layer has its own flavor, so you get a little adventure with every bite.
What sets my fresh bomb pop popsicles recipe apart? I use real fruit for both the red and blue layers, plus a little lemon zest in the white layer to make it pop (pun intended). No artificial dyes—just vibrant, natural color and flavor. I’ve spent way too many hours adjusting the fruit-to-yogurt ratio for that perfect creamy bite and layered look. It’s easier than you think, and you don’t need any fancy popsicle molds—just something that’ll hold the layers.
This recipe isn’t just good—it’s the kind that makes you pause after the first taste and close your eyes for a second. It’s comfort food, but brighter and healthier. You can impress your guests with something homemade, and you don’t have to sweat it in the kitchen. Whether you’re serving these to a crowd or just eating one straight from the freezer after mowing the lawn (guilty), you’ll feel like you’re treating yourself to a little piece of summer magic.
What Ingredients You Will Need
This fresh bomb pop popsicles recipe uses simple, wholesome ingredients that deliver bold flavor and satisfying texture—no fuss, no weird additives. You’ll be layering real fruit and creamy yogurt for a treat that looks as good as it tastes.
- For the Red Layer:
- 1 cup (150g) fresh strawberries, hulled and chopped (raspberries work too)
- 2 tablespoons (25g) granulated sugar (adjust for sweetness)
- 2 tablespoons (30ml) lemonade (adds tartness and helps blend)
- For the White Layer:
- 3/4 cup (180g) vanilla Greek yogurt (use plain for less sweetness)
- 2 tablespoons (30ml) milk (dairy or non-dairy)
- 1 teaspoon lemon zest (optional, but brightens the flavor)
- 1 tablespoon (15g) honey (optional, for a touch of sweetness)
- For the Blue Layer:
- 1 cup (150g) fresh blueberries (frozen are fine, just thaw first)
- 2 tablespoons (25g) granulated sugar
- 2 tablespoons (30ml) lemonade or water
Ingredient Tips: If you have a favorite local honey, use it for the white layer—it really does make a difference. I love using Stonyfield or Fage yogurt for creamy texture. For berries, grab whatever’s freshest at your market. If you’re making these off-season, frozen berries will work—just thaw and drain a bit first. If you need them dairy-free, coconut yogurt is a great swap. Want these popsicles to be vegan? Use agave syrup instead of honey and plant-based yogurt and milk.
Substitutions: You can swap strawberries for cherries or raspberries. Try lime zest instead of lemon for a fun twist. Almond milk works perfectly for a nutty undertone. In summer, I sometimes toss in a handful of blackberries with the blueberries for a deeper blue shade.
Extra Notes: If you want to cut back on sugar, skip it in the fruit layers—just taste and adjust as you blend. For brighter colors, add a splash of pomegranate juice to the red layer or some butterfly pea flower powder to the blue (I haven’t tried this, but it’s on my list!). The layers don’t need to be perfectly even—imperfection is what makes homemade popsicles special.
Equipment Needed
Making these fresh bomb pop popsicles is straightforward, and you don’t need a fancy kitchen setup. Here’s what you’ll want to have handy:
- Popsicle Molds: Any standard mold works. I’ve used both rocket-shaped and basic cylindrical ones. If you’re in a pinch, small paper cups do the trick—just peel them away when frozen.
- Wooden Popsicle Sticks: Essential for that classic look. If your molds have built-in sticks, skip these.
- Blender or Food Processor: For smooth fruit purées. I’ve tried both; a regular blender works fine, but a mini food processor gives a silky result.
- Measuring Cups and Spoons: Helps keep the layers balanced.
- Small Spatula or Spoon: For spreading and layering evenly.
If you don’t have popsicle molds, don’t worry—I’ve made these using muffin tins lined with plastic wrap, and they pop out just fine. Clean your blender right after using; berry purée can stain if left too long. For budget-friendly options, dollar store molds work surprisingly well, and I’ve reused popsicle sticks from store-bought treats (just give them a good wash).
Preparation Method
- Prepare the Red Layer:
- Add strawberries, sugar, and lemonade to a blender.
- Blend until smooth (about 30 seconds). Taste and adjust sugar if needed.
- Pour approximately 1 to 1.5 tablespoons (15-22ml) of the red purée into the bottom of each popsicle mold.
- Freeze for 30-45 minutes, until just set (not rock hard—you want the layers to stick together).
- Tip: If your freezer runs cold, check at 30 minutes. The layer should be firm but should still allow the next layer to stick.
- Prepare the White Layer:
- Mix yogurt, milk, lemon zest, and honey in a bowl. Stir until smooth.
- Spoon about 1 tablespoon (15ml) of yogurt mixture over the red layer in each mold.
- Gently tap molds on the counter to level the layer.
- Freeze for 25-35 minutes, until firm.
- Note: If you don’t wait long enough, layers might blend together. If it happens, don’t fret—the flavor’s still spot-on.
- Prepare the Blue Layer:
- Blend blueberries, sugar, and lemonade until smooth.
- Pour 1 to 1.5 tablespoons (15-22ml) of blue purée over the white layer.
- Insert popsicle sticks into the center of each mold (if using paper cups, cover with foil and poke the stick through to hold upright).
- Freeze for at least 4-6 hours, until solid.
- Personal tip: I like to freeze overnight for the best texture. If you’re impatient (like my kids), 4 hours is usually enough.
- Unmold and Serve:
- Run warm water over the outside of the molds for 10-15 seconds to loosen popsicles.
- Gently wiggle sticks to release pops. If they’re stuck, give it another quick rinse.
- Enjoy immediately or transfer to a freezer bag for storage.
- Note: If layering looks uneven, just call them “artisan” pops—no one minds!
Troubleshooting: If your layers run together, try freezing a bit longer between each. If pops break during unmolding, let them rest at room temp for a minute and try again. For extra smooth purée, strain fruit mixtures before pouring (I usually skip this—seeds and bits add texture).
Cooking Tips & Techniques
Over the years, I’ve picked up a few tricks to make these fresh bomb pop popsicles foolproof and extra tasty:
- Layering Patience: Freeze each layer just until set—not rock solid. If you rush, colors will blend. If you wait too long, layers might separate. I learned this the messy way after my first batch came out with psychedelic swirls instead of stripes!
- Purée Consistency: Don’t over-blend. You want purées thick enough to sit on top of each other, but not so stiff they’re hard to pour. If it’s too runny, add a few extra berries; too thick, splash in a bit more lemonade or milk.
- Sensory Cues: Each layer should look glossy and vibrant before freezing. If the color seems dull, taste—sometimes a squeeze of lemon brightens things up.
- Stick Placement: Place sticks in after the final layer so they anchor all three. If you have wobbly sticks, covering the molds with foil helps keep them upright.
- Efficiency: Set up your ingredients before starting. I line up all three bowls, so I’m not scrambling mid-recipe. This makes the layering go faster and keeps the kitchen (mostly) clean.
- Common Mistakes: Adding too much sugar can make popsicles icy. Less is more—fruit’s natural sweetness shines through. If you forget to tap the molds after adding layers, you might get uneven stripes (learned that one the hard way).
If you’re multitasking, prep the red and blue layers first, then mix the yogurt while the first layer sets. And don’t stress if the layers aren’t perfect—real life isn’t Instagram, and homemade popsicles are all about fun. The best tip? Taste the fruit before blending. If it’s sweet and flavorful, your popsicles will be too!
Variations & Adaptations
One of my favorite things about this fresh bomb pop popsicles recipe is how easy it is to tweak for different tastes, seasons, and dietary needs. Here are some go-to variations:
- Dairy-Free: Swap the Greek yogurt and milk with coconut yogurt and almond milk. The flavor’s tropical and the texture stays creamy.
- Low-Sugar: Skip the added sugar entirely if your fruit is sweet enough. Use a splash of stevia or monk fruit for a light touch.
- Seasonal Swaps: In summer, try blackberries for the blue layer and cherries for the red. I’ve made these with mango and pineapple for a sunset effect (not quite patriotic but delicious!).
If you want a grown-up twist, add a splash of coconut water to the white layer for a lighter taste. For extra crunch, toss in some chia seeds to any layer (they’ll plump up as the pops freeze). If you’re making these for a birthday, use all kinds of fruit and make rainbow popsicles—my kids love picking the colors.
Allergen notes: If you have nut allergies, use regular milk and dairy yogurt. For gluten-free needs, these pops are naturally safe—no grains here! I tried peanut butter yogurt instead of vanilla once, and while it wasn’t a hit for everyone, my oldest still talks about it.
Personal favorite? Swapping raspberries for strawberries in the red layer. The tartness is just unbeatable, and it pairs so nicely with the creamy white layer. The possibilities are endless—don’t be afraid to experiment!
Serving & Storage Suggestions
Fresh bomb pop popsicles are best served straight from the freezer, icy cold and with colors that pop. If you’re hosting, arrange them on a platter lined with ice or a chilled baking sheet—makes for a Pinterest-worthy display!
They pair perfectly with cold lemonade, iced tea, or a light fruit salad. For a cookout, set a cooler of popsicles near the grill so everyone can grab one when the burgers are done. If you want a dessert table, stack popsicles in tall glasses so they stand upright and show off their stripes.
To store, keep popsicles in an airtight container or freezer bag for up to 2 weeks. Place parchment paper between each pop so they don’t stick. If they soften a bit, just refreeze—flavors only get better. To reheat (sort of!), let them sit at room temp for 2-3 minutes before serving for the creamiest bite.
As they freeze longer, the fruit flavors mingle and deepen, so I actually prefer them a day after making. If you want to pack them for a picnic, wrap individually in wax paper and tuck into a cooler with ice packs. Trust me, they’ll disappear fast!
Nutritional Information & Benefits
Each fresh bomb pop popsicle is about 60-80 calories, depending on how much sugar and yogurt you use. They’re low in fat, with a good dose of Vitamin C and antioxidants from the berries. The yogurt adds a bit of protein and calcium, making these a more balanced treat than your average store-bought pop.
If you go for the low-sugar or dairy-free variations, they fit nicely into gluten-free, vegetarian, or even vegan diets. Berries are great for immune support and summer hydration, and the touch of lemon zest helps with digestion. The only allergen to watch for is dairy—swap for coconut or soy yogurt if needed.
From a wellness perspective, I love that these popsicles are made with real ingredients. It’s a treat that feels good—refreshing, light, and totally guilt-free. You get all the nostalgia without the artificial flavors or colors!
Conclusion
If you’re searching for the ultimate easy 4th of July treat, these fresh bomb pop popsicles are the answer. They’re vibrant, delicious, and packed with real fruit flavor—plus they look stunning on any summer spread.
Don’t be afraid to swap in your favorite fruits or play with the layers. Homemade popsicles are meant to be fun and a little messy. I keep coming back to this recipe because it brings out the laughter and joy that summer’s all about.
Give them a whirl, and let me know how they turn out! Share your tweaks and creative combos in the comments below—I’d love to see your own spin. Here’s to more happy, colorful, and tasty summer moments (with a popsicle in hand)!
FAQs
How long do bomb pop popsicles take to freeze?
Usually 4-6 hours is enough for them to set completely, but I prefer freezing overnight for the best texture.
Can I use frozen fruit instead of fresh?
Yes! Just be sure to thaw and drain any excess liquid before blending so the layers don’t get too watery.
What can I use if I don’t have popsicle molds?
Small paper cups or muffin tins lined with plastic wrap work just fine. Don’t forget to add sticks before the final freeze!
Are these popsicles gluten-free?
Absolutely! All the ingredients in this recipe are naturally gluten-free, so no worries there.
How do I get clean, even layers?
Freeze each layer until just set before adding the next. Tap the mold on the counter for a smooth finish, and don’t stress if they aren’t perfect—homemade is all about character!
Pin This Recipe!
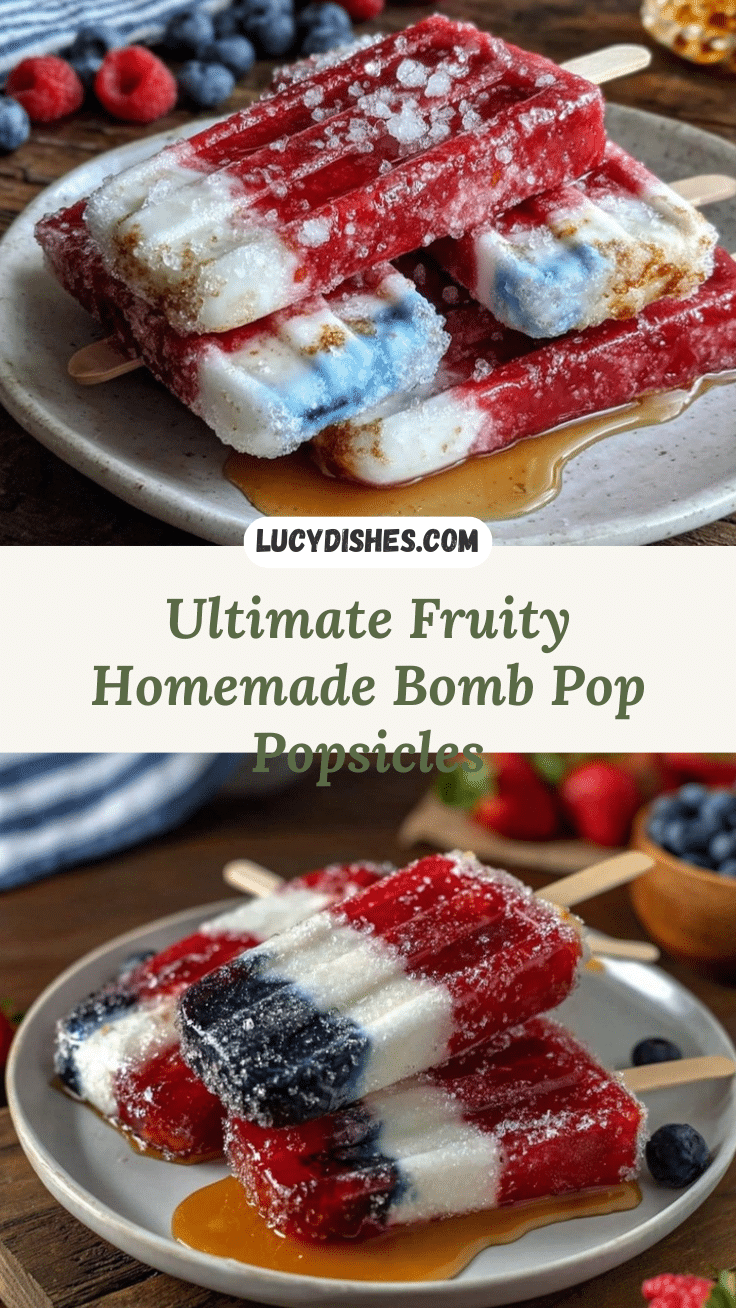
Fresh Bomb Pop Popsicles Recipe Easy 4th of July Treat
These homemade bomb pop popsicles feature vibrant layers of real strawberries, creamy yogurt, and blueberries for a festive, refreshing treat. Perfect for summer celebrations, they’re easy to make, naturally colored, and loved by kids and adults alike.
- Prep Time: 25 minutes
- Cook Time: 0 minutes
- Total Time: 6 hours 30 minutes (includes freezing time)
- Yield: 8 popsicles 1x
- Category: Dessert
- Cuisine: American
Ingredients
- 1 cup fresh strawberries, hulled and chopped (raspberries or cherries can be substituted)
- 2 tablespoons granulated sugar (adjust for sweetness)
- 2 tablespoons lemonade
- 3/4 cup vanilla Greek yogurt (or plain for less sweetness; coconut yogurt for dairy-free)
- 2 tablespoons milk (dairy or non-dairy)
- 1 teaspoon lemon zest (optional)
- 1 tablespoon honey (optional; agave syrup for vegan)
- 1 cup fresh blueberries (frozen, thawed and drained, or blackberries for variation)
- 2 tablespoons granulated sugar
- 2 tablespoons lemonade or water
Instructions
- Add strawberries, sugar, and lemonade to a blender. Blend until smooth (about 30 seconds). Taste and adjust sugar if needed.
- Pour 1 to 1.5 tablespoons of the red purée into the bottom of each popsicle mold. Freeze for 30-45 minutes, until just set.
- Mix yogurt, milk, lemon zest, and honey in a bowl. Stir until smooth.
- Spoon about 1 tablespoon of yogurt mixture over the red layer in each mold. Tap molds on the counter to level the layer. Freeze for 25-35 minutes, until firm.
- Blend blueberries, sugar, and lemonade (or water) until smooth.
- Pour 1 to 1.5 tablespoons of blue purée over the white layer. Insert popsicle sticks into the center of each mold.
- Freeze for at least 4-6 hours, until solid (overnight preferred for best texture).
- To unmold, run warm water over the outside of the molds for 10-15 seconds to loosen popsicles. Gently wiggle sticks to release pops.
- Enjoy immediately or transfer to a freezer bag for storage.
Notes
For dairy-free popsicles, use coconut yogurt and almond milk. For vegan, swap honey for agave syrup. Freeze each layer until just set for clean stripes. If using frozen fruit, thaw and drain before blending. Popsicles can be stored in an airtight container or freezer bag for up to 2 weeks. For brighter colors, add a splash of pomegranate juice to the red layer or butterfly pea flower powder to the blue. Imperfect layers add homemade charm.
Nutrition
- Serving Size: 1 popsicle
- Calories: 70
- Sugar: 12
- Sodium: 20
- Fat: 1
- Saturated Fat: 0.5
- Carbohydrates: 15
- Fiber: 2
- Protein: 2
Keywords: bomb pop, popsicles, 4th of July, summer treat, homemade, berries, yogurt, gluten-free, kid-friendly, patriotic dessert