“Are you sure this will work without frying?” my sister asked, eyeing the pile of shredded coconut and breadcrumbs scattered across my kitchen counter. Honestly, I was skeptical too. I’d always thought coconut shrimp had to be deep-fried to get that golden, crispy shell with the tropical sweetness. But that night, after a long day juggling work calls and dinner chaos, I just wanted something quick, less messy, and not a total calorie bomb. So, I threw together what I had, baked them on a sheet pan, and tossed together a simple sweet chili sauce from pantry staples.
The first bite was surprising—the crunch was real, the coconut toasted just right, and the shrimp inside stayed juicy and tender. That sweet chili sauce? It hit that perfect balance of heat and tang that made me close my eyes for a second. I ended up making these crispy baked coconut shrimp three times that week, partly because of the flavor and partly because it was so darn easy to whip up even when I was wiped out. The recipe stuck around because it’s one of those dishes that feels a little special but doesn’t ask for much in return. It’s comfort food with a tropical twist, perfect for any time you want a little sunshine on your plate without fuss.
Since then, it’s become my go-to for casual nights, impressing friends without breaking a sweat, and pairing beautifully with other quick meals like the fresh Hawaiian pasta salad I love in summer. I’m pretty sure once you try this, you’ll find yourself reaching for it just as often as I do—simple, satisfying, and just a bit addictive in the best way.
Why You’ll Love This Crispy Baked Coconut Shrimp Recipe
This crispy baked coconut shrimp recipe isn’t just another fried appetizer—it’s a reliable weeknight winner that has been tested over and over in my kitchen. After many trials, I’ve nailed the balance between crunchy coating and tender shrimp, all without the hassle of frying oil splatters. Here’s why you might want to keep this recipe close:
- Quick & Easy: Ready to eat in under 30 minutes, including baking time—perfect when you want a fast snack or appetizer.
- Simple Ingredients: No need to hunt down exotic items. You probably already have shredded coconut, panko breadcrumbs, and basic pantry spices on hand.
- Perfect for Entertaining: Whether it’s a casual gathering or a last-minute party, these shrimp always get gobbled up fast.
- Crowd-Pleaser: Kids and adults alike rave about the crunchy texture and the sweet-spicy kick from the dipping sauce.
- Unbelievably Delicious: The crispy coating with toasted coconut contrasts so well with the tender shrimp inside, making every bite a little celebration.
What sets this recipe apart? I skip the usual deep-frying step and bake the shrimp instead, which cuts down on grease but keeps the crispiness thanks to a special panko and coconut mix. Plus, the sweet chili sauce is homemade from scratch—no bottled shortcuts—giving it a fresher, brighter flavor that complements the shrimp perfectly. This recipe isn’t just coconut shrimp; it’s the kind of dish that fills your kitchen with a cozy, inviting aroma while promising a satisfying bite every time.
What Ingredients You Will Need
This recipe uses straightforward, wholesome ingredients to build a crispy, flavorful crust and a tangy-sweet dipping sauce. Most of these are pantry staples or easy to find at any grocery store.
- For the Shrimp Coating:
- 1 pound (450g) large shrimp, peeled and deveined, tails on (for best texture)
- ½ cup (120ml) all-purpose flour (can substitute with almond flour for gluten-free)
- 2 large eggs, beaten (helps the coating stick and adds moisture)
- ¾ cup (75g) panko breadcrumbs (I recommend Japanese-style for extra crunch)
- ¾ cup (60g) sweetened shredded coconut (toasted if you want more flavor)
- ½ teaspoon garlic powder (adds subtle depth)
- ½ teaspoon paprika (for mild smoky warmth)
- Salt and freshly ground black pepper, to taste
- For the Sweet Chili Sauce:
- ¼ cup (80ml) sweet chili sauce (store-bought works, but homemade tastes fresher—see method)
- 1 tablespoon rice vinegar (brightens the sauce)
- 1 teaspoon soy sauce (adds umami)
- 1 teaspoon honey or maple syrup (balances heat)
- Optional: pinch of red pepper flakes for extra kick
If you want to swap out ingredients, almond flour works well for a gluten-free option, and you can use dairy-free milk to beat the eggs for a vegan alternative (though texture may vary). For a fresher touch, try swapping the sweetened coconut with unsweetened and add a touch more honey in the sauce to compensate.
Equipment Needed
- Baking sheet or tray – a rimmed sheet pan works best to catch any drips and keep everything contained.
- Parchment paper or a silicone baking mat – essential for easy cleanup and preventing sticking.
- Three shallow bowls or plates – for the flour, egg wash, and breadcrumb-coconut mixture.
- Tongs – handy for dipping and turning each shrimp without losing coating.
- Mixing bowl – for prepping the sweet chili sauce.
- Oven thermometer (optional) – helps maintain accurate baking temperature, especially if your oven is temperamental.
Personally, I’ve tried baking these shrimp on both wire racks atop baking sheets and directly on parchment. The wire rack method yields a slightly crisper bottom but requires more cleanup. For a simpler approach, parchment works just fine. If you don’t have panko breadcrumbs, crushed cornflakes or crushed saltine crackers can work in a pinch, though the texture will be a bit different.
Preparation Method
- Preheat your oven to 425°F (220°C). Line a baking sheet with parchment paper or a silicone mat to prevent sticking. This high temperature helps achieve that crispy finish without frying.
- Prepare the coating stations: Pour the flour into one shallow bowl, beat the eggs in a second bowl, and combine the panko breadcrumbs, shredded coconut, garlic powder, paprika, salt, and pepper in a third bowl. Mixing the spices into the coconut and panko ensures every bite has flavor.
- Dry the shrimp: Pat the shrimp dry with paper towels. This helps the coating stick better. Trust me, skipping this step can lead to soggy bits.
- Coat the shrimp: One by one, dredge each shrimp in flour, shaking off the excess, then dip into the beaten eggs, and finally press into the breadcrumb-coconut mixture. Use tongs to keep your hands clean and make sure the shrimp are evenly coated. Place each coated shrimp on the prepared baking sheet, spacing them about ½ inch (1.3 cm) apart.
- Bake for 10-12 minutes, flipping the shrimp halfway through (around 5-6 minutes). You’re looking for a golden-brown, toasted coconut crust. If you want extra crispiness, you can broil for 1-2 minutes at the end, but keep a close eye so they don’t burn.
- Make the sweet chili sauce: While the shrimp bake, whisk together sweet chili sauce, rice vinegar, soy sauce, honey, and red pepper flakes in a small bowl. Taste and adjust sweetness or heat to your liking. This quick sauce adds a bright, tangy contrast to the richness of the shrimp.
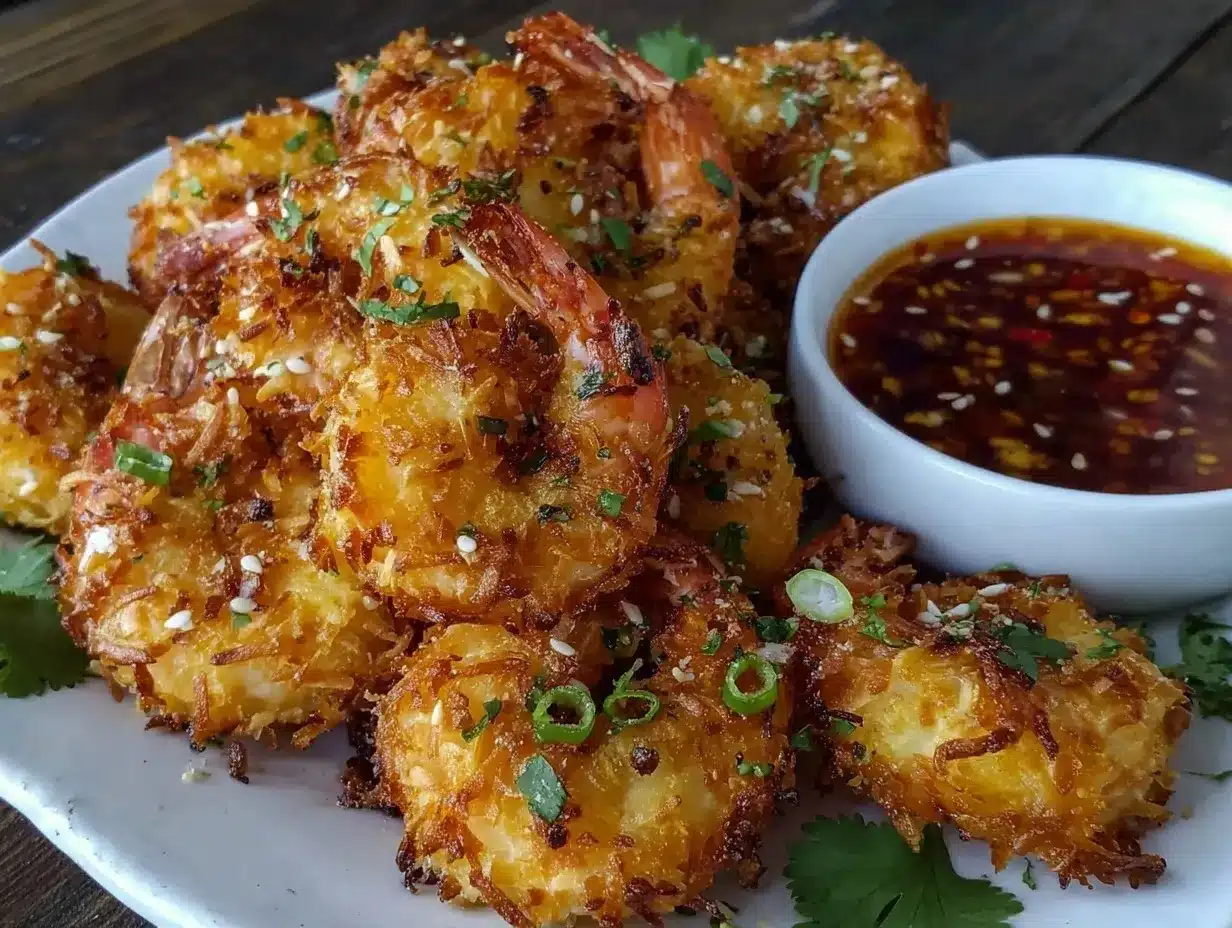
- Serve immediately with the dipping sauce on the side. For the best crunch, eat them fresh from the oven. If you need to hold them briefly, keep them warm in a low oven (about 200°F/90°C).
If the coating seems a little loose, chilling the shrimp on the baking sheet for 10 minutes before baking helps it set. Also, avoid overcrowding the pan—crowding traps steam and ruins crispiness. When flipping, use a gentle touch so the coating doesn’t fall off.
Cooking Tips & Techniques for Perfect Coconut Shrimp
One thing I’ve learned from trial and error: drying your shrimp thoroughly before coating is non-negotiable. Wet shrimp will make the flour and egg stick poorly, leading to patchy crusts. Also, mixing the shredded coconut with panko breadcrumbs is key—straight coconut burns too quickly, but mixing balances the toastiness with crunch.
For even cooking, spread the shrimp out so they’re not touching. This prevents steaming, which kills that crisp texture. Flipping halfway through baking ensures the coating browns evenly on both sides. I like to set a timer because it’s easy to get distracted and overcook shrimp, which turns them rubbery.
When making the sweet chili sauce, don’t be shy with tasting and tweaking. I usually start with less honey and add more if it’s too spicy or tangy. A little rice vinegar brightens the sauce and cuts through the richness of the coconut shrimp, balancing the flavors beautifully.
Multitasking tip: While the shrimp are baking, you can whip up an easy side like the fresh healthy quinoa salad for a quick, nutritious counterpart. It’s a time-saver that complements the crispy shrimp well.
Variations & Adaptations
- Spicy Kick: Add cayenne pepper or chili powder to the breadcrumb-coconut mix for a heat boost right in the coating.
- Gluten-Free Version: Use almond flour or gluten-free panko breadcrumbs instead of regular panko, and make sure your soy sauce is gluten-free or swap with tamari.
- Vegan Alternative: Replace shrimp with firm tofu slices or cauliflower florets. Use aquafaba or a flax egg in place of the eggs for coating.
- Seasonal Twist: Swap shredded coconut with finely chopped macadamia nuts or pistachios for a nutty crunch variation.
- Different Dipping Sauce: Try a zesty mango salsa or a tangy lime crema instead of sweet chili sauce for a fresh flavor profile.
One of my favorite tweaks was making a batch with a honey-lime dipping sauce instead of the sweet chili. The bright citrus notes added a lovely refreshing contrast that felt perfect for a summer evening snack.
Serving & Storage Suggestions
Serve these crispy baked coconut shrimp hot and fresh for the best crunch. I like to plate them with a small bowl of sweet chili sauce on the side for dipping. Garnish with lime wedges and a sprinkle of chopped fresh cilantro or green onions for a pop of color and extra zing.
This dish pairs wonderfully with light sides, like a crisp green salad or the fresh green snacks recipe for a quick burst of veggies. For drinks, a cold beer or a tropical mocktail works nicely to complement the tropical flavors.
Leftovers can be stored in an airtight container in the refrigerator for up to 2 days. To reheat, place shrimp on a baking sheet and warm in a 375°F (190°C) oven for 5-7 minutes to help crisp the coating again. Microwaving will make them soggy, so avoid that if you want to keep the texture intact.
Interestingly, the sweet chili sauce flavors tend to deepen when stored overnight, so it’s worth making a little extra for dipping later on.
Nutritional Information & Benefits
This crispy baked coconut shrimp recipe offers a lighter alternative to traditional fried versions without sacrificing texture or flavor. Per serving (about 6 shrimp), expect roughly 280 calories, 18 grams of protein, and 15 grams of fat, mostly from the shrimp and coconut. The baking method reduces added oil, making it a smarter choice.
Shrimp is a low-calorie, high-protein seafood packed with important nutrients like selenium, vitamin B12, and omega-3 fatty acids. Coconut adds a touch of healthy fats and fiber, and the homemade sauce avoids excess sugar and preservatives found in many bottled dips.
This recipe works well for gluten-free diets when using appropriate substitutions and is also low in carbs if you skip the flour or use almond flour. Just watch for soy if you have allergies, and adjust the sauce accordingly.
Conclusion
There’s something about this crispy baked coconut shrimp recipe that makes it feel both special and effortless—a rare combo in home cooking. I love that it turns a handful of simple ingredients into a crunchy, juicy bite that’s perfect for any occasion, from casual snacks to small dinner parties. Plus, the sweet chili sauce is easy to tweak, so you can make it your own with just a few adjustments.
Whether you’re a shrimp lover or just looking for a tasty new appetizer to try, this recipe is worth keeping in your rotation. Play around with the coating and sauce to suit your preferences, and enjoy the crispy, tropical crunch whenever the craving hits. And hey, if you try it, I’d love to hear how you made it your own!
Frequently Asked Questions About Crispy Baked Coconut Shrimp
Can I use frozen shrimp for this recipe?
Yes, but make sure to thaw and pat them completely dry before coating to ensure the crust sticks and crisps up nicely.
Is it possible to make the sweet chili sauce ahead of time?
Absolutely! The sauce can be made up to 3 days in advance and stored in the fridge. The flavors actually meld and improve with time.
How do I keep the coconut from burning in the oven?
Mixing shredded coconut with panko breadcrumbs helps prevent burning. Also, watch the shrimp closely near the end of baking or broiling and remove promptly once golden.
Can I fry these shrimp instead of baking?
Yes, traditional coconut shrimp is often fried. If you prefer frying, use oil heated to 350°F (175°C) and fry shrimp until golden and cooked through, about 2-3 minutes per side.
What can I serve with coconut shrimp for a full meal?
Pair them with light, fresh sides like a quinoa salad or a crisp green salad, such as the fresh healthy quinoa salad, for a balanced, satisfying meal.
Pin This Recipe!
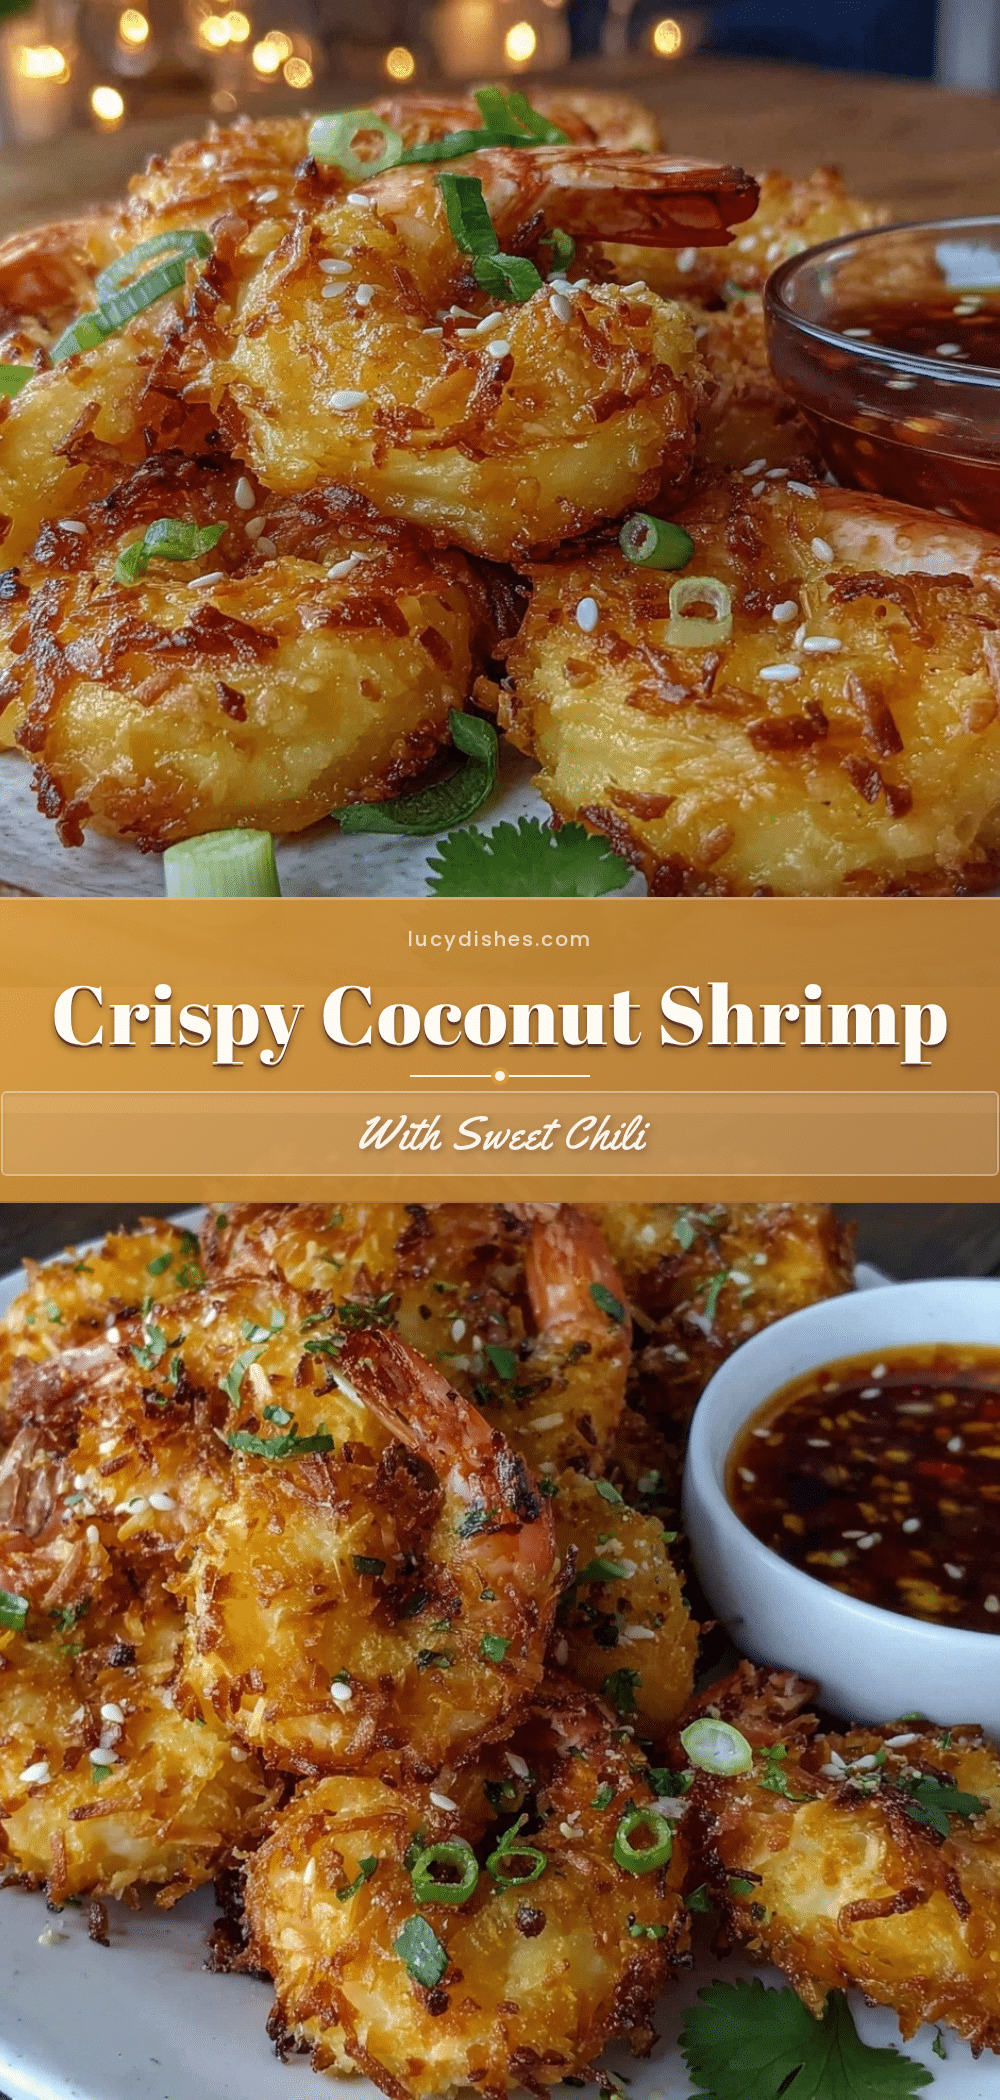
Crispy Baked Coconut Shrimp Recipe Easy Perfect Sweet Chili Sauce Dip

A quick and easy baked coconut shrimp recipe with a crunchy panko and coconut coating paired with a homemade sweet chili dipping sauce. Perfect for a healthier alternative to fried shrimp with a tropical twist.
- Prep Time: 10 minutes
- Cook Time: 12 minutes
- Total Time: 22 minutes
- Yield: 4 servings 1x
- Category: Appetizer
- Cuisine: American
Ingredients
- 1 pound large shrimp, peeled and deveined, tails on
- ½ cup all-purpose flour (can substitute with almond flour for gluten-free)
- 2 large eggs, beaten
- ¾ cup panko breadcrumbs (Japanese-style recommended)
- ¾ cup sweetened shredded coconut (toasted if desired)
- ½ teaspoon garlic powder
- ½ teaspoon paprika
- Salt and freshly ground black pepper, to taste
- ¼ cup sweet chili sauce
- 1 tablespoon rice vinegar
- 1 teaspoon soy sauce
- 1 teaspoon honey or maple syrup
- Optional: pinch of red pepper flakes
Instructions
- Preheat your oven to 425°F (220°C). Line a baking sheet with parchment paper or a silicone mat.
- Prepare the coating stations: place flour in one shallow bowl, beaten eggs in a second bowl, and mix panko breadcrumbs, shredded coconut, garlic powder, paprika, salt, and pepper in a third bowl.
- Pat the shrimp dry with paper towels.
- Dredge each shrimp in flour, shaking off excess, dip into beaten eggs, then press into the breadcrumb-coconut mixture. Place coated shrimp on the baking sheet about ½ inch apart.
- Bake for 10-12 minutes, flipping shrimp halfway through baking (around 5-6 minutes), until golden brown and toasted.
- Optional: broil for 1-2 minutes at the end for extra crispiness, watching carefully to avoid burning.
- While shrimp bake, whisk together sweet chili sauce, rice vinegar, soy sauce, honey, and red pepper flakes in a small bowl. Adjust sweetness or heat to taste.
- Serve shrimp immediately with the sweet chili sauce on the side.
Notes
Dry shrimp thoroughly before coating to ensure crispiness. Mixing shredded coconut with panko prevents burning. Avoid overcrowding the pan to keep shrimp crispy. Broil briefly for extra crispiness but watch carefully. Sweet chili sauce can be made ahead and stored in the fridge for up to 3 days. Reheat shrimp in oven to maintain crisp texture; avoid microwaving.
Nutrition
- Serving Size: About 6 shrimp per s
- Calories: 280
- Fat: 15
- Protein: 18
Keywords: coconut shrimp, baked shrimp, crispy shrimp, sweet chili sauce, easy appetizer, healthy shrimp, gluten-free option