Introduction
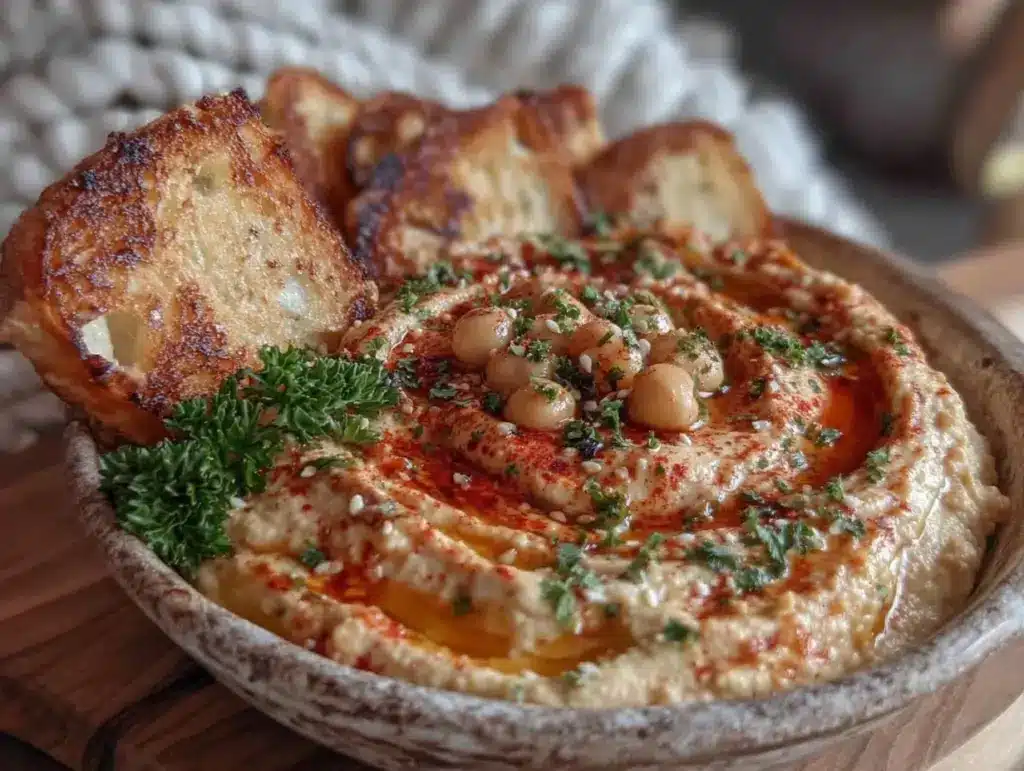
Let me tell you, the scent of roasted garlic mingling with nutty tahini and fresh lemon juice is enough to make anyone’s mouth water. The first time I whipped up this creamy hummus platter with toasted pita chips, I was instantly hooked—the kind of moment where you pause, take a deep breath, and just smile because you know you’re onto something truly special. When I was knee-high to a grasshopper, my grandma used to serve her homemade dips with warm pita bread during family gatherings, and this recipe brings back those pure, nostalgic comforts in a dangerously easy way.
Honestly, my family couldn’t stop sneaking the pita chips off the platter (and I can’t really blame them). You know what makes this creamy hummus platter stand out? It’s the perfect balance of smooth, tangy hummus paired with crispy, golden pita chips that you can make right at home—no store-bought shortcuts here! Perfect for potlucks, a sweet snack for your kids, or to brighten up your Pinterest snack board, this recipe has been tested multiple times in the name of research, of course. It’s become a staple for family gatherings and gifting because it feels like a warm hug in every bite. You’re going to want to bookmark this one.
Why You’ll Love This Recipe
After many kitchen experiments (and a few hummus mishaps), I’ve nailed a creamy hummus platter recipe that’s both simple and crowd-pleasing. Here’s why this recipe is a winner:
- Quick & Easy: Comes together in under 20 minutes, perfect for last-minute cravings or busy weeknights.
- Simple Ingredients: No fancy grocery trips needed; you likely already have everything in your pantry or fridge.
- Perfect for Entertaining: Whether it’s a brunch, potluck, or casual get-together, this platter impresses without stress.
- Crowd-Pleaser: Kids and adults alike rave about the creamy texture and perfectly toasted pita chips.
- Unbelievably Delicious: The balance of garlic, lemon, and tahini makes every bite soulful and satisfying.
What sets this creamy hummus platter apart isn’t just the recipe—it’s the technique. Blending the chickpeas until ultra-smooth and using a splash of ice-cold water to get that velvety texture takes the hummus to the next level. Plus, toasting the pita chips yourself means you control the crunch and seasoning, giving you a flavor profile that just can’t be beat. It’s comfort food that feels fresh and effortless. Trust me, after your first bite, you’ll understand why this recipe has earned a permanent spot on my snack rotation.
What Ingredients You Will Need
This creamy hummus platter uses simple, wholesome ingredients to deliver bold flavor and satisfying texture without the fuss. Most items are pantry staples, and substitutions are easy if needed.
- For the Hummus:
- 1 can (15 oz / 425 g) chickpeas, drained and rinsed (or 1 ½ cups cooked chickpeas)
- ¼ cup (60 ml) tahini (I recommend Soom or Joyva for the best creamy texture)
- 3 tablespoons fresh lemon juice (about 1 large lemon)
- 2 cloves garlic, minced (roasted garlic works beautifully for a milder flavor)
- 2 tablespoons extra virgin olive oil, plus more for drizzling
- ½ teaspoon ground cumin (adds warmth and depth)
- ½ teaspoon kosher salt, or to taste
- 3-4 tablespoons ice-cold water (to thin and smooth the hummus)
- For the Toasted Pita Chips:
- 4 large pita pockets, cut into triangles
- 2 tablespoons olive oil
- ½ teaspoon garlic powder (optional, for extra flavor)
- ½ teaspoon smoked paprika or chili powder (optional, for a subtle kick)
- Salt to taste
- Optional Garnishes:
- Chopped fresh parsley or cilantro
- Whole chickpeas, lightly toasted
- Extra drizzle of olive oil or a sprinkle of za’atar
- Food Processor or High-Speed Blender: Essential for making that ultra-smooth, creamy hummus texture. I’ve tried a regular blender but found it takes much longer and the texture isn’t quite as silky.
- Baking Sheet: For toasting pita chips evenly. A rimmed sheet works best to keep the chips from sliding off.
- Mixing Bowls: For tossing pita chips with oil and seasoning.
- Measuring Cups and Spoons: To get your proportions just right.
- Optional: Garlic press for easier mincing, but a sharp knife works fine too.
- Prepare the Chickpeas: Drain and rinse one 15 oz (425 g) can of chickpeas. For extra creaminess, you can peel the skins off a few chickpeas, but it’s not required. (This step is optional but makes a smoother hummus.) Time estimate: 5 minutes.
- Blend the Tahini and Lemon Juice: In your food processor, combine ¼ cup (60 ml) tahini and 3 tablespoons fresh lemon juice. Process for about 1 minute until thick and creamy. This step “whips” the tahini, which prevents bitterness later. You’ll notice it lightens in color and texture. Time estimate: 2 minutes.
- Add Garlic, Olive Oil, and Spices: Add 2 minced garlic cloves, 2 tablespoons olive oil, ½ teaspoon ground cumin, and ½ teaspoon kosher salt to the tahini mixture. Pulse a few times to combine. Time estimate: 1 minute.
- Add Chickpeas and Water: Add the rinsed chickpeas to the food processor. Blend for about 1 to 2 minutes, stopping to scrape down the sides as needed. Slowly add 3 to 4 tablespoons of ice-cold water until the hummus is smooth and creamy. (The water helps achieve that luscious, airy texture.) Taste and adjust salt or lemon if needed. Time estimate: 5 minutes.
- Toast the Pita Chips: Preheat your oven to 375°F (190°C). Cut 4 pita pockets into triangles and spread on a baking sheet. Drizzle with 2 tablespoons olive oil and sprinkle with ½ teaspoon garlic powder, ½ teaspoon smoked paprika, and salt to taste. Toss gently to coat. Arrange in a single layer. Bake for 10-12 minutes, flipping halfway, until golden and crispy. Keep an eye on them—they can burn quickly! Time estimate: 15 minutes.
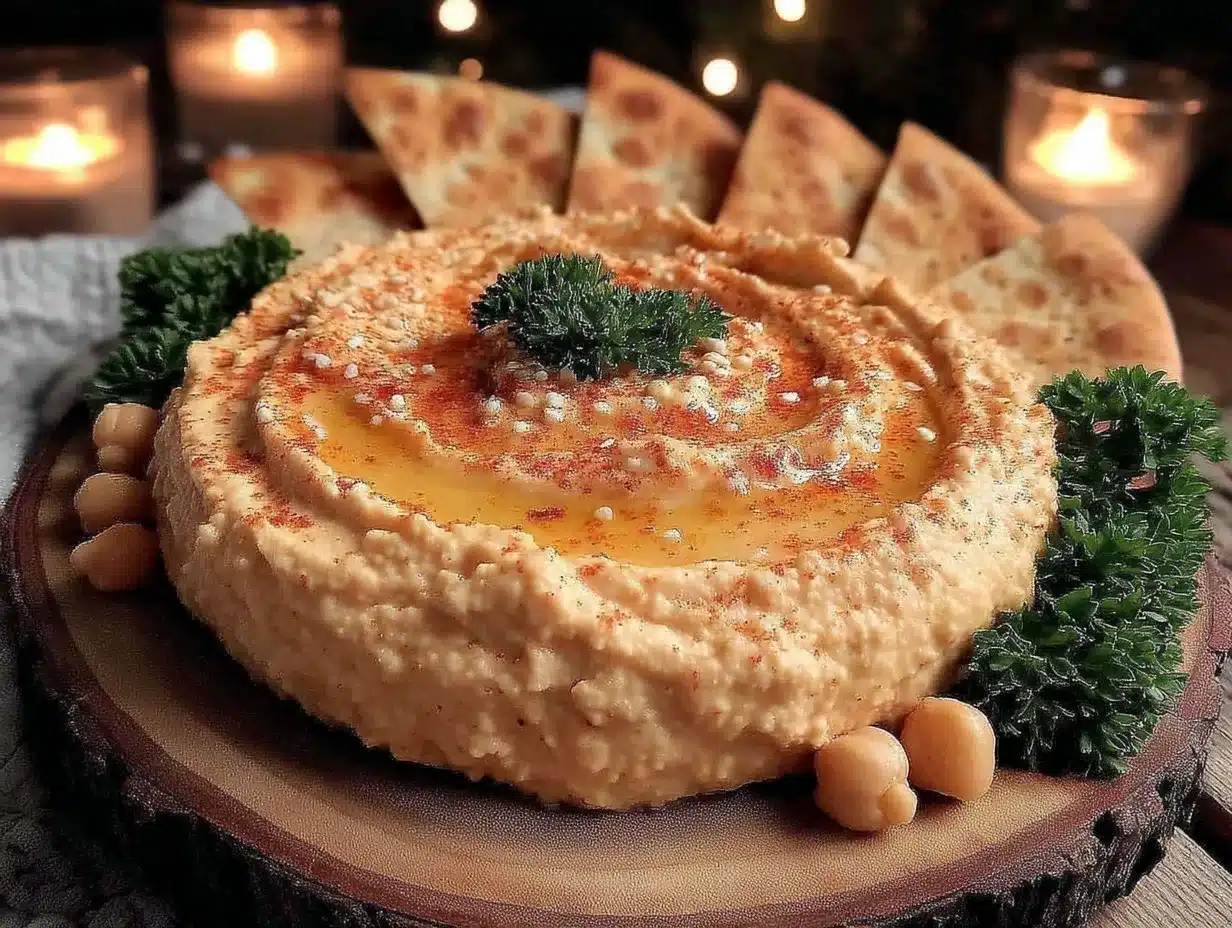
- Assemble the Platter: Transfer the creamy hummus to a serving bowl. Drizzle with olive oil and garnish with chopped parsley or toasted chickpeas if you like. Arrange the toasted pita chips around the bowl or on a platter for dipping. Time estimate: 5 minutes.
- Roasted Red Pepper Hummus: Blend in ½ cup roasted red peppers for a smoky, sweet flavor twist.
- Spicy Hummus: Add ¼ teaspoon cayenne pepper or a spoonful of harissa paste for some heat.
- Herb-Infused: Blend in fresh herbs like basil, cilantro, or dill for a bright, fresh note.
- Gluten-Free Option: Swap pita chips for gluten-free crackers or sliced veggies like cucumber and carrots.
- Dairy-Free and Nut-Free: This recipe is naturally free from dairy and nuts, but be cautious with store-bought tahini blends that might contain additives.
If you want to switch things up, you can swap tahini with sunflower seed butter for a nut-free option, or use gluten-free pita for a special diet. In summer, adding fresh diced cucumbers or cherry tomatoes on the side makes a refreshing pairing. When looking for chickpeas, I prefer organic canned ones for convenience, but freshly cooked chickpeas work just as well if you have the time.
Equipment Needed
For this creamy hummus platter with toasted pita chips, you’ll need a few basic kitchen tools that most home cooks already have:
If you don’t have a food processor, a strong blender can do the job, just be prepared to scrape down the sides a few times. For budget-friendly options, a hand mixer with a whisk attachment can work, but expect a chunkier texture. Keeping your equipment clean and well maintained (especially your food processor blade) makes a surprising difference in how smooth your hummus turns out.
Preparation Method
Pro tip: If the hummus feels too thick, add water one tablespoon at a time; if too thin, blend in a few more chickpeas or a little extra tahini. The garlic flavor mellows if you let the hummus rest for 30 minutes before serving, so feel free to make it ahead.
Cooking Tips & Techniques
One of the secrets to getting that perfect creamy hummus texture is patience in blending. You can’t rush it—processing the tahini and lemon juice first is a technique I learned the hard way after a few bitter batches. It helps to whip the tahini into a light, fluffy base before adding chickpeas.
Another tip? Use ice-cold water instead of oil to thin the hummus. It sounds counterintuitive, but it keeps the hummus light instead of greasy. And don’t skip rinsing the canned chickpeas; it removes excess salt and starch, which can impact texture and taste.
When toasting pita chips, spread them in a single layer and flip halfway through baking to get even crispness. Watch closely during the last few minutes—oven temperatures vary, and burnt chips are no fun. I once left mine in too long and learned the importance of setting a timer!
Multitasking here is easy: while the pita chips bake, finish blending the hummus and prep your garnishes. This timing keeps everything fresh and warm for serving.
Variations & Adaptations
This creamy hummus platter is wonderfully versatile. Here are a few ways you can mix it up:
Personally, I love adding a sprinkle of za’atar on top for a touch of earthiness. Once, I tried baking pita chips with a dash of za’atar mixed in with the olive oil—it was an instant hit at a dinner party.
Serving & Storage Suggestions
Serve the creamy hummus platter at room temperature to bring out its full flavor and creamy texture. It pairs beautifully with a crisp white wine or sparkling water with lemon for a light, refreshing touch. For a heartier snack, add sliced veggies like bell peppers, cucumbers, or cherry tomatoes alongside the pita chips.
Store leftover hummus in an airtight container in the refrigerator for up to 5 days. Give it a good stir and drizzle with olive oil before serving again to refresh the texture. Toasted pita chips keep best in an airtight container at room temperature and are best eaten within 2 days for maximum crunch.
Reheat pita chips briefly in a warm oven (about 300°F / 150°C for 3-4 minutes) if they lose their crispness. Flavors in the hummus mellow and blend beautifully if made a day ahead, so making it in advance is a great strategy for stress-free entertaining.
Nutritional Information & Benefits
This creamy hummus platter is not only delicious but also packed with nutrition. Chickpeas provide a great source of plant-based protein and fiber, which helps keep you full and satisfied. Tahini adds healthy fats and calcium, while olive oil contributes heart-healthy monounsaturated fats.
Per serving (about ¼ cup hummus and a handful of pita chips), you’re looking at approximately 200 calories, 7 grams of protein, and 5 grams of fiber. It’s naturally gluten-free if served with veggies or gluten-free chips, and free from dairy and added sugars.
If you’re watching sodium intake, opt for low-sodium canned chickpeas or rinse well. This recipe suits many dietary needs including vegetarian, vegan, and nut-free (when tahini is tolerated).
Conclusion
This creamy hummus platter with toasted pita chips is a no-fuss, delicious recipe you’ll want in your regular rotation. It’s easy enough for a quick snack but impressive enough for guests, making it a versatile kitchen win. The creamy texture, fresh lemony zing, and crispy chips come together in a way that’s hard to resist.
I love this recipe because it brings people together—whether sharing at a party or enjoying a quiet moment with a good book. Feel free to customize the spices and garnishes to suit your taste. I’d love to hear how you make it your own, so don’t hesitate to leave a comment or share your favorite variations.
Give it a try, and I bet you’ll come back to this creamy hummus platter again and again. Happy dipping!
FAQs
Can I make the hummus ahead of time?
Absolutely! The flavors develop beautifully if you make the hummus a few hours or even a day in advance. Just store it in an airtight container in the fridge.
How do I store leftover pita chips?
Keep toasted pita chips in an airtight container at room temperature for up to 2 days. If they lose crispness, reheat briefly in a warm oven.
Can I use dried chickpeas instead of canned?
Yes! Just soak and cook dried chickpeas until tender. They often produce a creamier hummus but require more prep time.
What if I don’t have tahini?
You can substitute with sunflower seed butter for a nut-free option or simply omit it, though it will change the flavor and texture slightly.
How do I make pita chips gluten-free?
Swap pita chips for gluten-free crackers or fresh veggie sticks like carrots, cucumbers, or bell peppers for dipping.
Pin This Recipe!

Creamy Hummus Platter Recipe with Easy Toasted Pita Chips Guide

A creamy, smooth hummus paired with crispy homemade toasted pita chips, perfect for entertaining, snacking, or family gatherings.
- Prep Time: 10 minutes
- Cook Time: 15 minutes
- Total Time: 25 minutes
- Yield: 6 servings 1x
- Category: Snack / Appetizer
- Cuisine: Middle Eastern
Ingredients
- 1 can (15 oz / 425 g) chickpeas, drained and rinsed (or 1 ½ cups cooked chickpeas)
- ¼ cup (60 ml) tahini
- 3 tablespoons fresh lemon juice (about 1 large lemon)
- 2 cloves garlic, minced (roasted garlic optional)
- 2 tablespoons extra virgin olive oil, plus more for drizzling
- ½ teaspoon ground cumin
- ½ teaspoon kosher salt, or to taste
- 3–4 tablespoons ice-cold water
- 4 large pita pockets, cut into triangles
- 2 tablespoons olive oil
- ½ teaspoon garlic powder (optional)
- ½ teaspoon smoked paprika or chili powder (optional)
- Salt to taste
- Optional garnishes: chopped fresh parsley or cilantro, whole toasted chickpeas, extra olive oil drizzle, sprinkle of za’atar
Instructions
- Drain and rinse one 15 oz (425 g) can of chickpeas. Optionally peel skins off a few chickpeas for extra creaminess.
- In a food processor, combine ¼ cup tahini and 3 tablespoons fresh lemon juice. Process for about 1 minute until thick and creamy.
- Add 2 minced garlic cloves, 2 tablespoons olive oil, ½ teaspoon ground cumin, and ½ teaspoon kosher salt to the tahini mixture. Pulse a few times to combine.
- Add rinsed chickpeas to the food processor. Blend for 1 to 2 minutes, scraping down sides as needed. Slowly add 3 to 4 tablespoons ice-cold water until smooth and creamy. Taste and adjust salt or lemon juice if needed.
- Preheat oven to 375°F (190°C). Cut 4 pita pockets into triangles and spread on a baking sheet. Drizzle with 2 tablespoons olive oil and sprinkle with ½ teaspoon garlic powder, ½ teaspoon smoked paprika, and salt to taste. Toss gently to coat and arrange in a single layer.
- Bake pita chips for 10-12 minutes, flipping halfway through, until golden and crispy. Watch closely to avoid burning.
- Transfer hummus to a serving bowl. Drizzle with olive oil and garnish with parsley or toasted chickpeas if desired. Arrange pita chips around the bowl or on a platter for dipping.
Notes
For extra smooth hummus, peel skins off some chickpeas. Use ice-cold water to thin hummus instead of oil for a lighter texture. Toast pita chips in a single layer and flip halfway for even crispness. Make hummus ahead to mellow garlic flavor. Substitute sunflower seed butter for tahini for nut-free option. Use gluten-free pita or veggies for gluten-free diet.
Nutrition
- Serving Size: About ¼ cup hummus a
- Calories: 200
- Sugar: 1
- Sodium: 210
- Fat: 10
- Saturated Fat: 1.5
- Carbohydrates: 22
- Fiber: 5
- Protein: 7
Keywords: hummus, pita chips, creamy hummus, toasted pita, easy snack, appetizer, Middle Eastern, vegan, gluten-free option