Imagine this: the aroma of warm cinnamon and nutmeg wafting through your kitchen, mingling with the sweet, caramel-like scent of apple butter. It’s the kind of smell that instantly wraps you in a blanket of comfort and nostalgia. The first time I made this Cozy Apple Butter Pie with a Golden Crust, I couldn’t believe how something so simple could taste so utterly divine. It was one of those moments where you take a bite, close your eyes, and let out a satisfied “Mmm.” My family devoured it before it even had a chance to cool completely (and honestly, I don’t blame them). Whether it’s a chilly autumn evening or a festive holiday gathering, this pie is destined to become a staple in your kitchen and a hit with everyone who tries it.
Years ago, I stumbled upon a jar of apple butter at a local farmers’ market and instantly fell in love with its velvety texture and rich flavor. It reminded me of the apple pies my grandmother used to make when I was knee-high to a grasshopper. She had a way of blending spices and apples that felt like a warm hug in every bite. I wanted to recreate that magic but with a little twist, and that’s how this recipe was born. With a perfectly golden, buttery crust and a filling that’s equal parts smooth and spiced, this pie is as comforting as it gets. Trust me, this is one recipe you’ll want to bookmark and make again and again.
Why You’ll Love This Recipe
- Quick & Simple: Don’t let pie-making intimidate you—this recipe is beginner-friendly and comes together in about an hour!
- Perfect for Any Occasion: Whether you’re hosting Thanksgiving dinner, attending a potluck, or craving a cozy dessert on a chilly evening, this pie fits the bill.
- Crowd-Pleaser: Kids and adults alike adore its comforting flavors and luscious texture. I always get compliments when I serve this pie!
- Unique Flavor: The apple butter adds a rich, caramelized depth that sets this pie apart from traditional apple pies.
- Customizable: You can easily tweak the recipe to suit your taste with different spices or even by making it gluten-free.
What truly sets this pie apart is the apple butter. It creates a creamy, concentrated apple flavor that pairs perfectly with the flaky, golden crust. You don’t have to be a pastry chef to make this pie—it’s simple, forgiving, and oh-so-rewarding. Plus, the filling-to-crust ratio is absolutely perfect, ensuring every bite is balanced and heavenly. After baking it several times (purely in the name of research, of course), I can confidently say: this pie is the real deal and worth every bite.
What Ingredients You Will Need
This recipe uses simple, wholesome ingredients to create a warm and flavorful dessert that feels indulgent yet approachable. Here’s what you’ll need:
- For the crust:
- 2 ½ cups all-purpose flour
- 1 tsp salt
- 1 tbsp granulated sugar
- 1 cup unsalted butter, cold and cubed
- 6-8 tbsp ice water (add gradually)
- For the filling:
- 1 ¼ cups apple butter (look for a rich, thick variety with no added sugar)
- ¾ cup brown sugar, packed
- 2 large eggs
- ¾ cup heavy cream
- 2 tsp pure vanilla extract
- 1 tsp ground cinnamon
- ½ tsp ground nutmeg
- ¼ tsp ground cloves
- Optional topping:
- Whipped cream or vanilla ice cream (for serving)
If you’re gluten-free, you can swap the all-purpose flour for an equal amount of almond flour or a 1:1 gluten-free baking blend. For dairy-free folks, use a plant-based butter and coconut cream instead of heavy cream.
Equipment Needed
Here’s what you’ll need to make this pie:
- Mixing bowls (one large, one medium)
- Pastry cutter or food processor (to make the crust)
- Rolling pin
- 9-inch pie dish
- Whisk
- Spatula
- Baking sheet (optional, to catch any drips)
- Cooling rack
If you don’t own a pastry cutter, no worries—a fork works in a pinch! For the pie dish, I recommend a ceramic or glass one for even baking and that classic homemade aesthetic.
Preparation Method

Follow these simple steps to create the most comforting apple butter pie you’ve ever had:
- Prepare the crust: In a large mixing bowl, whisk together the flour, salt, and sugar. Add the cold, cubed butter and use a pastry cutter (or your fingertips) to work it into the dry ingredients until the mixture resembles coarse crumbs.
- Gradually add ice water, one tablespoon at a time, while gently mixing with a fork. Stop when the dough just comes together—it should be slightly sticky but not wet. Be careful not to overwork the dough.
- Divide the dough into two equal portions, flatten each into a disk, wrap in plastic wrap, and refrigerate for at least 30 minutes.
- Preheat the oven: While the dough chills, preheat your oven to 375°F (190°C).
- Make the filling: In a medium bowl, whisk together the apple butter, brown sugar, eggs, heavy cream, vanilla, cinnamon, nutmeg, and cloves until smooth.
- Roll out the crust: On a lightly floured surface, roll out one disk of dough into a circle large enough to fit your pie dish. Carefully transfer it to the dish and trim any excess, leaving about 1 inch hanging over the edge.
- Pour in the filling, spreading it out evenly. Roll out the second disk of dough and place it on top of the filling. Pinch the edges together and trim any excess. Crimp or flute the edges for a decorative touch.
- Prepare the crust: Brush the top crust lightly with water or an egg wash and sprinkle with a pinch of sugar for extra sparkle.
- Bake: Place the pie on a baking sheet to catch any drips and bake for 45-50 minutes, or until the crust is golden brown and the filling is just set.
- Cool and serve: Allow the pie to cool on a wire rack for at least 2 hours before slicing. Serve with whipped cream or a scoop of vanilla ice cream for the ultimate treat.
Cooking Tips & Techniques
Making pie doesn’t have to be intimidating! Here are some tips to ensure success:
- Keep your butter cold: Cold butter is key to a flaky crust. If it starts to soften while you’re working, pop the dough back in the fridge for 10-15 minutes.
- Don’t overwork the dough: Handle it gently to avoid a tough crust. The goal is to mix just until it comes together.
- Check for doneness: When the top crust is golden brown and the filling is bubbling slightly, your pie is ready.
- Prevent soggy bottoms: Baking on a preheated baking sheet can help ensure the bottom crust cooks evenly.
- Troubleshooting: If your crust cracks while rolling, don’t panic! Patch it up with a bit of dough and press it together gently.
My secret to a perfect pie? Patience! Letting the dough chill and the pie cool completely ensures the best texture and flavor. Trust me, it’s worth the wait!
Variations & Adaptations
Want to switch things up? Here are a few ideas:
- Gluten-Free Option: Swap out the all-purpose flour for an equal amount of gluten-free flour blend or almond flour.
- Dairy-Free Option: Replace butter with a plant-based alternative and use coconut cream instead of heavy cream.
- Seasonal Twist: Add a layer of fresh apple slices on top of the apple butter filling for a bit of texture and extra apple goodness.
- Spice it up: Try adding a pinch of cardamom or ginger for a unique flavor twist.
Once, I added a handful of chopped pecans to the top crust before baking, and the nutty crunch was such a hit! Don’t be afraid to experiment—you might just discover your own signature twist.
Serving & Storage Suggestions
This Cozy Apple Butter Pie is best served at room temperature or slightly warm. Here are some ideas for enjoying and storing it:
- Serving: Pair it with a dollop of whipped cream or a scoop of vanilla ice cream. The creamy sweetness complements the spiced apple butter beautifully.
- Presentation: Dust the top with powdered sugar or drizzle with caramel sauce for a show-stopping finish.
- Storage: Cover tightly and store in the refrigerator for up to 4 days. Let the pie come to room temperature before serving, or warm it in the oven at 300°F (150°C) for 10 minutes.
- Freezing: Wrap the cooled pie tightly in plastic wrap and aluminum foil before freezing. It will keep for up to 3 months—just thaw overnight in the fridge before reheating.
Nutritional Information & Benefits
Here’s a breakdown of the nutritional benefits of this delightful dessert:
- Each slice (1/8 of the pie) contains approximately:
- Calories: 290
- Fat: 14g
- Carbohydrates: 38g
- Protein: 3g
- Sugar: 18g
- Health Benefits: Apple butter is rich in fiber and antioxidants, while spices like cinnamon and nutmeg have anti-inflammatory properties.
- Dietary Notes: This pie can be made gluten-free and dairy-free with simple substitutions.
- Allergens: Contains dairy and gluten. Adjust as needed for dietary restrictions!
Conclusion
There’s something magical about a warm, homemade pie, and this Cozy Apple Butter Pie with a Golden Crust delivers all the comfort and flavor you could ever want. With its rich, spiced filling and buttery, flaky crust, it’s the perfect dessert for any occasion. Whether you’re making it for your family or sharing it at a holiday gathering, this recipe is sure to become an instant favorite.
I love how customizable this pie is—you can tweak the flavors, experiment with toppings, or make it fit your dietary needs. It’s a recipe that’s truly yours to make your own. And trust me, once you take that first bite, you’ll be hooked just like I was.
Ready to give it a try? I’d love to hear how it turned out for you! Leave a comment below or share your version of this recipe—it always makes my day to see your creations. Happy baking, and may your kitchen be filled with the cozy, irresistible aroma of apple butter pie!
FAQs
Can I use store-bought pie crust?
Absolutely! If you’re short on time, a store-bought pie crust works just fine. However, I highly recommend making your own—it’s easier than you think and adds an extra homemade touch.
What is apple butter, and can I use applesauce instead?
Apple butter is a concentrated, spiced apple spread with a thicker texture than applesauce. While applesauce can work in a pinch, it won’t have the same depth of flavor, so I recommend sticking with apple butter.
Can I freeze this pie?
Yes! Wrap the cooled pie tightly in plastic wrap and aluminum foil, then freeze for up to 3 months. Thaw overnight in the fridge before reheating.
What’s the best way to reheat this pie?
To reheat, place the pie in a preheated oven at 300°F (150°C) for about 10 minutes or until warmed through. Avoid microwaving, as it can make the crust soggy.
Can I make this pie ahead of time?
Definitely! You can bake the pie up to two days ahead and store it in the refrigerator. Let it come to room temperature or warm it slightly before serving.
Pin This Recipe!

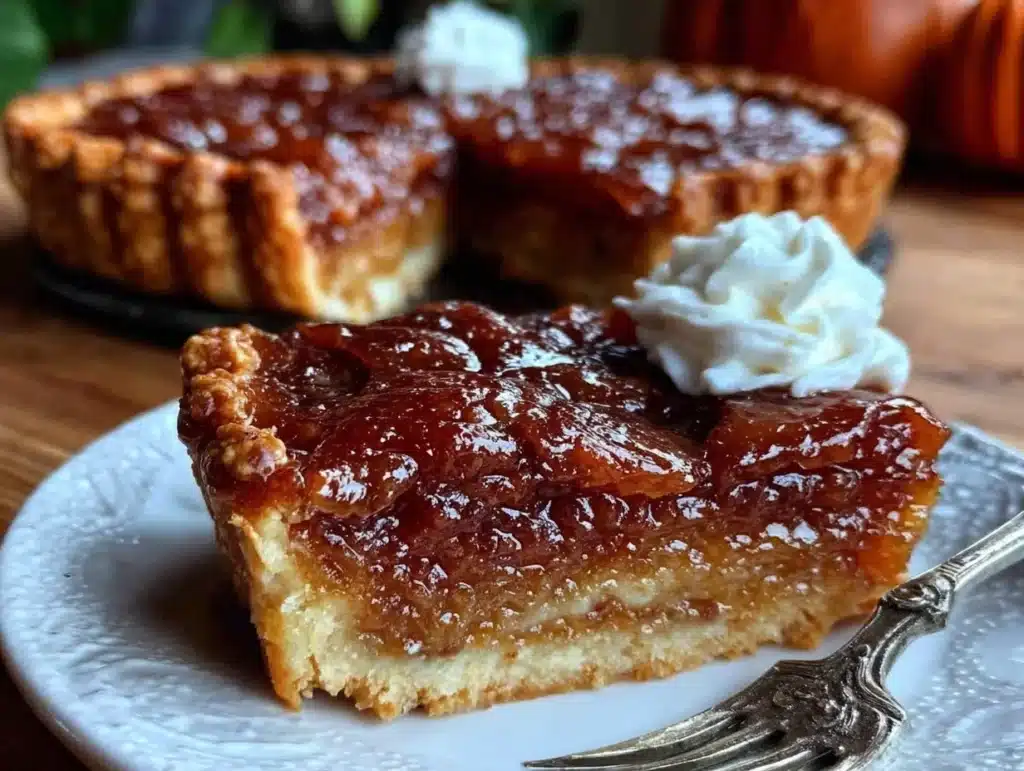
Cozy Apple Butter Pie Recipe with Perfect Golden Crust

A comforting dessert with a rich, spiced apple butter filling and a buttery, flaky golden crust. Perfect for any occasion.
- Prep Time: 30 minutes
- Cook Time: 50 minutes
- Total Time: 1 hour 20 minutes
- Yield: 8 servings 1x
- Category: Dessert
- Cuisine: American
Ingredients
- 2 ½ cups all-purpose flour
- 1 tsp salt
- 1 tbsp granulated sugar
- 1 cup unsalted butter, cold and cubed
- 6–8 tbsp ice water
- 1 ¼ cups apple butter
- ¾ cup brown sugar, packed
- 2 large eggs
- ¾ cup heavy cream
- 2 tsp pure vanilla extract
- 1 tsp ground cinnamon
- ½ tsp ground nutmeg
- ¼ tsp ground cloves
- Whipped cream or vanilla ice cream (optional, for serving)
Instructions
- In a large mixing bowl, whisk together the flour, salt, and sugar. Add the cold, cubed butter and use a pastry cutter or fingertips to work it into the dry ingredients until the mixture resembles coarse crumbs.
- Gradually add ice water, one tablespoon at a time, while gently mixing with a fork. Stop when the dough just comes together—it should be slightly sticky but not wet. Be careful not to overwork the dough.
- Divide the dough into two equal portions, flatten each into a disk, wrap in plastic wrap, and refrigerate for at least 30 minutes.
- Preheat the oven to 375°F (190°C).
- In a medium bowl, whisk together the apple butter, brown sugar, eggs, heavy cream, vanilla, cinnamon, nutmeg, and cloves until smooth.
- On a lightly floured surface, roll out one disk of dough into a circle large enough to fit your pie dish. Carefully transfer it to the dish and trim any excess, leaving about 1 inch hanging over the edge.
- Pour in the filling, spreading it out evenly. Roll out the second disk of dough and place it on top of the filling. Pinch the edges together and trim any excess. Crimp or flute the edges for a decorative touch.
- Brush the top crust lightly with water or an egg wash and sprinkle with a pinch of sugar for extra sparkle.
- Place the pie on a baking sheet to catch any drips and bake for 45-50 minutes, or until the crust is golden brown and the filling is just set.
- Allow the pie to cool on a wire rack for at least 2 hours before slicing. Serve with whipped cream or a scoop of vanilla ice cream.
Notes
[‘Keep your butter cold for a flaky crust.’, ‘Don’t overwork the dough to avoid a tough crust.’, ‘Bake on a preheated baking sheet to prevent soggy bottoms.’, ‘Let the pie cool completely for the best texture and flavor.’]
Nutrition
- Serving Size: 1 slice (1/8 of the
- Calories: 290
- Sugar: 18
- Fat: 14
- Carbohydrates: 38
- Protein: 3
Keywords: apple butter pie, golden crust, comforting dessert, holiday pie, spiced pie