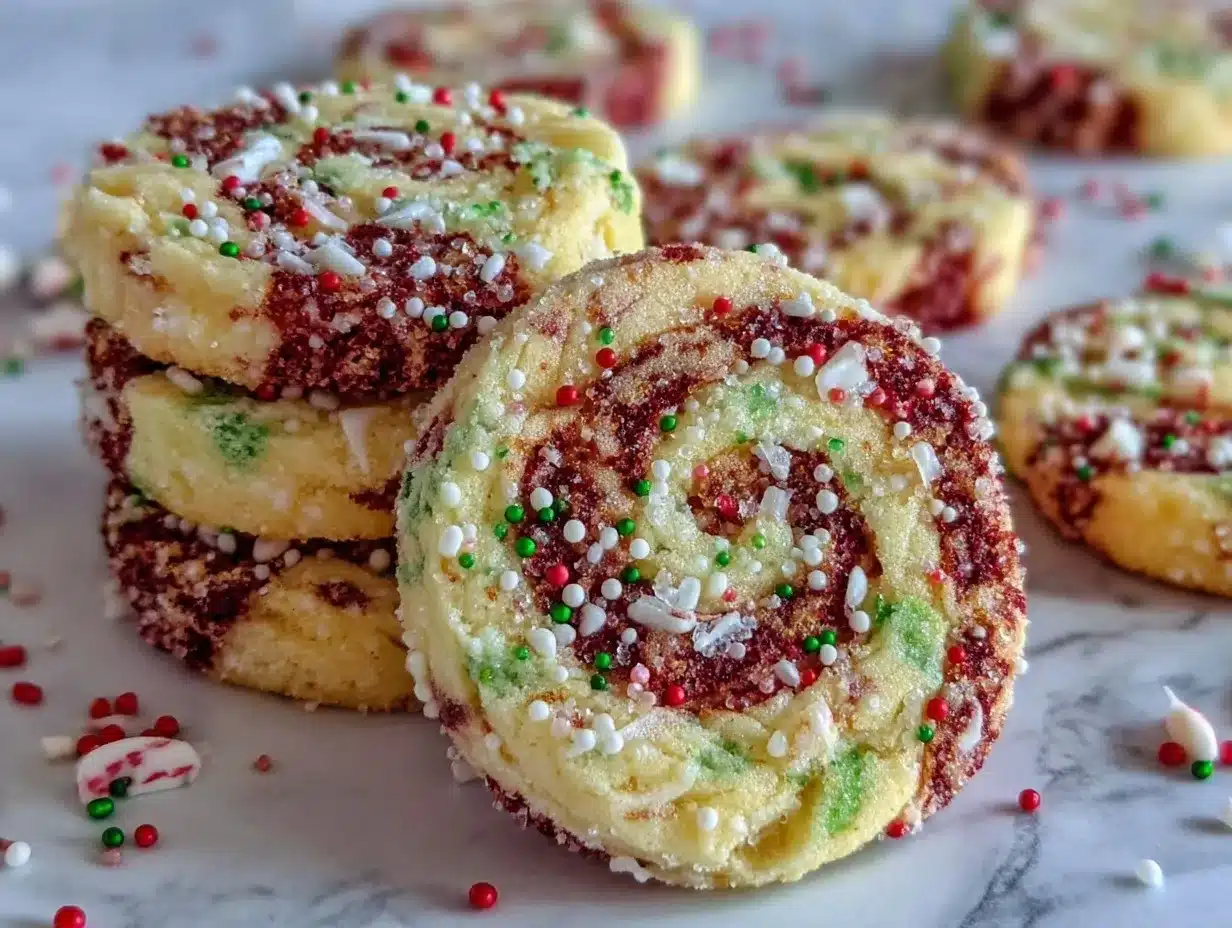
You know that moment when the kitchen is alive with the scent of buttery vanilla and sugar, and the world outside feels just a bit quieter? That’s exactly the scene every time I make Christmas Pinwheel Cookies for the holiday cookie boxes. The swirl of vibrant red and green against creamy white dough is downright mesmerizing—like little edible ornaments, each one promising a bite of pure festive joy. There’s something about rolling out that dough, slicing through the perfect spiral, and watching the colors pop in the oven that just makes me pause and smile.
The first time I tried pinwheel cookies, I was knee-high to a grasshopper and sitting at my grandma’s kitchen table. She let me sprinkle colored sugar everywhere (and I mean everywhere—even the cat got a dusting). I was instantly hooked. That was the kind of moment where you pause, take a deep breath, and just know you’re onto something truly special. Honestly, if I’d stumbled on this recipe years ago, I would have saved myself a lot of holiday stress. These cookies have become a staple for family gatherings, gifting, and those cozy baking marathons on snowy weekends. They’re dangerously easy to whip up and provide pure, nostalgic comfort with every bite.
Let’s face it, my family can’t resist sneaking them off the cooling rack (and, really, I can’t blame them). Friends have begged for the recipe after just one taste, and my kids love helping with the rolling, slicing, and decorating. Christmas Pinwheel Cookies are perfect for potlucks, holiday parties, and brightening up your Pinterest cookie board. I’ve tested this recipe more times than I care to admit (in the name of research, of course), and I can say with confidence: this one feels like a warm hug in cookie form. You’re going to want to bookmark this for every December from now on.
Why You’ll Love This Recipe
As someone who’s baked my way through more holiday cookie recipes than I can count, I can honestly say these Christmas Pinwheel Cookies stand out for their cheery appearance and crowd-pleasing flavor. I’ve tested, tweaked, and shared them with everyone from neighbors to my pickiest cousin, and the response is always a resounding “Wow!” Here’s what makes these cookies a must-have for your holiday baking:
- Quick & Easy: Comes together in under 30 minutes of hands-on time. Perfect for busy holiday schedules and last-minute cookie boxes.
- Simple Ingredients: No need for fancy grocery trips. Likely, you’ve got everything on hand—flour, butter, sugar, and a splash of food coloring.
- Perfect for Holiday Occasions: These cookies look dazzling on cookie trays, make ideal gifts for teachers, and are a hit at every holiday party.
- Crowd-Pleaser: Both kids and adults can’t resist the festive swirls. They’re always the first to vanish from the cookie plate!
- Unbelievably Delicious: The buttery, tender texture combined with gentle vanilla sweetness is next-level comfort food. Plus, the visual appeal is off the charts.
What sets this recipe apart is the dough technique—chilling and rolling in layers for a crisp spiral, plus a dash of almond extract for extra depth. The colors stay vibrant, the cookies hold their shape, and you get reliable results every time. If you’ve ever struggled with dough that spreads or colors that bleed, this recipe is your answer.
Honestly, these Christmas Pinwheel Cookies aren’t just good—they’re the kind you close your eyes over after the first bite. They deliver holiday magic in every swirl. Whether you’re gifting a box, sharing with friends, or just treating yourself, these cookies turn any moment into a celebration. They’re comfort food reimagined—festive, fun, and absolutely irresistible. I promise, you’ll be proud to show these off and even more excited to taste them.
What Ingredients You Will Need
This recipe uses simple, wholesome ingredients that work together to deliver bold flavor and that signature pinwheel look—without any fuss. Most are pantry staples, and there’s room for a few swaps if you need them. Here’s what you’ll need:
- For the dough:
- 2 ¾ cups (345g) all-purpose flour (I like King Arthur for consistent texture)
- 1 cup (226g) unsalted butter, softened (adds rich flavor and helps layering)
- 1 cup (200g) granulated sugar
- 1 large egg, room temperature
- 2 teaspoons vanilla extract (for classic holiday aroma)
- ½ teaspoon almond extract (optional, but I recommend it for a deeper flavor)
- ½ teaspoon salt
- ½ teaspoon baking powder
- For the colors:
- Red gel food coloring (Wilton and Americolor work best—no bleeding)
- Green gel food coloring
- For decoration:
- Coarse sanding sugar or sprinkles (optional, but they add sparkle and crunch)
If you’re looking for substitutions, here are a few tips from my own kitchen experiments:
- Swap the all-purpose flour for a 1:1 gluten-free blend—Bob’s Red Mill is my go-to.
- Use plant-based butter for a dairy-free cookie; just watch for salt content and texture differences.
- Want to make a vegan version? Replace the egg with 1 tablespoon ground flaxseed mixed with 2½ tablespoons water (let sit for 5 minutes).
- Almond extract is optional, but honestly, it takes the flavor up a notch. If you don’t have it, increase the vanilla by ½ teaspoon.
- Don’t have gel food coloring? Liquid food coloring works, but use sparingly to avoid thinning the dough—and colors will be less vibrant.
When shopping, I always look for unsalted, high-quality butter and pure extracts. For colors, stick with gel types for bold, non-bleeding hues. In summer, you can swap in pastel colors for a fun twist. These ingredients make the cookies shine—visually and flavor-wise!
Equipment Needed
I’ve baked these Christmas Pinwheel Cookies with a range of tools, from bargain finds to my trusty stand mixer. Here’s what you’ll need:
- Stand mixer or handheld mixer (either works, but stand mixer saves your arms!)
- Large mixing bowls (one for dough, one for color mixing)
- Plastic wrap or parchment paper (essential for rolling and chilling)
- Rolling pin (classic wooden or silicone; even a wine bottle in a pinch!)
- Baking sheets (heavy-duty recommended for even baking)
- Sharp knife or serrated bread knife (for clean slicing—don’t use a dull one!)
- Measuring cups and spoons (accurate measurements = perfect pinwheels)
- Wire cooling rack
- Optional: Silicone baking mat (prevents sticking and helps with rolling)
If you don’t have a stand mixer, a sturdy wooden spoon can do the job—just expect a decent arm workout. For rolling, parchment paper is a lifesaver (less sticking, easy cleanup). I’ve used both plastic wrap and parchment; parchment holds up better if you’re heavy-handed like me. Baking sheets should be light-colored to prevent over-browning. For knife maintenance, keep it sharp for clean spirals—run it under hot water and wipe between slices. Budget-friendly options like generic rolling pins or thrifted bowls work just fine—no need for anything fancy here.
Preparation Method
-
Cream the butter and sugar: In a large bowl, beat 1 cup (226g) unsalted butter and 1 cup (200g) sugar until light and fluffy—about 3 minutes with a mixer. The mixture should be pale and creamy.
Tip: If it looks greasy or separated, your butter may be too soft—chill for 5 minutes and rebeat. -
Add egg and extracts: Mix in 1 large egg, 2 teaspoons vanilla extract, and ½ teaspoon almond extract (if using). Beat until well combined, scraping down the bowl as needed.
Sensory cue: The mixture will smell sweet and nutty—like holiday mornings! -
Combine dry ingredients: In a separate bowl, whisk together 2 ¾ cups (345g) all-purpose flour, ½ teaspoon salt, and ½ teaspoon baking powder.
Note: Don’t skip the whisking—this ensures even distribution and prevents salty pockets. -
Mix to form dough: Gradually add dry ingredients to wet, mixing on low until a soft dough forms. If it’s too sticky, add 1 tablespoon flour at a time.
Troubleshooting: If dough crumbles, add 1 teaspoon milk. If super sticky, chill for 10 minutes. -
Divide and color dough: Split dough into 3 equal parts (about 320g each). Leave one plain, tint one with red gel food coloring, and one with green gel coloring. Knead gently until colors are even.
Warning: Use gloves or parchment to avoid stained hands! -
Roll and layer dough: On parchment, roll each color into a rectangle about 8×10 inches (20x25cm), ¼-inch (6mm) thick. Stack layers—plain, red, then green. Trim edges for a clean rectangle.
Personal tip: Chill layers for 10 minutes if dough gets soft during rolling. -
Form the pinwheel log: Starting from the long edge, roll the stacked dough tightly into a log. Use parchment to help guide the roll. Wrap tightly and chill for 2 hours (or up to overnight).
Sensory cue: The log should feel firm, not squishy. -
Slice and decorate: Unwrap the chilled log. Slice into ¼-inch (6mm) rounds using a sharp knife, cleaning the blade between cuts. If desired, dip edges in coarse sugar or sprinkles.
Preparation note: Slices may flatten—reshape gently by hand. -
Bake: Arrange cookies on lined baking sheets, spacing 1 inch (2.5cm) apart. Bake at 350°F (175°C) for 8-10 minutes, until edges are just set but centers remain pale.
Troubleshooting: If cookies brown too fast, reduce oven temp by 10°F. -
Cool: Transfer cookies to a wire rack. Cool completely before packing into boxes.
Tip: Warm cookies are fragile—let them firm up for 10 minutes before moving.
Efficiency tip: Prep dough and colors a day ahead; slice and bake fresh for best texture and color. These steps help guarantee perfect pinwheels—crisp, colorful, and oh-so festive!
Cooking Tips & Techniques
Having baked and gifted hundreds of Christmas Pinwheel Cookies, I’ve picked up a few tricks that make a world of difference:
- Chill, chill, chill: Cold dough means precise spirals. If it gets soft, pause and refrigerate. I learned this the hard way—warm dough spreads and loses that sharp swirl.
- Roll evenly: Use a ruler or edge of parchment as a guide. Uneven dough leads to lopsided cookies. (Trust me, I’ve served a few “abstract art” pinwheels!)
- Sharp knife for slicing: Wipe the blade after each cut. A dull or sticky knife can squash the log and blur colors. If you forget, cookies may look more marbled than swirled.
- Multitasking: While dough chills, prep your cookie boxes or mix up hot cocoa. I love batching these steps to save time during busy holiday weeks.
- Consistent color intensity: Use gel food color and knead until fully incorporated. Colors fade if you’re shy with the gel or don’t mix thoroughly.
- Prevent spreading: Bake on heavy-duty sheets and chill sliced dough for 10 minutes before baking. If your oven runs hot, reduce temp and keep watch.
- Decorating: Dip just the edges for a professional look, or go all-in for kids’ parties. Sanding sugar adds crunch; sprinkles make it playful.
Biggest lesson from my own kitchen fails? Don’t rush the chilling—impatience equals wonky spirals. And don’t skimp on the color! These cookies are meant to be bold and bright. With these techniques, you’ll get bakery-worthy cookies every time.
Variations & Adaptations
One of my favorite things about Christmas Pinwheel Cookies is how customizable they are. If you love to tinker in the kitchen, here are some fun ways to make them your own:
- Dietary swaps: For gluten-free, use a 1:1 blend—no one will notice the difference. Dairy-free butter and plant-based egg substitutes work surprisingly well (I’ve made vegan batches for friends—still delicious!).
- Seasonal colors: Switch up the red and green for pastel shades at Easter, or orange and black for Halloween. I once made rainbow pinwheels for my niece’s birthday—total showstopper!
- Flavor twists: Add citrus zest (lemon or orange) for a bright, zippy note. Mix in spices like cinnamon or cardamom for cozy, warming cookies. You can even swirl in cocoa powder for a chocolatey surprise.
- Different cooking methods: If you don’t want to slice and bake, roll out dough and use cookie cutters for festive shapes—still colorful, just a new look.
- Allergen substitutions: Nut allergies? Skip almond extract and use more vanilla. For soy allergies, stick to pure butter or coconut oil-based alternatives.
- Personal favorite variation: Last year, I added crushed peppermint candies to the edges before baking. The result? A crunchy, minty border everyone raved about!
Don’t be afraid to play with flavors and colors. These cookies are forgiving, and the swirls make every batch a little different—just like snowflakes.
Serving & Storage Suggestions
For best results, serve Christmas Pinwheel Cookies at room temperature—their texture is soft and tender, just right for nibbling. I love arranging them on a festive platter with hot chocolate or mulled cider nearby. They pair beautifully with a cheese plate or bowl of fresh fruit for a cozy holiday spread.
For gifting, stack cookies in decorative tins or clear cellophane bags—tie with ribbon for instant holiday cheer. They add a pop of color to every cookie box and look stunning on a Pinterest-worthy dessert board.
To store, layer cookies with parchment in an airtight container. They’ll stay fresh for 5-7 days at room temp (if they last that long!). For longer storage, freeze in single layers, wrapped tightly—thaw at room temp before serving. To reheat, pop in a 300°F (150°C) oven for 2-3 minutes to refresh the flavor and crispness.
One tip: the flavors develop even more after a day or two, so they’re perfect for make-ahead gifting. Just watch out—family may sneak a few before you get them boxed up!
Nutritional Information & Benefits
Here’s the scoop on what you’re eating with each Christmas Pinwheel Cookie (estimating about 1 cookie):
- Calories: 95
- Fat: 5g
- Saturated Fat: 3g
- Carbs: 12g
- Sugar: 6g
- Protein: 1g
These cookies are a treat—light on the portion, big on the flavor. Key ingredients like butter provide that classic, satisfying texture, while vanilla and almond add antioxidants and a little mood lift. Gluten-free and dairy-free swaps make them accessible for most diets, and nut-free is easy with a quick extract swap. Main allergens: wheat, dairy, egg (but alternatives noted above). My personal take? Holiday baking is about joy and sharing—so I focus on portion control and savoring every festive bite.
Conclusion
There’s a reason I keep coming back to Christmas Pinwheel Cookies every year—they’re fun, festive, and honestly, just make people happy. From the vivid swirl to the buttery, melt-in-your-mouth texture, these cookies bring holiday magic to every occasion. I love how easy they are to personalize, whether you’re baking for a crowd or just want something cheerful for your own cookie jar.
If you’re looking for a new holiday tradition, give these pinwheels a whirl. Customize the colors, flavors, and even the shapes—make them yours! I hope you’ll enjoy the smiles and “mmm!”s as much as I do. If you try this recipe, drop a comment below, share your photos, or let me know your favorite twist. Happy baking, and may your holidays be sweet and bright!
Frequently Asked Questions (FAQs)
Can I make Christmas Pinwheel Cookies ahead of time?
Absolutely! You can prepare the dough up to 2 days ahead and keep it wrapped in the fridge. Bake fresh for best texture or freeze sliced cookies and bake straight from the freezer—just add 1-2 minutes to the baking time.
Do I need gel food coloring for the pinwheels?
Gel food coloring is best for vibrant, non-bleeding colors. Liquid food coloring works in a pinch, but the colors will be softer and you may need to chill the dough longer to keep it firm.
How do I keep the pinwheel shape from spreading?
Chill the dough thoroughly before slicing and baking. If your cookies spread too much, try chilling the sliced cookies again for 10 minutes before baking and use heavy-duty baking sheets for even heat.
Can I freeze these cookies?
Yes! Freeze baked cookies in single layers, separated with parchment, for up to 2 months. Thaw at room temp and refresh in the oven for 2-3 minutes if needed.
What’s the best way to package these for gifting?
Arrange cookies in holiday tins or cellophane bags, stacking with parchment paper to prevent sticking. Add a festive ribbon and a simple tag—your cookie boxes will look Pinterest-perfect and travel well!
Pin This Recipe!
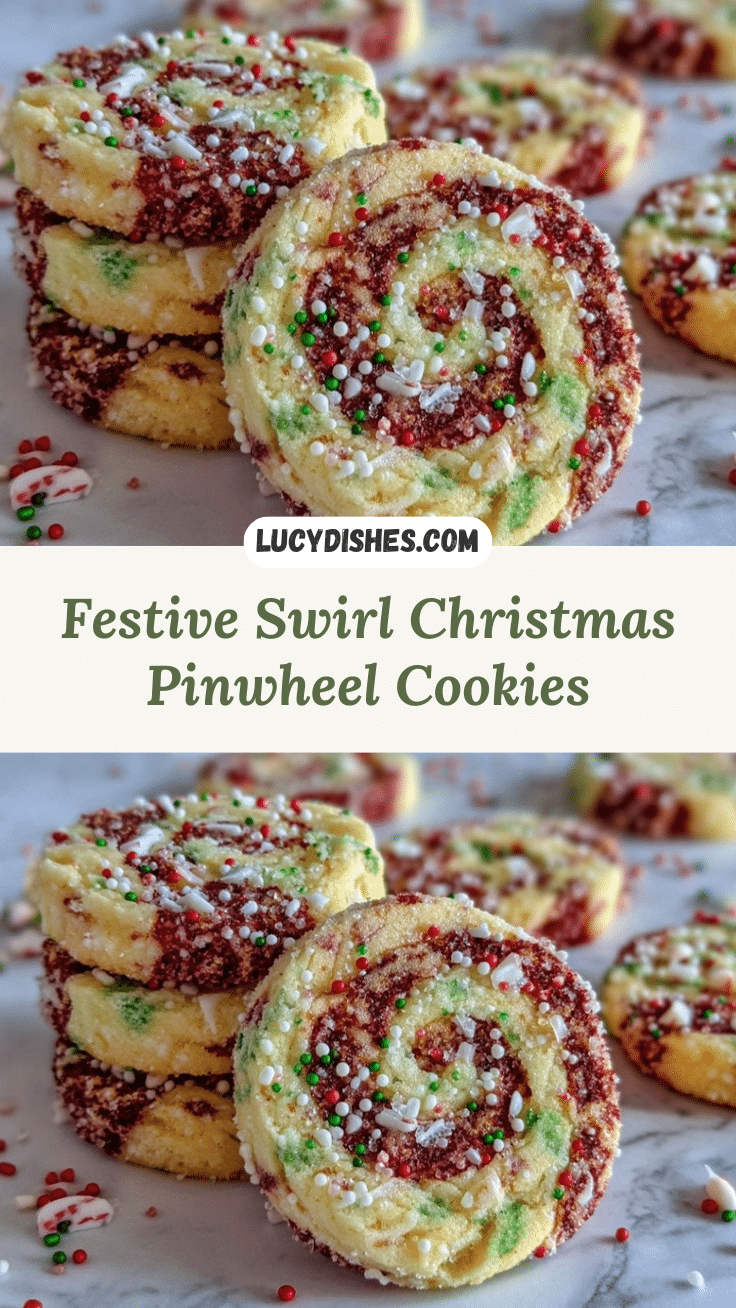
Christmas Pinwheel Cookies
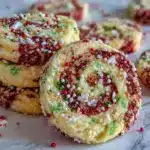
Christmas Pinwheel Cookies are festive, buttery vanilla cookies with vibrant red and green swirls, perfect for holiday gifting and celebrations. Their tender texture and eye-catching appearance make them a crowd-pleaser for all ages.
- Prep Time: 20 minutes
- Cook Time: 10 minutes
- Total Time: 2 hours 30 minutes
- Yield: 36 cookies 1x
- Category: Dessert
- Cuisine: American
Ingredients
- 2 3/4 cups all-purpose flour
- 1 cup unsalted butter, softened
- 1 cup granulated sugar
- 1 large egg, room temperature
- 2 teaspoons vanilla extract
- 1/2 teaspoon almond extract (optional)
- 1/2 teaspoon salt
- 1/2 teaspoon baking powder
- Red gel food coloring
- Green gel food coloring
- Coarse sanding sugar or sprinkles (optional, for decoration)
Instructions
- In a large bowl, beat butter and sugar until light and fluffy, about 3 minutes.
- Mix in egg, vanilla extract, and almond extract (if using) until well combined.
- In a separate bowl, whisk together flour, salt, and baking powder.
- Gradually add dry ingredients to wet mixture, mixing on low until a soft dough forms.
- Divide dough into 3 equal parts. Leave one plain, tint one with red gel food coloring, and one with green gel coloring. Knead gently until colors are even.
- On parchment paper, roll each color into a rectangle about 8×10 inches, 1/4-inch thick. Stack layers—plain, red, then green. Trim edges for a clean rectangle.
- Starting from the long edge, roll the stacked dough tightly into a log. Wrap tightly and chill for 2 hours or up to overnight.
- Unwrap the chilled log. Slice into 1/4-inch rounds using a sharp knife, cleaning the blade between cuts. Dip edges in coarse sugar or sprinkles if desired.
- Arrange cookies on lined baking sheets, spacing 1 inch apart. Bake at 350°F for 8-10 minutes, until edges are just set but centers remain pale.
- Transfer cookies to a wire rack and cool completely before packing or serving.
Notes
Chill the dough thoroughly for sharp spirals and minimal spreading. Use gel food coloring for vibrant colors. For gluten-free or vegan adaptations, substitute flour and egg as noted. Cookies can be made ahead and freeze well. Decorate edges with sanding sugar or sprinkles for extra crunch and festive appeal.
Nutrition
- Serving Size: 1 cookie
- Calories: 95
- Sugar: 6
- Sodium: 40
- Fat: 5
- Saturated Fat: 3
- Carbohydrates: 12
- Protein: 1
Keywords: Christmas cookies, pinwheel cookies, holiday baking, festive cookies, butter cookies, vanilla cookies, edible gifts, cookie box, easy cookies, colorful cookies