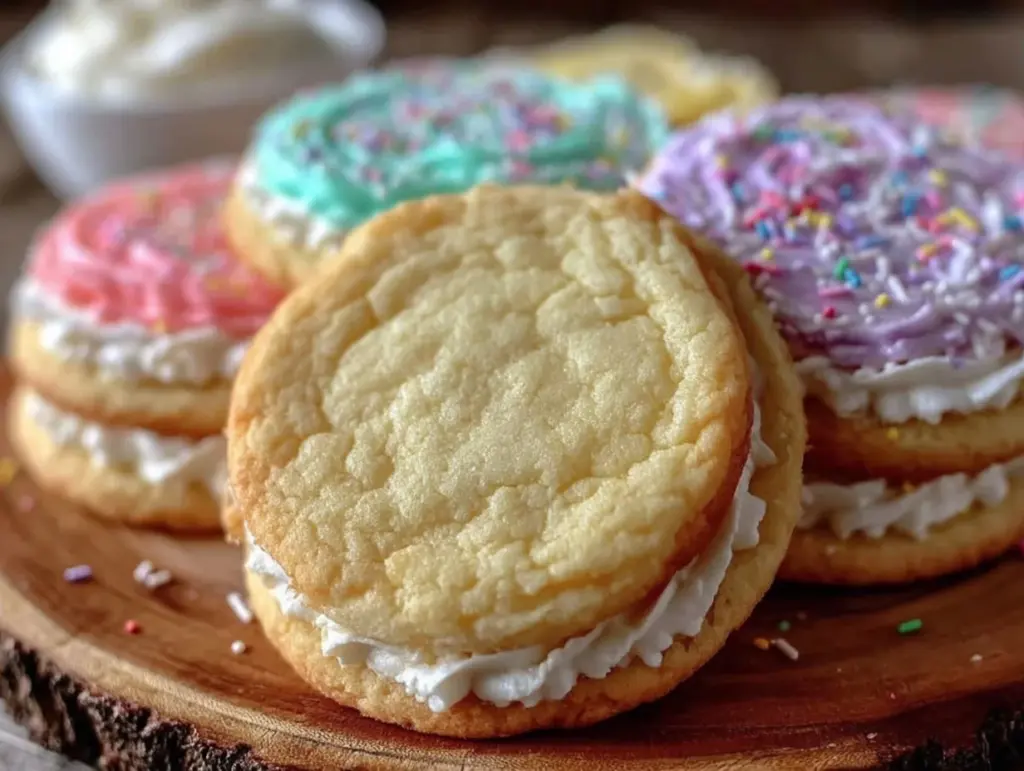
“Wait, the royal icing is too stiff again!” I muttered under my breath, staring at the bowl as my first batch of sugar cookie frosting turned out more like a rock than that smooth, glossy finish I’d been dreaming of. Honestly, I wasn’t even sure flooding sugar cookies was worth the mess until that quiet Sunday afternoon when I decided to give it one more shot. I was that friend who always brought decorated sugar cookies to gatherings but secretly dreaded the whole icing process. That day, between a few sips of cold coffee and a playlist humming softly in the background, I tweaked the recipe, adjusted the egg whites, and added just the right splash of lemon juice. Suddenly, the icing flowed like a dream, settling perfectly onto the cookies without losing shape or gloss. That moment stuck with me—the thrill of finally mastering the perfect royal icing sugar cookie frosting for flooding. It’s not just about making cookies look pretty; it’s about that satisfying glide of icing that makes you want to bake again, and again, and maybe even share some with neighbors (or keep them all to yourself). This recipe isn’t just frosting; it’s a little magic in a bowl that never fails to impress, even on those late-night baking marathons when you’re half-asleep but can’t resist decorating one more cookie.
Why You’ll Love This Recipe
After countless trials, this royal icing sugar cookie frosting recipe has become my go-to for flooding cookies with that flawless, glassy finish. I’ve tested it on everything from holiday batches to last-minute birthday treats, and here’s why it’s a keeper:
- Quick & Easy: Whips up in about 10 minutes, making it perfect for busy bakers who want stunning results without fuss.
- Simple Ingredients: You probably already have powdered sugar, egg whites, and a few pantry staples—no last-minute grocery runs needed.
- Perfect for Any Occasion: Whether it’s festive holiday cookies or a casual weekend treat, this frosting adapts beautifully.
- Crowd-Pleaser: Kids, adults, and even picky eaters love the smooth texture and subtle vanilla flavor.
- Unbelievably Delicious: Far from just decoration, the icing adds a delicate sweetness and melt-in-your-mouth finish.
What sets this royal icing apart is the balance between flow and hold—the kind of texture that hugs your cookie edges without spilling over, thanks to the right consistency and a hint of cream of tartar for stability. Plus, adding fresh lemon juice instead of plain water gives the frosting a subtle zing that cuts through sweetness, making every bite feel fresh. Honestly, it’s the little tricks I picked up during a marathon decorating session that make this recipe shine. If you’ve ever struggled with frosting that cracks or looks dull, I promise this method will change the game. And if you’re into other easy weeknight meals, recipes like my one-pan Italian sausage and peppers show how simple ingredients can deliver big flavor—same idea here with the frosting!
What Ingredients You Will Need
This royal icing sugar cookie frosting recipe keeps things straightforward, focusing on staple ingredients that come together for that perfect flood consistency. Each component plays a role—from structure to shine. Here’s what you’ll need:
- Powdered Sugar (Confectioners’ Sugar) – 4 cups (about 480 grams), sifted to avoid lumps and give a silky texture.
- Pasteurized Egg Whites – 3 large (about 90 ml), room temperature. I prefer using pasteurized whites for safety and smoothness (no raw egg taste).
- Fresh Lemon Juice – 1 tablespoon (15 ml). Adds a slight tang and helps stabilize the icing.
- Cream of Tartar – ¼ teaspoon (1 gram). This little trick keeps the icing firm and prevents cracking.
- Vanilla Extract – 1 teaspoon (5 ml). For a warm, inviting flavor without overpowering sweetness.
- Optional: Food coloring gels or powders for vibrant, fade-resistant colors.
Tip: I always recommend using a trusted brand like Domino or C&H for powdered sugar since the fineness affects how smoothly your icing mixes. If you need a dairy-free or vegan alternative, you can swap out egg whites with aquafaba (the liquid from canned chickpeas), but be aware the texture and drying times vary a bit. For seasonal twists, adding a drop of peppermint or almond extract is a crowd favorite during the holidays. And if you’re craving a little color creativity, gel food coloring works best to keep the icing thick without thinning it down—something I learned after too many watery batches!
Equipment Needed
To get your royal icing sugar cookie frosting just right, there’s a handful of tools that make life easier. You don’t need fancy gadgets, but having the right basics helps:
- Mixing Bowl: A medium to large glass or stainless steel bowl (plastic can hold onto grease, which messes with the icing).
- Electric Hand Mixer or Stand Mixer: For whipping egg whites and sugar to the perfect fluffy consistency. Hand mixers work fine if you don’t have a stand mixer.
- Sifter: To sift powdered sugar, ensuring no lumps sneak into your icing.
- Rubber Spatula: For scraping down the sides and folding in ingredients without losing volume.
- Measuring Cups and Spoons: Precision matters here—especially with egg whites and cream of tartar.
- Piping Bags and Tips: Optional but highly recommended for flooding and outlining your cookies neatly.
Personally, I swear by my trusty KitchenAid stand mixer—it speeds things up and gives consistent results every time. But if you’re just starting out or baking for one, a handheld mixer paired with a sturdy bowl does the trick. When cleaning, avoid soap residue on your equipment because even a tiny bit of grease can cause the royal icing to separate or not set properly. For budget-friendly options, silicone spatulas and plastic piping bags work perfectly and are easy to clean or toss.
Preparation Method
- Sift the Powdered Sugar: Begin by sifting 4 cups (480 grams) of powdered sugar into your mixing bowl. This step is crucial for a smooth, lump-free icing base. Set aside.
- Whip the Egg Whites: Using 3 large pasteurized egg whites (about 90 ml), start beating on medium speed until they become frothy. Add ¼ teaspoon (1 gram) of cream of tartar to stabilize the whites. Continue whipping until soft peaks form, about 3-4 minutes.
- Combine Ingredients: Gradually add the sifted powdered sugar to the whipped egg whites, about ½ cup at a time, mixing on low speed. This slow addition helps prevent sugar dust clouds and integrates evenly. Once all sugar is added, pour in 1 tablespoon (15 ml) fresh lemon juice and 1 teaspoon (5 ml) vanilla extract.
- Adjust Consistency: Increase mixer speed to medium-high and whip icing for about 5-7 minutes. You want a thick, glossy texture that holds peaks but still flows smoothly when thinned.
- Test Flooding Consistency: To check if your royal icing is ready for flooding, dip a spoon into the bowl and let the icing drip back. It should take about 10-15 seconds to smooth out flat. If it’s too thick, add a few drops of warm water; too thin, add a bit more powdered sugar.
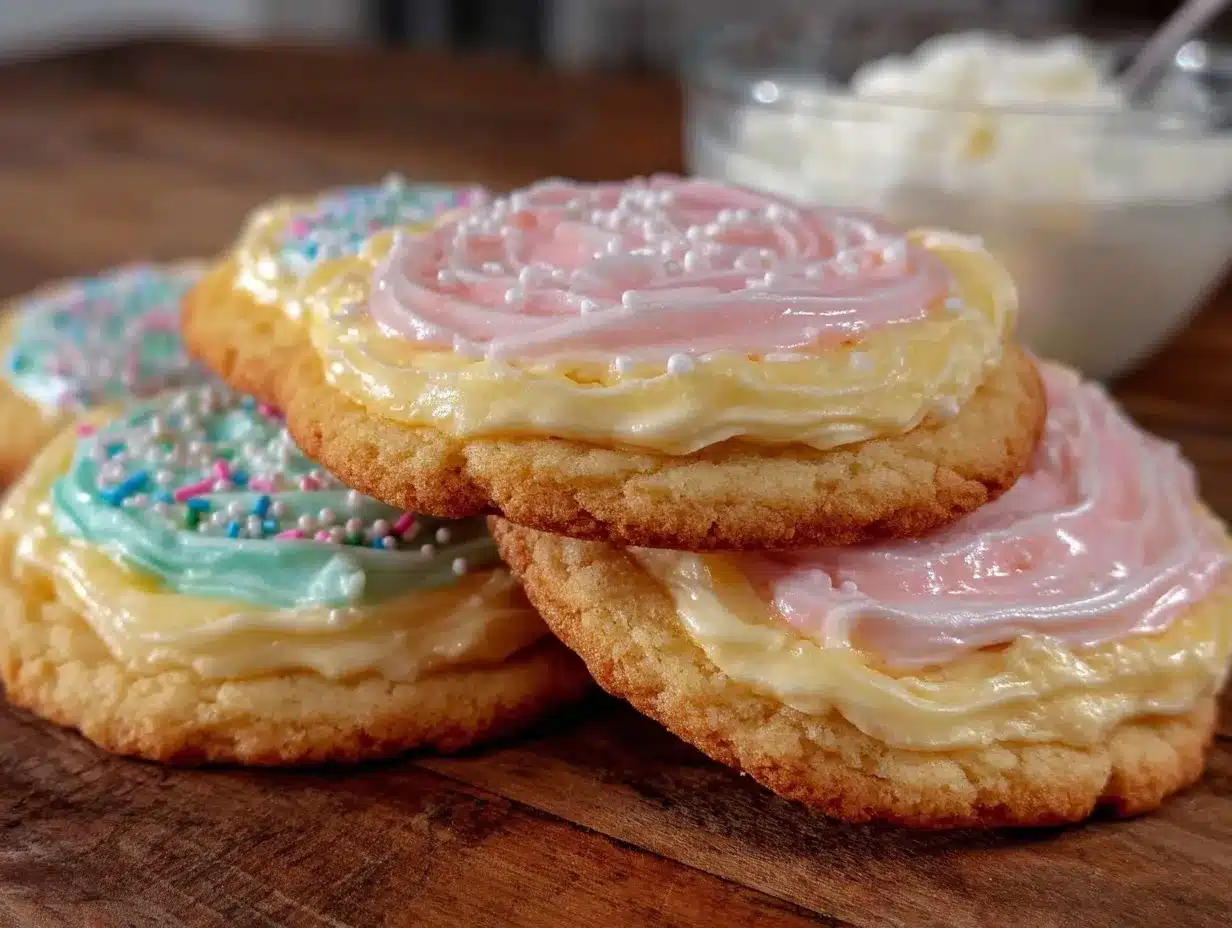
- Color and Transfer: If using food coloring, divide icing into separate bowls and mix in gels or powders until you reach desired shades. Transfer to piping bags fitted with small round tips for outlining and flooding cookies.
- Outline and Flood Cookies: Pipe a firm outline around your sugar cookies and let it crust for 10-15 minutes. Then flood the inside with thinner icing, using a toothpick or scribe tool to spread evenly and pop air bubbles.
- Drying Time: Allow iced cookies to dry at room temperature for 6-8 hours or overnight. Avoid stacking or covering until completely dry to prevent smudges.
Pro Tip: I learned the hard way that using room temperature ingredients helps the icing come together faster and smoother. Also, keep a damp cloth nearby to wipe your piping tips between colors for clean lines. If the icing starts to crust in your bowl or bags, a few drops of water and a quick stir will bring it back to life.
Cooking Tips & Techniques
Getting royal icing just right can feel like a tightrope walk between stiff and runny, but a few tricks help steady your balance. First, always sift powdered sugar—that’s non-negotiable. I once skipped this step, and the lumps nearly ruined a holiday batch. Second, don’t rush whipping the egg whites; they need to be fluffy enough to add air but not so over-whipped they dry out.
Mixing speed matters too—start slow to avoid sugar clouds, then crank up for a glossy finish. If your icing cracks when dry, it’s usually because it’s too thick or dried too fast; adding lemon juice and cream of tartar helps prevent this by stabilizing the mix. Another tip: when flooding cookies, outline first and let it crust for a few minutes—that edge acts like a dam to keep the flood icing in place.
From personal experience, using gel food coloring instead of liquid dyes keeps the icing’s texture intact. Also, plan your decorating in stages—outline one batch, flood another, and switch colors once the first layer sets. Timing and patience here save a lot of frustration. And if you’re experimenting with shapes or themes, check out how I paired sweet and savory in my Turkish chicken kebabs with creamy garlic yogurt dip for an easy entertaining mix that impressed guests.
Variations & Adaptations
Royal icing is surprisingly versatile, and with a few tweaks, you can customize it for different styles or dietary needs:
- Vegan Version: Replace egg whites with aquafaba (liquid from canned chickpeas). Whip as you would egg whites, but expect slightly longer drying times and a softer finish.
- Flavor Variations: Swap vanilla extract with almond, peppermint, or lemon extracts to complement your cookie theme. For instance, lemon icing pairs beautifully with almond-flavored sugar cookies.
- Gluten-Free Adaptation: While royal icing itself is naturally gluten-free, ensure your sugar cookies use gluten-free flour blends for a safe pairing.
- Color Play: Use natural food colorings like beet powder for red or spirulina for green to keep things vibrant and free from artificial dyes.
- Alternate Sweeteners: For a lower-sugar option, try mixing powdered erythritol with powdered sugar or use all erythritol for diabetic-friendly frosting, though texture might differ slightly.
One variation I adore is adding a touch of orange zest into the icing for a subtle citrus pop, especially during winter cookie swaps. It’s a small touch that makes a big impression. Whether you’re aiming for classic white frosting or colorful designs, this recipe adapts well without losing its signature smoothness.
Serving & Storage Suggestions
Once your royal icing sugar cookie frosting has dried to that perfect matte finish, serving is a breeze. These cookies taste best at room temperature where the icing is firm but not brittle. For presentation, I like arranging them on a simple white platter to let the colors pop, often alongside a pot of tea or a festive punch.
To store, keep the cookies in an airtight container at room temperature for up to 5 days. If you want to keep them longer, freezing works well—just layer parchment paper between cookies to prevent sticking. When ready to enjoy, let them thaw in the container to avoid condensation that can soften the icing.
Reheating isn’t necessary, and honestly, the icing flavor and texture develop even more after a day or two, so if you can wait, that’s ideal. For parties or gifting, I’ve found that packaging in cello bags with a little tissue paper gives a charming homemade touch while protecting delicate decorations.
Nutritional Information & Benefits
This royal icing sugar cookie frosting is primarily powdered sugar and egg whites, so it’s definitely a treat to enjoy in moderation. A typical serving (about 2 tablespoons of frosting) contains roughly 90 calories, primarily from sugar.
Egg whites provide a small amount of protein without fat or cholesterol, while lemon juice adds a bit of vitamin C and freshness. Since the recipe uses pasteurized egg whites, it’s a safer option for raw egg concerns. For those watching sugar intake, consider pairing the frosting with lower-sugar cookie bases or smaller portions.
From my perspective, frosting is about joy and celebration rather than nutrition, so I recommend enjoying these cookies as an occasional indulgence. If you’re curious about pairing sweet treats with healthier meals, my Mediterranean chickpea salad is great for balancing a festive spread.
Conclusion
Making the perfect royal icing sugar cookie frosting for flooding isn’t just about following a recipe—it’s about tuning in to textures, timing, and tiny tweaks that transform your cookies from plain to picture-perfect. This recipe has been my reliable companion for countless celebrations, and I hope it becomes yours too. Whether you’re decorating for a holiday, a birthday, or just to treat yourself on a quiet afternoon, there’s a special satisfaction in that smooth, glossy finish that only great royal icing can deliver.
Feel free to play around with flavors and colors to make it truly your own. And if you give this frosting a try, I’d love to hear how your cookies turn out or what creative spins you add. Baking is better when shared, even if just in stories and photos. So grab your mixing bowl, and let’s get frosting—because every cookie deserves that perfect royal touch.
FAQs
- Can I use meringue powder instead of egg whites? Yes! Meringue powder is a great substitute and often preferred for convenience and safety. Use about 2 tablespoons plus 6 tablespoons water to replace 3 egg whites.
- How do I fix royal icing that’s too runny? Add small amounts of sifted powdered sugar, mixing well until you reach the desired thickness suitable for flooding or outlining.
- Why does my royal icing crack after drying? Cracking usually happens if the icing is too thick or dries too fast. Adding cream of tartar and lemon juice helps prevent this by stabilizing the icing.
- How long does royal icing take to dry completely? Typically, it takes 6-8 hours at room temperature. For thicker layers, overnight drying is best before stacking or packaging.
- Can I store leftover royal icing? Yes, store it in an airtight container in the fridge for up to a week. Stir well before use and add a few drops of water if it’s too thick.
Pin This Recipe!
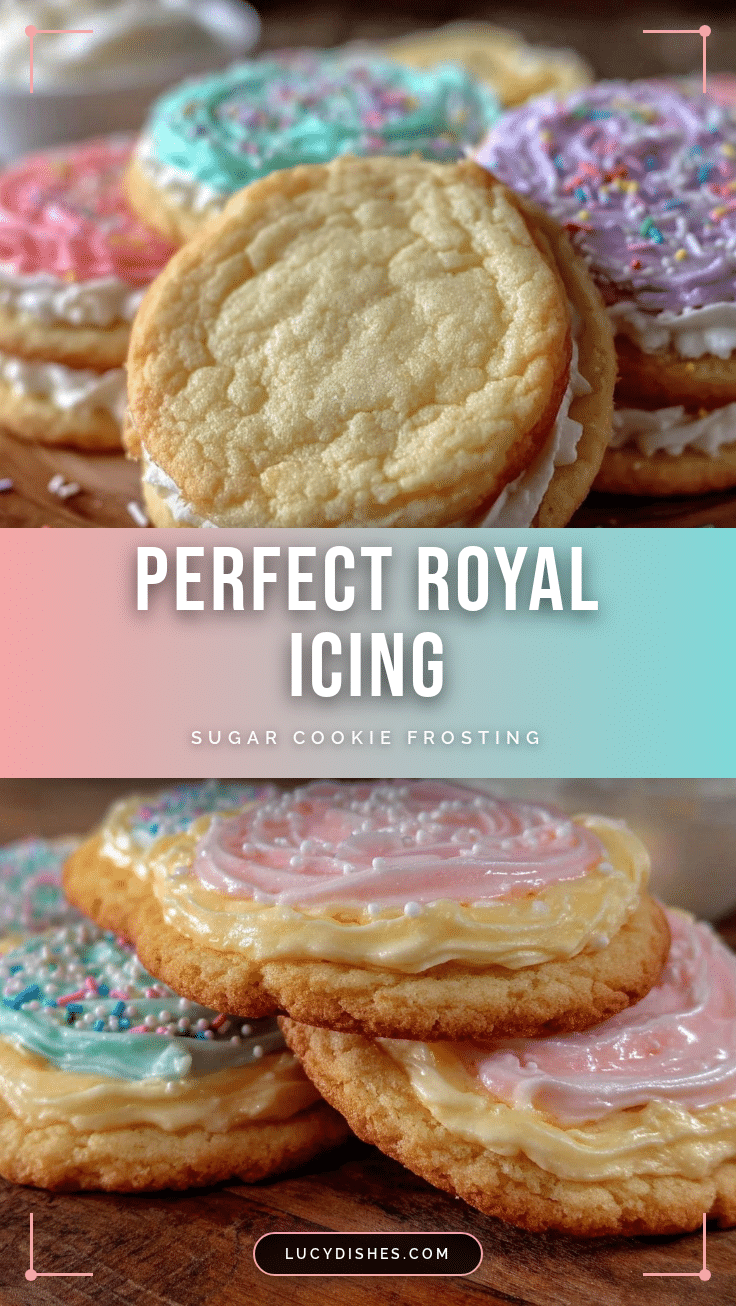
Perfect Royal Icing Sugar Cookie Frosting for Flooding

This royal icing recipe delivers a smooth, glossy finish perfect for flooding sugar cookies. Easy to make with simple ingredients, it offers a balanced flow and hold for flawless decorating.
- Prep Time: 10 minutes
- Cook Time: 0 minutes
- Total Time: 6-8 hours drying time
- Yield: About 2 cups of royal icing (approximately 20 servings of 2 tablespoons each) 1x
- Category: Dessert
- Cuisine: American
Ingredients
- 4 cups powdered sugar (confectioners’ sugar), sifted
- 3 large pasteurized egg whites (about 3 fl oz / 90 ml), room temperature
- 1 tablespoon fresh lemon juice (15 ml)
- ¼ teaspoon cream of tartar (1 gram)
- 1 teaspoon vanilla extract (5 ml)
- Optional: food coloring gels or powders
Instructions
- Sift 4 cups (480 grams) of powdered sugar into a mixing bowl and set aside.
- Whip 3 large pasteurized egg whites (about 3 fl oz / 90 ml) on medium speed until frothy. Add ¼ teaspoon (1 gram) cream of tartar and continue whipping until soft peaks form, about 3-4 minutes.
- Gradually add sifted powdered sugar to the whipped egg whites, about ½ cup at a time, mixing on low speed to avoid sugar dust clouds.
- Once all sugar is incorporated, add 1 tablespoon (15 ml) fresh lemon juice and 1 teaspoon (5 ml) vanilla extract.
- Increase mixer speed to medium-high and whip for 5-7 minutes until the icing is thick, glossy, and holds peaks but still flows smoothly when thinned.
- Test flooding consistency by dipping a spoon into the icing; it should smooth out flat in 10-15 seconds. Adjust thickness by adding a few drops of warm water if too thick, or more powdered sugar if too thin.
- If using food coloring, divide icing into separate bowls and mix in gels or powders until desired colors are reached. Transfer to piping bags fitted with small round tips.
- Pipe a firm outline around sugar cookies and let crust for 10-15 minutes. Flood the inside with thinner icing, using a toothpick or scribe tool to spread evenly and pop air bubbles.
- Allow iced cookies to dry at room temperature for 6-8 hours or overnight before stacking or storing.
Notes
Use pasteurized egg whites for safety and smoothness. Sift powdered sugar to avoid lumps. Add cream of tartar and lemon juice to stabilize and prevent cracking. Use gel food coloring to maintain icing consistency. Room temperature ingredients help achieve better texture. Store leftover icing in an airtight container in the fridge for up to a week.
Nutrition
- Serving Size: 2 tablespoons of fro
- Calories: 90
- Sugar: 22
- Sodium: 10
- Carbohydrates: 22
- Protein: 1
Keywords: royal icing, sugar cookie frosting, flooding icing, cookie decorating, easy royal icing, sugar cookie frosting recipe


