
“You want a quick pick-me-up? Try these.” That was the text I got from my coworker one afternoon when my energy was tanking hard after a long morning of back-to-back meetings. Honestly, I was skeptical—protein balls? But those Easy No-Bake Chocolate Peanut Butter Protein Balls turned out to be a total game-changer. The moment I bit into one, the rich chocolate and creamy peanut butter hit my taste buds like a tiny burst of joy, and I actually felt my energy lift without the crash typical of sugary snacks.
They’re not fancy, no baking required, and you can whip them up in about 15 minutes tops—perfect for those chaotic days when you barely have time to breathe, let alone prepare a snack. I’ve since made these a staple in my routine, especially on days when I’m rushing between work and errands, or just need a little boost before a workout. What’s wild is how the texture balances chewy oats with smooth peanut butter and a subtle crunch from chia seeds. I never thought a little ball of goodness could feel so indulgent and wholesome at the same time.
After trying a batch inspired by that text and tossing in a few tweaks of my own, these protein balls stuck around in my snack drawer, quietly promising to rescue me from hanger and afternoon slumps. So yeah, this recipe isn’t just about a quick bite—it’s about having a little moment of calm and fuel in a busy day that actually tastes good. That’s why I’m sharing it here, hoping it brings you the same kind of low-key magic it brought me.
Why You’ll Love This Recipe
Having whipped up these Easy No-Bake Chocolate Peanut Butter Protein Balls countless times, I can confidently say they’re one of those recipes that just works every time. Here’s why they might become your new go-to snack too:
- Quick & Easy: Ready in under 15 minutes—no oven, no mess, just mixing and rolling.
- Simple Ingredients: Pantry staples like oats, peanut butter, and protein powder, so no last-minute grocery runs needed.
- Perfect for On-the-Go: Whether you need a pre-workout boost or a midday snack, these balls travel well and won’t melt or get messy.
- Crowd-Pleaser: Kids, coworkers, friends—you name it, everyone’s asking for more once they try them.
- Unbelievably Delicious: The combo of chocolate and peanut butter is classic but balanced with just enough sweetness and crunch.
This isn’t just another protein ball recipe floating online. What sets it apart is the texture: smooth peanut butter blended with a touch of natural sweetness and little bursts from chia seeds and oats. Plus, I use a good-quality chocolate-flavored protein powder that adds a rich, deep flavor without any chalky aftertaste. Honestly, it’s like having a treat that also feels like a smart snack.
It’s a recipe that fits into hectic days but still feels like a little moment of care, whether you’re packing for a busy workday or need a quick bite before heading out. Plus, if you’re curious about similar easy homemade snacks, you might enjoy the crunchy fun from this crunchy goldfish snack mix or the fresh energy from a fresh green snacks recipe.
What Ingredients You Will Need
This recipe keeps things straightforward with wholesome ingredients that work together to create a satisfying and nutritious snack. Most of these you might already have in your pantry or fridge, making it super accessible for a quick fix.
- Rolled oats (1 cup / 90g) – The base, giving structure and a chewy texture.
- Natural peanut butter (1/2 cup / 125g) – Adds creaminess and rich flavor; I prefer brands like Smucker’s Natural for that pure peanut taste.
- Chocolate protein powder (1/3 cup / 30g) – Choose a smooth, chocolate-flavored whey or plant-based powder to deepen the chocolate notes and boost protein.
- Honey (2 tablespoons / 30ml) – For natural sweetness and to help bind the balls together.
- Chia seeds (1 tablespoon / 12g) – Adds a slight crunch and a boost of omega-3s and fiber.
- Vanilla extract (1 teaspoon / 5ml) – A subtle flavor enhancer that rounds out the sweetness.
- Mini dark chocolate chips (optional, 2 tablespoons / 30g) – For extra bursts of chocolate; these melt slightly in the mouth.
- Sea salt (a pinch) – Balances out the sweetness and intensifies the chocolate-peanut butter combo.
Feel free to swap rolled oats with gluten-free oats if needed. If peanut allergies are a concern, almond or sunflower seed butter works well too, though it changes the flavor profile slightly. For a vegan or refined sugar-free version, replace honey with maple syrup or agave nectar. These substitutions keep the recipe flexible without losing its essence.
Equipment Needed
- Mixing bowl: A medium-sized one to combine all ingredients comfortably.
- Measuring cups and spoons: For accuracy, especially with protein powder and wet ingredients.
- Spatula or wooden spoon: To mix everything thoroughly without sticking.
- Baking sheet or plate: For placing the rolled balls before chilling.
- Refrigerator: Essential for setting the balls so they hold together.
An optional addition is a small cookie scoop or melon baller if you want perfectly sized protein balls without guessing. I usually just roll them by hand—it’s oddly satisfying and gives a nice rustic look. If you don’t have a dedicated scoop, a tablespoon works great too.
For those curious about cleanup, I find silicone spatulas easiest as they don’t hold onto sticky peanut butter, and a non-stick baking mat helps keep the balls from sticking during chilling.
Preparation Method
- Combine dry ingredients: In a mixing bowl, add 1 cup (90g) rolled oats, 1/3 cup (30g) chocolate protein powder, 1 tablespoon (12g) chia seeds, and a pinch of sea salt. Mix these together until evenly combined. This step ensures the protein powder and chia seeds are distributed well.
- Add wet ingredients: Add 1/2 cup (125g) natural peanut butter, 2 tablespoons (30ml) honey, and 1 teaspoon (5ml) vanilla extract to the dry mix. Stir with a spatula or spoon until the mixture starts to come together. It’ll seem thick and sticky—exactly what you want.
- Fold in chocolate chips (optional): Add 2 tablespoons (30g) mini dark chocolate chips if you’re using them, gently folding them in to avoid melting.
- Chill slightly for easier rolling: Pop the bowl into the refrigerator for about 10 minutes. This firms up the mixture and makes it easier to handle.
- Form the balls: Scoop out about 1 tablespoon (15g) of the mixture and roll it between your palms into a ball. Place each on a baking sheet or plate. Repeat until all mixture is used, usually making around 12–14 balls.
- Set in the fridge: Chill the protein balls for at least 30 minutes to firm up completely. This step helps them hold shape and enhances flavor melding.
Watch out for mixtures that feel too dry—if your protein powder or oats absorb more moisture, just add a splash of milk (dairy or plant-based) a teaspoon at a time. Conversely, if it’s too sticky, toss in a bit more oats or protein powder to balance it out. The texture should be firm but pliable, not crumbly or overly wet.
Cooking Tips & Techniques
Making these protein balls is pretty straightforward, but I’ve learned a few things along the way that can make your experience smoother:
- Use natural peanut butter: It has the right consistency and flavor. Avoid brands with lots of added sugar or oils, or your balls might be too greasy or overly sweet.
- Mix thoroughly but gently: Overmixing can make the texture dense. Stir just enough to combine ingredients evenly.
- Chill before rolling: This isn’t just about convenience; it helps the balls hold their shape better and reduces stickiness on your hands.
- Keep the size consistent: Using a cookie scoop or tablespoon helps the balls cook evenly and makes portion control easier.
- Store properly: Keep them refrigerated in an airtight container, or they can get too soft or dry out on the edges.
- Don’t skip the pinch of salt: It might seem minor, but salt really brings out the chocolate and peanut butter flavors in a subtle way.
One time, I forgot the honey and ended up with dry, crumbly balls that didn’t stick. Lesson learned—sweeteners aren’t just about taste; they’re part of the texture glue. Also, if your protein powder is very dense or chalky, try mixing it with a little liquid first to avoid clumps. These are little kitchen hacks that make a big difference.
Variations & Adaptations
Feel like switching things up? These protein balls are like a blank canvas, so here are some ways I’ve personally tweaked the recipe or seen others enjoy it:
- Nut-free version: Swap peanut butter with sunflower seed butter and use a soy or pea protein powder to avoid nut allergens.
- Seasonal twist: Add dried cranberries or chopped dates for a chewy, fruity surprise. Perfect for holiday snacking.
- Superfood boost: Stir in a tablespoon of ground flaxseed or hemp seeds for extra omega-3s and fiber.
- Different protein powders: Try vanilla or unflavored protein powder with a tablespoon of cocoa powder if you want a less sweet, more chocolate-forward flavor.
- Energy ball bars: Press the mixture into a lined pan and refrigerate to cut into bars for a more portable option.
I once made a batch with almond butter and added a sprinkle of cinnamon—unexpected but lovely. If you want even more protein, a scoop of collagen peptides works well without changing the taste much.
Serving & Storage Suggestions
These protein balls are best served chilled or right out of the fridge. They make a perfect quick snack between meals, a pre- or post-workout bite, or even a guilt-free dessert.
- Serving ideas: Pair with a cup of tea or coffee for a cozy afternoon break, or alongside a fresh fruit platter like the fresh rainbow fruit tray for a balanced snack spread.
- Storage: Store in an airtight container in the refrigerator for up to one week. For longer storage, freeze them in a single layer on a baking sheet, then transfer to a freezer-safe bag for up to 3 months.
- Reheating: They’re best eaten cold or at room temperature, but if you prefer a softer texture, let them sit at room temp for 10 minutes or warm gently in the microwave for 10 seconds.
- Flavor development: Letting them chill overnight actually enhances the flavors as the ingredients meld together, making the chocolate taste richer and the peanut butter more pronounced.
Nutritional Information & Benefits
Each protein ball roughly contains:
| Calories | Approx. 120 kcal |
|---|---|
| Protein | 7–8 grams |
| Fat | 6–7 grams (mostly healthy fats) |
| Carbohydrates | 10–12 grams (with fiber from oats and chia seeds) |
These balls pack a solid protein punch thanks to the peanut butter and added protein powder, making them great for muscle repair and sustained energy. The chia seeds add omega-3 fatty acids and fiber, aiding digestion and heart health. Using natural sweeteners like honey keeps them wholesome, without the sugar crash from processed snacks.
They’re gluten-free if you use certified gluten-free oats and suitable for many dietary lifestyles, including vegetarian and low-sugar. Just watch out if you have nut allergies or sensitivities.
Conclusion
These Easy No-Bake Chocolate Peanut Butter Protein Balls have been a quiet lifesaver in my snack game, offering a quick, tasty fix that feels a little like a treat but fuels the day. They’re simple, fast, and customizable—perfect for anyone juggling a busy schedule but wanting something homemade and nourishing.
Feel free to tweak the flavors to your liking or experiment with mix-ins. Honestly, once you get the hang of the texture, the possibilities are endless. I love that these balls can be ready before I even realize I need a snack, and they’ve become part of my regular routine.
If you try the recipe, I’d love to hear how you make it your own or what combos you discover. Sharing those little kitchen wins always makes the process even better. Here’s to snacks that fuel, satisfy, and keep things real!
FAQs
Can I make these protein balls without protein powder?
Yes, you can omit the protein powder and simply add a bit more oats or nut butter for binding. The texture will be slightly different and less protein-dense, but still tasty and satisfying.
How long do these protein balls last?
Stored in an airtight container in the fridge, they last about one week. You can freeze them for up to 3 months for longer storage.
Are these suitable for vegans?
To make this recipe vegan, replace honey with maple syrup or agave nectar and use a plant-based protein powder. The rest of the ingredients are naturally vegan-friendly.
Can I substitute peanut butter with another nut or seed butter?
Absolutely! Almond butter, cashew butter, or sunflower seed butter work well. Just keep in mind the flavor will change slightly depending on your choice.
What’s the best way to store and carry these for on-the-go snacks?
Keep them in a small airtight container or reusable snack bag in the fridge until you’re ready to head out. They’re sturdy enough to carry in a bag without making a mess, perfect for busy days.
Pin This Recipe!
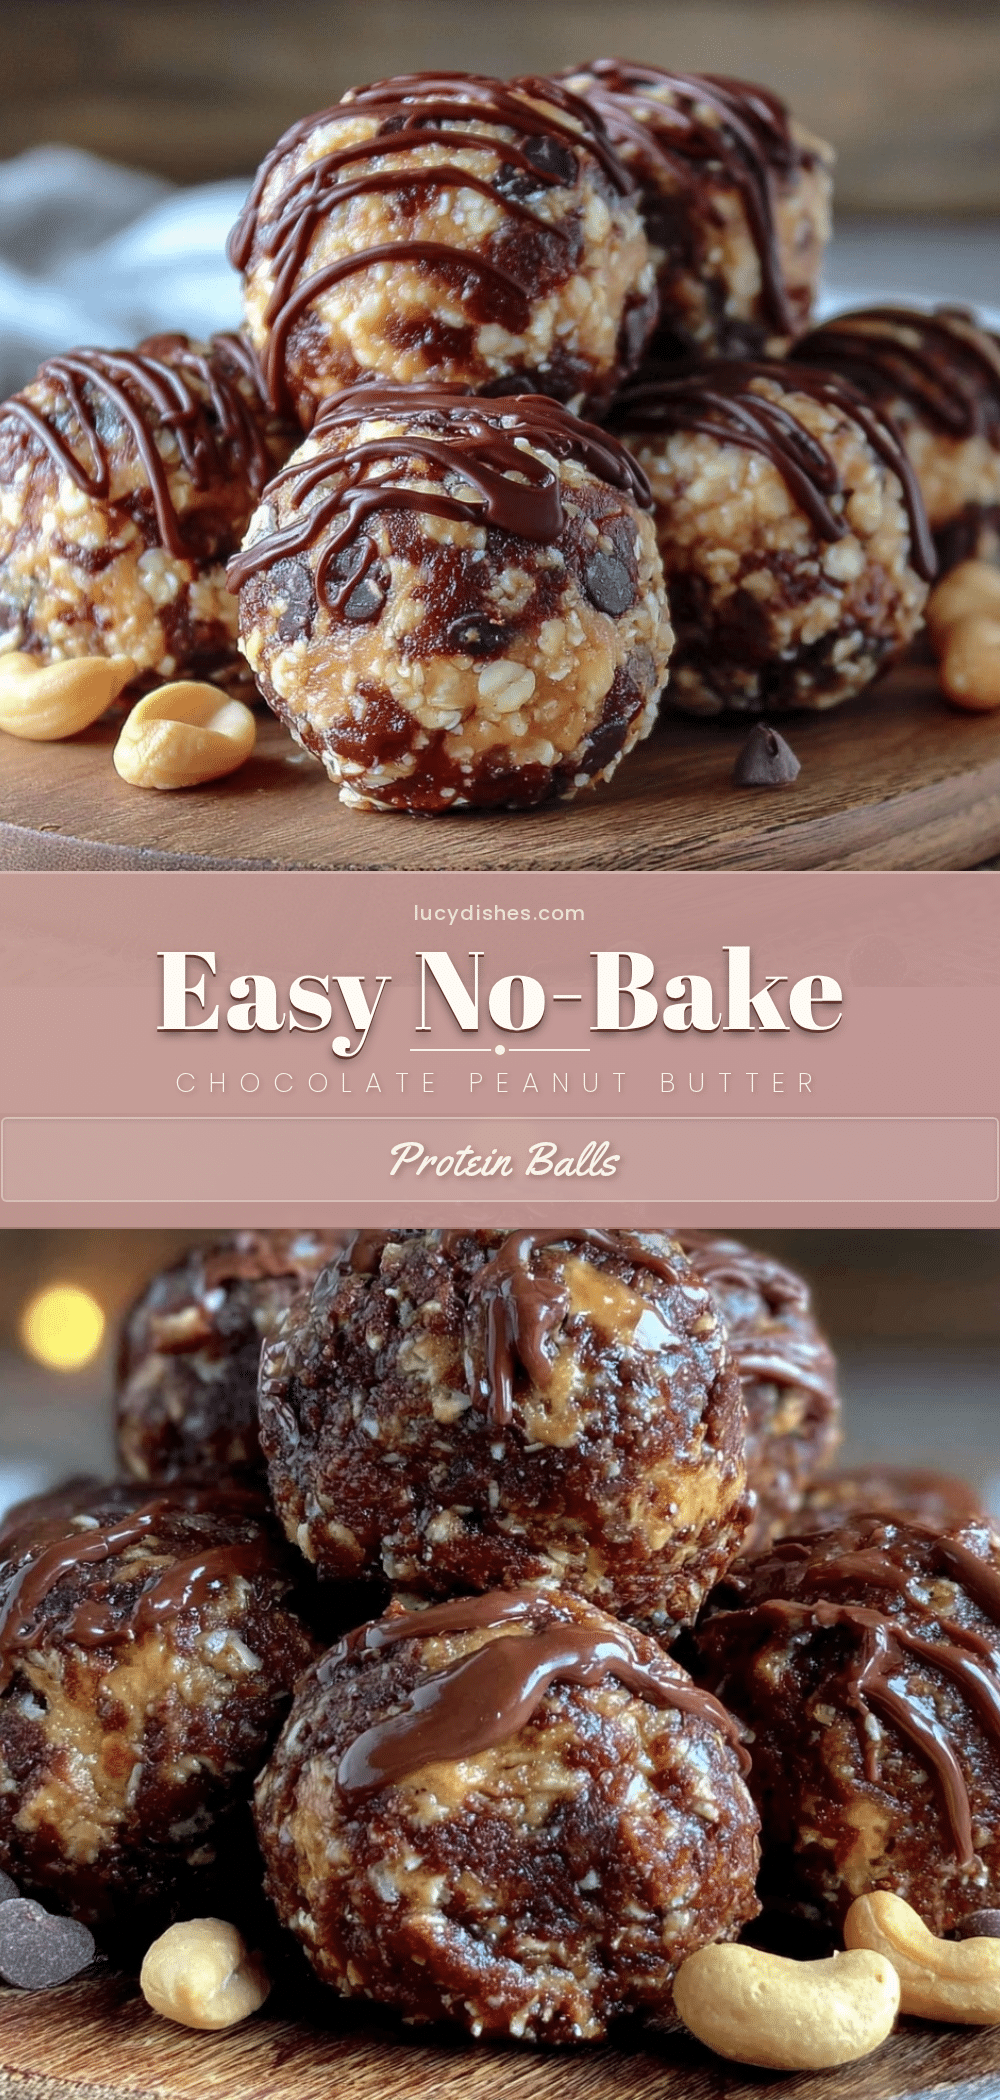
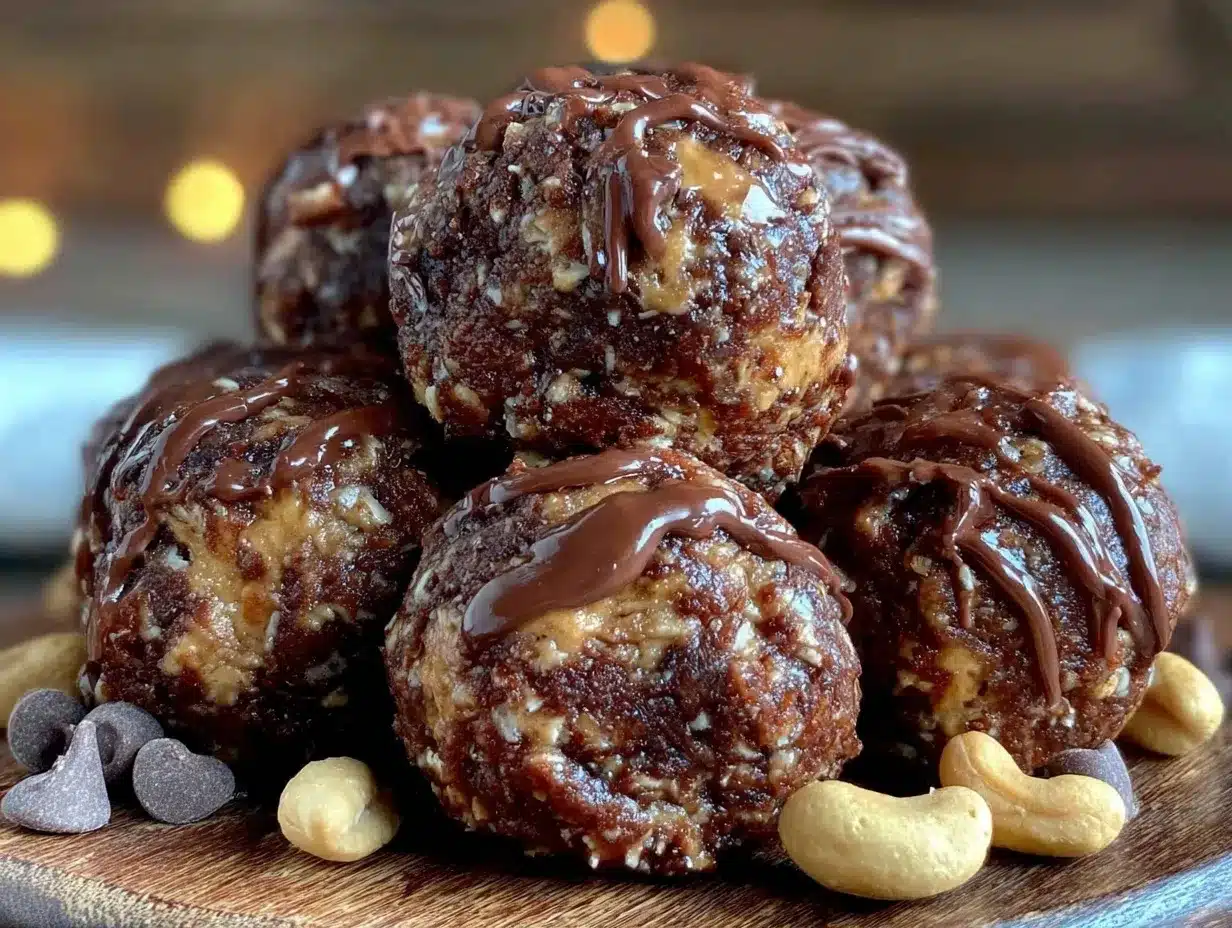
Easy No-Bake Chocolate Peanut Butter Protein Balls
These no-bake protein balls combine rich chocolate and creamy peanut butter for a quick, energizing snack that’s perfect for busy days or pre-workout fuel.
- Prep Time: 10 minutes
- Cook Time: 0 minutes
- Total Time: 40 minutes
- Yield: 12-14 balls 1x
- Category: Snack
- Cuisine: American
Ingredients
- 1 cup (90g) rolled oats
- 1/2 cup (125g) natural peanut butter
- 1/3 cup (30g) chocolate protein powder
- 2 tablespoons (30ml) honey
- 1 tablespoon (12g) chia seeds
- 1 teaspoon (5ml) vanilla extract
- 2 tablespoons (30g) mini dark chocolate chips (optional)
- Pinch of sea salt
Instructions
- In a mixing bowl, combine rolled oats, chocolate protein powder, chia seeds, and sea salt until evenly mixed.
- Add natural peanut butter, honey, and vanilla extract to the dry ingredients and stir until the mixture starts to come together and is thick and sticky.
- Fold in mini dark chocolate chips if using, gently to avoid melting.
- Chill the mixture in the refrigerator for about 10 minutes to firm up.
- Scoop about 1 tablespoon (15g) of the mixture and roll it between your palms into a ball. Place on a baking sheet or plate. Repeat until all mixture is used, making about 12–14 balls.
- Chill the protein balls in the refrigerator for at least 30 minutes to set completely.
Notes
If the mixture is too dry, add a splash of milk (dairy or plant-based) one teaspoon at a time. If too sticky, add more oats or protein powder. Use natural peanut butter without added sugar or oils for best texture and flavor. Chill before rolling to reduce stickiness. Store in an airtight container in the fridge for up to one week or freeze for up to 3 months.
Nutrition
- Serving Size: 1 protein ball
- Calories: 120
- Sugar: 4
- Sodium: 50
- Fat: 6.5
- Saturated Fat: 1
- Carbohydrates: 11
- Fiber: 2
- Protein: 7.5
Keywords: no-bake, protein balls, chocolate, peanut butter, quick snack, healthy snack, energy boost, easy recipe


