
Let me tell you, the aroma of freshly baked bread mingling with crisp lettuce, ripe tomatoes, and zesty spreads is enough to make anyone’s mouth water. The first time I put together these easy picnic sandwiches, I was instantly hooked—the kind of moment where you pause, take a deep breath, and just smile because you know you’re onto something truly special. It wasn’t on some fancy day, either; it was a lazy summer afternoon when I was knee-high to a grasshopper, helping my grandma pack up sandwiches for a family outing. Those simple flavors and fresh bites have stuck with me ever since.
Years ago, I stumbled upon this recipe while trying to recreate that nostalgic picnic feeling on a rainy weekend. Honestly, I wish I’d discovered these easy picnic sandwiches years ago because they bring pure, nostalgic comfort with dangerously little fuss. My family couldn’t stop sneaking them off the platter, and I can’t really blame them. Whether you’re planning a sunny park day, a sweet treat for your kids, or looking to brighten up your Pinterest cookie board with some savory delights, these fresh, flavorful bites fit the bill perfectly.
I’ve tested this recipe more times than I can count—in the name of research, of course—and it’s become a staple for family gatherings, potlucks, and those impromptu get-togethers. If you’re searching for something easy, satisfying, and downright delicious, you’re going to want to bookmark this one.
Why You’ll Love This Recipe
After plenty of kitchen trials and honest family feedback, these easy picnic sandwiches have proven to be a winner for so many reasons. Here’s why you’ll fall in love with them just like I did:
- Quick & Easy: Comes together in under 20 minutes, perfect for last-minute picnic plans or a speedy lunch.
- Simple Ingredients: No fancy grocery trips needed; you likely already have everything in your kitchen pantry or fridge.
- Perfect for Outdoor Fun: Great for picnics, park days, or even casual office lunches.
- Crowd-Pleaser: Always gets rave reviews from kids and adults alike—trust me, they disappear fast!
- Unbelievably Delicious: The combo of fresh veggies, savory spreads, and soft bread hits that spot every time.
What sets this recipe apart? It’s all about balance. I’ve found that layering fresh, crisp ingredients with a tangy mustard-mayo blend, plus the right bread choice (I swear by bakery-fresh sourdough or hearty whole grain), makes these sandwiches anything but ordinary. And you know what? The flavors meld beautifully when you let them rest wrapped up for just 10 minutes before serving.
This isn’t just a sandwich recipe—it’s a little celebration of fresh flavors and simplicity that’ll make you close your eyes after the first bite. Whether you’re impressing guests without breaking a sweat or turning a simple meal into something memorable, these easy picnic sandwiches have got you covered.
What Ingredients You Will Need
This recipe uses simple, wholesome ingredients to deliver bold flavor and satisfying texture without the fuss. Most are pantry staples or fresh market finds, making substitutions easy if needed.
- For the Sandwich Base:
- Fresh sandwich bread (I recommend sourdough or whole grain, about 8 slices)
- Unsalted butter, softened (for spreading)
- For the Filling:
- Cooked deli turkey or chicken breast, thinly sliced (8 oz / 225 g)
- Sharp cheddar cheese, sliced (4 oz / 115 g)
- Crisp lettuce leaves (romaine or butter lettuce works well)
- Ripe tomatoes, sliced thin (2 medium tomatoes)
- Thinly sliced cucumbers (optional, adds crunch)
- For the Spread:
- Mayonnaise (1/4 cup / 60 ml; use dairy-free mayo if preferred)
- Dijon mustard (1 tablespoon)
- Freshly ground black pepper and a pinch of sea salt
- Optional: a dash of lemon juice or honey for a subtle tang
Tips on ingredients: I always pick firm, ripe tomatoes and fresh, crisp lettuce to keep the sandwiches from getting soggy. For the turkey or chicken, deli-sliced works fine, but if you have leftover roast chicken, that’s even better. And yes, if you want to switch up the bread to gluten-free or a baguette, feel free—just beware of crust thickness for easy eating!
Equipment Needed
- A sharp serrated knife for clean, even sandwich slices
- A cutting board (plastic or wooden works fine)
- Small bowl for mixing the spread
- Spreader or butter knife for applying butter and spread
- Optional: sandwich press or grill pan if you prefer warm, toasted sandwiches (not required but nice)
Honestly, this is one of those recipes where you don’t need fancy gadgets. If you don’t have a serrated knife, just take your time with a regular sharp one. For the spread, a fork or whisk in a bowl gets the job done smoothly. And if you want to make it budget-friendly, skip any specialized tools; these sandwiches shine with simple equipment and fresh ingredients.
Preparation Method
- Prepare the Spread: In a small bowl, combine 1/4 cup (60 ml) mayonnaise with 1 tablespoon Dijon mustard. Add a pinch of sea salt and freshly ground black pepper. Stir well until smooth. Taste and add a dash of lemon juice or honey if you like a subtle tang or sweetness. (Takes about 3 minutes)
- Prep the Veggies: Rinse and dry the lettuce leaves thoroughly to avoid sogginess. Slice 2 medium ripe tomatoes into thin rounds. If using cucumbers, slice them thinly as well. Pat the tomato and cucumber slices dry with a paper towel to keep moisture at bay. (Takes about 5 minutes)
- Butter the Bread: Lay out 8 slices of your chosen bread on the cutting board. Spread a thin layer of softened unsalted butter on one side of each slice—this acts as a moisture barrier and adds richness. (Takes about 3 minutes)
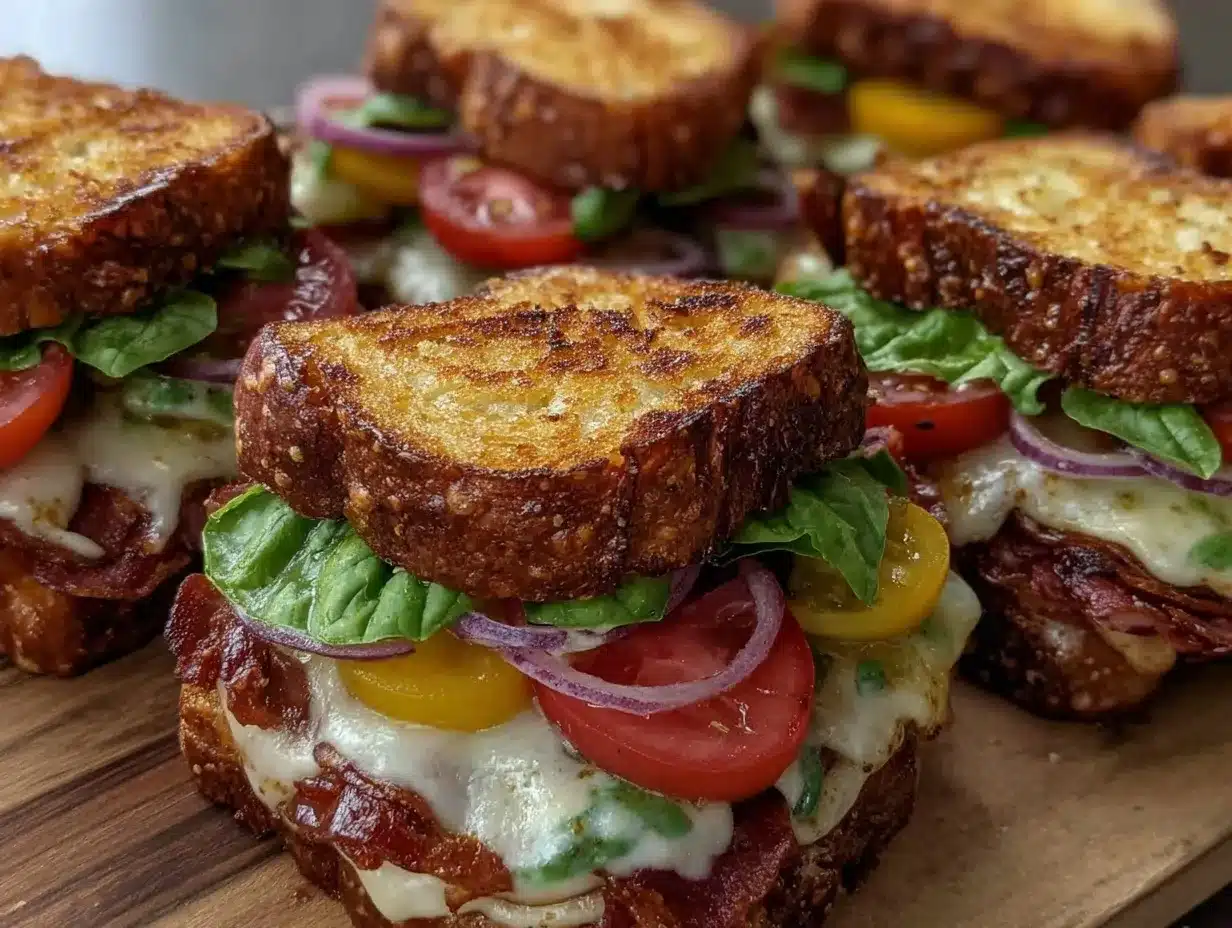
- Assemble the Sandwiches: On the buttered side of 4 slices, spread a generous layer of the mayo-mustard mix. Then layer the turkey or chicken slices evenly (about 2 oz / 60 g per sandwich). Next, add a layer of cheddar cheese slices, followed by lettuce leaves, tomato slices, and cucumbers if using. Top with the remaining bread slices, butter side down. (Takes about 7-10 minutes)
- Rest and Slice: Wrap the sandwiches tightly in parchment paper or plastic wrap and let them rest for about 10 minutes. This lets the flavors meld and the bread soften just enough without getting soggy. Then, slice each sandwich diagonally or into halves for easy eating. (Takes about 10 minutes)
- Serve: Arrange on a platter or pack into your picnic basket and enjoy! If you’re prepping ahead, keep sandwiches chilled until serving. (Serving immediately is ideal for the freshest bite.)
Pro tip: If you want to speed things up, prep the spread and slice the veggies the night before. Just keep them covered separately to keep everything crisp and fresh. Also, don’t skip the butter layer on the bread—it’s a game changer for texture and moisture control.
Cooking Tips & Techniques
One thing I learned the hard way is that soggy sandwiches can kill a picnic vibe. So, layering butter on the bread before adding moist ingredients is crucial—it acts like a shield. Also, drying your veggies well makes a big difference; even the best bread can turn sad if the tomato slices are dripping.
When it comes to slicing bread, a serrated knife is your best friend for a clean cut without squashing the sandwich. And hey, if you like a bit of warmth, you can lightly toast the bread before assembly, but honestly, fresh and soft is just as delightful.
Don’t rush the resting step after assembly. Letting the sandwich sit wrapped for 10 minutes helps the flavors settle in and meld together, making each bite more harmonious. I always find this small pause makes a surprisingly big impact.
Multitasking tip: While your spread is mixing, prep your veggies, so you’re not standing around waiting. Efficiency in the kitchen definitely helps when you’re putting together picnic food on a sunny afternoon!
Variations & Adaptations
- Vegetarian Version: Swap the turkey or chicken for grilled veggies like zucchini, bell peppers, and roasted eggplant, or use a generous scoop of hummus for protein and creaminess.
- Seasonal Flavors: In summer, add fresh basil leaves and swap cheddar for mozzarella slices. For fall, try cranberry sauce and brie cheese for a cozy twist.
- Gluten-Free Option: Use gluten-free bread or hearty lettuce wraps for a low-carb alternative without compromising on flavor.
- Spicy Kick: Mix a bit of hot sauce or chipotle mayo into your spread for a smoky heat that wakes up the palate.
One personal favorite I tried recently was adding thin slices of avocado and swapping the mayo for Greek yogurt mixed with lemon zest—it gave a fresh, creamy texture that felt like a mini upgrade. Honestly, the recipe is flexible, so have fun making it your own!
Serving & Storage Suggestions
Serve these easy picnic sandwiches at room temperature for the best flavor and texture. If you’re serving outdoors, pack them in a cooler with an ice pack to keep everything fresh. Presentation-wise, wrapping each sandwich in parchment paper with a colorful string or fresh herb sprig adds a charming touch for guests.
Pair these sandwiches with crisp pickle spears, kettle-cooked chips, or a fresh fruit salad for a well-rounded picnic spread. For drinks, a chilled lemonade or iced tea complements the fresh flavors perfectly.
To store leftovers, wrap sandwiches tightly in plastic wrap and refrigerate for up to 24 hours. Avoid freezing—they’re best enjoyed fresh or within a day. When reheating (if you prefer warm sandwiches), unwrap and toast lightly in a skillet or sandwich press, but beware of sogginess if there are fresh veggies inside.
Flavors actually develop nicely after a little rest, so if you make them a bit ahead, they’ll still taste great—just keep an eye on moisture to keep that bread from getting overly soft.
Nutritional Information & Benefits
Each sandwich provides roughly 350-400 calories, depending on your ingredient choices, with a balance of protein, healthy fats, and fiber from fresh veggies and whole grain bread if used. The turkey or chicken offers lean protein that fuels your day, while the fresh vegetables contribute essential vitamins and antioxidants.
For those watching gluten or dairy, this recipe adapts easily with gluten-free bread and dairy-free spreads or cheeses. The mayo and mustard spread adds flavor without too many calories, and the inclusion of fresh produce keeps it light but satisfying.
Personally, I appreciate how these sandwiches combine simple, wholesome ingredients that satisfy hunger and keep you energized without feeling heavy—perfect for a day outdoors or a quick lunch break.
Conclusion
These easy picnic sandwiches recipe ideas offer fresh, flavorful bites that are simple to make and impossible to resist. Whether you stick with the classic turkey and cheddar or try one of the variations, you’re in for a treat that’s both satisfying and fuss-free. I love this recipe because it reminds me of carefree summer days and family time—something you can share and enjoy with minimal hassle.
Go ahead and customize these sandwiches to fit your taste buds and lifestyle. And please, let me know how you make them your own! Drop a comment, share your favorite twist, or just tell me your secret ingredient. Here’s to many delicious picnics ahead—cheers!
FAQs
What’s the best bread to use for picnic sandwiches?
Sourdough or whole grain bread works beautifully because they hold up well without getting soggy. You can also use sandwich rolls or baguettes if you prefer.
Can I make these sandwiches ahead of time?
Yes! Assemble and wrap them tightly, then refrigerate for up to 24 hours. Just add delicate veggies like lettuce right before serving if you want to keep them extra crisp.
How do I prevent the sandwiches from getting soggy?
Spread a thin layer of butter on the bread before adding moist ingredients and dry your veggies well. Wrapping sandwiches properly and letting them rest also helps.
Can I make these sandwiches vegetarian or vegan?
Absolutely! Swap meat for grilled veggies or plant-based deli slices, and replace mayo with vegan mayo or hummus for a tasty vegan-friendly option.
What are some good side dishes to serve with picnic sandwiches?
Think crisp pickles, chips, fresh fruit salad, or crunchy veggie sticks. Light drinks like iced tea or lemonade pair perfectly.
Pin This Recipe!

Easy Picnic Sandwiches

These easy picnic sandwiches combine fresh veggies, savory spreads, and soft bread for a quick, flavorful, and satisfying meal perfect for picnics, family gatherings, or casual lunches.
- Prep Time: 15 minutes
- Cook Time: 0 minutes
- Total Time: 25 minutes
- Yield: 4 sandwiches 1x
- Category: Main Course
- Cuisine: American
Ingredients
- 8 slices fresh sandwich bread (sourdough or whole grain recommended)
- Unsalted butter, softened (for spreading)
- 8 oz (225 g) cooked deli turkey or chicken breast, thinly sliced
- 4 oz (115 g) sharp cheddar cheese, sliced
- Crisp lettuce leaves (romaine or butter lettuce)
- 2 medium ripe tomatoes, sliced thin
- Thinly sliced cucumbers (optional)
- 1/4 cup (60 ml) mayonnaise (dairy-free mayo if preferred)
- 1 tablespoon Dijon mustard
- Freshly ground black pepper
- Pinch of sea salt
- Optional: dash of lemon juice or honey for subtle tang
Instructions
- Prepare the spread by combining mayonnaise, Dijon mustard, sea salt, and black pepper in a small bowl. Stir well until smooth. Add lemon juice or honey if desired. (About 3 minutes)
- Rinse and dry lettuce leaves thoroughly. Slice tomatoes and cucumbers thinly and pat dry with paper towels to avoid moisture. (About 5 minutes)
- Lay out 8 slices of bread and spread a thin layer of softened unsalted butter on one side of each slice to act as a moisture barrier. (About 3 minutes)
- On the buttered side of 4 slices, spread a generous layer of the mayo-mustard mix. Layer turkey or chicken slices evenly (about 2 oz per sandwich), then cheddar cheese slices, lettuce leaves, tomato slices, and cucumbers if using. Top with remaining bread slices, butter side down. (About 7-10 minutes)
- Wrap sandwiches tightly in parchment paper or plastic wrap and let rest for about 10 minutes to let flavors meld and bread soften without getting soggy. Then slice diagonally or into halves. (About 10 minutes)
- Serve immediately or keep chilled until serving.
Notes
Spread butter on bread to prevent sogginess. Dry veggies well before assembling. Let sandwiches rest wrapped for 10 minutes to meld flavors. Can prep spread and slice veggies the night before, keeping them covered separately. For warm sandwiches, lightly toast bread before assembly or reheat gently but beware of sogginess.
Nutrition
- Serving Size: 1 sandwich
- Calories: 350400
- Sugar: 4
- Sodium: 600
- Fat: 18
- Saturated Fat: 6
- Carbohydrates: 30
- Fiber: 3
- Protein: 22
Keywords: picnic sandwiches, easy sandwiches, turkey sandwich, fresh sandwiches, quick lunch, picnic food, sandwich recipe


