
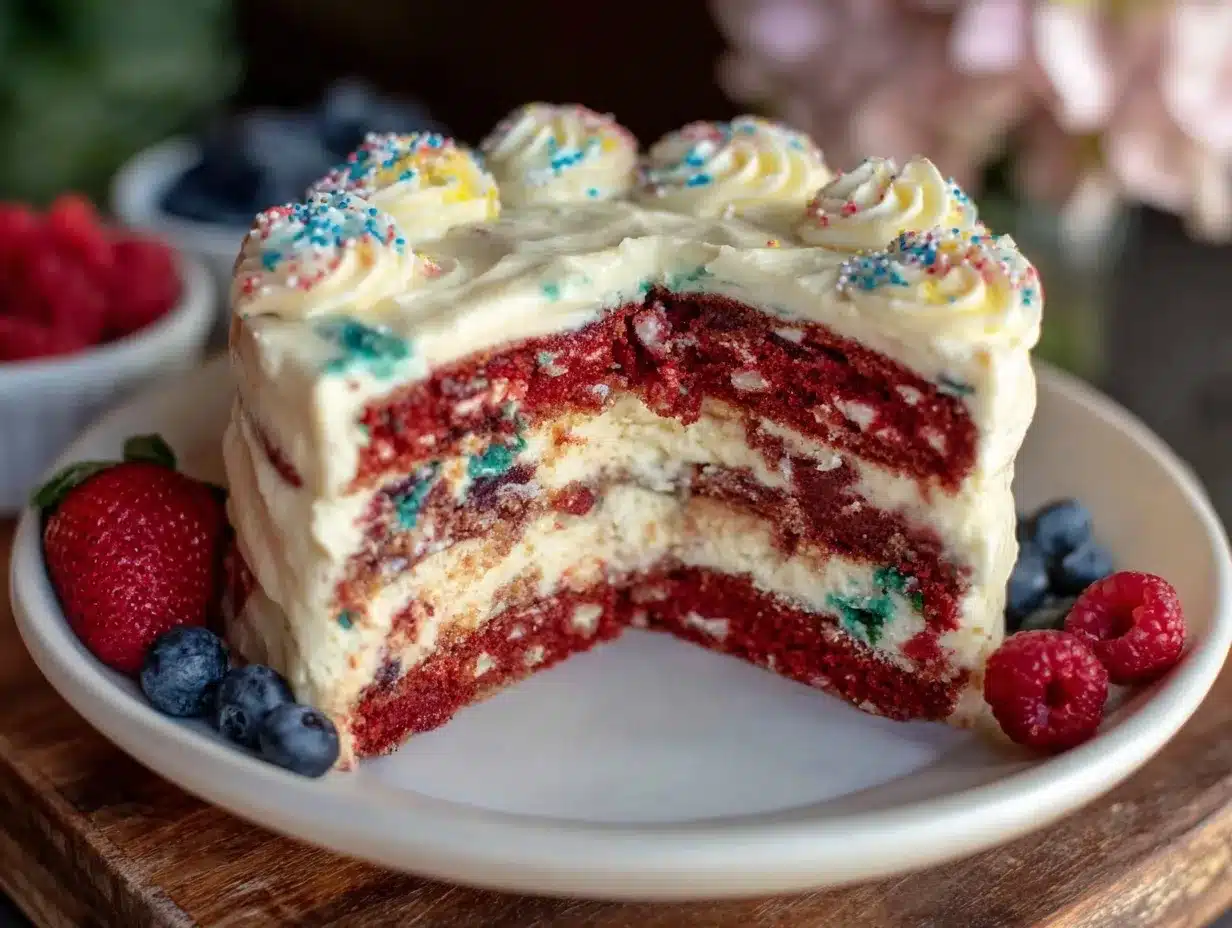
Let me tell you, the sight of this vibrant school colors layer cake sitting on my kitchen counter is enough to make anyone’s heart skip a beat. The bright hues—popping reds, blues, yellows, or greens—are like a burst of joy that promises a celebration before you even take a bite. The first time I baked this cake, I was instantly hooked. It was one of those moments where you pause, take a deep breath, and just smile because you know you’re onto something truly special.
Years ago, when I was knee-high to a grasshopper, my grandma used to make the most dazzling cakes for every school event, brimming with colors that matched our team spirit. I thought it was magic back then, and honestly, recreating that magic now feels like a warm hug from the past. My family couldn’t stop sneaking slices off the cooling rack (and I can’t really blame them). This vibrant school colors layer cake is dangerously easy, a pure, nostalgic comfort, and it’s perfect for potlucks, birthday parties, or just brightening up your Pinterest cookie board with a splash of fun.
You know what? After testing this recipe multiple times—in the name of research, of course—it’s become a staple for family gatherings and gifting. If you’re looking for a treat that captures the spirit of celebration in every bite, you’re going to want to bookmark this one.
Why You’ll Love This Recipe
Honestly, this vibrant school colors layer cake isn’t just another cake recipe. I’ve tried plenty, but this one stands out, and here’s why:
- Quick & Easy: Comes together in under 90 minutes, perfect for those last-minute celebrations or school spirit events.
- Simple Ingredients: No fancy trips to specialty stores; chances are you already have almost everything in your pantry.
- Perfect for Celebrations: Great for school functions, birthdays, or any occasion where you want to show your colors loud and proud.
- Crowd-Pleaser: Kids and adults alike rave about the moist texture and bright, cheerful colors—it’s impossible not to smile.
- Unbelievably Delicious: The balanced vanilla flavor blends with the sweet buttercream frosting to create a next-level comfort food experience.
What sets this recipe apart is the way the cake layers stay moist and vibrant without bleeding colors into each other. The trick? Using gel food coloring and letting the batter rest just a bit before baking. Plus, the frosting is whipped to just the right texture—not too stiff, not too runny—making that perfect creamy blanket for your layers.
This cake isn’t just good—it’s the kind of dessert that makes you close your eyes after the first bite and savor every crumb. It’s comfort food with a party hat, ready to impress guests without stress and turn your simple gathering into something memorable.
What Ingredients You Will Need
This vibrant school colors layer cake uses simple, wholesome ingredients to deliver bold color and satisfying texture without the fuss. Most are pantry staples, and the colors come from easy-to-find gel food coloring that packs a punch without watering down the batter.
- For the Cake Batter:
- All-purpose flour – 3 cups (360g), sifted for lightness
- Baking powder – 1 tablespoon (15g), for that perfect rise
- Salt – ½ teaspoon (3g), to balance flavors
- Unsalted butter – 1 cup (227g), softened (I recommend Kerrygold for rich flavor)
- Granulated sugar – 2 cups (400g), for sweetness and structure
- Large eggs – 4, room temperature (helps with even mixing)
- Pure vanilla extract – 2 teaspoons (10ml), for that classic cake aroma
- Whole milk – 1 cup (240ml), room temperature (adds moisture and tenderness)
- Gel food coloring – assorted colors matching your school colors (I prefer AmeriColor gels for vibrant hues)
- For the Buttercream Frosting:
- Unsalted butter – 1 cup (227g), softened
- Powdered sugar – 4 cups (480g), sifted to avoid lumps
- Pure vanilla extract – 1 teaspoon (5ml)
- Heavy cream – 2-3 tablespoons (30-45ml), to achieve the perfect spreadable consistency
- Pinch of salt – to balance sweetness
If you want a dairy-free version, swap the butter with a plant-based alternative and use coconut or almond milk instead of whole milk. For a gluten-free option, try a 1:1 gluten-free baking flour, but note this may slightly alter the texture. In summer, fresh edible flowers or sprinkles add a festive touch, making it even more special.
Equipment Needed
- Three 8-inch (20cm) round cake pans – non-stick recommended for easy release
- Mixing bowls – at least two, medium and large sizes
- Electric mixer – stand or hand-held, for creaming butter and sugar smoothly
- Measuring cups and spoons – precise measurements matter here
- Rubber spatula – for folding and scraping batter cleanly
- Cooling racks – to cool layers evenly and avoid sogginess
- Offset spatula – for smooth frosting application (a small one works wonders)
- Parchment paper – to line pans for extra insurance against sticking
If you don’t have three pans, no worries! You can bake the layers one or two at a time, just allow extra cooling time. For frosting, a simple whisk can work if you don’t have an electric mixer, but it takes more elbow grease. I’ve found that investing in a good offset spatula really ups your frosting game—worth every penny.
Preparation Method
- Prep Your Pans and Oven: Preheat your oven to 350°F (175°C). Grease your three 8-inch cake pans with butter, then line the bottoms with parchment paper circles for easy release. This step saves you from any cake pan drama later.
- Mix Dry Ingredients: In a medium bowl, sift together 3 cups (360g) all-purpose flour, 1 tablespoon (15g) baking powder, and ½ teaspoon (3g) salt. Set aside. This ensures a tender crumb with no surprises.
- Cream Butter and Sugar: In a large bowl, beat 1 cup (227g) softened unsalted butter and 2 cups (400g) granulated sugar with an electric mixer on medium speed for about 3 minutes, until light and fluffy. This aerates the butter for a lighter cake.
- Add Eggs and Vanilla: Beat in 4 large eggs, one at a time, making sure each is fully incorporated before adding the next. Stir in 2 teaspoons (10ml) vanilla extract. This step locks in moisture and flavor.
- Alternate Adding Dry Ingredients and Milk: Reduce mixer speed to low. Add the dry ingredients in three parts, alternating with 1 cup (240ml) whole milk, starting and ending with dry ingredients. Mix just until combined—overmixing can toughen the cake.
- Divide and Color the Batter: Evenly divide the batter into three bowls. Add gel food coloring to each portion, matching your vibrant school colors. Stir gently until the color is fully blended, but be careful not to overmix.
- Pour and Bake: Pour each colored batter into its prepared pan, smoothing the top with a spatula. Bake all pans simultaneously for 25-30 minutes, or until a toothpick inserted in the center comes out clean. The edges should start pulling away slightly from the pan.
- Cool Completely: Let the cakes cool in the pans for 10 minutes, then turn them out onto cooling racks. Peel off parchment paper and cool fully—this prevents the frosting from melting later.
- Make the Buttercream: Beat 1 cup (227g) softened butter on medium speed until creamy. Gradually add 4 cups (480g) powdered sugar, 1 teaspoon vanilla, a pinch of salt, and 2-3 tablespoons (30-45ml) heavy cream until fluffy and spreadable. Adjust cream quantity as needed for consistency.
- Assemble the Cake: Place the first colored layer on your serving plate. Spread a generous layer of buttercream on top. Repeat with the second and third layers. Finish with a smooth coat of frosting all around the cake using an offset spatula. Chill for 20 minutes before slicing for clean cuts.
Pro tip: If your layers dome on top, gently trim the high spots with a serrated knife for an even stack. Also, resting the batter for 10 minutes before pouring helps reduce air bubbles, giving a smoother crumb.
Cooking Tips & Techniques
Getting this vibrant school colors layer cake just right can be a thrill, but a few tricks go a long way. First, always use gel food coloring—liquid dyes tend to thin the batter and dull the colors. I learned that the hard way after a sad pastel disaster.
When mixing your batter, don’t overdo it. You want just enough to combine ingredients. Overmixing develops gluten, making cakes tough instead of tender. Also, room temperature eggs and milk help the batter come together smoothly.
Timing matters during baking. Start checking your cake layers around 25 minutes. Ovens vary, and you don’t want dry cake. The toothpick test is your best friend. If you’re baking layers one by one, keep the baked layers wrapped in foil to stay moist.
Frosting consistency is key—too stiff, and it’s hard to spread; too soft, and it slides off. Beat your buttercream just right, and chill it slightly if it gets too soft. And if you want sharp layer edges, chill the cake between frosting applications (I usually do a crumb coat, chill, then final coat).
Lastly, multitasking helps. While cakes bake, prep the frosting. While frosting chills, clean your workspace. It’s a dance that saves time and keeps the process fun rather than frantic.
Variations & Adaptations
This vibrant school colors layer cake is a great canvas for creativity. Here are some ways to make it your own:
- Dietary: Swap all-purpose flour with a gluten-free blend for those avoiding gluten. Use dairy-free butter and milk alternatives to make it vegan-friendly.
- Seasonal: In warmer months, add fresh fruit slices between layers or top with edible flowers for a garden party vibe. In winter, a hint of cinnamon or nutmeg in the batter adds cozy warmth.
- Flavor Twists: Experiment by swapping vanilla extract for almond or orange extract for a subtle flavor change. Or fold in mini chocolate chips for a fun surprise.
Personally, I once tried a rainbow version with six layers—that was a showstopper at a kid’s birthday! Just remember to keep layer thickness even and allow extra baking time. Another fun twist is using cream cheese frosting in place of buttercream for tangy richness.
Serving & Storage Suggestions
This vibrant school colors layer cake shines best served at room temperature. Take it out of the fridge about 30 minutes before slicing to let the flavors soften and the frosting mellow. For presentation, a simple sprinkle of matching colored sprinkles or edible glitter makes it shine even more.
Pair it with a cold glass of milk, a cup of coffee, or a fruity punch for a complete celebration spread. It’s perfect for birthdays, school events, or anytime you want to make a statement with color and taste.
Store leftover cake tightly covered in the fridge for up to 4 days. To freeze, wrap individual slices or entire cake layers in plastic wrap and foil, then freeze for up to 2 months. Thaw in the fridge overnight and bring to room temperature before serving. Reheating in a warm oven (about 300°F/150°C) for 10 minutes refreshes the texture and flavor nicely.
The colors stay bright for days, and the flavor often deepens after resting—a delightful bonus if you can wait that long!
Nutritional Information & Benefits
Each slice of this vibrant school colors layer cake (assuming 12 slices) contains approximately 400 calories, with 18g of fat, 55g of carbohydrates, and 4g of protein. The cake provides a good source of energy and satisfaction for a celebratory treat.
The key ingredients like eggs and butter contribute essential nutrients such as vitamin A and protein. Using whole milk adds calcium and vitamin D. While this cake is an indulgence, it’s made with familiar ingredients and can be adapted for dietary needs.
If you’re mindful of allergies, note the presence of gluten, dairy, and eggs, but substitutions can make it inclusive. From a wellness perspective, sharing a colorful homemade cake offers joy and connection—sometimes, that’s the best kind of nutrition!
Conclusion
This vibrant school colors layer cake is worth every minute you spend making it. It’s fun, festive, and packs a punch of color and flavor that livens up any celebration. Whether you’re cheering on your favorite team, celebrating a birthday, or just craving a colorful treat, this recipe delivers.
Feel free to tweak the colors, flavors, or frosting to suit your style. I love how this cake brings people together—family, friends, kids, and adults alike. It’s become one of my go-to crowd-pleasers, and I hope it becomes yours too.
If you give this recipe a try, let me know how it went! Share your pictures, variations, or any fun stories in the comments—I’m always excited to hear from fellow cake lovers. Here’s to making every celebration a little brighter and a lot sweeter!
Frequently Asked Questions
Can I make this vibrant school colors layer cake ahead of time?
Absolutely! You can bake the layers a day or two in advance and store them wrapped tightly in the fridge. Assemble and frost the day you want to serve for the freshest look and taste.
What’s the best way to keep the colors from bleeding into each other?
Use gel food coloring instead of liquid, and let the batter rest for about 10 minutes before baking. Also, make sure the cakes are completely cool before frosting to prevent melting and bleeding.
Can I use a different size pan?
Yes, but baking times will vary. For example, a 9-inch pan will bake faster and produce thinner layers. Adjust your bake time accordingly and check frequently with a toothpick.
How do I get even layers?
Use a kitchen scale to divide batter evenly between pans or measure by volume. If your layers dome, slice off the tops with a serrated knife for flat, stackable layers.
Is there a way to make this cake dairy-free?
Yes! Swap out butter for vegan butter or margarine, and replace whole milk with almond, soy, or coconut milk. Use a dairy-free frosting recipe or coconut cream-based frosting for a delicious alternative.
Pin This Recipe!
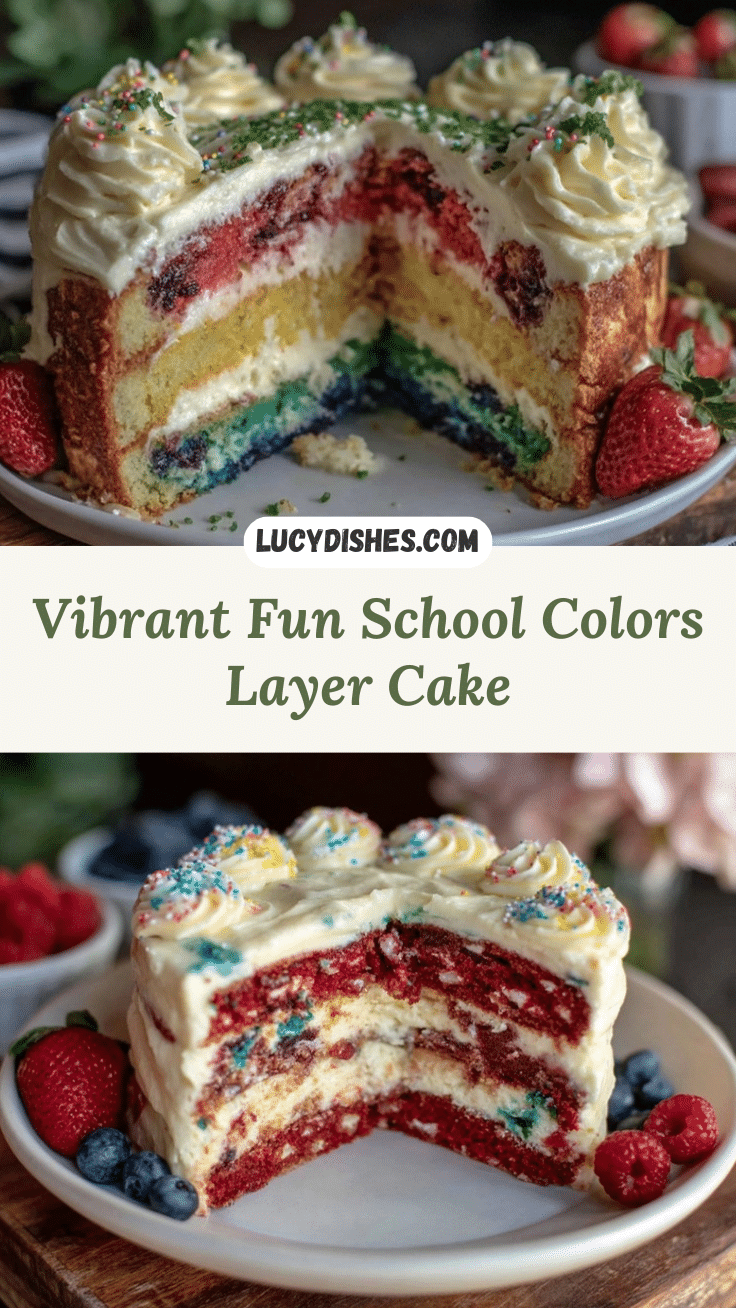
Vibrant School Colors Layer Cake

A quick and easy 3-layer celebration cake featuring bright, vibrant school colors with a moist texture and creamy buttercream frosting. Perfect for birthdays, school events, and festive gatherings.
- Prep Time: 20 minutes
- Cook Time: 30 minutes
- Total Time: 50 minutes
- Yield: 12 servings 1x
- Category: Dessert
- Cuisine: American
Ingredients
- 3 cups (360g) all-purpose flour, sifted
- 1 tablespoon (15g) baking powder
- ½ teaspoon (3g) salt
- 1 cup (227g) unsalted butter, softened
- 2 cups (400g) granulated sugar
- 4 large eggs, room temperature
- 2 teaspoons (10ml) pure vanilla extract
- 1 cup (240ml) whole milk, room temperature
- Gel food coloring, assorted colors
- For the Buttercream Frosting:
- 1 cup (227g) unsalted butter, softened
- 4 cups (480g) powdered sugar, sifted
- 1 teaspoon (5ml) pure vanilla extract
- 2–3 tablespoons (30-45ml) heavy cream
- Pinch of salt
Instructions
- Preheat oven to 350°F (175°C). Grease three 8-inch cake pans and line bottoms with parchment paper.
- In a medium bowl, sift together flour, baking powder, and salt. Set aside.
- In a large bowl, beat butter and sugar with an electric mixer on medium speed for about 3 minutes until light and fluffy.
- Add eggs one at a time, beating well after each addition. Stir in vanilla extract.
- Reduce mixer speed to low. Add dry ingredients in three parts, alternating with milk, starting and ending with dry ingredients. Mix just until combined.
- Divide batter evenly into three bowls. Add gel food coloring to each and stir gently until fully blended.
- Pour each colored batter into prepared pans and smooth tops. Bake for 25-30 minutes or until a toothpick inserted in the center comes out clean.
- Cool cakes in pans for 10 minutes, then turn out onto cooling racks. Remove parchment and cool completely.
- For the buttercream, beat butter until creamy. Gradually add powdered sugar, vanilla, salt, and heavy cream until fluffy and spreadable.
- Assemble cake by layering each colored cake with buttercream between layers. Frost entire cake smoothly with remaining buttercream. Chill for 20 minutes before slicing.
Notes
Use gel food coloring to prevent bleeding and maintain vibrant colors. Let batter rest 10 minutes before baking to reduce air bubbles. Chill cake between frosting layers for sharp edges. For dairy-free, substitute butter and milk with plant-based alternatives. For gluten-free, use 1:1 gluten-free flour blend.
Nutrition
- Serving Size: 1 slice (1/12 of cak
- Calories: 400
- Fat: 18
- Carbohydrates: 55
- Protein: 4
Keywords: layer cake, school colors cake, celebration cake, buttercream frosting, colorful cake, easy cake recipe, birthday cake, party cake


