
Let me tell you, the rich aroma of freshly baked mooncakes wafting through the kitchen is enough to make anyone’s mouth water. The delicate, golden crust, the smooth, sweet red bean paste, and that surprise burst of salted egg yolk right in the center—honestly, it’s the kind of treat that stops you in your tracks. The first time I baked these perfect traditional mooncakes with rich red bean and salted egg yolk filling, I was instantly hooked. I remember that moment vividly—the kind where you pause, take a deep breath, and just smile because you know you’re onto something truly special.
Years ago, when I was knee-high to a grasshopper, my grandma used to bring mooncakes back from the local bakery every Mid-Autumn Festival. Those were the days before I tried making my own. It took a rainy weekend and a bit of kitchen experimentation for me to recreate that nostalgic flavor at home. I wish I’d discovered this recipe way earlier—it’s dangerously easy once you get the hang of it, and the results are pure, nostalgic comfort.
My family couldn’t stop sneaking these mooncakes off the cooling rack (and I can’t really blame them). It’s perfect for sharing at festive gatherings, sweet treats for your kids, or even brightening up your Pinterest cookie board with something truly authentic. After testing this recipe multiple times—in the name of research, of course—it’s become a staple for family reunions and gifting. Honestly, these mooncakes feel like a warm hug wrapped in pastry, and you’re going to want to bookmark this one.
Why You’ll Love This Recipe
Having tested countless mooncake recipes, I can confidently say this one stands out for all the right reasons. Whether you’re a seasoned baker or just starting out, this recipe brings together simplicity and authenticity that you don’t often find in traditional mooncake recipes.
- Quick & Easy: Comes together in about 2 hours, including resting and baking—perfect for those festive last-minute preparations.
- Simple Ingredients: You likely have most of these pantry staples on hand, no fancy shopping required.
- Perfect for Mid-Autumn Festival: Ideal for celebrations, gifting, or just treating yourself to a classic delight.
- Crowd-Pleaser: The rich red bean paste paired with the salted egg yolk filling always gets rave reviews—kids and adults alike can’t resist.
- Unbelievably Delicious: That perfectly balanced texture—crispy crust with smooth, flavorful filling—is next-level comfort food.
What sets this recipe apart? It’s the attention to detail—the dough is tender but sturdy, the red bean paste is homemade and silky smooth, and the salted egg yolks are roasted to just the right firmness. This isn’t just another mooncake recipe; it’s the best version you’ll find that honors tradition while being manageable in a home kitchen. You know what? This recipe isn’t just good—it’s the kind that makes you close your eyes after the first bite, savoring every nuance. Whether you’re impressing guests or enjoying a quiet moment, it brings that soul-soothing satisfaction everyone craves.
What Ingredients You Will Need
This recipe uses simple, wholesome ingredients to deliver bold flavor and satisfying texture without the fuss. Most are pantry staples, with a few special touches to keep it authentic and delicious.
- For the Dough:
- All-purpose flour – 250 grams (2 cups)
- Golden syrup – 180 grams (3/4 cup) (adds sweetness and moisture; I recommend Lyle’s Golden Syrup for the best texture)
- Vegetable oil – 60 ml (1/4 cup) (use neutral oils like canola or sunflower)
- Alkaline water (lye water) – 1 tsp (helps create that tender, chewy crust)
- For the Red Bean Filling:
- Adzuki beans – 200 grams (1 cup), soaked overnight
- Sugar – 150 grams (3/4 cup) (adjust to taste)
- Vegetable oil – 2 tbsp (for smoothness)
- Salt – a pinch (to balance sweetness)
- For the Salted Egg Yolks:
- Salted duck egg yolks – 8, roasted and halved (available at Asian markets or homemade if you’re adventurous)
- For the Egg Wash:
- Egg yolk – 1, beaten with 1 tsp water (for that beautiful golden finish)
If you’re short on time, store-bought red bean paste can be used, but nothing beats homemade. For a gluten-free twist, almond flour can replace all-purpose flour, but expect a different texture. Also, if you prefer a vegan version, skip the salted egg yolks and consider adding some chopped nuts or dried fruits to the bean paste instead.
Equipment Needed
- Mooncake molds (wooden or plastic) – essential to get that signature shape and pattern. If you don’t have one, a silicone mold or even small cookie cutters can work in a pinch.
- Mixing bowls – for dough and filling preparation.
- Rolling pin – to flatten the dough evenly.
- Steamer or saucepan – needed if you decide to steam the bean paste (some recipes do).
- Baking tray and parchment paper – for baking the mooncakes.
- Brush – for applying egg wash evenly.
Personally, I’ve had great success with a medium-sized wooden mooncake mold—it’s durable and easy to clean. If you’re on a budget, plastic molds do the trick and are easier to find online. Remember to lightly dust the mold with flour before pressing the dough to prevent sticking. Keeping your tools well-maintained means your mooncakes come out clean and beautiful every time.
Preparation Method

- Prepare the Red Bean Paste (if making from scratch): Drain soaked adzuki beans and rinse well. Boil in a pot with fresh water until beans are soft (about 1 hour). Drain and mash or blend the beans until smooth. Transfer to a pan, add sugar, oil, and a pinch of salt, then cook on low heat, stirring constantly until thick and paste-like (about 15 minutes). Let cool completely. (Tip: For a silkier texture, pass the paste through a fine sieve.)
- Roast the Salted Egg Yolks: Preheat oven to 350°F (175°C). Place halved salted egg yolks on a baking tray lined with parchment paper. Roast for 5-7 minutes until firm but not dry. Let cool.
- Make the Dough: In a large bowl, combine golden syrup, vegetable oil, and alkaline water. Stir well. Gradually add the all-purpose flour, mixing until a soft dough forms. Knead gently until smooth but not sticky (about 5 minutes). Cover with plastic wrap and let rest for at least 30 minutes.
- Assemble the Mooncakes: Divide the dough into 40-45 gram (1.4-1.6 oz) portions. Similarly, divide the red bean paste into 30-35 gram (1.1-1.2 oz) portions. Flatten a dough ball into a disc, place a portion of red bean paste in the center, then press half a salted egg yolk on top of the paste. Enclose the filling completely with the dough and gently roll into a smooth ball.
- Shape with the Mold: Lightly dust the mooncake mold with flour. Place the filled dough ball into the mold, press firmly to create the pattern, then gently release onto the baking tray. Repeat with remaining portions.
- Apply Egg Wash and Bake: Preheat oven to 350°F (175°C). Brush the top of each mooncake lightly with the egg wash. Bake for 10 minutes, remove from oven, brush another layer of egg wash, then bake for an additional 15-20 minutes or until golden brown.
- Cool and Rest: Let the mooncakes cool on a wire rack. Ideally, allow them to rest for 1-2 days in an airtight container to let the crust soften and flavors meld. (Patience pays off!)
If you notice the dough cracking during shaping, it might be too dry—try resting it a bit longer or adding a teaspoon of oil. The mooncakes should look glossy and have a deep golden color when done. You’ll know they’re ready when they smell fragrant and feel firm but not hard.
Cooking Tips & Techniques
Mooncake making is an art, but you don’t have to be a pro to get great results. Here are some tips I’ve picked up over the years:
- Don’t rush the dough resting: It allows the gluten to relax, making the dough easier to work with and less prone to cracking.
- Use the right golden syrup: Not all syrups are created equal. I always go for a high-quality brand to get that perfect sweetness and texture.
- Light dusting of flour on molds: Prevents sticking but avoid too much flour, which can dull the pattern.
- Egg wash timing: Brush once halfway through baking and once more before finishing for that signature glossy look.
- Watch the oven temperature: Too hot and the crust burns; too cool and it won’t brown properly. A steady 350°F (175°C) works best.
- Multitasking: While the bean paste simmers, prep your dough ingredients to save time.
One time, I tried skipping the egg wash—big mistake. The crust turned out pale and dull, and that shiny golden finish was missing. Lesson learned! Also, the salted yolks can dry out if over-roasted, so keep a close eye during that quick bake. These small details make all the difference.
Variations & Adaptations
Not a fan of red bean or salted egg yolk? No worries! Mooncakes are versatile, and there are plenty of ways to make this recipe your own:
- Lotus Seed Paste Filling: Swap the red bean paste with smooth lotus seed paste for a classic alternative. You can find pre-made paste or make your own by simmering lotus seeds until soft.
- Snow Skin Mooncakes: Instead of baking, try this recipe with a glutinous rice flour dough for a cooler, chewy texture. Great for summer festivals and those avoiding baking.
- Vegan Option: Skip the salted egg yolk and add chopped nuts or dried fruits like dried cranberries or dates to the red bean paste for texture and flavor.
- Chocolate Twist: Mix cocoa powder into the dough or add a small piece of dark chocolate inside the filling for a fusion mooncake.
Personally, I once tried swapping salted egg yolks with small salted nuts for a crunchy surprise—my family loved the unexpected texture! Adjust the sweetness or saltiness to your liking, and don’t be afraid to experiment with festive themes by adding natural food coloring to the dough.
Serving & Storage Suggestions
Mooncakes are best enjoyed at room temperature or slightly warmed to bring out the flavors. Serve them alongside hot tea—jasmine, oolong, or pu-erh are perfect companions that balance the richness.
If sharing at a gathering, arrange them on a decorative platter with fresh flowers or lanterns for that festive vibe. They also make wonderful gifts wrapped in pretty boxes, especially during Mid-Autumn Festival.
Store leftover mooncakes in an airtight container at room temperature for up to 3 days. For longer storage, keep them in the refrigerator for up to a week, but bring them back to room temperature before eating to soften the crust.
To reheat, pop them in a preheated oven at 300°F (150°C) for 5-7 minutes or microwave briefly on low power. Overheating can dry them out, so watch closely. Over time, the flavors meld beautifully—the filling becomes creamier, and the crust softens, making every bite even more satisfying.
Nutritional Information & Benefits
Each traditional mooncake (about 90 grams) contains roughly 300-350 calories, depending on filling and size. The red bean paste provides a good source of plant-based protein and fiber, while salted egg yolks add richness and a dose of essential minerals like selenium.
This recipe is free from artificial preservatives and made with minimal processing. For those watching gluten intake, almond or rice flour substitutions can make this recipe more accessible, though texture will vary.
While these mooncakes are a treat and should be enjoyed in moderation, their homemade nature means you control the ingredients and can adjust sugar levels to suit your dietary needs. Personally, I find these mooncakes to be a wholesome way to celebrate tradition without feeling overly indulgent.
Conclusion
All in all, this perfect traditional mooncakes recipe with rich red bean and salted egg yolk filling offers a delicious way to connect with heritage and impress your loved ones. It’s approachable, rewarding, and absolutely worth the time spent in the kitchen. Feel free to customize the fillings or dough to fit your tastes—this recipe is as forgiving as it is delightful.
I love these mooncakes because they bring my family together, remind me of childhood festivals, and taste like pure happiness wrapped in pastry. If you give this recipe a try, I’d love to hear how your mooncakes turn out—drop a comment below or share your own twists!
Happy baking, and may your mooncakes be golden, fragrant, and full of joy.
Frequently Asked Questions
What is the best way to store homemade mooncakes?
Store them in an airtight container at room temperature for up to 3 days, or refrigerate for up to a week. Always bring to room temperature before serving for the best texture.
Can I use canned red bean paste instead of making it from scratch?
Absolutely! Canned or store-bought red bean paste can save time and still taste great. Just make sure it’s smooth and not too sweet.
How do I prevent the mooncake crust from cracking?
Rest the dough for at least 30 minutes before shaping to relax the gluten. Also, avoid over-flouring the dough and handle it gently when wrapping the filling.
Can I freeze mooncakes?
Yes, you can freeze unbaked assembled mooncakes for up to a month. Thaw completely before baking. Baked mooncakes freeze well too but may lose some crust crispness.
What if I don’t have salted egg yolks?
You can omit them for a pure red bean mooncake or substitute with chopped nuts, dried fruits, or even custard filling for a different flavor.
Pin This Recipe!
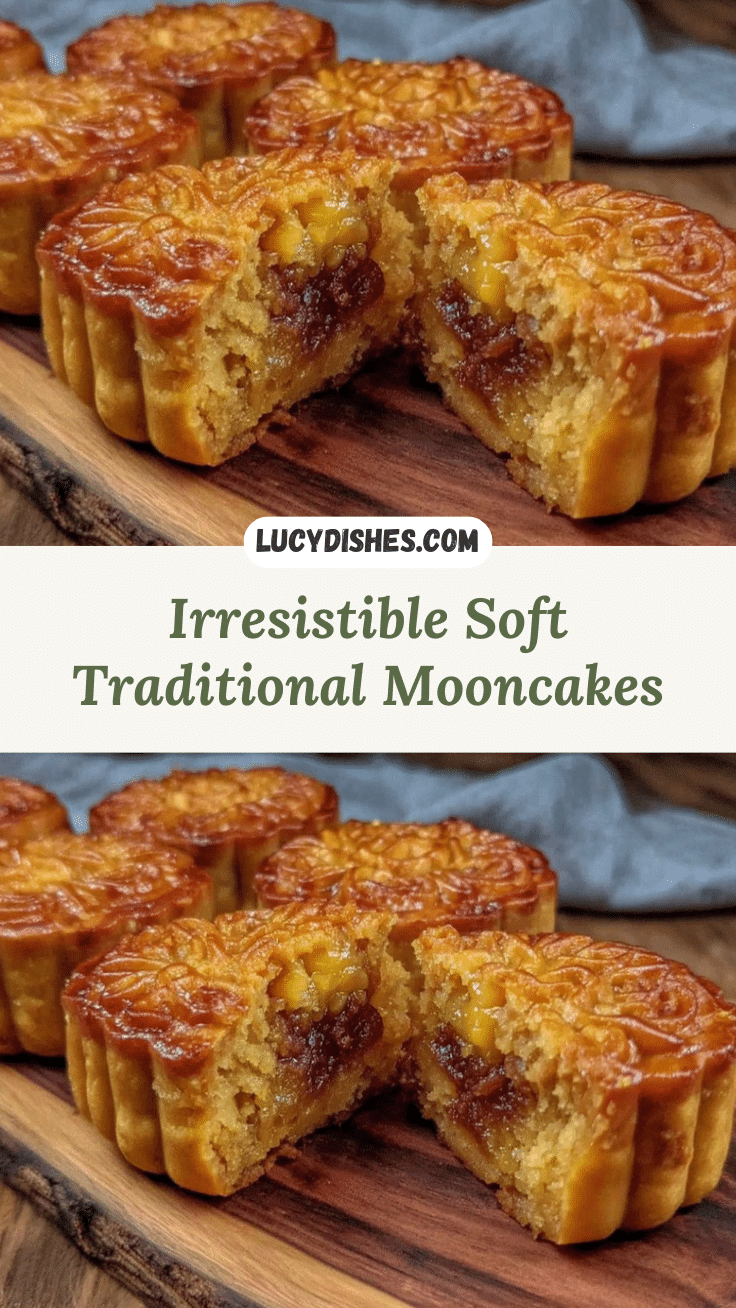
Perfect Traditional Mooncakes Recipe with Rich Red Bean and Salted Egg Yolk Filling Made Easy

This traditional mooncake recipe features a tender, golden crust filled with smooth homemade red bean paste and a surprise salted egg yolk center. Perfect for Mid-Autumn Festival celebrations, it combines authentic flavors with an approachable method.
- Prep Time: 45 minutes
- Cook Time: 1 hour 15 minutes
- Total Time: 2 hours
- Yield: 12 mooncakes (about 4 servings)
- Category: Dessert
- Cuisine: Chinese
Ingredients
- All-purpose flour – 250 grams (2 cups)
- Golden syrup – 180 grams (3/4 cup)
- Vegetable oil – 60 ml (1/4 cup)
- Alkaline water (lye water) – 1 tsp
- Adzuki beans – 200 grams (1 cup), soaked overnight
- Sugar – 150 grams (3/4 cup)
- Vegetable oil – 2 tbsp
- Salt – a pinch
- Salted duck egg yolks – 8, roasted and halved
- Egg yolk – 1, beaten with 1 tsp water
Instructions
- Prepare the Red Bean Paste: Drain soaked adzuki beans and rinse well. Boil in a pot with fresh water until beans are soft (about 1 hour). Drain and mash or blend the beans until smooth. Transfer to a pan, add sugar, oil, and a pinch of salt, then cook on low heat, stirring constantly until thick and paste-like (about 15 minutes). Let cool completely.
- Roast the Salted Egg Yolks: Preheat oven to 350°F (175°C). Place halved salted egg yolks on a baking tray lined with parchment paper. Roast for 5-7 minutes until firm but not dry. Let cool.
- Make the Dough: In a large bowl, combine golden syrup, vegetable oil, and alkaline water. Stir well. Gradually add the all-purpose flour, mixing until a soft dough forms. Knead gently until smooth but not sticky (about 5 minutes). Cover with plastic wrap and let rest for at least 30 minutes.
- Assemble the Mooncakes: Divide the dough into 40-45 gram (1.4-1.6 oz) portions. Similarly, divide the red bean paste into 30-35 gram (1.1-1.2 oz) portions. Flatten a dough ball into a disc, place a portion of red bean paste in the center, then press half a salted egg yolk on top of the paste. Enclose the filling completely with the dough and gently roll into a smooth ball.
- Shape with the Mold: Lightly dust the mooncake mold with flour. Place the filled dough ball into the mold, press firmly to create the pattern, then gently release onto the baking tray. Repeat with remaining portions.
- Apply Egg Wash and Bake: Preheat oven to 350°F (175°C). Brush the top of each mooncake lightly with the egg wash. Bake for 10 minutes, remove from oven, brush another layer of egg wash, then bake for an additional 15-20 minutes or until golden brown.
- Cool and Rest: Let the mooncakes cool on a wire rack. Ideally, allow them to rest for 1-2 days in an airtight container to let the crust soften and flavors meld.
Notes
Rest the dough for at least 30 minutes to prevent cracking. Use high-quality golden syrup for best texture and sweetness. Lightly dust molds with flour to prevent sticking but avoid excess flour to keep patterns sharp. Brush egg wash twice during baking for a glossy finish. Roast salted egg yolks carefully to avoid drying out. Allow mooncakes to rest 1-2 days for best flavor and texture.
Nutrition
- Serving Size: One mooncake (about
- Calories: 325
- Sugar: 20
- Sodium: 250
- Fat: 12
- Saturated Fat: 3
- Carbohydrates: 45
- Fiber: 4
- Protein: 7
Keywords: mooncakes, traditional mooncakes, red bean paste, salted egg yolk, Mid-Autumn Festival, baking, Asian dessert


