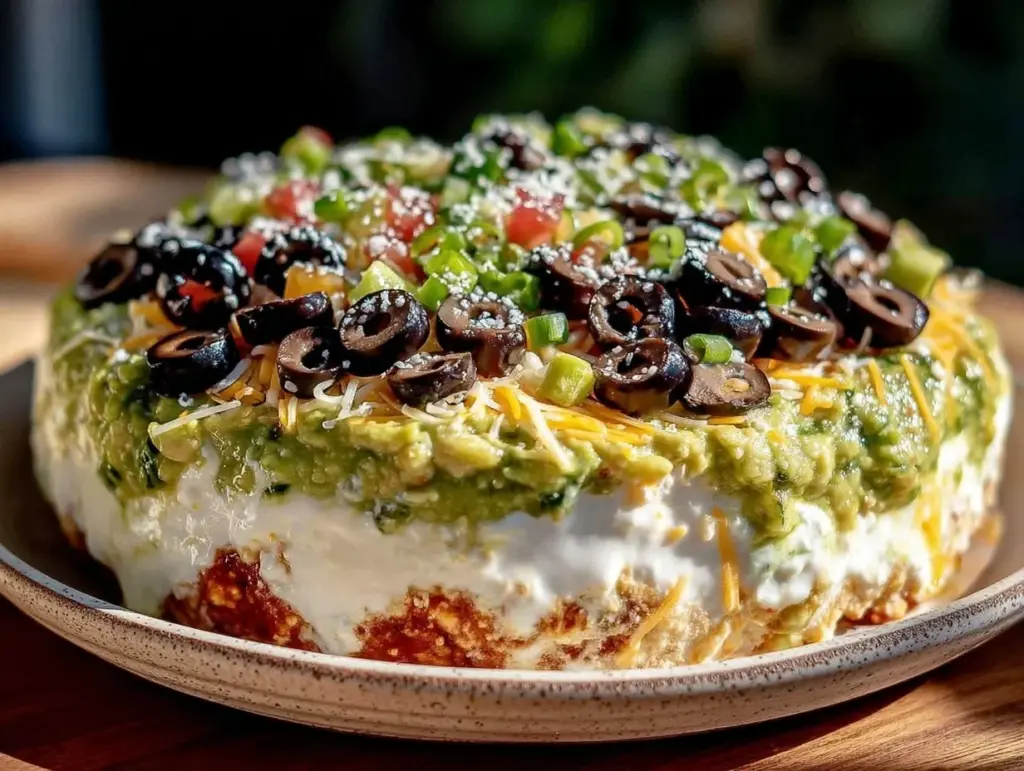
Let me tell you, the sight of this creamy seven layer dip spread out in a vibrant glass dish is enough to make any party guest’s mouth water. The layers—each bursting with color and flavor—come together like a little masterpiece of snacking joy. The first time I whipped this up, I was instantly hooked; it was one of those rare moments where you pause, take a deep breath, and just smile because you know you’re onto something truly special. Years ago, when I was knee-high to a grasshopper, my grandma used to make a dip that tasted close to this, but I never quite captured that magic until I tried this recipe during a rainy weekend experiment. Honestly, it feels like a warm hug wrapped in every bite.
My family couldn’t stop sneaking spoonfuls off the platter before the official start of the party (and I can’t really blame them). You know what’s great? This creamy seven layer dip recipe is dangerously easy to prepare but offers pure, nostalgic comfort that brightens up any occasion. Whether you’re hosting a casual get-together, need a sweet treat for your kids’ game night, or want to brighten up your Pinterest cookie board with something savory, this dip fits the bill. I’ve tested it multiple times in the name of research, of course, and it’s become a staple for family gatherings and gifting alike. You’re going to want to bookmark this one for your next party or snack attack!
Why You’ll Love This Recipe
This creamy seven layer dip recipe isn’t just another dip—it’s the kind that gets rave reviews from everyone who tries it. From my experience as a home cook who’s tried countless party snacks, here’s what you’re in for:
- Quick & Easy: Comes together in under 20 minutes, perfect for busy weeknights or last-minute cravings.
- Simple Ingredients: No fancy grocery trips needed; you likely already have everything in your kitchen.
- Perfect for Parties: Great for potlucks, game days, or casual hangouts with friends.
- Crowd-Pleaser: Always gets rave reviews from kids and adults alike—trust me, it disappears fast!
- Unbelievably Delicious: The creamy texture paired with fresh, zesty toppings is comfort food at its best.
What makes this recipe stand out? It’s all about the balance: a smooth, rich base layered with fresh, crisp veggies and just the right kick from spices and salsa. I blend the cream cheese and sour cream for an ultra-smooth texture that’s way better than your typical chunky dips. Plus, with a little twist—like swapping in Greek yogurt for a tangier, healthier option—you get a dip that’s both comforting and fresh. It’s the kind of recipe that makes you close your eyes after the first bite and say, “Yep, this is it.” Perfect for impressing guests without stress, or turning a simple snack into something memorable.
What Ingredients You Will Need
This recipe uses simple, wholesome ingredients to deliver bold flavor and satisfying texture without the fuss. Most are pantry staples, and you can swap a few to suit your preferences or dietary needs.
- For the creamy base:
- 8 oz (225g) cream cheese, softened (I prefer Philadelphia for smoothness)
- 1 cup (240ml) sour cream (or substitute with plain Greek yogurt for tang)
- 1 packet (1 oz/28g) taco seasoning mix (choose your favorite brand for best flavor)
- For the layers:
- 1 cup (170g) refried beans (warm slightly for easy spreading)
- 1 cup (100g) shredded cheddar cheese
- 1 cup (120g) shredded lettuce (crisp iceberg or romaine works well)
- 1 medium tomato, diced (opt for ripe Roma for less juice)
- 1/2 cup (80g) sliced black olives
- 1/4 cup (40g) chopped green onions (adds fresh bite)
- Optional: 1/4 cup (60g) sliced jalapeños for a spicy kick
- For serving:
- Assorted tortilla chips (look for sturdy, thick chips to hold up to the dip)
Feel free to swap refried beans for black beans if you want a chunkier texture or use dairy-free sour cream to make it vegan-friendly. In summer, fresh tomatoes and crisp lettuce make this dip shine, while in winter canned beans and olives keep it easy and tasty. Just remember, the cream cheese and sour cream combo is key for that creamy foundation that holds the layers together.
Equipment Needed
- Glass or clear acrylic 9-inch (23 cm) round or square baking dish – this lets you show off the layers beautifully.
- Mixing bowls – at least two, one for the creamy base and one for mixing beans or veggies.
- Spatula or butter knife for spreading layers smoothly.
- Measuring cups and spoons for precise ingredient amounts.
- Sharp knife and cutting board for dicing tomatoes and chopping green onions.
- Optional: Electric mixer – helpful for whipping cream cheese and sour cream quickly, but a sturdy spoon works fine too.
If you don’t have a glass dish, a shallow ceramic or even a trifle bowl can work. I’ve even used a clear plastic container for potluck trips—just remember to keep it covered. For budget-friendly picks, you can find great mixing bowls and dishes at thrift stores or discount kitchen shops. Personally, investing in a good-quality glass dish has been worth it for how it makes the dip look and helps with even layering.
Preparation Method
- Prepare the creamy base (10 minutes): In a medium bowl, soften the cream cheese by letting it sit at room temperature for about 30 minutes or microwave it for 15 seconds (don’t overdo it). Then, mix in 1 cup (240ml) sour cream and the entire 1 oz (28g) packet of taco seasoning until smooth and well combined. The mixture should be creamy and slightly tangy. If you want extra zing, add a squeeze of fresh lime juice (about 1 teaspoon).
- Spread the refried beans (5 minutes): Warm the refried beans in the microwave for 20-30 seconds to make spreading easier. In your clear serving dish, spread the beans evenly in a thin layer (about 1 cup or 170g). This layer adds a nice heartiness and depth of flavor to the dip.
- Add the creamy layer (5 minutes): Carefully spoon the cream cheese mixture over the refried beans and spread gently to cover the beans entirely. The goal here is a smooth, even layer. If you want a neater look, use the back of a spoon to smooth the surface.
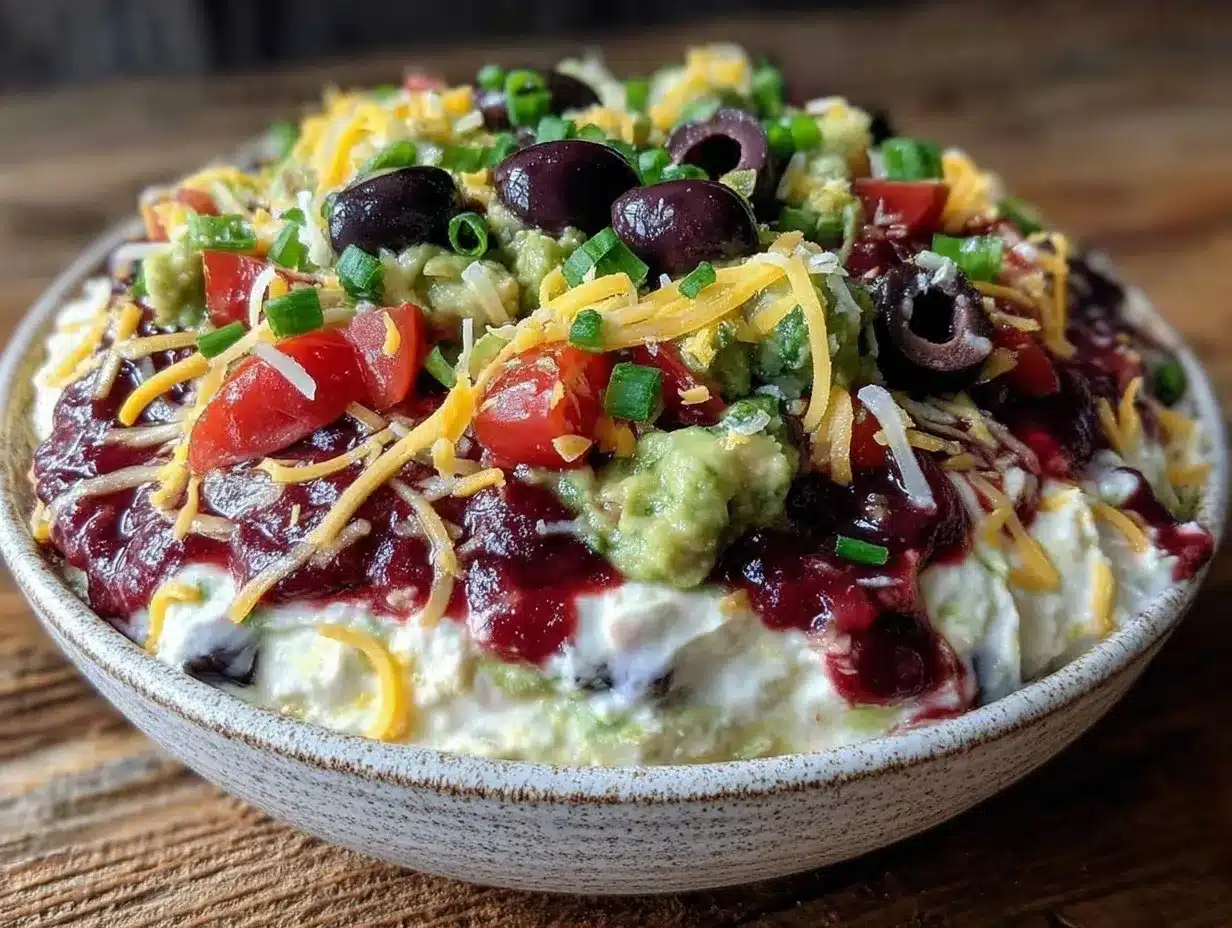
- Layer the toppings (10 minutes): Sprinkle 1 cup (100g) shredded cheddar cheese evenly over the creamy base. Follow with 1 cup (120g) shredded lettuce, then add the diced tomato (1 medium tomato), sliced black olives (1/2 cup or 80g), and chopped green onions (1/4 cup or 40g). If you like heat, scatter sliced jalapeños over the top. Each layer adds a fresh texture and burst of flavor, so don’t rush this part.
- Chill and serve (at least 30 minutes): Cover the dip with plastic wrap and refrigerate for at least 30 minutes to let the flavors meld together. This step is crucial—trust me, the dip tastes better the next day, but if you’re in a hurry, 30 minutes will do. Serve chilled with your favorite tortilla chips or veggie sticks for dipping.
If you notice the cream cheese mixture is too thick, add a little milk (1 tablespoon at a time) to loosen it up. On the other hand, if it’s too runny, a bit more cream cheese will thicken things right up. The layers should be visible and vibrant, so take your time spreading each one.
Cooking Tips & Techniques
Here are some tricks I’ve picked up from many dip experiments and party mishaps:
- Softening cream cheese properly: Don’t rush this or you’ll end up with lumps. Room temperature is best, but a quick microwave zap for 10-15 seconds works wonders.
- Layer evenly: Use a spatula or the back of a spoon to smooth layers so they don’t mix and lose that signature look. It’s part of the fun to see the beautiful layers peek through.
- Don’t overload the top: Too many juicy veggies can make the dip watery. Dice tomatoes finely and pat them dry with a paper towel before layering.
- Chill time is key: The dip tastes best after resting in the fridge. This lets the flavors meld and thicken the creamy layer, making it easier to scoop.
- Multitasking: Prep veggies while your cream cheese softens to save time. I usually get the toppings ready first, then whip up the base so everything comes together smoothly.
- Don’t skip the taco seasoning: It’s the secret star that brings depth and a little spice. Homemade blends work too if you want to control salt and heat.
One time, I accidentally added too much jalapeño and had to serve it with plenty of chips and sour cream to cool things down. Lesson learned: start small and add heat gradually!
Variations & Adaptations
This creamy seven layer dip recipe is wonderfully flexible. Here are some ways I’ve played with it:
- Vegetarian & Vegan: Swap refried beans for black beans, use dairy-free cream cheese and sour cream alternatives, and add extra veggies like corn or avocado slices.
- Low-carb version: Replace refried beans with mashed cauliflower or a mix of cream cheese and shredded chicken for a dip that’s keto-friendly.
- Spicy twist: Add a layer of chipotle salsa or sprinkle cayenne pepper into the creamy base for more heat. A few dashes of hot sauce in the mix work great too.
- Seasonal flavors: In summer, toss in fresh corn kernels and diced avocado for a bright, fresh feel. In fall, try adding a layer of roasted pumpkin puree seasoned with cumin for a cozy touch.
- Personal favorite: I once swapped the shredded cheddar for a blend of pepper jack and mozzarella—totally creamy and melty, a real crowd-pleaser!
Feel free to customize the layers based on what you have on hand or your taste buds’ mood. That’s the beauty of this recipe—it’s forgiving and fun!
Serving & Storage Suggestions
Serve this creamy seven layer dip chilled or at room temperature—both work well but chilling helps the layers hold their shape better. Present it in a clear dish with colorful tortilla chips, sturdy enough to scoop without breaking. I like pairing it with fresh veggie sticks like celery, bell peppers, and cucumber for a refreshing crunch.
If you have leftovers (rare, I know!), cover the dish tightly with plastic wrap or transfer the dip to an airtight container. Store in the refrigerator for up to 3 days. The flavors actually deepen after a day, so leftovers can be even better. When ready to serve again, let it sit at room temperature for 15-20 minutes before scooping, or give it a gentle stir to refresh the layers.
For longer storage, you can freeze the creamy base mixture (without fresh veggies) in a sealed container for up to 1 month. Thaw overnight in the fridge and reassemble the layers fresh before serving to keep that crisp texture.
Nutritional Information & Benefits
Per serving (about 1/8 of the recipe), this creamy seven layer dip provides roughly:
| Calories | Fat | Protein | Carbohydrates | Fiber |
|---|---|---|---|---|
| 220 kcal | 15g | 8g | 12g | 4g |
Key ingredients like black beans and veggies add fiber and plant-based protein, while the cream cheese and sour cream provide calcium and a creamy texture. Using Greek yogurt can boost protein and reduce fat content if you want a lighter option. This recipe is naturally gluten-free, but always check seasoning labels if you have allergies.
From my wellness perspective, having a dip that combines fresh veggies with creamy goodness makes snack time feel indulgent yet balanced. It’s a great way to sneak some extra fiber and nutrients into your party spread without sacrificing flavor.
Conclusion
This creamy seven layer dip recipe is definitely worth trying if you want an easy, crowd-pleasing snack that feels both comforting and fresh. You can customize it to fit your taste—whether you crave spicy, mild, or something in-between. I love how this recipe brings people together, sparks smiles, and makes any gathering feel a little more special. So, grab your mixing bowl, invite your favorite folks over, and get ready to enjoy a dip that’s creamy, crunchy, colorful, and utterly delicious.
Feel free to leave a comment sharing your favorite twist or how your party went with this dip. Don’t forget to share the recipe with friends who love a good snack, too—you’re going to want to keep this one handy. Remember, good food is all about fun and flavor, and this dip is just that. Happy dipping!
FAQs About Creamy Seven Layer Dip
What can I use instead of refried beans?
You can substitute black beans, pinto beans, or even mashed chickpeas for a different texture and flavor. Just warm and mash them slightly before layering.
How long can I store the dip in the fridge?
Stored in an airtight container or covered dish, the dip lasts up to 3 days. For best texture, consume within that time frame and keep fresh veggies on top.
Can I make this dip vegan?
Absolutely! Use dairy-free cream cheese and sour cream alternatives, swap refried beans for black beans, and add plenty of fresh veggies for a tasty vegan version.
What’s the best way to serve this dip?
Serve chilled or at room temperature with sturdy tortilla chips or fresh veggie sticks. It pairs well with cold beverages like iced tea or light beer.
Can I prepare this dip ahead of time?
Yes! Prepare all layers except fresh veggies a day in advance. Add lettuce, tomato, and green onions just before serving to keep them crisp.
Pin This Recipe!

Creamy Seven Layer Dip

A quick and easy creamy seven layer dip perfect for parties, combining a smooth base with fresh veggies and bold flavors for a nostalgic, crowd-pleasing snack.
- Prep Time: 15 minutes
- Cook Time: 0 minutes
- Total Time: 45 minutes
- Yield: 8 servings 1x
- Category: Appetizer
- Cuisine: American
Ingredients
- 8 oz cream cheese, softened
- 1 cup sour cream (or plain Greek yogurt for tang)
- 1 packet (1 oz) taco seasoning mix
- 1 cup refried beans (warm slightly for easy spreading)
- 1 cup shredded cheddar cheese
- 1 cup shredded lettuce (iceberg or romaine)
- 1 medium tomato, diced
- 1/2 cup sliced black olives
- 1/4 cup chopped green onions
- Optional: 1/4 cup sliced jalapeños
- Assorted tortilla chips for serving
Instructions
- Prepare the creamy base: Soften cream cheese at room temperature or microwave for 15 seconds. Mix in sour cream and taco seasoning until smooth. Optionally add 1 teaspoon fresh lime juice.
- Warm refried beans for 20-30 seconds and spread evenly in a thin layer in a clear serving dish.
- Spoon the cream cheese mixture over the beans and spread gently to cover evenly.
- Layer shredded cheddar cheese, shredded lettuce, diced tomato, sliced black olives, chopped green onions, and optional jalapeños evenly on top.
- Cover with plastic wrap and refrigerate for at least 30 minutes before serving. Serve chilled with tortilla chips or veggie sticks.
Notes
Soften cream cheese properly to avoid lumps. Warm refried beans slightly for easier spreading. Chill dip for at least 30 minutes to meld flavors and improve texture. Use a spatula or back of a spoon to layer evenly. Dice tomatoes finely and pat dry to avoid watery dip. Adjust cream cheese or milk to achieve desired creaminess. Substitute ingredients to fit dietary needs or preferences.
Nutrition
- Serving Size: About 1/8 of the rec
- Calories: 220
- Fat: 15
- Carbohydrates: 12
- Fiber: 4
- Protein: 8
Keywords: seven layer dip, creamy dip, party snack, easy dip, taco seasoning, layered dip, appetizer, crowd-pleaser


