
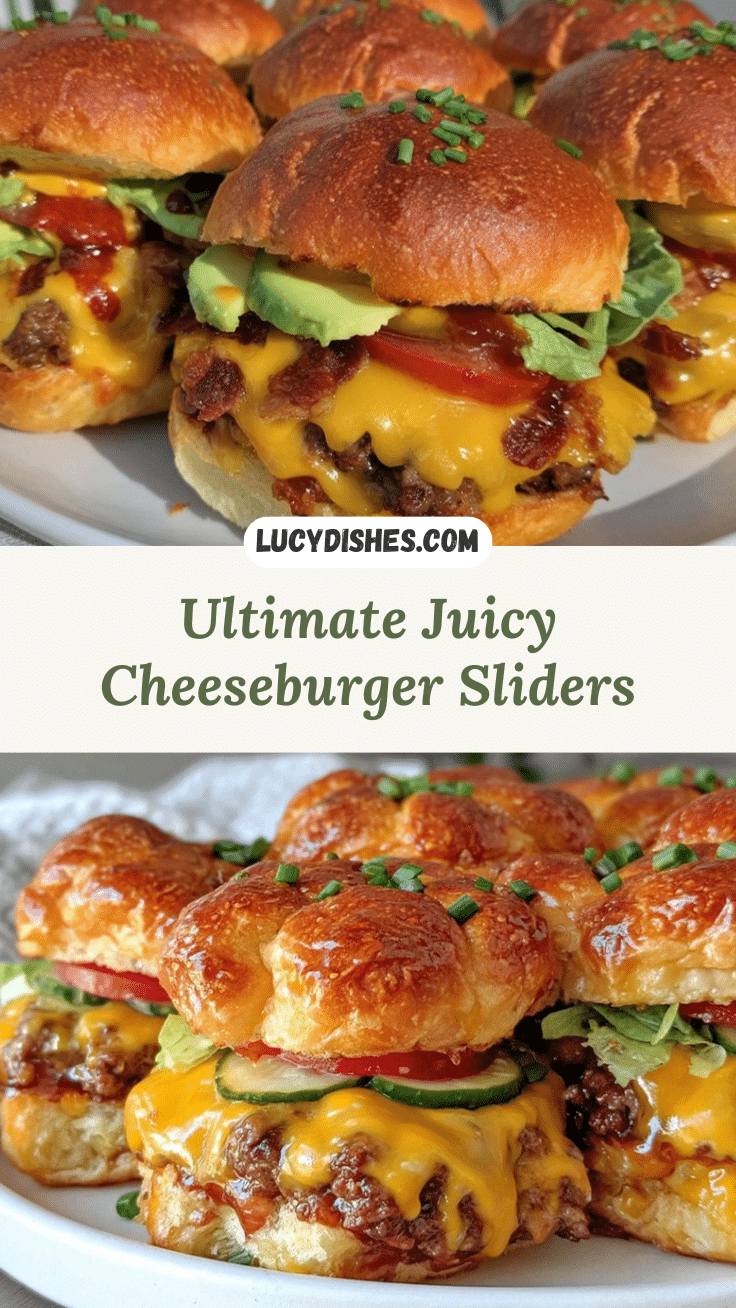
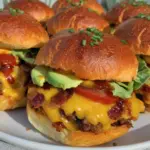
Picture this: The unmistakable aroma of sizzling beef, sharp cheddar melting into gooey perfection, and pillowy slider buns warming in the oven—all mingling together in your kitchen. The first time I made these loaded All-American cheeseburger sliders, the whole house was filled with that classic burger joint scent (you know, the one that makes your stomach grumble even if you’re not hungry). I was instantly hooked. There’s something about the way the juices from the beef mingle with the melted cheese and tangy pickles that just makes every bite a mini celebration.
Honestly, these cheeseburger sliders have become my secret weapon for parties and game nights. Years ago, when I was knee-high to a grasshopper, my grandma used to whip up her version of mini burgers for family get-togethers—messy, buttery, and always gone too soon. I tried to recreate that feeling one rainy weekend, and, let’s face it, I wish I’d stumbled on this easy loaded party appetizer recipe sooner. It’s the kind of moment where you pause, take a deep breath, and just smile because you know you’re onto something truly special. My kids couldn’t stop sneaking them off the cooling rack (and, to be fair, neither could I).
These sliders are dangerously easy to make, offer pure, nostalgic comfort, and are perfect for potlucks, birthday bashes, or just to brighten up your Pinterest board. Whether you’re hosting a backyard barbecue or need a sweet treat for your kid’s sleepover, this flavorful loaded All-American cheeseburger sliders recipe fits the bill. I’ve tested them more times than I care to admit (in the name of research, of course), and now they’re a staple for family gatherings, gifting, and late-night cravings. Trust me, if you’re looking for a warm hug in slider form, you’re going to want to bookmark this one!
Why You’ll Love This Recipe
When it comes to party appetizers, these All-American cheeseburger sliders stand out for more reasons than just their irresistible flavor. After testing dozens of slider recipes as a recipe developer—and, honestly, after more than a few failed batches—I can say with confidence that this one brings together everything you want in finger food. Here’s why you’ll be sneaking seconds:
- Quick & Easy: You can whip these up in under 45 minutes, which is perfect for those last-minute gatherings or when you realize you forgot to plan a snack for the big game.
- Simple Ingredients: No fancy grocery store runs required—just grab what’s already in your fridge and pantry.
- Perfect for Parties: These sliders are the ultimate party appetizer. Whether it’s a birthday, a tailgate, or a family movie night, they’ll fit right in.
- Crowd-Pleaser: Kids love them, adults love them, and even picky eaters find themselves reaching for one more. Trust me, I’ve seen it happen!
- Unbelievably Delicious: The combination of seasoned beef, gooey cheese, and classic toppings is next-level comfort food. Each bite bursts with flavor and nostalgia.
What makes this loaded All-American cheeseburger sliders recipe different? It’s the layering technique—pressing the beef into a pan for even cooking, then topping with a generous layer of cheese and those signature burger toppings before baking. No dry patties, no soggy bread. It’s also customizable: swap the buns for gluten-free, change the cheese, or add your favorite pickles. The best part? It’s the kind of recipe that makes you close your eyes after the first bite, savoring every morsel. It’s comfort food, but faster, and with all the soul-soothing satisfaction you crave.
If you’re out to impress guests without the stress, this party appetizer delivers. It turns a simple meal into something memorable. My chef friends say it’s all in the details—trust me, this recipe nails them all.
What Ingredients You Will Need
This flavorful loaded All-American cheeseburger sliders recipe relies on simple, wholesome ingredients that come together for bold flavor and melt-in-your-mouth texture. Most of these are pantry staples, and you can easily swap or adjust based on what you have.
- For the Beef Layer:
- 1 ½ pounds (680g) ground beef (80/20 blend for juiciness)
- 1 teaspoon kosher salt
- ½ teaspoon black pepper (freshly cracked if possible)
- ½ teaspoon garlic powder
- ½ teaspoon onion powder
- 1 tablespoon Worcestershire sauce (adds depth)
- For the Cheese & Toppings:
- 8 ounces (225g) sharp cheddar cheese, sliced or shredded (I like Cabot or Tillamook for best melt)
- ¼ cup (60ml) ketchup
- 2 tablespoons yellow mustard
- ½ cup (75g) dill pickle chips or slices (crunchy, not sweet!)
- ½ cup (60g) finely chopped onion (optional, but so good)
- ½ cup (75g) tomato slices (thinly sliced, for juiciness)
- For the Buns:
- 12 slider buns or Hawaiian rolls (soft, not too sweet)
- 2 tablespoons unsalted butter, melted (for brushing)
- 1 tablespoon sesame seeds (optional, for classic look)
- For Garnish (Optional):
- Lettuce leaves (crisp, for layering)
- Crumbled bacon (for a loaded twist)
- Jalapeño slices (for a spicy kick)
If you need substitutions, you can use ground turkey or chicken for a lighter option, dairy-free cheese for allergies, or gluten-free slider buns. I’ve tried King’s Hawaiian for a slightly sweet touch, but brioche or potato rolls work just as well. For summer parties, swap tomato with grilled red pepper for smoky flavor. My tip: Always buy extra pickles—they disappear fast!
Equipment Needed
Making these All-American cheeseburger sliders doesn’t require any fancy gear. Here’s what you’ll need:
- 13×9-inch (33x23cm) baking pan: Essential for pressing and baking the sliders evenly. I use a nonstick metal pan, but glass works too—just watch for sticking.
- Large mixing bowl: For combining the beef and seasonings.
- Spatula or wooden spoon: Helps spread the beef mixture smoothly.
- Sharp knife: For slicing buns and toppings. If you don’t own a bread knife, a regular chef’s knife will do with a gentle sawing motion.
- Small brush: For buttering the buns. I’ve used everything from silicone brushes to the back of a spoon—no judgment.
- Aluminum foil: Handy for covering the pan during baking to keep the sliders moist.
If you don’t have a baking pan, you can use a rimmed baking sheet and form the beef into a rectangle. For budget-friendly options, check thrift stores for sturdy pans. Maintenance tip: soak your pan immediately after use to prevent stuck-on cheese—it saves so much scrubbing!
Preparation Method

- Preheat Oven: Set your oven to 350°F (175°C). While it heats, grease your 13×9-inch pan lightly with butter or nonstick spray.
- Prepare Beef Mixture: In a large bowl, combine 1 ½ pounds (680g) ground beef, 1 teaspoon salt, ½ teaspoon black pepper, ½ teaspoon garlic powder, ½ teaspoon onion powder, and 1 tablespoon Worcestershire sauce. Mix gently—don’t overwork, or the beef gets tough. The mixture should smell savory and look evenly blended.
- Press Beef Into Pan: Spread the beef mixture into the pan, pressing into an even layer about ½-inch (1.25cm) thick. Try to reach all corners. If the beef cracks, just patch it with your fingers.
- Bake Beef Layer: Bake for 15-18 minutes, until browned and juices run clear. The beef should shrink slightly from the edges. If you see excess liquid, carefully drain it off to avoid soggy buns. (Tip: use oven mitts and tilt the pan over the sink.)
- Add Cheese & Toppings: Remove the pan from the oven. Immediately layer 8 ounces (225g) cheddar cheese over the hot beef, then sprinkle with onions, lay out tomato slices, and distribute pickle chips evenly. The cheese should start to melt from residual heat—if not, pop it back in for 2 minutes.
- Prepare Buns: Slice 12 slider buns in half horizontally. Place the bottom halves over the cheese and toppings, gently pressing down. Spread ketchup and mustard over the bun bottoms—don’t skimp on the sauce!
- Top & Butter: Place the bun tops on, brush lightly with 2 tablespoons melted butter, and sprinkle with sesame seeds if you want that classic burger look.
- Bake Again: Cover the pan loosely with foil and bake for 8-10 minutes. Remove foil for the last 2 minutes to let the buns crisp slightly. The buns should be golden and the cheese fully melted.
- Slice & Serve: Let the sliders cool for 5 minutes, then use a sharp knife to cut into 12 squares. Serve warm, stacked with lettuce or crumbled bacon if you like. The sliders should hold together, feeling soft but firm—if they fall apart, let them cool another minute.
Personal tip: If you want extra crispy buns, broil for 1 minute at the end—just watch closely, they burn fast! Troubleshooting: If your beef looks gray, it’s overcooked; next time, pull it out 2 minutes earlier. If you end up with soggy buns, drain beef well and use a thicker bun. Efficiency trick: Prep toppings while the beef bakes, and you’ll be done in no time.
Cooking Tips & Techniques
Let’s talk about what really makes these loaded All-American cheeseburger sliders shine. Over the years, I’ve picked up a few tricks to keep them juicy, flavorful, and party-ready every single time.
- Don’t Overwork the Beef: Mixing too aggressively turns the meat dense. I learned this the hard way—once ended up with sliders that felt like hockey pucks. Gentle mixing keeps them tender.
- Layer Cheese Immediately: Lay cheese on hot beef straight from the oven. If you wait, it won’t melt evenly and you’ll get sad, lumpy pockets instead of gooey goodness.
- Drain Excess Liquid: After baking the beef, tilt the pan and spoon out fat. This prevents soggy buns (nobody likes a mushy slider!).
- Timing Is Everything: Prep your toppings while the beef bakes. Multitasking saves time and gets the sliders on the table faster.
- Consistent Sizing: Use a ruler for the beef layer if you want perfect, uniform squares. Not necessary, but it does make your Pinterest pics pop.
- Toasty Bun Trick: Buttering the tops before baking gives that golden, bakery-style finish. I’ve forgotten this step before, and the sliders just didn’t have the same appeal.
- Don’t Overbake: Keep an eye on the second bake—go for just enough to warm and crisp buns, but not so long that they dry out.
Common mistake? Overcrowding the pan. Make sure each slider has breathing room; otherwise, you’ll get a giant mass that’s hard to serve. For extra flavor, sprinkle a pinch of smoked paprika or add a splash of hot sauce to the beef. I’ve tried dozens of variations, and these techniques make all the difference for reliable, tasty results.
Variations & Adaptations
One of my favorite things about this loaded All-American cheeseburger sliders recipe is how easily you can adapt it to suit your crowd—dietary needs, flavor preferences, or just what’s in your fridge.
- Dietary Swaps: Use ground turkey or chicken instead of beef for a lighter option. Gluten-free buns work perfectly here, and you can swap cheddar for dairy-free cheese if allergies are a concern (I’ve tried Daiya and it melts well).
- Seasonal Flavors: In summer, add grilled red peppers or swap tomato slices for avocado. In winter, try caramelized onions and a layer of sautéed mushrooms for rich, earthy flavor.
- Flavor Twists: For a spicy kick, add jalapeño slices or a smear of sriracha mayo. Barbecue lovers can swap ketchup for BBQ sauce and toss in crispy fried onions for crunch.
- Cooking Method: Don’t have an oven? Cook the beef layer on the stovetop in a large skillet, then assemble and finish under a broiler or toaster oven.
- Personal Favorite: I sometimes add a layer of crumbled bacon and a sprinkle of smoked paprika for a “loaded” barbecue slider. It’s always a hit at summer cookouts.
Customizing these sliders is half the fun. If you’re feeding picky eaters or guests with allergies, just set out toppings “bar-style” so everyone can build their own. The recipe is forgiving—feel free to get creative!
Serving & Storage Suggestions
These loaded All-American cheeseburger sliders taste best served warm, right out of the oven. I like to plate them on a big platter with extra pickles and lettuce leaves for color. For parties, stack them high and add little toothpicks for easy grabbing (makes them look Pinterest-perfect, too!).
Pair these sliders with crispy fries, homemade coleslaw, or a simple green salad. For drinks, classic cola, lemonade, or cold beer work wonders. If you’re feeling fancy, set out dipping sauces—ranch, spicy mayo, or barbecue are all winners.
To store leftovers, cool the sliders completely, then wrap tightly in foil or place in an airtight container. Refrigerate for up to 3 days. For longer storage, freeze individual sliders wrapped in wax paper, then sealed in a zip-top bag—up to a month. Reheat in a 350°F (175°C) oven for 10-12 minutes, or zap in the microwave for 30 seconds (but they’re best oven-warmed for crispy buns). Honestly, the flavors deepen overnight, so don’t be surprised if the next-day sliders taste even better!
Nutritional Information & Benefits
Each loaded All-American cheeseburger slider has roughly 220 calories, 13g protein, 11g fat, and 15g carbohydrates. Using lean beef or turkey lowers the fat content, and you can opt for whole wheat or gluten-free buns for extra fiber or dietary needs.
Key ingredients like cheddar cheese provide calcium and protein, while tomatoes and pickles offer a touch of vitamins and antioxidants. If you add lettuce, you’re sneaking in some greens (not that my kids notice!). Allergens include wheat (buns), dairy (cheese, butter), and possibly egg in some brands of buns—always check labels if allergies are a concern.
From a wellness perspective, these sliders are balanced: protein, carbs, and a little fat for satiety. They’re a treat, sure, but they don’t weigh you down or leave you feeling sluggish. I love serving them as part of a party spread where guests can pick and choose their portions.
Conclusion
If you’re searching for a party appetizer that’s easy, flavorful, and guaranteed to bring smiles, these loaded All-American cheeseburger sliders are it. They’re juicy, cheesy, and packed with classic burger goodness—without the fuss or mess of grilling individual patties. I love how customizable they are; you can tweak the toppings, buns, and even the cheese to suit every crowd.
This recipe has become one of my go-tos, especially when I want to impress friends without spending all day in the kitchen. Honestly, it’s the kind of food that feels like a celebration, even on a regular Tuesday. Give it a try, make it your own, and let me know how you serve yours!
If you enjoyed this all-American cheeseburger sliders recipe, please drop a comment below with your favorite slider variation or party pairing. Share the recipe with fellow burger lovers, and don’t forget to bookmark it for your next gathering. Here’s to delicious, easy party food—happy cooking!
Frequently Asked Questions
Can I make these cheeseburger sliders ahead of time?
Yes! Assemble the sliders up to the buttered bun step, cover tightly, and refrigerate for up to 24 hours. Bake right before serving for fresh, melty goodness.
What type of cheese is best for loaded cheeseburger sliders?
Sharp cheddar melts beautifully and adds classic flavor. You can use American, Swiss, or even pepper jack if you like it spicy.
Can I freeze leftover sliders?
Absolutely. Wrap each slider in wax paper, seal in a freezer bag, and freeze up to a month. Reheat in the oven for best texture.
How do I prevent soggy buns?
Drain excess fat from the beef after baking and use sturdy slider buns. Toasting the buns before assembly also helps.
Are these sliders gluten-free or dairy-free?
The basic recipe contains both wheat and dairy, but you can use gluten-free buns and dairy-free cheese to suit dietary needs. Always check ingredient labels if you’re serving guests with allergies.
Pin This Recipe!
All-American Cheeseburger Sliders
These loaded cheeseburger sliders are a quick, easy, and crowd-pleasing party appetizer featuring juicy seasoned beef, gooey cheddar cheese, and classic burger toppings baked into pillowy slider buns. Perfect for gatherings, game nights, or family celebrations, they deliver nostalgic comfort in every bite.
- Prep Time: 15 minutes
- Cook Time: 28 minutes
- Total Time: 43 minutes
- Yield: 12 sliders 1x
- Category: Appetizer
- Cuisine: American
Ingredients
- 1 ½ pounds ground beef (80/20 blend)
- 1 teaspoon kosher salt
- ½ teaspoon black pepper
- ½ teaspoon garlic powder
- ½ teaspoon onion powder
- 1 tablespoon Worcestershire sauce
- 8 ounces sharp cheddar cheese, sliced or shredded
- ¼ cup ketchup
- 2 tablespoons yellow mustard
- ½ cup dill pickle chips or slices
- ½ cup finely chopped onion (optional)
- ½ cup tomato slices, thinly sliced
- 12 slider buns or Hawaiian rolls
- 2 tablespoons unsalted butter, melted
- 1 tablespoon sesame seeds (optional)
- Lettuce leaves (optional, for garnish)
- Crumbled bacon (optional, for garnish)
- Jalapeño slices (optional, for garnish)
Instructions
- Preheat oven to 350°F (175°C) and lightly grease a 13×9-inch baking pan.
- In a large mixing bowl, gently combine ground beef, salt, black pepper, garlic powder, onion powder, and Worcestershire sauce.
- Press beef mixture evenly into the prepared pan, about ½-inch thick.
- Bake beef layer for 15-18 minutes, until browned and juices run clear. Drain excess liquid.
- Remove pan from oven and immediately layer cheddar cheese over hot beef. Add onions, tomato slices, and pickle chips evenly.
- Slice slider buns in half horizontally. Place bottom halves over cheese and toppings, gently pressing down. Spread ketchup and mustard over bun bottoms.
- Place bun tops on, brush with melted butter, and sprinkle with sesame seeds if desired.
- Cover pan loosely with foil and bake for 8-10 minutes, removing foil for last 2 minutes to crisp buns.
- Let sliders cool for 5 minutes, then cut into 12 squares. Serve warm, garnished with lettuce, bacon, or jalapeño if desired.
Notes
For extra crispy buns, broil for 1 minute at the end. Drain beef well to prevent soggy buns. Customize with gluten-free buns, dairy-free cheese, or alternative toppings. Prep toppings while beef bakes for efficiency. Store leftovers in airtight container up to 3 days or freeze up to 1 month.
Nutrition
- Serving Size: 1 slider
- Calories: 220
- Sugar: 3
- Sodium: 420
- Fat: 11
- Saturated Fat: 5
- Carbohydrates: 15
- Fiber: 1
- Protein: 13
Keywords: cheeseburger sliders, party appetizer, loaded sliders, easy sliders, American sliders, beef sliders, game day food, finger food, kid-friendly, comfort food


