
Let me tell you, the moment you crack open the oven and catch that sweet, cocoa-laced scent swirling up from a tray of fluffy red velvet whoopie pies, it’s like stepping into a memory you wish you’d had years ago. Picture this: the soft, pillowy cakes, each a perfect shade of deep scarlet, with a hint of cocoa peeking through—the kind of color that makes your Pinterest board pop and your kitchen feel like a retro bakery. The first time I made these, it was a rainy Saturday, and I was knee-high to a grasshopper, wandering the kitchen with my grandma, who swore by cream cheese in everything. She’d scoop the filling with her finger (just for tasting, of course), grinning like she’d struck gold.
I was instantly hooked, and so was my family—my brother kept sneaking them off the cooling rack, and even my dad (not a sweets guy, you know) couldn’t resist a second helping. There’s just something about the blend of fluffy red velvet cake and tangy, cloud-like cream cheese filling that feels like pure, nostalgic comfort. Honestly, these are dangerously easy to whip up, perfect for potlucks, classroom treats, or whenever you want to brighten up your Pinterest cookie board. The best part? I’ve tested this red velvet whoopie pies recipe so many times—in the name of research, of course—that it’s now a staple for family gatherings, gifting, and those moments when you need a little edible hug.
Whether you’re a baking newbie or a seasoned pro, you’re going to want to bookmark this one. There’s a little magic in every bite—trust me, your kitchen will smell amazing, and your friends will think you’re a whoopie pie wizard. So, let’s face it: if you love easy, fluffy treats with a cream cheese twist, this red velvet whoopie pies recipe is about to become your new go-to.
Why You’ll Love This Recipe
Let’s be real—life’s too short for boring cookies, and these red velvet whoopie pies with cream cheese filling are anything but ordinary. After countless batches (and a few mishaps, I’ll admit), I can confidently say this recipe delivers every single time. Here’s why you’ll fall head over heels for these:
- Quick & Easy: Comes together in just about 40 minutes, making it perfect for spontaneous baking sessions or last-minute party needs.
- Simple Ingredients: No need to hunt down fancy groceries. Everything is probably in your pantry already—think cocoa powder, buttermilk, and a splash of red food coloring.
- Perfect for Every Occasion: Whether it’s a holiday cookie swap, a birthday celebration, or just a Tuesday afternoon, these whoopie pies fit right in. They’re a hit at potlucks and classroom parties (kids can’t get enough!).
- Crowd-Pleaser: Both kids and adults rave about the fluffy texture and that tangy, creamy filling. My neighbor always asks for the recipe, and frankly, I don’t blame her.
- Unbelievably Delicious: The cake is tender and moist, with just the right balance of cocoa and buttermilk. The cream cheese filling? Dreamy, slightly sweet, and oh-so-smooth.
What sets this red velvet whoopie pies recipe apart is the method—beating the butter and sugar until light and using just enough baking soda for that perfect fluff. Plus, chilling the batter before baking means you get thick, cake-like pies (not flat, sad cookies). It’s comfort food, but with a fun twist—rich red velvet flavor, classic cream cheese, and a texture that’s somewhere between a cupcake and a cookie. The first bite is the kind that makes you close your eyes and savor, and honestly, it’s the kind of treat that makes even plain afternoons feel a little more special.
So if you want a recipe that’s easy, reliable, and guaranteed to impress without fuss, this is it. Trust me, once you taste these, you’ll be hooked—just like my family, who now expect a batch at every get-together. It’s classic, cozy baking with a little wow factor!
What Ingredients You Will Need
This red velvet whoopie pies recipe uses simple, wholesome ingredients that come together for a bold flavor and that signature fluffy texture. If you’re a fan of pantry staples and easy swaps, you’ll love how straightforward this list is.
- For the Red Velvet Cakes:
- All-purpose flour (240g / 2 cups) – sifted for best texture
- Unsweetened cocoa powder (16g / 2 tablespoons) – natural, not Dutch-processed
- Baking soda (4g / 1 teaspoon)
- Baking powder (4g / 1 teaspoon)
- Salt (2g / ½ teaspoon)
- Unsalted butter (113g / ½ cup), softened – I like using Kerrygold for extra richness
- Granulated sugar (200g / 1 cup)
- Large eggs (2), room temperature
- Buttermilk (120ml / ½ cup) – gives that signature tang
- Pure vanilla extract (5ml / 1 teaspoon)
- Red food coloring (15ml / 1 tablespoon, gel preferred) – for deep, vibrant color
- Distilled white vinegar (5ml / 1 teaspoon) – helps activate the leavening agents
- For the Cream Cheese Filling:
- Cream cheese (170g / 6 oz), softened – full-fat for best flavor
- Unsalted butter (56g / ¼ cup), softened
- Powdered sugar (240g / 2 cups), sifted
- Pure vanilla extract (5ml / 1 teaspoon)
- Pinch of salt – balances the sweetness
- Optional for Decorating:
- Sprinkles (red or white)
- Mini chocolate chips
Ingredient Tips: For the cocoa powder, I prefer Hershey’s Natural—it gives a classic flavor without overpowering. If you need gluten-free, swap in a 1:1 gluten-free baking blend. No buttermilk? Mix ½ cup milk with 1 teaspoon lemon juice or vinegar and let it sit for 5 minutes. For dairy-free, use plant-based cream cheese and butter (like Miyoko’s or Earth Balance). If you want even brighter color, go with gel food coloring—it won’t thin out your batter.
If berries are in season, try adding a few fresh raspberries to the filling for a twist. Honestly, these ingredients are as flexible as you need them to be. If you’re missing something, check the swaps above—no need to skip this recipe!
Equipment Needed
Here’s what you’ll want to have on hand to make your red velvet whoopie pies:
- Large mixing bowl – for the dry ingredients
- Medium mixing bowl – for the wet ingredients and filling
- Electric mixer (handheld or stand) – I’ve used both, but a stand mixer is less tiring!
- Cookie scoop (medium, about 1.5 tablespoons) – ensures even pies; a spoon works too if you’re in a pinch
- Rubber spatula – for scraping down the sides
- Baking sheets (2) – lined with parchment paper for easy cleanup
- Wire cooling rack – prevents soggy bottoms
- Piping bag (optional) – for neat filling, though a zip-top bag with the corner snipped does the trick
If you don’t have a cookie scoop, two spoons work fine; just try to keep the sizes similar. For the electric mixer, a sturdy whisk can substitute (though your arms might get a workout!). I’ve made these with budget-friendly pans and parchment, and they always turn out great. Just make sure your baking sheets aren’t warped, and give them a little wash before starting. For piping, you can use a silicone piping bag or simply fill a zip bag—no need for fancy tips.
Keep your mixer clean—wipe down the blades and bowl between making the batter and the filling to avoid mixing flavors. Honestly, you don’t need anything fancy, just a few reliable basics and you’re good to go.
Preparation Method
- Prep Your Workspace: Preheat your oven to 350°F (175°C). Line two baking sheets with parchment paper. Set out all your ingredients at room temperature—especially the butter and cream cheese so they blend smoothly.
- Mix Dry Ingredients: In a large bowl, sift together the flour (240g), cocoa powder (16g), baking soda (4g), baking powder (4g), and salt (2g). Sifting helps keep your whoopie pies fluffy, so don’t skip it.
- Cream Butter and Sugar: In a medium bowl, beat the softened butter (113g) and granulated sugar (200g) together with your electric mixer on medium speed until light and fluffy (about 2-3 minutes). The mixture should look pale and airy—if it’s dense, keep beating!
- Add Eggs and Wet Ingredients: Beat in the eggs, one at a time, scraping down the sides after each addition. Then add buttermilk (120ml), vanilla extract (5ml), red food coloring (15ml), and vinegar (5ml). Mix until smooth and evenly colored. If the batter seems streaky, give it another minute with the mixer.
- Combine Wet and Dry: Gradually add the dry mixture to the wet, mixing on low speed until just combined. Overmixing leads to tough pies, so stop as soon as no streaks remain. The batter will be thick and glossy.
- Chill Batter: Cover the bowl and chill in the fridge for 10-15 minutes. This helps prevent spreading and gives you fluffier cakes. If you’re in a rush, you can skip this step, but I’ve found it really helps.
- Scoop and Bake: Using a medium cookie scoop (about 1.5 tablespoons), drop mounds of batter onto the prepared baking sheets, spacing them about 2 inches apart. Bake for 9-11 minutes, until the tops spring back when lightly pressed and the edges look set. If they’re still shiny or sink in, give them another minute.
- Cool Completely: Let the cakes cool on the baking sheets for 5 minutes, then transfer to wire racks. Don’t rush this—warm cakes will melt the filling.
- Make Cream Cheese Filling: In a clean bowl, beat the softened cream cheese (170g) and butter (56g) until smooth and creamy (about 1 minute). Add the powdered sugar (240g), vanilla extract (5ml), and a pinch of salt. Beat until fluffy and thick, scraping the bowl as needed. The filling should hold its shape—if it’s runny, chill for 10 minutes.
- Assemble Whoopie Pies: Match up cakes by size. Pipe or spoon about 1-2 tablespoons of filling onto the flat side of half the cakes, then top with the remaining cakes (flat side down) to make sandwiches. Press gently to spread the filling evenly.
- Decorate (Optional): Roll the sides in sprinkles or mini chocolate chips if you like. Let them sit for 15 minutes to set before serving.
Preparation Notes: If your batter is too runny, add a tablespoon of flour. Watch the baking time—overbaked pies get dry. If the filling is too soft, pop it in the fridge for a few minutes. Sensory cues: the cakes should smell faintly cocoa-y and feel springy. For efficiency, prep the filling while the cakes bake. If you’re making a big batch, double the filling!
Cooking Tips & Techniques
Baking whoopie pies sounds simple, but a few tricks make all the difference. Here’s what I’ve learned over the years:
- Room Temperature Ingredients: Always use softened butter and cream cheese—cold ingredients make lumpy batter and filling. (I learned this the hard way—lumpy filling is no fun!)
- Sift Dry Ingredients: Sifting flour and cocoa powder helps prevent dense, flat pies. Don’t skip this step—even if you’re tempted.
- Don’t Overmix: Mix just until combined. Overworking the batter makes tough, chewy cakes instead of soft and fluffy pies.
- Chill the Batter: Refrigerating for 10-15 minutes helps keep the pies thick and cake-like. If you’re short on time, chill for at least 5 minutes.
- Bake Evenly: Rotate your trays halfway if your oven has hot spots. (Trust me, uneven pies aren’t as cute for Pinterest photos!)
- Watch the Bake Time: Start checking at 9 minutes. Overbaked pies get dry and crumbly. They should spring back lightly when touched, not sink.
- Filling Consistency: If your cream cheese filling is too soft, add a bit more powdered sugar or chill before piping. If it’s too stiff, add a teaspoon of milk.
- Multitasking: Prep the filling while the cakes bake to save time. Clean as you go—less mess, less stress!
Even pros mess up sometimes—I once forgot to chill the batter and ended up with pancake pies. But hey, they still tasted great! The secret is paying attention to consistency and temperature. If you’re making a double batch, bake one tray at a time for best results. If you want picture-perfect whoopie pies for your Pinterest page, match up cakes by size before filling. Honestly, practice makes perfect—and even the “messy” ones disappear fast!
Variations & Adaptations
One of the best things about this red velvet whoopie pies recipe is how flexible it is. Here are some fun ways to switch it up:
- Gluten-Free Option: Substitute a 1:1 gluten-free baking flour for the all-purpose flour. Bob’s Red Mill makes a great blend that keeps the pies fluffy (I’ve tried it—my gluten-free friends were thrilled!).
- Dairy-Free Adaptation: Use plant-based butter and cream cheese for the filling (Miyoko’s is my favorite). Swap buttermilk for almond milk plus a splash of vinegar.
- Seasonal Flavors: Add a teaspoon of pumpkin pie spice to the batter in autumn, or fold in chopped fresh strawberries to the filling for a springtime twist.
- Chocolate Lovers: Mix mini chocolate chips into the batter or sprinkle on the filling before sandwiching the pies.
- Nut-Free Swap: All ingredients are naturally nut-free, but if you’re worried about cross-contamination, check your cocoa powder and cream cheese brands.
- Different Cooking Methods: You can bake smaller pies for bite-sized treats (just reduce the baking time by a couple of minutes). For a giant whoopie pie “cake,” spread the batter in two round pans and layer with filling.
- Personal Twist: I once added orange zest to the cream cheese filling—sounds odd, but it’s a flavor combo that pops!
If you have allergies or dietary needs, don’t be afraid to experiment with substitutions. The key is keeping the ratios similar. And if you love playing with colors, try blue velvet or green velvet for themed celebrations. Honestly, these whoopie pies are your canvas—make them your own!
Serving & Storage Suggestions
For the fluffiest texture and best flavor, serve your red velvet whoopie pies at room temperature. The cream cheese filling is soft and dreamy, so let them sit out for about 15 minutes before serving if they’ve been chilled. Stack them on a pretty platter or pile up on a cake stand—they look gorgeous in a Pinterest-worthy display!
Pair these whoopie pies with a cold glass of milk, hot coffee, or even a festive mug of cocoa. They’re perfect as a sweet finish to brunch, or tucked into lunchboxes for a special treat. If you’re hosting, add some fresh berries or a handful of chocolate chips on the side.
For storing, place the assembled pies in an airtight container in the refrigerator for up to 5 days. Separate layers with parchment paper to keep them from sticking. You can freeze them, too—just wrap individually and thaw in the fridge overnight. To reheat, let them come to room temperature; don’t microwave, or the filling can melt and run. (Trust me, learned that the hard way!) The flavors deepen after a day, so leftovers are even better. If you’re gifting, wrap in wax paper and tie with string for a homemade touch.
Nutritional Information & Benefits
Each red velvet whoopie pie (with cream cheese filling) is about 220 calories, with 4g protein, 10g fat, 32g carbs, and about 18g sugar—these are estimates, of course. The recipe makes about 18 pies.
The buttermilk and cocoa powder add not just flavor but a little calcium and iron. Cream cheese offers a touch of protein and vitamin A. If you use gluten-free flour or dairy-free substitutes, the pies are friendly for those diets. Allergens include wheat, egg, dairy, and possible traces of soy (check your brands!).
Honestly, these are a treat—not health food—but they’re lighter than most cupcakes and portioned for easy sharing. My personal wellness tip: enjoy in moderation, savor every bite, and know you’re getting comfort and joy, too!
Conclusion
If you’re searching for an easy, fluffy treat with a cream cheese twist, this red velvet whoopie pies recipe is truly worth trying. It’s quick, reliable, and delivers that classic comfort food feeling without the fuss. Customize the pies with your favorite swaps or flavors—these are as fun to make as they are to eat.
I love this recipe because it brings people together. Whether you’re baking with your kids, friends, or just for yourself, there’s something joyful about creating these bright red, pillowy treats. Honestly, I’ve never seen a batch last more than a day in my house!
So go on, give these whoopie pies a spin, and let me know how yours turn out. Share your own twists, post a photo on Pinterest, or leave a comment below—I’d love to hear your stories! Happy baking (and even happier eating)!
Frequently Asked Questions
Can I make red velvet whoopie pies ahead of time?
Absolutely! You can bake the cakes and prepare the filling one day ahead. Assemble before serving for best texture. Store assembled pies in the fridge for up to 5 days.
Why do my whoopie pies turn out flat?
This usually happens if you skip chilling the batter, overmix, or use old baking powder. Make sure to chill the batter and use fresh leavening agents for fluffy pies.
Can I freeze whoopie pies?
Yes, wrap individual pies in plastic, then freeze for up to 2 months. Thaw overnight in the fridge and bring to room temperature before serving.
What’s the best substitute for buttermilk in this recipe?
Mix ½ cup regular milk with 1 teaspoon lemon juice or vinegar. Let it sit for 5 minutes, then use as buttermilk. Works great every time!
Can I make these gluten-free or dairy-free?
Definitely! Use a 1:1 gluten-free baking blend for the flour and plant-based butter and cream cheese for the filling. The results are still soft, fluffy, and delicious.
Pin This Recipe!

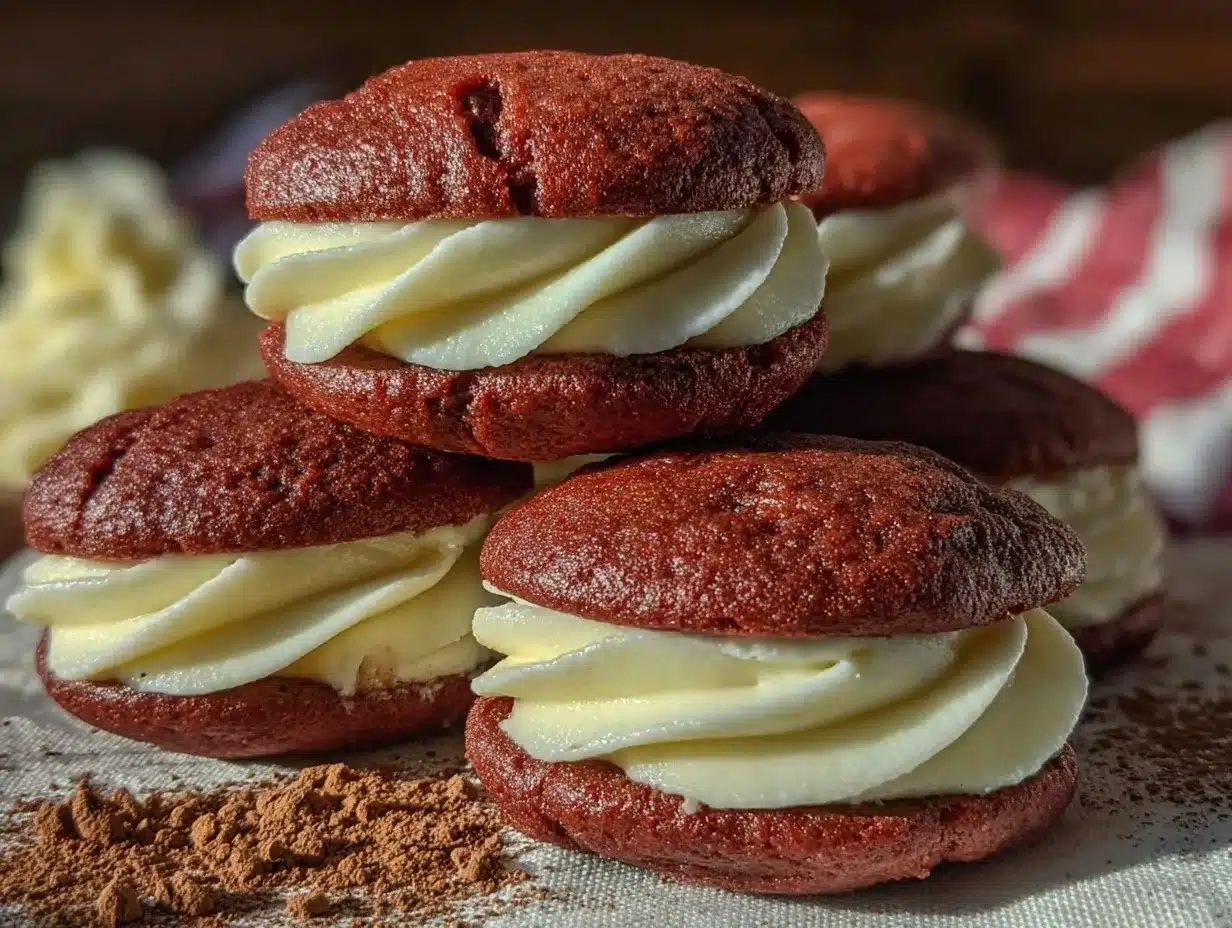
Red Velvet Whoopie Pies with Easy Fluffy Cream Cheese Filling

These red velvet whoopie pies feature soft, pillowy cakes with a hint of cocoa and a dreamy cream cheese filling. Quick to make and perfect for parties, potlucks, or a cozy treat at home.
- Prep Time: 20 minutes
- Cook Time: 11 minutes
- Total Time: 40 minutes
- Yield: 18 whoopie pies 1x
- Category: Dessert
- Cuisine: American
Ingredients
- 2 cups all-purpose flour, sifted
- 2 tablespoons unsweetened cocoa powder (natural, not Dutch-processed)
- 1 teaspoon baking soda
- 1 teaspoon baking powder
- 1/2 teaspoon salt
- 1/2 cup unsalted butter, softened
- 1 cup granulated sugar
- 2 large eggs, room temperature
- 1/2 cup buttermilk
- 1 teaspoon pure vanilla extract
- 1 tablespoon red food coloring (gel preferred)
- 1 teaspoon distilled white vinegar
- 6 oz cream cheese, softened (full-fat)
- 1/4 cup unsalted butter, softened
- 2 cups powdered sugar, sifted
- 1 teaspoon pure vanilla extract
- Pinch of salt
- Sprinkles (red or white, optional)
- Mini chocolate chips (optional)
Instructions
- Preheat oven to 350°F (175°C). Line two baking sheets with parchment paper.
- Sift together flour, cocoa powder, baking soda, baking powder, and salt in a large bowl.
- In a medium bowl, beat softened butter and granulated sugar with an electric mixer until light and fluffy (2-3 minutes).
- Beat in eggs one at a time, scraping down sides after each addition. Add buttermilk, vanilla extract, red food coloring, and vinegar. Mix until smooth and evenly colored.
- Gradually add dry ingredients to wet ingredients, mixing on low speed until just combined. Do not overmix.
- Cover bowl and chill batter in the fridge for 10-15 minutes.
- Using a medium cookie scoop (about 1.5 tablespoons), drop mounds of batter onto prepared baking sheets, spacing about 2 inches apart.
- Bake for 9-11 minutes, until tops spring back when lightly pressed and edges look set.
- Cool cakes on baking sheets for 5 minutes, then transfer to wire racks to cool completely.
- For the filling: In a clean bowl, beat softened cream cheese and butter until smooth and creamy (about 1 minute). Add powdered sugar, vanilla extract, and a pinch of salt. Beat until fluffy and thick.
- Match up cakes by size. Pipe or spoon 1-2 tablespoons of filling onto the flat side of half the cakes, then top with remaining cakes to make sandwiches.
- Optional: Roll sides in sprinkles or mini chocolate chips. Let pies sit for 15 minutes to set before serving.
Notes
Use room temperature butter and cream cheese for smooth batter and filling. Sift dry ingredients for fluffier pies. Chill batter for thicker cakes. If making gluten-free or dairy-free, use recommended swaps. Store in airtight container in fridge up to 5 days or freeze individually for up to 2 months. Let pies come to room temperature before serving for best texture.
Nutrition
- Serving Size: 1 whoopie pie
- Calories: 220
- Sugar: 18
- Sodium: 160
- Fat: 10
- Saturated Fat: 6
- Carbohydrates: 32
- Fiber: 1
- Protein: 4
Keywords: red velvet, whoopie pies, cream cheese filling, easy dessert, fluffy, party treats, baking, American dessert, cocoa, buttermilk, sandwich cookies


