There’s something magical about the smell of freshly sliced turkey mingling with the sharp tang of cheddar cheese—especially when you’re packing up little lunchboxes for the week ahead. The first time I assembled these homemade turkey and cheese Lunchables, the kitchen was filled with that savory, nutty aroma, and honestly, I couldn’t help but sneak a few bites myself. I remember that afternoon so vividly: the hum of the fridge, the sunlight streaming in, and my youngest perched on a stool, laying out the crackers with the kind of serious focus only a seven-year-old can muster.
You know, when I was knee-high to a grasshopper, my mom used to pack those store-bought Lunchables for school. But let’s face it—they weren’t exactly the healthiest option and they never tasted as fresh as this homemade version. So years ago, in a moment of pure parental inspiration (or desperation), I decided to recreate those nostalgic little snack trays with wholesome ingredients I actually recognized. The first time I brought them to a family picnic, my crew couldn’t stop snagging them off the tray—even the grownups got in on the action! It was one of those “pause and smile” moments, where you just know you’ve stumbled onto something truly special.
Honestly, these are dangerously easy to make. They deliver pure, nostalgic comfort—perfect for school lunches, picnics, or brightening up your Pinterest board with something that’s both adorable and practical. Homemade turkey and cheese Lunchables have become a staple for family gatherings and quick “grab-and-go” meals. I’ve tested them more times than I care to admit (in the name of research, of course), and every batch feels like a warm hug packed up for the day. You’re going to want to bookmark this one—promise!
Why You’ll Love This Recipe
- Quick & Easy: Comes together in under 15 minutes—seriously, you’ll be done before you know it, even on a hectic morning.
- Simple Ingredients: No fancy grocery runs required. You probably have everything in your fridge or pantry already.
- Perfect for Meal Prep: Whether it’s school lunches, work snacks, or lazy weekend bites, these Lunchables are perfect for prepping ahead.
- Crowd-Pleaser: Kids love the fun, build-your-own vibe, and grownups do too (especially when you add some spicy mustard or fancy crackers).
- Unbelievably Delicious: The creamy cheese, savory turkey, and crunchy crackers make for that classic comfort food combo—just fresher and healthier.
What really sets this recipe apart? I use thick-cut turkey breast (not the thin deli slices) and good cheddar cheese—sometimes even a little smoked gouda for a grown-up twist. If you’ve ever tried blending the cheese with a touch of Greek yogurt for extra creaminess, you know how dreamy that bite can be. I’ve spent a lot of time testing different cracker bases, too. Whole grain, gluten-free, seed crackers—the options are endless, and each brings its own texture and flavor to the party.
This isn’t just another homemade Lunchables knockoff. This version is healthier, fresher, and honestly more satisfying. It’s the kind of lunch that makes your kids excited to open their lunchbox, and you get that peace of mind knowing exactly what they’re eating. And if you’re craving a little comfort food magic without the guilt, this is it: fuss-free, kid-approved, and full of heart.
What Ingredients You Will Need
This recipe uses simple, wholesome ingredients to deliver bold flavor and satisfying texture without the fuss. Most of these are pantry staples or easy to swap based on your family’s preferences. Here’s what you’ll need for homemade turkey and cheese Lunchables:
- For the Main Stackers:
- Turkey breast, thick-cut (4 oz/115 g, sliced into rounds or squares; I love Applegate or Boar’s Head for extra freshness)
- Cheddar cheese, sliced (2 oz/55 g; sharp or mild—your pick! Swap in Swiss or Gouda for a twist)
- Whole grain crackers (12 pieces; try Triscuit, Wheat Thins, or any gluten-free cracker for allergies)
- For the Sides:
- Baby carrots (1/2 cup/60 g; peeled and sliced into sticks)
- Seedless grapes (1/2 cup/75 g; washed and de-stemmed for easy snacking)
- Mini dill pickles (optional, 2-3 pieces; adds a tangy crunch—my kids are obsessed!)
- For Extra Fun:
- Hummus or ranch dip (2 tbsp/30 ml; for dipping veggies or crackers)
- Dark chocolate chips (a small handful; for a sweet finishing touch)
If you’re looking for substitutions, swap the turkey with ham or chicken breast, use dairy-free cheese if you prefer, or try almond flour crackers for a gluten-free option. In summer, fresh berries make a great fruit swap, and you can sneak in snap peas or cucumber rounds for extra crunch. I always choose block cheese and slice it myself—pre-sliced cheese tends to dry out faster. Trust me, the fresher the ingredients, the better the flavor and texture!
Equipment Needed
- Sharp chef’s knife: For slicing turkey and cheese into neat rounds or squares. If you have a small cookie cutter, you can make fun shapes too.
- Cutting board: Preferably non-slip. I like bamboo or plastic for easy cleaning.
- Lunch containers: Reusable bento boxes, divided meal prep containers, or even simple plastic sandwich boxes. If you’re packing for kids, look for leak-proof lids.
- Small bowls or silicone muffin liners: Great for separating dips, pickles, and fruit. These keep everything tidy and prevent soggy crackers.
- Kitchen scale (optional): Helps portion ingredients evenly, especially if you’re prepping for multiple people or tracking nutrition.
If you don’t have fancy bento boxes, don’t worry. I’ve used everything from old Tupperware to mason jars—just keep the wet and dry ingredients separate. A pizza wheel makes quick work of cheese slicing, too (learned that one after a rushed morning!). Keep knives sharp for safe, easy slicing, and wash containers right after use to avoid lingering smells (trust me, cheddar cheese can get a little aggressive).
Preparation Method

-
Prep the turkey and cheese:
Start by slicing 4 oz (115 g) of turkey breast into rounds or squares, about the size of your crackers. If you want to get creative, use a small cookie cutter for fun shapes.
Next, slice 2 oz (55 g) of cheddar cheese into matching shapes. Stack turkey and cheese together to check sizing.
Tip: If the turkey is a bit wet from the package, pat it dry with a paper towel so your crackers don’t get soggy. -
Prepare the crackers:
Lay out 12 whole grain crackers on your cutting board. If you’re using a mix of cracker types, alternate for a fun presentation. Make sure they’re crisp and not broken. -
Wash and portion fruit and veggies:
Rinse 1/2 cup (75 g) of seedless grapes and 1/2 cup (60 g) of baby carrots. Slice carrots into sticks for easy grabbing.
For extra color, add snap peas or cucumber rounds.
Note: Dry grapes and carrots thoroughly, or they’ll make the crackers soggy in the container. -
Pack dips and extras:
Spoon 2 tbsp (30 ml) of hummus or ranch dip into a small bowl or silicone muffin liner. Drop in a few mini dill pickles for crunch.
If you’re adding chocolate chips, keep them in a separate compartment so they don’t melt onto the cheese. -
Assemble Lunchables:
In each lunch container, arrange 4-5 crackers, 3 slices of turkey, and 3 slices of cheese in a row.
Add fruit, veggies, pickles, and dip to separate sections. Place chocolate chips in a small compartment.
Personal trick: Layer crackers on top of turkey and cheese to keep them from getting moist. -
Seal and refrigerate:
Close containers tightly and refrigerate until ready to serve.
These will keep fresh for up to 3 days. If you’re prepping for the whole week, make sure to keep cheese slices away from moist ingredients. -
Troubleshooting:
If crackers get soft, try packing them in a separate snack bag. If cheese dries out, wrap slices in wax paper before adding to the container.
Crackers and cheese can be portioned ahead and stored in airtight containers for up to 5 days.
Cooking Tips & Techniques
Let’s be real: the key to epic homemade turkey and cheese Lunchables is keeping everything fresh and crisp. I’ve learned the hard way (after a few mushy cracker mishaps) that separating wet and dry ingredients is crucial. Use silicone liners or small snack bags for crackers—that way, they won’t soak up any excess moisture from the turkey or fruit.
Try slicing turkey and cheese with a pizza wheel for quick, even cuts—especially if you’re prepping a big batch. If you want an extra creamy bite, blend some cheddar with a spoonful of Greek yogurt and spread it on the crackers before stacking. It’s a little trick I picked up from a local deli, and it makes a world of difference.
Multitasking is your friend here. Wash and dry all produce first, then slice meats and cheeses. This keeps your workspace tidy and speeds things up. If you’re packing lunches for the whole week, prep all the turkey and cheese on Sunday, then just assemble each morning. Oh, and always taste a cracker before packing—sometimes a box goes stale without warning!
Consistency is key. Use equal-sized slices for even stacking, and if you notice any excess moisture, blot ingredients before packing. I’ve ruined a few lunches by skipping this step, so trust me: a little attention goes a long way. Keep everything bite-sized and easy to grab—kids love the build-your-own aspect, and adults will appreciate the neat presentation.
Variations & Adaptations
- Dietary: Swap turkey for roasted chicken, ham, or tofu slices for vegetarians. Use dairy-free cheese (like Violife or Daiya) if you’re avoiding lactose.
- Seasonal: In spring and summer, switch grapes for fresh berries or apple slices. In fall, add dried cranberries or sliced pears for a sweet twist.
- Flavor: Try smoked turkey or pepper jack cheese for a kick. Add a little spicy mustard or honey mustard dip for extra zing.
- Cooking Methods: If you have leftover roast turkey or chicken, use that instead of deli meat for a more homemade vibe.
- Allergen Substitutions: Use gluten-free crackers (like Simple Mills), nut-free dips, and soy-free cheese if needed.
One personal favorite: I sometimes add a little homemade pesto to the cheese stackers, or swap out crackers for mini rice cakes. My oldest swears by “pizza Lunchables”—just add a spoonful of marinara and a sprinkle of mozzarella. No two batches are ever the same at our house, and that’s half the fun!
Serving & Storage Suggestions
These homemade turkey and cheese Lunchables are best served chilled, straight from the fridge. For an extra treat, pack them with a fun reusable ice pack to keep everything cool until lunchtime. Presentation matters—stack the turkey and cheese neatly, add colorful veggies, and tuck in a little chocolate or dip for a pop of excitement.
Pair with a cup of soup, a smoothie, or fresh lemonade for a complete meal. If you’re hosting a picnic or party, arrange Lunchables on a big platter—everyone will love building their own mini stacks!
To store, keep Lunchables in airtight containers in the fridge for up to 3 days. Pack crackers separately if you want them ultra-crisp. You can freeze turkey and cheese slices for up to a month, but fruit and crackers should be packed fresh. To reheat (if you prefer a warm bite), microwave cheese and turkey for just 10 seconds—any longer and the cheese will melt everywhere (I learned that the hard way).
Over time, flavors actually meld together a bit, especially in the cheese and turkey. The veggies stay crisp, and the dips get a little richer. If you make a big batch, enjoy the variety each day!
Nutritional Information & Benefits
Each serving of homemade turkey and cheese Lunchables provides approximately:
- Calories: 320
- Protein: 22g
- Fat: 13g
- Carbohydrates: 27g
- Fiber: 4g
- Sugar: 7g
Lean turkey breast is a great source of protein and B vitamins, while cheddar cheese offers calcium for healthy bones. Whole grain crackers bring fiber and steady energy, and the fresh veggies and fruit add vitamins and antioxidants. This recipe is naturally gluten-free if you use GF crackers, and you can make it dairy-free with alternative cheeses.
Potential allergens include dairy (cheese), wheat (crackers), and, depending on dips, eggs or soy. I love that this lunchbox option feels light, filling, and much lower in sodium and preservatives than the store-bought kind. It’s comfort food you can feel good about—my personal wellness secret for busy weeks!
Conclusion
If you’re looking for a fun, easy, and genuinely wholesome way to pack lunches, homemade turkey and cheese Lunchables are worth every minute. They’re endlessly customizable, keep kids excited about real food, and make busy mornings a breeze. You can add your personal favorites, swap in seasonal ingredients, or let the kids help assemble—there’s really no wrong way.
I keep coming back to this recipe for the simple reason that it brings a little joy to everyday routines. My family loves it, I love it, and I hope you will too. Got a creative twist, substitution, or favorite dip? Leave a comment below, share your photos, or tag me on Pinterest! Your ideas make these Lunchables even better.
So go ahead—try this recipe, make it your own, and pack a little happiness into your day. You deserve it!
FAQs
Can I make homemade turkey and cheese Lunchables ahead of time?
Yes! You can prep everything up to 3 days in advance. Just keep crackers separate for maximum crunch.
What crackers work best for Lunchables?
Whole grain, gluten-free, or seed-based crackers all work well. Pick sturdy ones that won’t crumble easily.
Can I use other meats instead of turkey?
Definitely. Ham, roast chicken, or even tofu slices are great options if you want variety or have dietary needs.
How do I keep cheese and turkey fresh in the lunchbox?
Wrap cheese slices in wax paper and keep lunch containers airtight. Refrigerate until ready to serve.
Are these Lunchables healthy for kids?
Absolutely. You control the ingredients, so they’re lower in sodium and preservatives, and packed with protein, fiber, and vitamins!
Pin This Recipe!

Homemade Turkey and Cheese Lunchables Easy Meal Prep for Kids

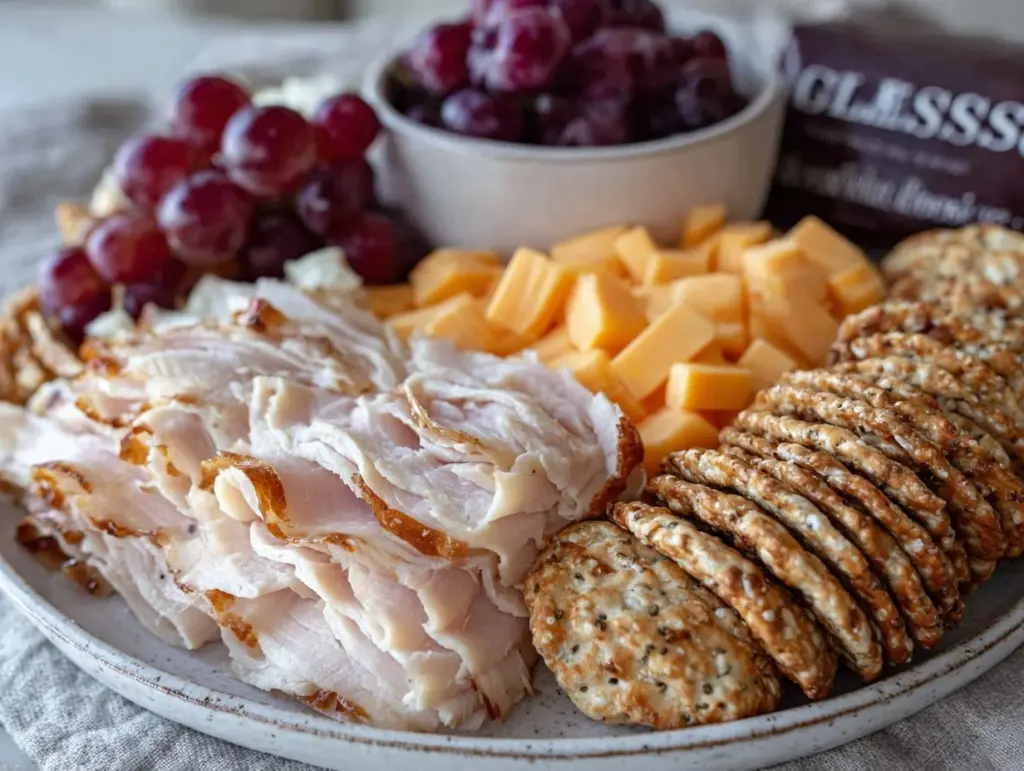
These homemade turkey and cheese Lunchables are a quick, wholesome, and customizable meal prep option for kids and adults alike. Packed with lean turkey, sharp cheddar, whole grain crackers, and fresh fruit and veggies, they’re perfect for school lunches, picnics, or busy days.
- Prep Time: 10 minutes
- Cook Time: 0 minutes
- Total Time: 10 minutes
- Yield: 2 servings 1x
- Category: Lunch
- Cuisine: American
Ingredients
- 4 oz thick-cut turkey breast, sliced into rounds or squares
- 2 oz cheddar cheese, sliced
- 12 whole grain crackers
- 1/2 cup baby carrots, peeled and sliced into sticks
- 1/2 cup seedless grapes, washed and de-stemmed
- 2–3 mini dill pickles (optional)
- 2 tbsp hummus or ranch dip
- A small handful of dark chocolate chips
Instructions
- Slice turkey breast into rounds or squares, matching the size of your crackers. Pat dry if needed.
- Slice cheddar cheese into matching shapes.
- Lay out 12 whole grain crackers on a cutting board. Alternate types for variety if desired.
- Rinse grapes and carrots. Slice carrots into sticks and dry both thoroughly.
- Spoon hummus or ranch dip into a small bowl or silicone liner. Add mini dill pickles if using.
- In each lunch container, arrange 4-5 crackers, 3 slices of turkey, and 3 slices of cheese. Add fruit, veggies, pickles, and dip to separate sections. Place chocolate chips in a small compartment.
- Seal containers tightly and refrigerate until ready to serve. Keeps fresh for up to 3 days.
- If crackers get soft, pack them in a separate snack bag. If cheese dries out, wrap slices in wax paper before adding to the container.
Notes
Keep wet and dry ingredients separate to maintain freshness and crispness. Use wax paper to wrap cheese if prepping ahead. Substitute turkey with ham, chicken, or tofu for dietary needs. Use gluten-free crackers and dairy-free cheese for allergies. These Lunchables are best served chilled and can be prepped up to 3 days in advance.
Nutrition
- Serving Size: 1 lunchbox (half the
- Calories: 320
- Sugar: 7
- Sodium: 650
- Fat: 13
- Saturated Fat: 6
- Carbohydrates: 27
- Fiber: 4
- Protein: 22
Keywords: Lunchables, turkey and cheese, meal prep, kids lunch, healthy lunch, homemade, snack tray, bento box, easy lunch, gluten-free option


