
Let me tell you, the first whiff of warm vanilla and cinnamon wafting from my oven on a chilly December afternoon is enough to make even the grumpiest Grinch smile. There’s just something about the way those tiny clouds of sugar and spice fill the kitchen, swirling around red-and-green sprinkles and buttery dough, that turns every cookie into a little piece of Christmas magic. I remember the first time I baked my own batch of Perfect Christmas Cookies for a festive holiday cookie exchange—my hands covered in flour, Bing Crosby crooning in the background, and my youngest trying to sneak raw dough when he thought I wasn’t looking.
It was one of those moments you just want to bottle up and save for later—the kind of moment where you pause, take a deep breath, and just smile because you know you’re onto something truly special. When I was knee-high to a grasshopper, my grandma used to line up dozens of tins on her rickety kitchen table, each filled with a different cookie: soft gingerbread men, sparkling thumbprints, and melt-in-your-mouth snickerdoodles. She always said the secret ingredient was a pinch of patience and a whole lot of love (and she wasn’t wrong).
Honestly, nothing brings people together like a plate of Christmas cookies. My family couldn’t stop sneaking them off the cooling rack (I can’t really blame them—who could resist that sweet, festive scent?). These cookies have become a staple for family gatherings, gifting, and, of course, our annual cookie swap. I’ve tested this recipe more times than I care to admit—in the name of research, of course—and every batch feels like a warm hug. Whether you’re looking to brighten up your Pinterest cookie board, impress at a cookie exchange, or just fill your house with pure, nostalgic comfort, you’re going to want to bookmark this one. Perfect Christmas Cookies for a festive holiday cookie exchange are what holiday dreams are made of!
Why You’ll Love These Perfect Christmas Cookies
You know what, I’ve baked a lot of cookies in my day, but these Perfect Christmas Cookies are something else. Years of holiday baking, countless swaps, and more taste tests than I’d care to admit have gone into perfecting them. From the first bite, you’ll see why they’re my go-to for every festive gathering.
- Quick & Easy: Comes together in under 45 minutes, making it the ultimate solution for last-minute holiday prep or spontaneous cookie exchanges.
- Simple Ingredients: No fancy grocery trips needed—chances are, you’ve got everything already waiting in your pantry or fridge.
- Perfect for Cookie Exchanges: These cookies hold their shape, travel well, and look stunning on a platter. They’re the stars of every swap I’ve attended.
- Crowd-Pleaser: Kids, adults, picky eaters—everyone comes back for seconds (or thirds). I’ve watched plates disappear in minutes.
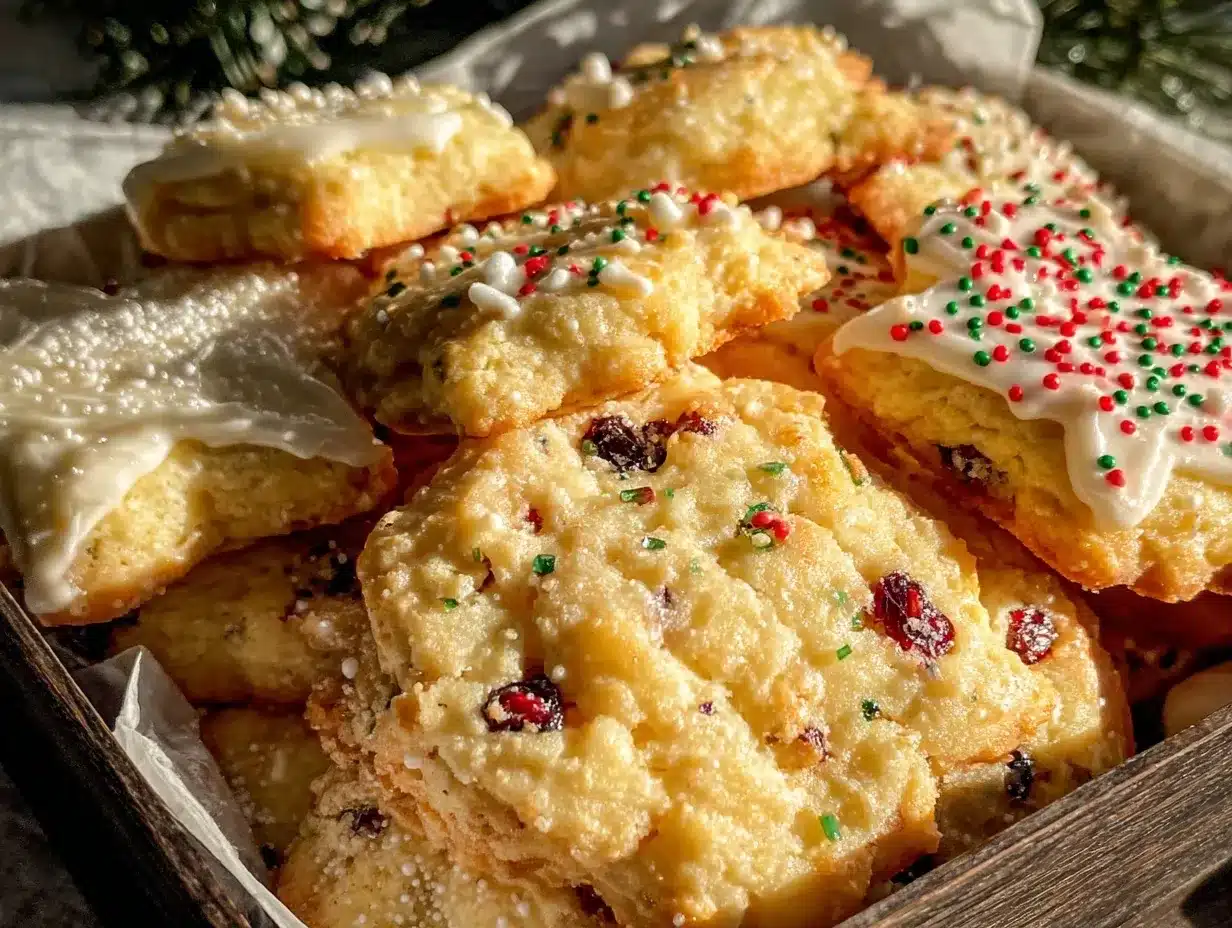
- Unbelievably Delicious: The combination of buttery richness, gentle vanilla, and festive spices hits all the right comfort notes. The texture? Soft in the middle, just crisp around the edges—cookie perfection.
What makes these different? I use a classic creaming method for maximum fluff, plus a chilling step (don’t skip it!) for the best shape and texture. My personal twist—rolling the dough in sparkling sugar—adds crunch and a shimmer that pops on any holiday table. You won’t find any dry, bland cookies here. Each one is crafted to ensure every bite tastes like Christmas should.
Honestly, this recipe isn’t just good—it’s the kind that makes you close your eyes after the first bite and sigh with happiness. Whether you’re baking for a crowd or just want to make your own December a little brighter, these cookies deliver nostalgia, cheer, and a little bit of magic. They’re comfort food, but dressed up for the holidays—healthier, faster, and just as soul-soothing as grandma’s originals. Ready to make your cookie exchange legendary?
What Ingredients You Will Need
This recipe uses simple, wholesome ingredients to deliver bold flavor and a satisfying texture—no complicated steps, just pure Christmas joy. Most of these are pantry staples, and if you need to swap something, don’t sweat it. I’ve got you covered with easy substitutions, too.
- For the Cookie Dough:
- 2 3/4 cups (345g) all-purpose flour (I use King Arthur for the best texture)
- 1 teaspoon baking soda
- 1/2 teaspoon baking powder
- 1/2 teaspoon fine sea salt (brings out the flavors)
- 1 cup (226g) unsalted butter, softened (adds richness—you can use plant-based butter for dairy-free)
- 1 1/2 cups (300g) granulated sugar
- 1 large egg, room temperature
- 2 teaspoons pure vanilla extract (use good quality for that classic flavor)
- 1/2 teaspoon ground cinnamon (optional, but adds a festive touch)
- For Decoration:
- 1/4 cup (50g) colored sparkling sugar or sanding sugar (red and green make these cookies pop!)
- Holiday sprinkles (your favorite shapes and colors)
- Royal icing (for decorating, if you fancy getting artsy)
- Optional Add-Ins:
- 1/2 cup (85g) mini chocolate chips (for extra sweetness)
- 1/2 cup (50g) chopped pecans or walnuts (for crunch—skip if nut-free)
- 1/2 teaspoon almond extract (nice twist, but not essential)
Ingredient tips: For gluten-free, swap with a 1:1 baking blend like Bob’s Red Mill. For vegan, use flaxseed “egg” and plant-based butter. If you like a citrusy punch, add a teaspoon of orange zest. I love using organic eggs—their yolks make the cookies extra golden. In summer, I swap sprinkles for fresh berries, but for Christmas, it’s all about the sparkle!
Trust me, the ingredients here are flexible. I’ve tested with all sorts of brands, and while premium butter and pure vanilla do make a difference, these cookies are forgiving. Whatever you have on hand will work just fine for a festive holiday cookie exchange!
Equipment Needed
You don’t need a fancy kitchen to whip up these Perfect Christmas Cookies for a festive holiday cookie exchange. Here’s what I use—and some budget-friendly swaps if you’re working with the basics.
- Stand mixer or hand mixer: Makes creaming butter and sugar a breeze, but a sturdy wooden spoon and elbow grease work in a pinch.
- Mixing bowls: At least two—one for wet ingredients, one for dry. Stainless steel or glass are my favorites (easy to clean, don’t hold odors).
- Measuring cups and spoons: Accurate measurements are key! I use OXO for reliable results.
- Baking sheets: Heavy-duty ones keep cookies from burning. If you’ve only got thin sheets, double them up.
- Parchment paper or silicone baking mats: Prevent sticking and make cleanup a snap. If you’re out, just grease your pans well.
- Cookie scoop or two spoons: For evenly sized cookies. I swear by my medium scoop for picture-perfect rounds.
- Cooling rack: Lets cookies cool evenly. No rack? Use a clean oven rack or even a flipped-over muffin tin.
- Rolling pin (if making cut-outs): Any sturdy pin works. In a pinch, I’ve used a wine bottle before!
- Cookie cutters: Festive shapes are fun, but circles work just fine.
Maintenance tip: If you use silicone mats, wash them with warm soapy water—no scrubbing needed. For budget options, thrift stores are a goldmine for baking gear. Honestly, the best cookies come from the simplest tools (and a little bit of love).
Preparation Method
Ready for the best batch of Perfect Christmas Cookies for your holiday cookie exchange? Follow these steps for festive success (and a kitchen that smells like pure joy).
- Prep your ingredients: Gather everything and let butter and egg come to room temperature (about 30 minutes).
- Combine dry ingredients: In a medium bowl, whisk together 2 3/4 cups (345g) flour, 1 tsp baking soda, 1/2 tsp baking powder, 1/2 tsp salt, and 1/2 tsp cinnamon (if using). Set aside.
- Cream butter and sugar: In a large bowl (or mixer), beat 1 cup (226g) softened butter and 1 1/2 cups (300g) sugar until light and fluffy—about 2-3 minutes. Scrape down the sides as needed (don’t rush this step; it’s key for the perfect texture).
- Add egg and vanilla: Mix in 1 egg and 2 tsp vanilla extract. Beat until thoroughly combined. If using almond extract, add it now.
- Incorporate dry ingredients: Gradually add dry mixture to wet, mixing just until combined. If adding chocolate chips or nuts, fold them in gently with a spatula. Don’t overmix—just until the dough pulls together.
- Chill the dough: Cover and chill dough for at least 30 minutes (up to overnight). Chilling helps cookies hold their shape and prevents spreading. If you skip this, cookies might flatten too much.
- Preheat oven: Set to 350°F (175°C). Line baking sheets with parchment or silicone mats.
- Scoop and shape: Using a medium cookie scoop or two spoons, portion dough into 1-tbsp balls (about 20g each). Roll in colored sugar or sprinkles. For cut-outs, roll dough to 1/4-inch thickness and use cutters.
- Bake: Arrange cookies 2 inches apart. Bake for 9-11 minutes, until edges are golden and centers are just set. (They’ll firm up as they cool.)
- Cool: Let cookies rest on the sheet for 3 minutes, then transfer to a rack to cool completely. If decorating with icing, wait until cookies are fully cool.
- Decorate: Get creative! Drizzle with royal icing, add more sprinkles, or pipe festive designs. Kids love helping with this part—just prepare for a little mess.
Efficiency tip: While dough chills, clean up and prep your decorating area. If cookies spread too much, chill dough longer or check your oven temperature. The dough should feel firm but scoopable, and cookies should smell sweet with hints of butter and spice. Don’t worry if a few come out wonky—they’ll taste just as good!
Cooking Tips & Techniques
When it comes to baking Perfect Christmas Cookies for a festive holiday cookie exchange, success is all about the details. Years of cookie swaps have taught me a few tricks you won’t find on the back of a flour bag.
- Chill the dough: Never skip this step. Chilled dough holds its shape, prevents spreading, and gives cookies that irresistible chewy center. If you’re short on time, even 15 minutes helps.
- Even sizing: Use a cookie scoop for uniform cookies. Uneven cookies bake at different rates, so some end up too crispy while others are underdone. Trust me, I’ve learned this the hard way.
- Don’t overmix: Once you add the flour, mix gently. Overworked dough leads to tough cookies. I used to think more mixing meant better texture, but nope—gentle is best.
- Bake one tray at a time: For the most even results, bake a single sheet in the center of the oven. If you must bake two, rotate halfway through.
- Watch for doneness cues: Edges should be lightly golden, but centers may look slightly soft. They’ll finish setting on the rack. Overbaking is the enemy of soft cookies!
- Multitasking: Start prepping decorations while cookies bake. I set up a sprinkle station (because who doesn’t love options?).
- Consistency: If cookies are spreading too much, the butter may be too warm or oven too cool. Chilling fixes most issues.
- Failures & lessons: Once, I forgot the baking soda—flat, dense cookies that tasted like sweet crackers. Now, I double-check every ingredient before mixing.
Honestly, these little tricks make all the difference. Even if you mess up a step (we all do sometimes), the end result will still bring plenty of holiday cheer.
Variations & Adaptations
Perfect Christmas Cookies aren’t just one-size-fits-all. I love switching things up to suit everyone’s tastes and needs—especially at a holiday cookie exchange, where variety is half the fun!
- Dietary Options: For gluten-free cookies, use a 1:1 gluten-free flour blend. For vegan, swap butter for plant-based margarine and egg for a flax “egg” (1 tbsp flaxseed + 3 tbsp water).
- Seasonal Twists: Add orange or lemon zest for a citrusy kick. In January, I swap sprinkles for dried cranberries and white chocolate chips—so good!
- Flavor Boosts: Try peppermint extract or crushed candy canes for a minty version. Or stir in cocoa powder for chocolate Christmas cookies (replace 1/4 cup of flour with cocoa).
- Cooking Method Adjustments: For air fryer cookies, drop dough onto parchment and bake at 320°F (160°C) for 6-8 minutes (watch closely!).
- Nut-Free Version: Skip nuts and be sure to use allergy-safe sprinkles.
- Personal Spin: My favorite adaptation is adding a layer of caramel in the middle—press two small rounds together with a dab of caramel sauce, then bake. Gooey, sweet, and totally festive!
Feel free to mix and match these ideas. Every cookie exchange is different, and half the fun is seeing what creative twists others bring. Don’t be afraid to experiment—you might stumble on your new holiday favorite!
Serving & Storage Suggestions
Presentation counts, especially for a festive holiday cookie exchange. Serve these Perfect Christmas Cookies at room temperature, stacked on a pretty platter or tucked into holiday tins lined with parchment. I love adding a sprig of rosemary or a few candy canes for that extra Pinterest-worthy touch.
Pair with hot cocoa, mulled cider, or even a glass of cold milk—classic choices that bring out the cookie flavors. They’re lovely alongside a cheese board, too, for a sweet-and-savory party spread.
For storage, keep cookies in an airtight container at room temperature for up to 5 days. If you’re prepping ahead, freeze baked cookies in layers separated by wax paper for up to 2 months. Thaw at room temp. To reheat, pop in a 300°F (150°C) oven for 2-3 minutes. Flavors deepen after a day—so if you can resist, let them sit overnight!
Gifting tip: Wrap stacks in cellophane with festive ribbon, or tuck into mason jars for neighborly cheer. These cookies stay soft, making them perfect for sharing and enjoying all week long.
Nutritional Information & Benefits
Each Perfect Christmas Cookie comes in around 120 calories, with 6g fat, 16g carbs, and 2g protein (based on a 2-inch round). Butter and eggs provide a bit of protein, while cinnamon and vanilla offer antioxidants. Using whole wheat flour or nut flours can boost fiber and nutrition.
If you swap in gluten-free flour, the cookies are suitable for celiac diets. Vegan adaptations mean no eggs or dairy, so even plant-based eaters can join the fun. Watch for nuts and eggs if you’re baking for allergy-sensitive folks. For wellness, enjoy in moderation—these cookies are about holiday joy, not deprivation!
I always say, a homemade cookie is better than anything store-bought, especially when you know exactly what’s inside. It’s comfort you can feel good about sharing.
Conclusion
Perfect Christmas Cookies for a festive holiday cookie exchange aren’t just a treat—they’re a tradition, a memory, and a little bit of holiday sparkle in every bite. Whether you stick to the original recipe or make it your own, these cookies are guaranteed to bring smiles and plenty of “can I have the recipe?” requests.
I genuinely love how easy and versatile this recipe is, and I hope it finds a permanent spot in your holiday baking rotation. Don’t be afraid to experiment—swap flavors, try new decorations, and make each batch a reflection of your own festive spirit.
If you bake these, let me know how it goes! Drop a comment, share your cookie creations on Pinterest, or tag me in your holiday photos. Baking together is half the fun, and I can’t wait to see how you make these cookies your own. Happy holidays—and happy baking!
FAQs
Can I make the dough ahead for Perfect Christmas Cookies?
Absolutely! You can make the dough up to 2 days ahead and store it in the fridge. Just let it soften slightly before scooping and baking.
How can I prevent my cookies from spreading too much?
Chilling the dough is key. If your kitchen is warm, chill longer. Also, be sure to measure flour accurately and use cool baking sheets.
Are these cookies good for shipping?
Yes—they hold up well and stay soft for days. Pack them snugly in tins or boxes, with parchment between layers, to prevent breakage.
Can I freeze Perfect Christmas Cookies?
Definitely. Freeze baked cookies for up to 2 months in airtight containers. Thaw at room temperature and enjoy!
What’s the best way to decorate these cookies for a holiday exchange?
I love colored sugars, festive sprinkles, and a drizzle of royal icing. Let your imagination run wild—kids especially love helping with this part!
Pin This Recipe!
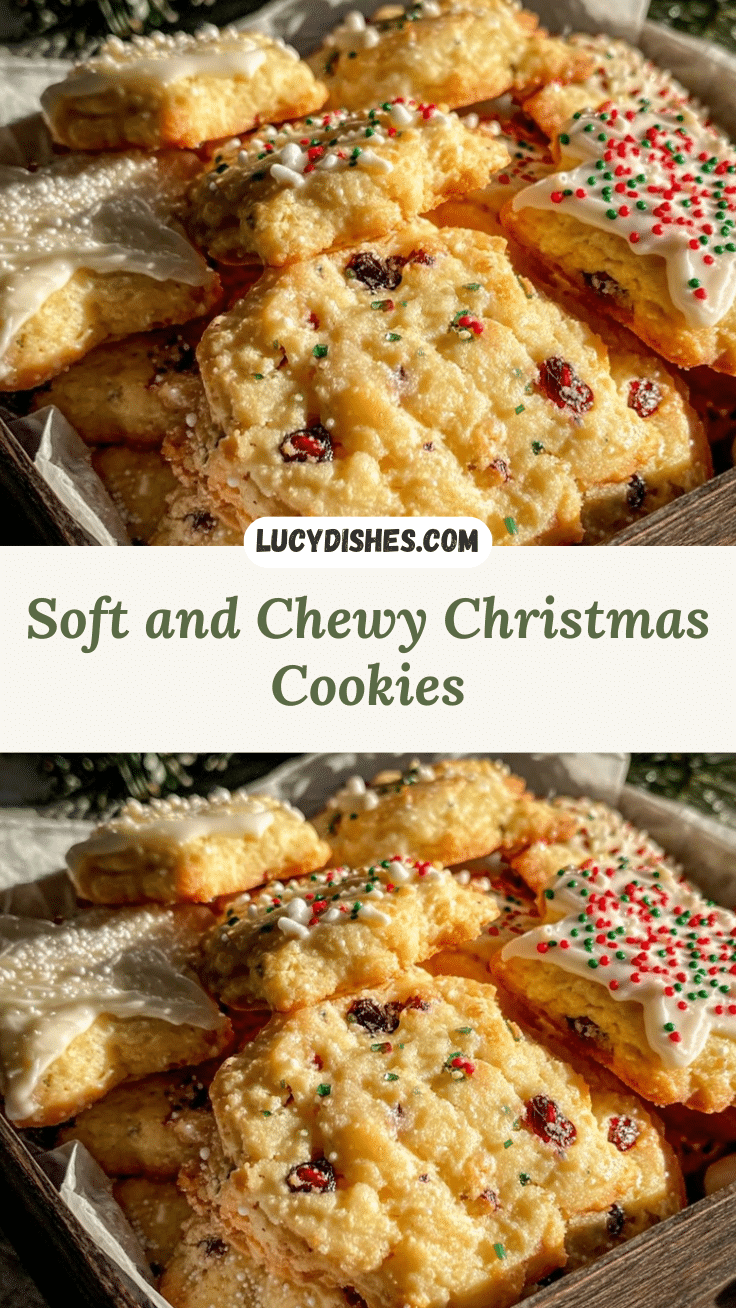
Perfect Christmas Cookies: Festive Holiday Cookie Exchange
These Perfect Christmas Cookies are soft in the middle, crisp around the edges, and bursting with buttery vanilla and festive spices. Quick, easy, and endlessly adaptable, they’re the ultimate crowd-pleaser for holiday gatherings and cookie swaps.
- Prep Time: 15 minutes
- Cook Time: 11 minutes
- Total Time: 45 minutes
- Yield: 24 cookies 1x
- Category: Dessert
- Cuisine: American
Ingredients
- 2 3/4 cups all-purpose flour
- 1 teaspoon baking soda
- 1/2 teaspoon baking powder
- 1/2 teaspoon fine sea salt
- 1 cup unsalted butter, softened
- 1 1/2 cups granulated sugar
- 1 large egg, room temperature
- 2 teaspoons pure vanilla extract
- 1/2 teaspoon ground cinnamon (optional)
- 1/4 cup colored sparkling sugar or sanding sugar
- Holiday sprinkles
- Royal icing (for decorating, optional)
- 1/2 cup mini chocolate chips (optional)
- 1/2 cup chopped pecans or walnuts (optional)
- 1/2 teaspoon almond extract (optional)
Instructions
- Gather all ingredients and let butter and egg come to room temperature (about 30 minutes).
- In a medium bowl, whisk together flour, baking soda, baking powder, salt, and cinnamon (if using). Set aside.
- In a large bowl or stand mixer, beat softened butter and sugar until light and fluffy, about 2-3 minutes. Scrape down the sides as needed.
- Mix in egg and vanilla extract (and almond extract, if using) until thoroughly combined.
- Gradually add dry mixture to wet, mixing just until combined. Fold in chocolate chips or nuts if desired. Do not overmix.
- Cover and chill dough for at least 30 minutes (up to overnight).
- Preheat oven to 350°F (175°C). Line baking sheets with parchment paper or silicone baking mats.
- Using a medium cookie scoop or two spoons, portion dough into 1-tablespoon balls. Roll in colored sugar or sprinkles. For cut-outs, roll dough to 1/4-inch thickness and use cookie cutters.
- Arrange cookies 2 inches apart on baking sheets. Bake for 9-11 minutes, until edges are golden and centers are just set.
- Let cookies rest on the sheet for 3 minutes, then transfer to a cooling rack to cool completely.
- Decorate cooled cookies with royal icing, sprinkles, or festive designs as desired.
Notes
Chilling the dough is essential for shape and texture. For gluten-free, use a 1:1 baking blend; for vegan, swap butter for plant-based margarine and egg for flaxseed ‘egg’. Decorate with colored sugars, sprinkles, or royal icing. Cookies can be made ahead, frozen, and shipped easily. For best results, bake one tray at a time and avoid overmixing.
Nutrition
- Serving Size: 1 cookie (about 2-in
- Calories: 120
- Sugar: 9
- Sodium: 70
- Fat: 6
- Saturated Fat: 3.5
- Carbohydrates: 16
- Fiber: 0.5
- Protein: 2
Keywords: Christmas cookies, holiday cookies, cookie exchange, festive cookies, easy cookies, vanilla cookies, butter cookies, sugar cookies, baking, holiday dessert


