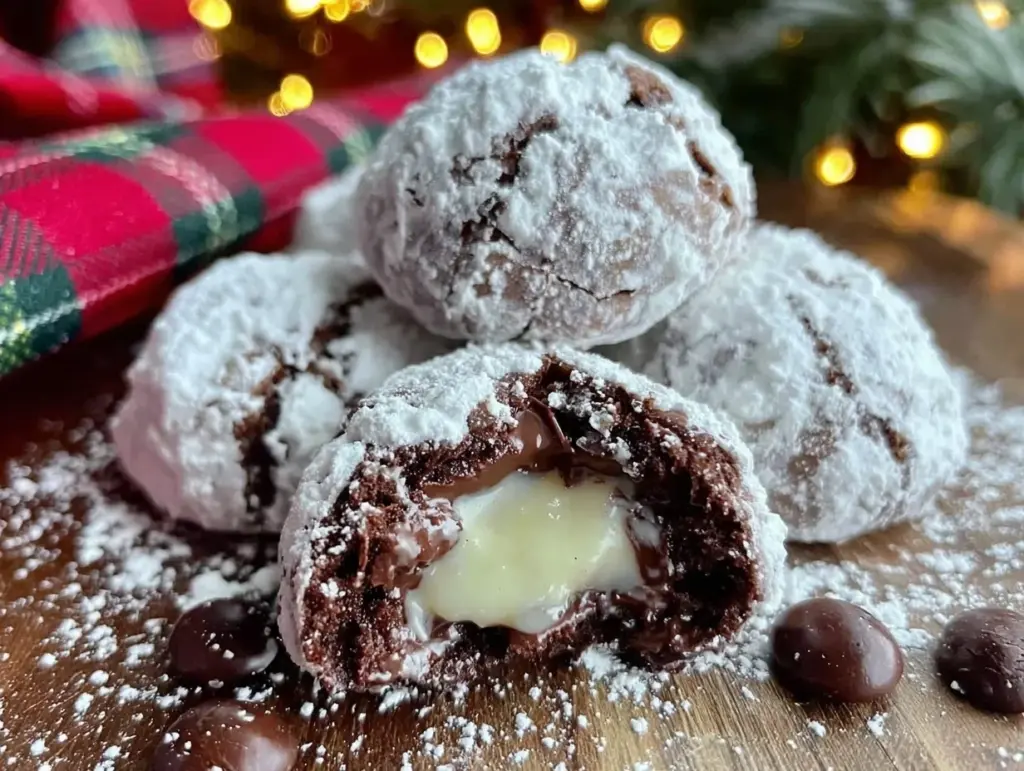
Imagine this: the kitchen is alive with laughter, twinkling lights, and the irresistible aroma of chocolate wafting from the oven. It’s one of those crisp winter afternoons, and you’re knee-deep in flour (literally, if you’re anything like me), rolling out batches of cookies while the kids sneak little bites of dough when they think you’re not looking. The first time I tasted these creamy chocolate snowball cookies, I was instantly hooked. I remember pausing—just for a moment—to savor the way the powdered sugar melted on my tongue, followed by that dreamy, velvety chocolate center. That’s the kind of moment where you pause, take a deep breath, and just smile because you know you’re onto something truly special.
These cookies aren’t just any holiday treat. Years ago, my grandma used to make a version of these for our Christmas Eve gatherings, and let me tell you, there was always a race to the dessert table. When I finally nailed my own recipe—after lots of “research” and taste-testing (I’m not sorry)—it felt like I’d captured a piece of that pure, nostalgic comfort. Honestly, I wish I’d discovered this creamy chocolate snowball cookie trick years ago! My family couldn’t stop sneaking them off the cooling rack, and I can’t really blame them. They’re dangerously easy to make, and they look absolutely magical on a holiday cookie platter.
Whether you’re planning a Pinterest-worthy cookie exchange, want a sweet treat for your kids’ lunchboxes, or just need something comforting to nibble by the fireplace, these creamy chocolate snowball cookies deliver every single time. They’ve become a staple for family gatherings and gifting. You know what? They truly feel like a warm hug during the holidays. If you’re searching for the perfect festive recipe, you’re going to want to bookmark this one.
Why You’ll Love These Creamy Chocolate Snowball Cookies
I’ve tested this recipe more times than I can count, and trust me—it’s got plenty of reasons to earn a spot in your holiday baking lineup. Here’s what makes these cookies stand out:
- Quick & Easy: These cookies come together in under 40 minutes, which means you’ll have festive treats ready in no time—perfect for busy holiday schedules or last-minute gift ideas.
- Simple Ingredients: No fancy grocery runs required. You probably already have everything in your pantry.
- Perfect for Every Occasion: Bring them to cookie swaps, potlucks, or family gatherings—they fit right in with cozy winter nights or cheerful brunches.
- Crowd-Pleaser: Kids love the creamy chocolate center, and adults can’t resist the melt-in-your-mouth texture. I’ve had people ask for the recipe before they even finish their first cookie.
- Unbelievably Delicious: The combination of cocoa, rich butter, and a secret dash of cream cheese (yep!) gives these snowballs a velvety bite you won’t find in regular chocolate cookies.
What sets this recipe apart? It’s the creamy twist—most snowball cookies are crumbly and nutty, but these are soft, chocolatey, and have that irresistible creaminess thanks to a bit of cream cheese blended right into the dough. I learned after several trial runs that blending the cream cheese fully is key for that dreamy texture. The balance between sweet cocoa, a touch of vanilla, and the snowy dusting of powdered sugar makes each bite a little moment of holiday joy.
This isn’t just another chocolate cookie—it’s comfort food with a festive spirit and a touch of elegance (without being fussy). Whether you’re trying to impress guests, treat yourself, or add a star to your Pinterest board, creamy chocolate snowball cookies will deliver every time. They’re easy enough for beginner bakers, but special enough to make you feel like a kitchen pro. And honestly, that first bite is always a little bit magical.
What Ingredients You Will Need
This recipe uses simple, wholesome ingredients to deliver bold chocolate flavor and a satisfying creamy texture. Most are pantry staples, and you can easily swap or substitute to fit your needs. Here’s what you’ll need for creamy chocolate snowball cookies:
- For the Cookie Dough:
- 1 cup (226g) unsalted butter, softened (adds richness and helps create that tender crumb)
- 3 oz (85g) cream cheese, softened (the secret for a creamy, melt-in-your-mouth bite)
- 1/2 cup (60g) powdered sugar (for gentle sweetness and a smooth dough texture)
- 1 3/4 cups (220g) all-purpose flour (regular or use a gluten-free blend if needed)
- 1/3 cup (35g) unsweetened cocoa powder (I like Hershey’s or Ghirardelli for bold flavor)
- 1/2 tsp salt (balances the sweetness and brings out the chocolate)
- 1 tsp pure vanilla extract (I always reach for Nielsen-Massey for best aroma)
- For Rolling & Finishing:
- 1 cup (120g) powdered sugar (for that classic snowball look)
- Optional: 1/2 cup finely chopped chocolate or mini chocolate chips (for extra chocolate drama)
- Optional: 1/2 cup finely chopped nuts, such as pecans or walnuts (if you like a little crunch)
Ingredient Notes & Substitutions:
- Butter: You can use vegan butter sticks if you need to keep it dairy-free. Avoid margarine, though—it won’t give the right texture.
- Cream Cheese: Dairy-free cream cheese (like Kite Hill) works well for those with allergies.
- Cocoa Powder: Dutch-process cocoa will make the cookies darker and a bit richer. Both work—just use what you have!
- Flour: Almond flour can be swapped in for a gluten-free option, but expect a little more spread.
- Powdered Sugar: If you’re out, you can pulse granulated sugar in a blender until fine, but powdered is best for rolling.
- Nuts & Chocolate Chips: Totally optional. Leave them out for classic creamy snowballs, or add for texture and flavor.
These ingredients work together to create the perfect cookie—soft, creamy, chocolatey, and coated in a snowy blanket. They’re easy to customize, so don’t stress if you’re missing one or two. Just swap and experiment (that’s how I discovered the cream cheese trick, honestly!).
Equipment Needed
You don’t need a ton of specialized tools for creamy chocolate snowball cookies, which is part of what makes them so approachable. Here’s what will help:
- Mixing Bowls: At least two—one for the dough, one for rolling in powdered sugar. I use sturdy glass bowls because they’re easy to clean.
- Electric Mixer: Stand mixer or hand mixer. A stand mixer gives you extra muscle for blending cream cheese, but a hand mixer works just fine.
- Baking Sheets: Heavy-duty, rimmed sheets are ideal. Lined with parchment paper for easy cleanup.
- Cookie Scoop (1-inch): Makes portioning a breeze. You can use a regular tablespoon if you don’t have a scoop.
- Wire Cooling Rack: Essential for cooling the cookies evenly and quickly.
- Spatula: For scraping every last bit of dough out of the bowl (no chocolate left behind!).
- Measuring Cups & Spoons: Accuracy matters—especially with baking.
If you’re missing a cookie scoop, don’t worry—just roll the dough by hand. Parchment paper is optional but prevents sticking and makes cleanup a snap. I’ve used dollar-store baking sheets and fancy ones, and honestly, both work if you line them properly. For mixers, just be sure to beat the butter and cream cheese until fluffy; that’s key for the creamy texture.
Preparation Method
- Prep the Kitchen: Preheat your oven to 350°F (175°C). Line two baking sheets with parchment paper. This helps prevent sticking and makes cleanup much easier.
- Cream the Butter & Cream Cheese: In a large mixing bowl, add 1 cup (226g) unsalted butter and 3 oz (85g) cream cheese, both softened. Using an electric mixer on medium speed, beat until the mixture is light, fluffy, and smooth—about 2-3 minutes. If you notice lumps, keep mixing until it’s creamy.
- Add Powdered Sugar & Vanilla: Mix in 1/2 cup (60g) powdered sugar and 1 tsp vanilla extract. Beat until fully combined. The mixture should look pale and creamy. If it seems runny, just keep mixing—it’ll firm up with the flour.
- Combine Dry Ingredients: In a separate bowl, whisk together 1 3/4 cups (220g) all-purpose flour, 1/3 cup (35g) unsweetened cocoa powder, and 1/2 tsp salt. Make sure there are no cocoa lumps—sometimes I sift the cocoa if it’s clumpy.
- Mix Dry into Wet: Gradually add the flour mixture to the butter mixture. Beat on low speed or stir by hand until a soft dough forms. If adding mini chocolate chips or nuts, fold them in gently at this stage. The dough will be thick and slightly sticky.
- Shape the Cookies: Use a 1-inch cookie scoop or tablespoon to portion the dough, then roll into smooth balls between your palms. Place them 1 inch apart on your prepared baking sheets. The dough can be a little sticky—dust your hands lightly with flour if needed.
- Bake: Bake for 13-15 minutes, until the tops look set and the cookies feel slightly firm to the touch. They won’t brown much, so don’t wait for color. Rotate the pan halfway through for even baking.
- Cool Slightly: Let the cookies sit on the baking sheet for 5 minutes (they’re fragile when hot). Then gently transfer to a wire rack to cool completely. Resist the urge to move them too soon—they’ll firm up as they cool.
- Roll in Powdered Sugar: While still a little warm, roll each cookie generously in powdered sugar to coat. For a classic “snowball” look, roll again once fully cooled. Double coating gives that picture-perfect finish for Pinterest!
- Serve & Enjoy: Arrange on a festive platter and watch them disappear. These cookies are best fresh, but keep their creamy texture for days.
Troubleshooting: If your dough feels too soft to roll, chill it for 15-20 minutes. If the cookies spread too much, check your oven temp (some run hot or cool). If the powdered sugar melts off, wait until the cookies are just warm—not hot—to roll. I’ve learned these little tricks the hard way, so trust me—they help!
Cooking Tips & Techniques
There’s a little art to getting creamy chocolate snowball cookies just right. I’ve picked up a few tricks (and hit a few speed bumps, too) over the years:
- Room Temperature Ingredients: Make sure your butter and cream cheese are truly soft—not cold, not melted. This creates that ultra-smooth dough. If you forget to set them out, microwave for 10 seconds at a time (but don’t melt them!).
- Don’t Overmix Once the Flour’s In: Overmixing after adding flour can make cookies tough. Mix just until the dough comes together.
- Chilling the Dough: If it’s too sticky, pop it in the fridge for 15-20 minutes. This makes rolling much easier and helps cookies hold their shape.
- Double Sugar Coating: Rolling cookies in powdered sugar twice (once warm, once cool) gives that thick, snowy finish—perfect for photos and flavor.
- Consistent Sizing: Using a cookie scoop keeps sizes even, so they bake uniformly. If you eyeball it, just try to keep them close for even results.
I’ve had batches that were too dry (forgot to measure the flour accurately—oops) and some that flattened too much (didn’t chill the dough). If you run into these, don’t panic! Most issues are fixable. For multitasking, I shape all the dough balls first, then bake in batches. This keeps things moving and makes it easier to coat them while warm. With these tips, your creamy chocolate snowball cookies will turn out perfect every time. And don’t be afraid to experiment or adjust—baking is meant to be fun!
Variations & Adaptations
One of the best things about creamy chocolate snowball cookies is how easy they are to tweak for different tastes and dietary needs. Here are some of my favorite ways to switch things up:
- Gluten-Free: Replace the all-purpose flour with a 1:1 gluten-free baking blend. Almond flour also works for a slightly nuttier, softer cookie. Be aware, gluten-free versions may spread a little more.
- Nutty Snowballs: Fold in 1/2 cup finely chopped pecans, walnuts, or hazelnuts to the dough for extra crunch and flavor. My uncle loves them with hazelnuts—adds a little grown-up twist!
- Mint Chocolate: Add 1/2 tsp peppermint extract to the dough, and sprinkle a little crushed candy cane on top before serving for a festive minty kick.
- Dairy-Free: Use plant-based butter and dairy-free cream cheese. I’ve tried Kite Hill and Earth Balance—both work well.
- White Chocolate Snowballs: Swap mini chocolate chips for white chocolate chips, or add a drizzle of melted white chocolate on top once cooled.
- Seasonal Flavors: Try stirring in a pinch of cinnamon or orange zest for a wintery twist. Citrus brightens up the chocolate beautifully!
My personal favorite? A batch with both mini chocolate chips and a splash of orange zest—reminds me of those fancy chocolate oranges from holiday shops. If you have allergies to nuts or dairy, the swaps above work just fine. Don’t be afraid to experiment; these cookies are pretty forgiving, and honestly, some of my best versions were accidents!
Serving & Storage Suggestions
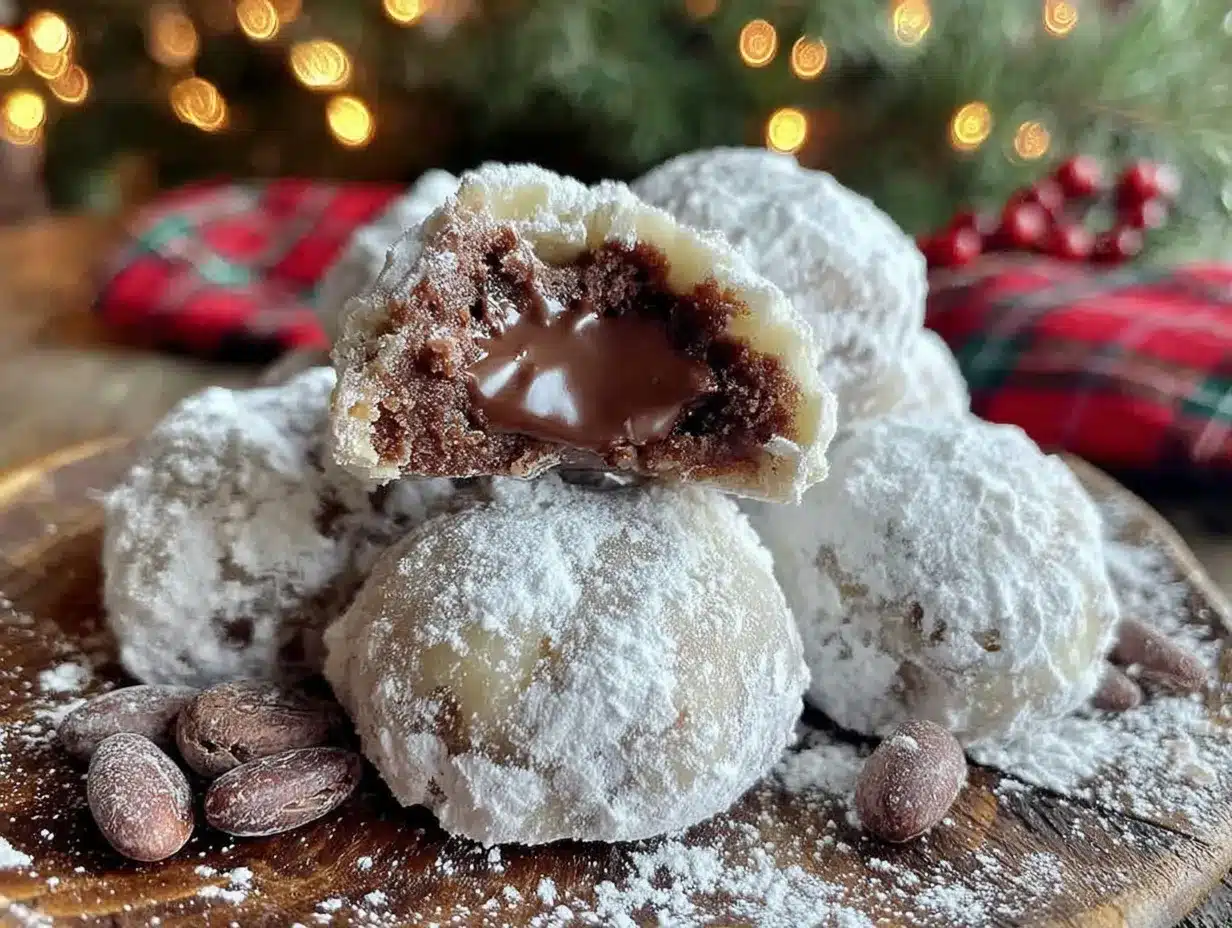
For serving, I always recommend letting creamy chocolate snowball cookies cool completely, then arranging them on a festive platter. They look gorgeous piled high with a dusting of extra powdered sugar—just like fresh snow! Serve at room temperature for the best creamy texture. Pair them with hot cocoa, mulled wine, or a simple cup of coffee for a cozy treat.
Storage Tips:
- Room Temperature: Store in an airtight container for up to 5 days. Layer with parchment paper to keep the powdered sugar from sticking.
- Freezer: Freeze baked cookies in a sealed container for up to 2 months. Thaw at room temperature before serving, then roll in fresh powdered sugar for best appearance.
- Reheating: If you want them warm, pop in a 300°F (150°C) oven for 3-4 minutes. Don’t microwave—they’ll get soggy.
Flavors actually deepen as the cookies rest overnight, so making them a day ahead is a smart move for parties and gifting. I sometimes tuck a few into lunchboxes or wrap them in cellophane for neighbor gifts—they’re always met with big smiles!
Nutritional Information & Benefits
Each creamy chocolate snowball cookie (based on a batch of 24) contains roughly:
- Calories: 110
- Fat: 7g
- Carbs: 12g
- Protein: 1g
- Sugar: 7g
The cocoa powder adds antioxidants and a little magnesium, while using cream cheese instead of extra butter keeps the cookies creamy with a touch less saturated fat. If you use almond flour or add nuts, you’ll boost vitamin E and fiber. These cookies are naturally nut-free and vegetarian, and easy to make gluten-free or dairy-free as described above. The main allergens present are dairy and gluten (unless adapted).
From a wellness perspective, I see these as a sweet holiday treat—meant to be enjoyed in moderation, and totally worth the indulgence. Sharing homemade cookies brings happiness, and honestly, that’s a real health benefit in my book!
Conclusion
Creamy chocolate snowball cookies are my go-to holiday treat for so many reasons—they’re easy, delicious, and look absolutely magical on any table. These cookies bring together rich chocolate, a dreamy creamy texture, and that nostalgic powdered sugar finish. If you love recipes that are simple but special, this is one you’ll make again and again.
Don’t be afraid to put your own spin on them—swap flavors, add nuts, go gluten-free, or try a dash of citrus. That’s the joy of home baking! Personally, I love how these cookies bring people together, sparking smiles and sweet memories. If you give them a try, I’d love to hear how yours turn out—leave a comment, share a photo, or tag me on social media. Here’s wishing you a season filled with warmth, laughter, and plenty of creamy chocolate snowball cookies!
Frequently Asked Questions
Can I make creamy chocolate snowball cookies ahead of time?
Absolutely! You can bake them up to two days ahead. Store in an airtight container and roll in powdered sugar again before serving for a fresh “snowy” look.
How do I keep the powdered sugar from melting off?
Let the cookies cool for about 5 minutes before rolling the first time, then again once they’re fully cooled. Double coating is key for a thick, snowy finish.
What’s the best way to freeze these cookies?
Place cooled cookies in a single layer in a freezer-safe container. When ready to serve, thaw at room temperature, then roll in a little extra powdered sugar to refresh their appearance.
Can I add nuts or chocolate chips to the dough?
Yes! Fold in up to 1/2 cup finely chopped nuts or mini chocolate chips after mixing the dough. It adds texture and flavor, but the cookies are delicious plain, too.
Are creamy chocolate snowball cookies gluten-free or dairy-free?
They can be! Substitute all-purpose flour with a gluten-free blend, and use plant-based butter and cream cheese for dairy-free. The cookies stay creamy and delicious with these swaps.
Pin This Recipe!

Creamy Chocolate Snowball Cookies: Easy Holiday Treats to Bake

These creamy chocolate snowball cookies feature a velvety chocolate center and a snowy powdered sugar coating. They’re quick to make, crowd-pleasing, and perfect for holiday gatherings or gifting.
- Prep Time: 15 minutes
- Cook Time: 15 minutes
- Total Time: 40 minutes
- Yield: 24 cookies 1x
- Category: Dessert
- Cuisine: American
Ingredients
- 1 cup unsalted butter, softened
- 3 oz cream cheese, softened
- 1/2 cup powdered sugar
- 1 3/4 cups all-purpose flour
- 1/3 cup unsweetened cocoa powder
- 1/2 tsp salt
- 1 tsp pure vanilla extract
- 1 cup powdered sugar (for rolling)
- Optional: 1/2 cup finely chopped chocolate or mini chocolate chips
- Optional: 1/2 cup finely chopped nuts (pecans or walnuts)
Instructions
- Preheat oven to 350°F (175°C). Line two baking sheets with parchment paper.
- In a large mixing bowl, beat together butter and cream cheese until light, fluffy, and smooth (2-3 minutes).
- Add powdered sugar and vanilla extract; beat until fully combined.
- In a separate bowl, whisk together flour, cocoa powder, and salt.
- Gradually add dry ingredients to wet mixture, mixing on low speed or by hand until a soft dough forms. Fold in optional chocolate chips or nuts if desired.
- Use a 1-inch cookie scoop or tablespoon to portion dough, then roll into smooth balls. Place 1 inch apart on prepared baking sheets.
- Bake for 13-15 minutes, until tops look set and cookies feel slightly firm. Rotate pans halfway through baking.
- Let cookies cool on baking sheet for 5 minutes, then transfer to a wire rack to cool completely.
- While still slightly warm, roll cookies generously in powdered sugar. Roll again once fully cooled for a thick, snowy coating.
- Serve on a festive platter. Store in an airtight container for up to 5 days.
Notes
For best results, use room temperature butter and cream cheese. If dough is too sticky, chill for 15-20 minutes before shaping. Double-coat cookies in powdered sugar for a classic snowball look. Easily adapt for gluten-free or dairy-free diets using recommended substitutions.
Nutrition
- Serving Size: 1 cookie
- Calories: 110
- Sugar: 7
- Sodium: 60
- Fat: 7
- Saturated Fat: 4
- Carbohydrates: 12
- Fiber: 1
- Protein: 1
Keywords: chocolate snowball cookies, holiday cookies, creamy cookies, powdered sugar cookies, Christmas cookies, easy baking, festive treats


