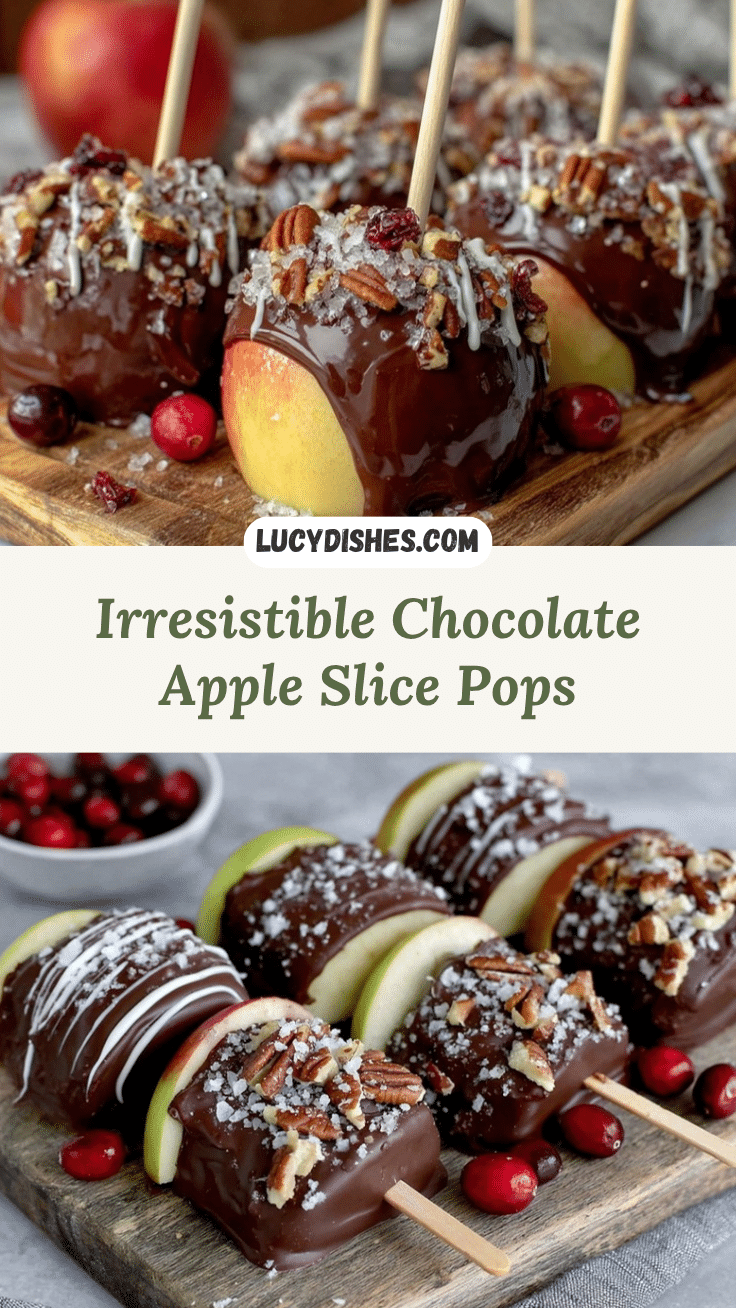
Introduction
Picture this: the aroma of rich, velvety chocolate melting in the kitchen, paired with the sweet, crisp scent of fresh apples. It’s enough to make anyone’s mouth water, isn’t it? The first time I made these irresistible chocolate apple slice pops, I wasn’t prepared for just how much of a hit they’d be. I mean, sure, they sounded like a fun idea, but I didn’t expect my kids to devour them before I could even snap a picture! That was the moment I knew I’d stumbled upon something special—a treat that’s as playful as it is delicious, and perfect for any occasion.
Years ago, I was searching for a way to add a healthy twist to classic chocolate-covered desserts. Let’s face it, we all love a good chocolate-dipped treat, but sometimes you want something a little lighter, right? Enter apple slice pops! They’re like the best of both worlds—natural sweetness from the apples, a satisfying crunch, and a layer of indulgent chocolate on the outside. My family loves them for movie nights, birthday parties, and even as a quick after-school snack. Honestly, I can’t keep them on the plate for long. (And I’m not complaining!)
Whether you’re planning a festive gathering, looking to impress friends on Pinterest, or just craving a treat to brighten your day, these chocolate apple slice pops are a recipe you’ll want to keep in your back pocket. They’re dangerously easy to make, and the results? Pure magic. Trust me, this will quickly become a go-to snack for any occasion.
Why You’ll Love This Recipe
- Quick & Easy: You can whip these up in under 30 minutes, making them perfect for last-minute party prep or spontaneous sweet cravings.
- Simple Ingredients: No need for fancy ingredients here—everything can be found at your local grocery store.
- Perfect for Parties: These pops are an instant crowd-pleaser at birthday parties, holiday gatherings, or even casual get-togethers.
- Fun and Creative: A unique twist on traditional chocolate-dipped fruit, these pops are fun to make and even more fun to eat.
- Healthy & Delicious: Apples provide natural sweetness and crunch, while the chocolate adds that comforting, indulgent flavor we all love.
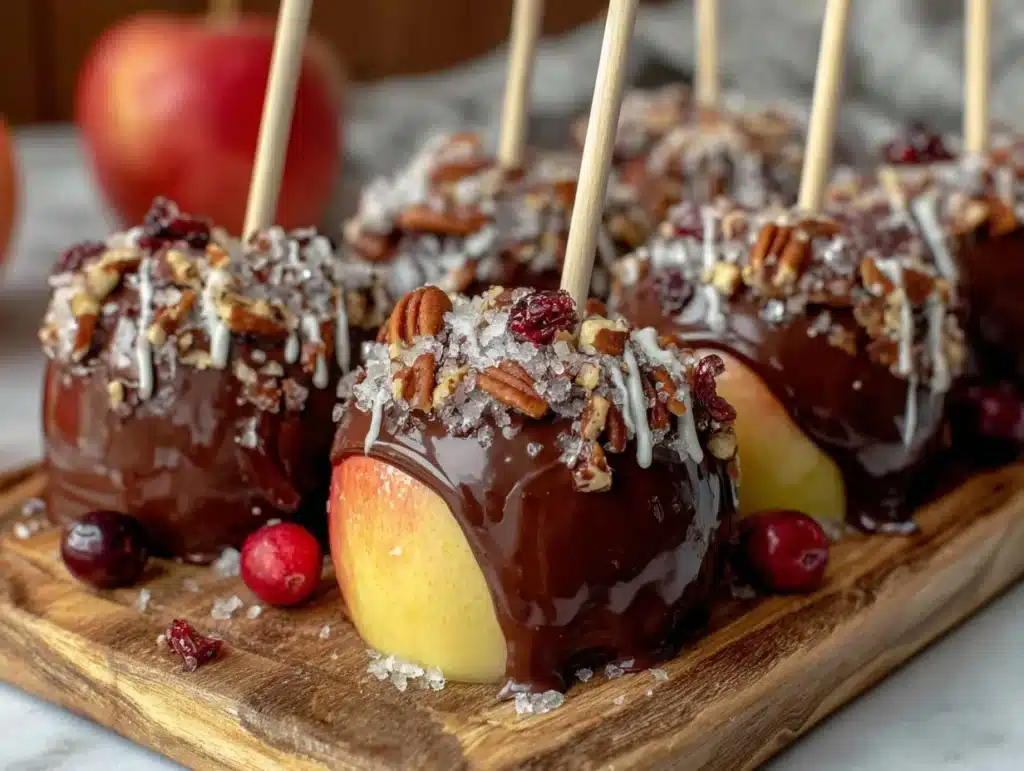
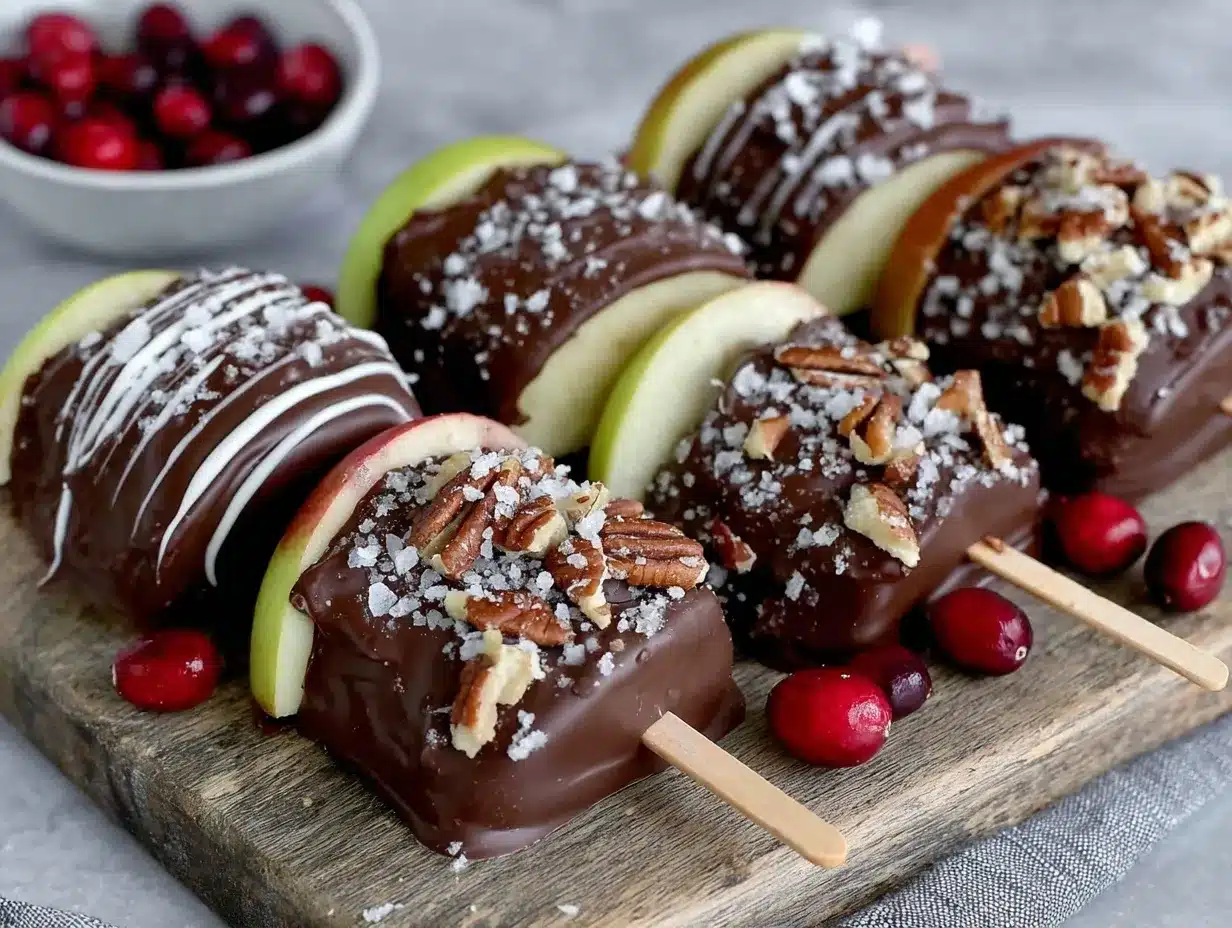
What sets this recipe apart? It’s all about the combination of flavors and textures. The crisp tartness of the apples perfectly complements the smooth, rich chocolate, and the pops are customizable to your heart’s content. Add sprinkles, nuts, or even drizzle some white chocolate for extra flair. It’s a treat that looks as good as it tastes!
This isn’t just food; it’s an experience. It’s that moment of pure joy when you bite into something unexpectedly delightful. The first bite is always a revelation—chocolatey, crunchy, and fruity all at once. You’ll love making these, and your guests will love eating them.
What Ingredients You Will Need
This recipe uses simple, wholesome ingredients to create a delightful dessert that’s perfect for any occasion. Most of these are pantry staples, and the fresh apples bring a natural sweetness that pairs beautifully with the chocolate.
- Apples: Choose firm, crisp apples like Granny Smith, Honeycrisp, or Fuji. Slice them into even rounds for the best results.
- Chocolate chips: Semi-sweet, milk, or dark chocolate—your choice! (I love using high-quality brands like Ghirardelli for a smooth melt.)
- Coconut oil: Helps the chocolate melt smoothly and gives it a shiny finish.
- Popsicle sticks: Essential for turning your apple slices into fun pops. You can find these at craft stores or online.
- Optional toppings: Sprinkles, crushed nuts, shredded coconut, mini chocolate chips, or even sea salt for a gourmet touch.
That’s it—simple ingredients with endless possibilities for customization!
Equipment Needed
- Cutting board: For slicing your apples into rounds.
- Sharp knife: A good-quality knife will help you achieve clean, even slices.
- Microwave-safe bowl: To easily melt the chocolate and coconut oil.
- Fork or spoon: For dipping the apple slices into the chocolate.
- Baking sheet or tray: Line it with parchment paper for easy cleanup.
- Popsicle sticks: To turn your apple slices into playful pops.
If you don’t have popsicle sticks, you can use skewers or even sturdy toothpicks as an alternative. For melting chocolate, a double boiler works great if you don’t want to use the microwave.
Preparation Method
- Prepare the apples: Wash and dry your apples thoroughly, then slice them into 1/4-inch thick rounds. Remove the seeds and core from each slice using a small knife or a round cookie cutter.
- Insert popsicle sticks: Carefully insert a popsicle stick into each apple slice, making sure it’s secure but doesn’t go all the way through.
- Melt the chocolate: Place your chocolate chips and coconut oil into a microwave-safe bowl. Microwave in 20-second intervals, stirring in between, until the chocolate is smooth and fully melted. Be careful not to overheat, as the chocolate can seize!
- Dip the apple slices: Hold each apple slice by the stick and dip it into the melted chocolate, ensuring it’s fully coated. You can use a spoon to help cover the edges.
- Add toppings: While the chocolate is still wet, sprinkle your desired toppings over each apple slice. Get creative—mix and match flavors, textures, and colors!
- Let them set: Place the chocolate-covered apple pops on a parchment-lined baking sheet and refrigerate for at least 15 minutes, or until the chocolate is fully set.
Pro tip: If the chocolate starts to harden while you’re dipping, pop it back in the microwave for another 10-15 seconds to reheat.
Cooking Tips & Techniques
Want to make sure your chocolate apple slice pops turn out perfectly? Here are some of my tried-and-true tips for success:
- Use cold apples: A chilled apple will help the chocolate set faster and give you a smoother finish.
- Don’t skip the coconut oil: It’s the secret to getting that glossy chocolate coating.
- Dry the apple slices: Before dipping, make sure your apple slices are completely dry. Any moisture can cause the chocolate to slip off.
- Work quickly: Once your chocolate is melted, it’s best to dip the apple slices right away. Chocolate can harden if left too long.
- Use a variety of toppings: Try crushed peanuts for a salty crunch or freeze-dried raspberries for a tangy twist. It’s all about creating pops that look as good as they taste.
Don’t stress if your first few pops aren’t perfect—practice makes perfect. Plus, even the “oops” pops are delicious!
Variations & Adaptations
One of the best things about this recipe is how versatile it is! Here are a few fun ways to change it up:
- Seasonal twist: Use seasonal apples or add holiday-themed toppings like crushed candy canes for Christmas or pastel sprinkles for Easter.
- Dietary adjustments: Swap regular chocolate with vegan or sugar-free chocolate chips for a dairy-free or keto-friendly version.
- Flavor boosts: Add a sprinkle of cinnamon or nutmeg to your melted chocolate for a warm, spiced flavor.
- Fruit variation: While apples are the star, you can also try this recipe with pear slices or firm bananas for a different fruity twist.
- Nutty or fruity layers: Spread a thin layer of almond butter or peanut butter on your apple slices before dipping them into the chocolate.
One of my favorite variations? A drizzle of salted caramel over the chocolate for an extra indulgent treat. Trust me, it’s a game-changer!
Serving & Storage Suggestions
These chocolate apple slice pops are best served chilled for that perfect crunch and chocolate snap. Arrange them on a pretty serving tray or stick them into a foam block for a fun display at parties. Pair them with a hot cup of coffee or tea for the adults, or a glass of milk for the kids.
If you have leftovers (though I doubt you will), store them in an airtight container in the refrigerator for up to 3 days. To prevent the apple slices from browning, you can give them a quick dip in lemon water before coating them in chocolate. When you’re ready to enjoy them again, just pull them out and let them sit at room temperature for a few minutes before eating.
Reheating isn’t necessary for these sweet treats, as they’re meant to be enjoyed cold. The chocolate stays firm, and the apples retain their crisp texture.
Nutritional Information & Benefits
These chocolate apple slice pops are a balanced treat that satisfies your sweet tooth without overloading on sugar. Here’s a quick breakdown of the nutrition benefits:
- Apples: Packed with fiber, vitamins, and antioxidants, they’re a healthy base for this dessert.
- Dark chocolate: If you opt for dark chocolate, you’ll enjoy a dose of antioxidants and a slightly lower sugar content.
- Customizable for dietary needs: Use vegan chocolate or sugar-free alternatives for specific diets.
- Portion control: These bite-sized treats are perfect for enjoying a little indulgence without going overboard.
While these pops are a dessert, they’re a much better option than traditional candy bars or cookies. You can feel good about sharing them with family and friends!
Conclusion
If you’re looking for a fun, easy, and downright delicious treat, these irresistible chocolate apple slice pops are the answer. They’re customizable, healthy, and perfect for any occasion—whether you’re hosting a party or just need a little pick-me-up.
So, give this recipe a try and let me know how you made it your own! Drop a comment below or share your creations on social media—I’d love to see how you’ve customized your apple slice pops. Happy dipping!
FAQs
Can I use other fruits for this recipe?
Yes! Pear slices or firm bananas work beautifully as substitutes for apples. Just make sure your fruit is firm enough to hold the popsicle stick.
What’s the best chocolate to use?
It depends on your preference! Semi-sweet chocolate gives a balanced flavor, while dark chocolate offers a richer taste. For a milder option, use milk chocolate.
How do I keep the apples from turning brown?
Can I make these ahead of time?
Yes! You can make them a day or two in advance. Store them in an airtight container in the fridge and serve chilled.
What toppings work best?
The possibilities are endless! Try crushed nuts, sprinkles, shredded coconut, mini chocolate chips, or even edible glitter for a festive touch.
Pin This Recipe!
Irresistible Chocolate Apple Slice Pops Recipe for Parties

A fun and easy treat combining the natural sweetness of apples with indulgent chocolate, perfect for parties or a quick snack.
- Prep Time: 10 minutes
- Cook Time: 15 minutes
- Total Time: 25 minutes
- Yield: 12 pops 1x
- Category: Dessert
- Cuisine: American
Ingredients
- 3–4 firm, crisp apples (Granny Smith, Honeycrisp, or Fuji)
- 1 cup chocolate chips (semi-sweet, milk, or dark)
- 1 tablespoon coconut oil
- Popsicle sticks
- Optional toppings: sprinkles, crushed nuts, shredded coconut, mini chocolate chips, sea salt
Instructions
- Wash and dry apples thoroughly, then slice them into 1/4-inch thick rounds. Remove seeds and core using a small knife or round cookie cutter.
- Carefully insert a popsicle stick into each apple slice, ensuring it’s secure but doesn’t go all the way through.
- Place chocolate chips and coconut oil into a microwave-safe bowl. Microwave in 20-second intervals, stirring in between, until the chocolate is smooth and fully melted.
- Hold each apple slice by the stick and dip it into the melted chocolate, ensuring it’s fully coated. Use a spoon to cover the edges if needed.
- Sprinkle desired toppings over each chocolate-coated apple slice while the chocolate is still wet.
- Place the chocolate-covered apple pops on a parchment-lined baking sheet and refrigerate for at least 15 minutes, or until the chocolate is fully set.
Notes
Use cold apples for a smoother chocolate finish. Ensure apple slices are completely dry before dipping to prevent chocolate from slipping off. Work quickly with melted chocolate to avoid hardening.
Nutrition
- Serving Size: 1 pop
- Calories: 150
- Sugar: 16
- Sodium: 10
- Fat: 8
- Saturated Fat: 5
- Carbohydrates: 20
- Fiber: 2
- Protein: 1
Keywords: Chocolate apple pops, party dessert, healthy treat, easy dessert, kid-friendly snack


